T-RMM-PFSense-HAProxy-config
Assumes fully configured public DNS or DDNS, and a functional PFSense installation with existing valid wildcard SSL certificate available. Adjust hostnames, IPs, etc to suit the environment.
Do NOT disable nginx proxy on the T-RMM instance. This assumes that it's in place and functional.
- HAProxy installation
- Firewall configuration
- HAProxy backend configuration
- Shared HTTP to HTTPS redirect frontend
- Shared HTTPS frontend
- T-RMM frontend
HAProxy installation
Go to System > Package Manager
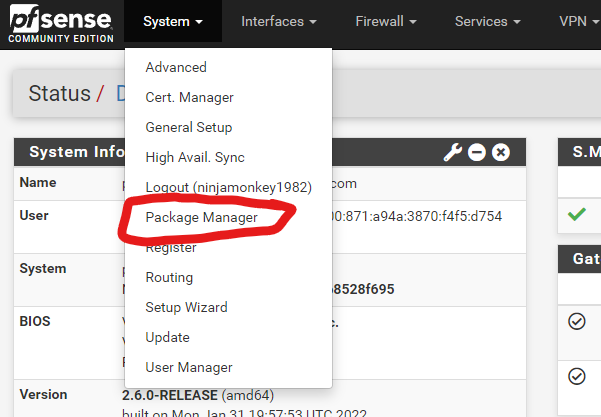
Select Available Packages
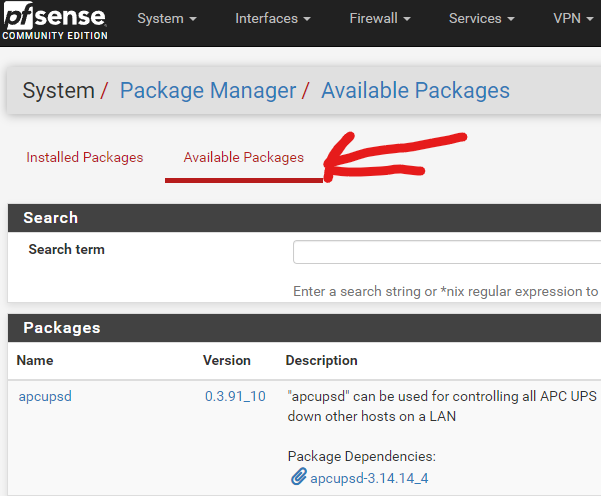
Find and install haproxy-devel

Firewall configuration
Go to Firewall > Rules
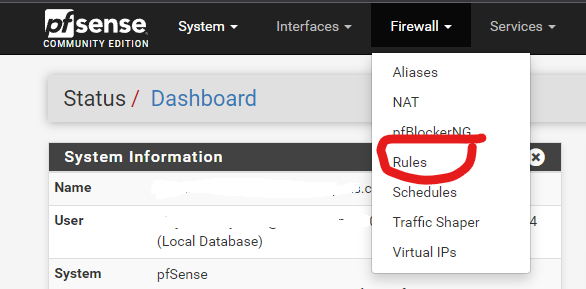
Select the WAN tab
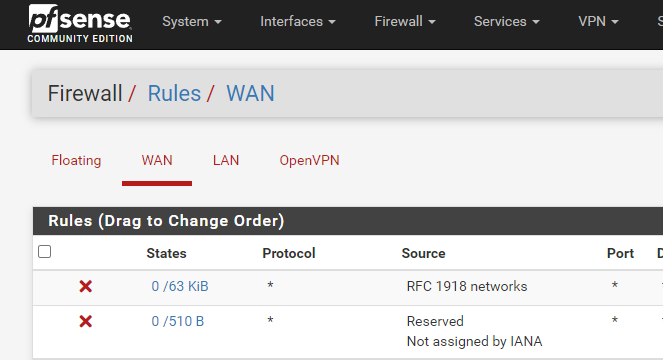
Add the following two rules to the bottom of the list, nothing else should be using ports 80 and 443:

HTTP rule:
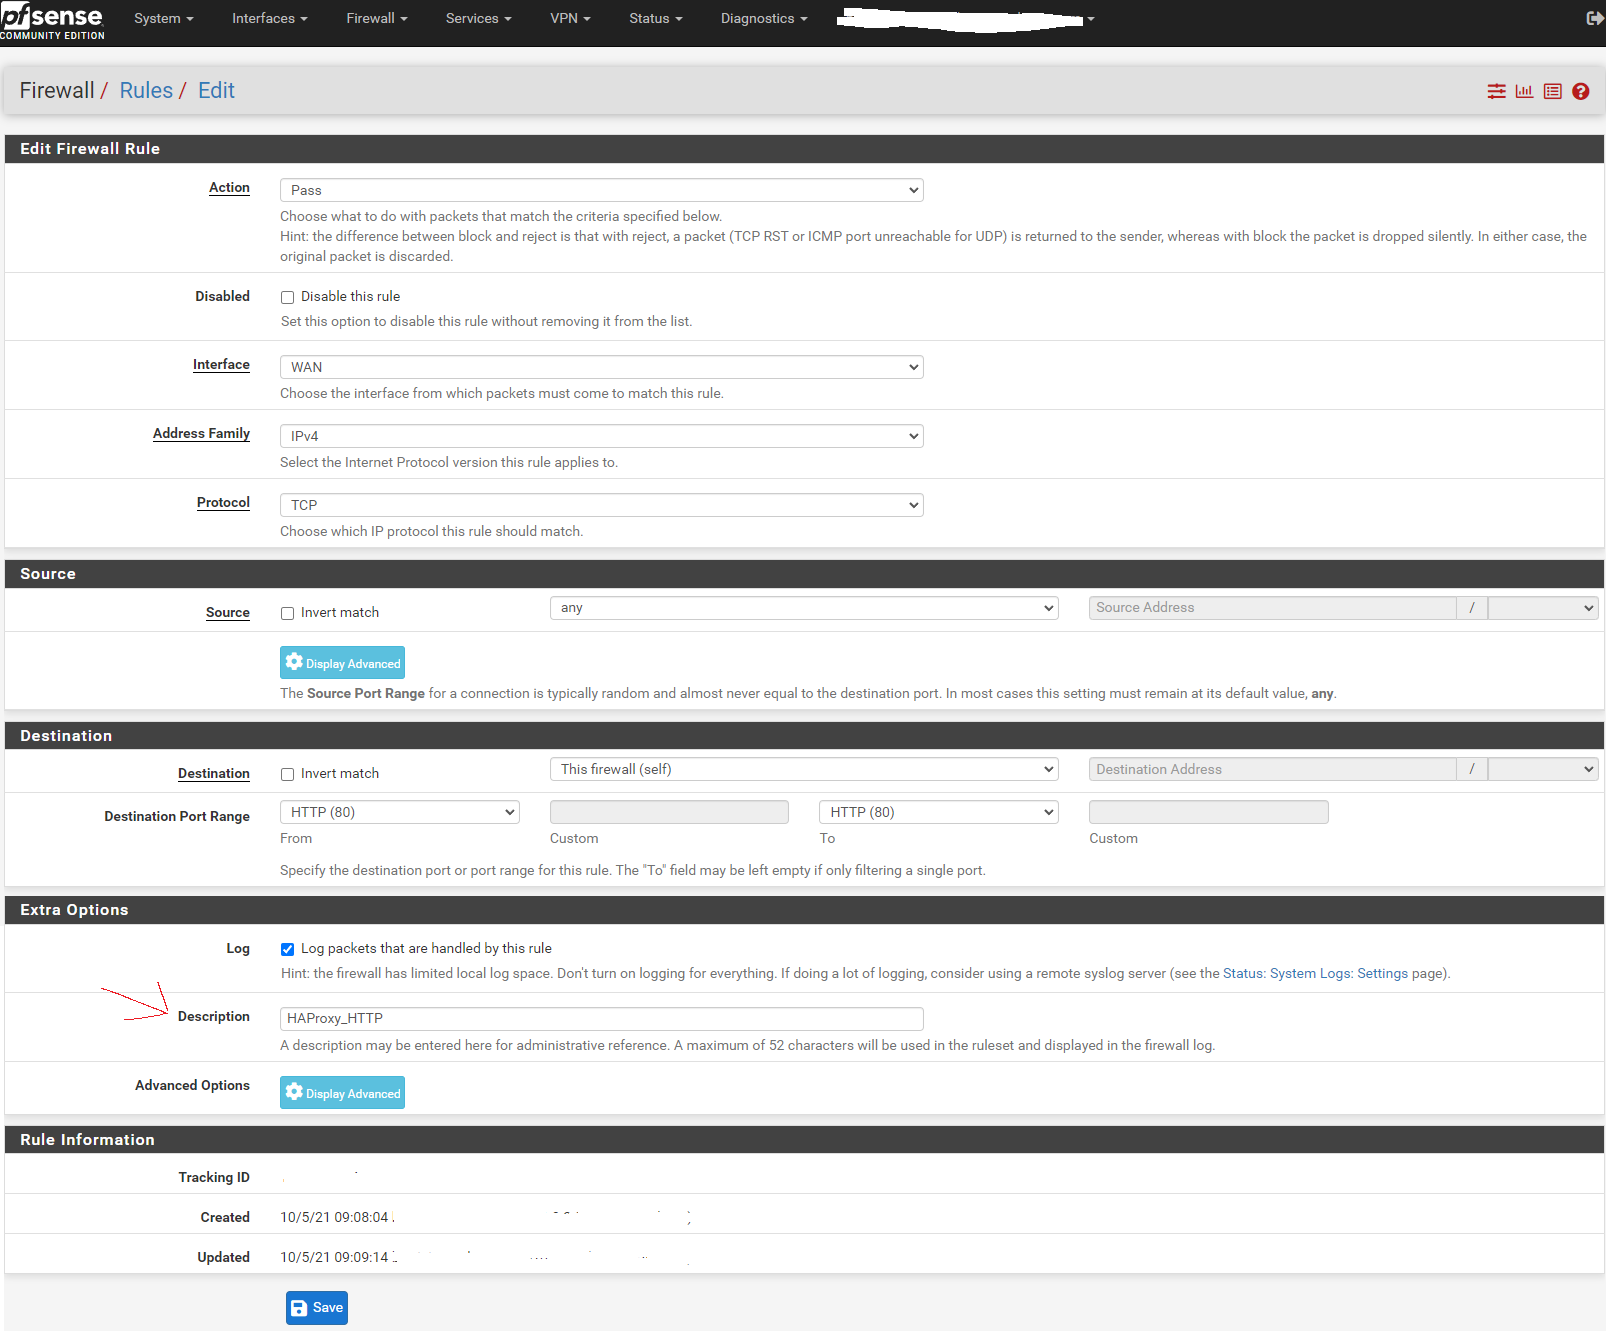
Create a duplicate rule, changing the port to 443 and the description for HTTPS
Enable the new rules.
HAProxy backend configuration
Go to Services > HAProxy
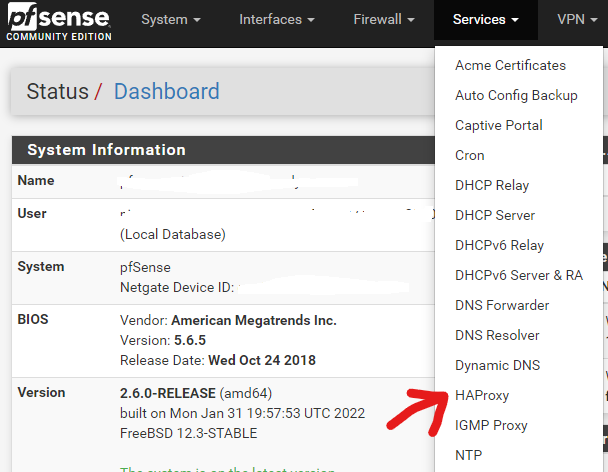
Leave the Settings tab alone for now and skip to the Backend tab:
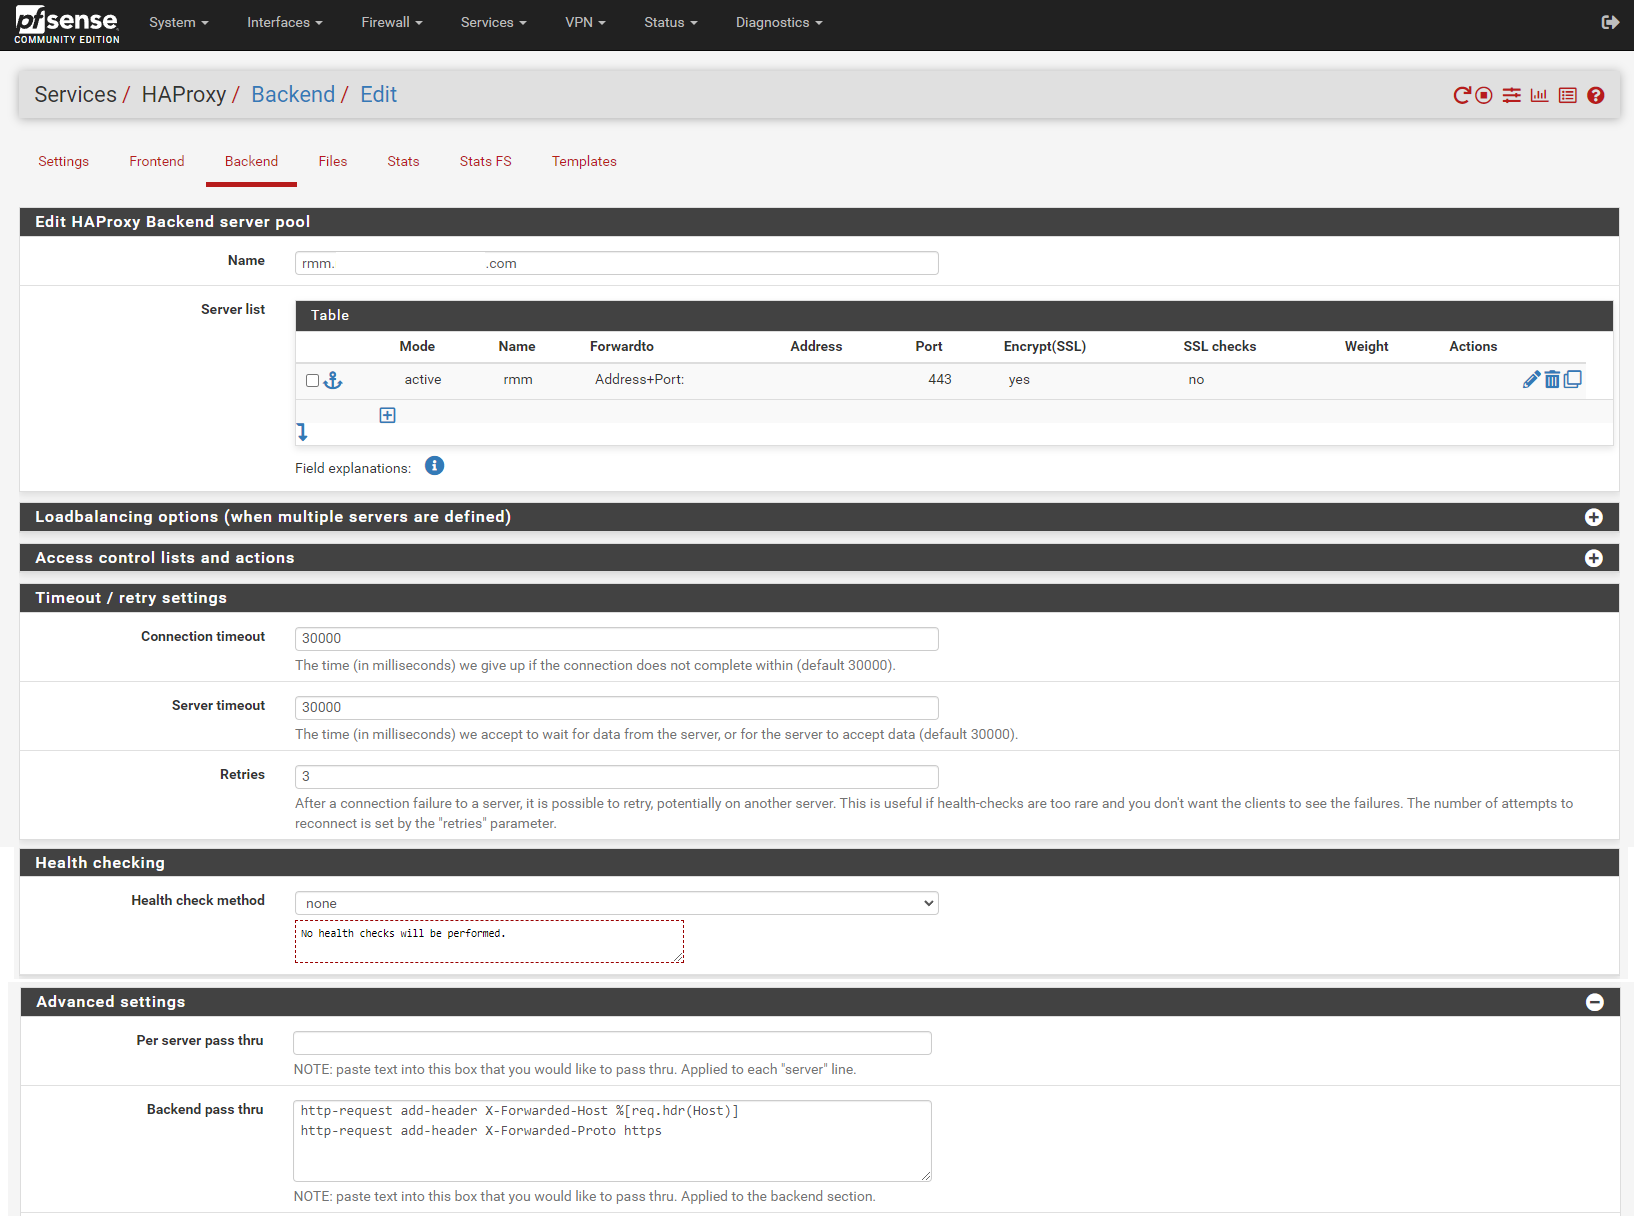
Add backend for rmm. Enter the rmm FQDN (eg, rmm.example.com) into the box titled Name, then click the down arrow in the Server list panel to add a server definition.
Enter the rmm for the server in the Name box, enter the internal IP address of the server, 443 (or other appropriate port) for the Port, and check the Encrypt(SSL) box.
In the Timeout / retry settings section, enter 30000 in Connection timeout and Server timeout.
In the Health checking section, set Health check method to none.
In the Advanced settings section, enter the following in the Backend pass thru box:
http-request add-header X-Forwarded-Host %[req.hdr(Host)]
http-request add-header X-Forwarded-Proto https
Scroll down, save, and apply changes when asked.

Copy the rmm backend. Change the Name entry to match the mesh FQDN (eg, mesh.example.com).
Change the Name for the server to mesh.
In the Timeout / retry settings section, change the entries in Connection timeout and Server timeout to 15000.
In the Advanced settings section, add the following in the Backend pass thru box:
timeout tunnel 15000Scroll down, save, and apply changes when asked.
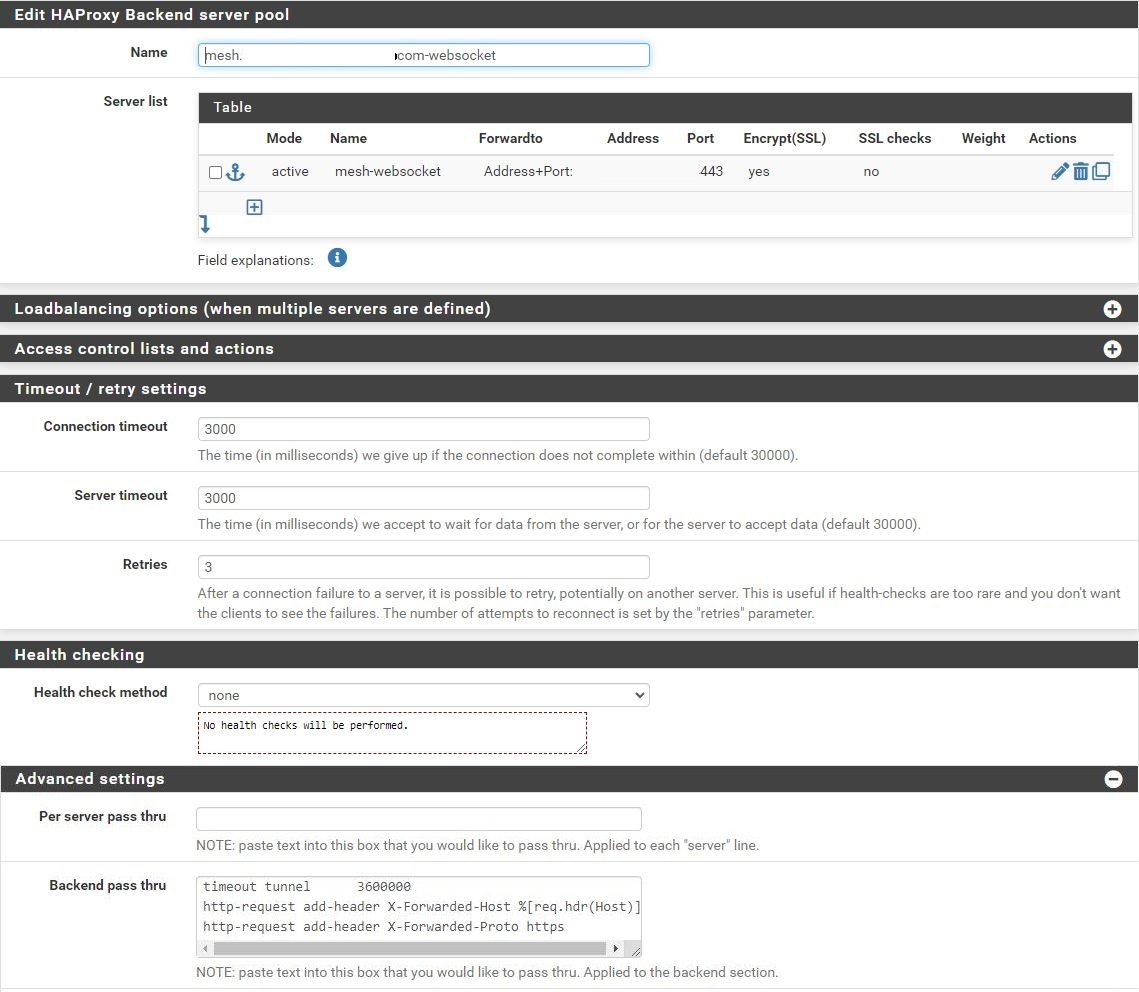
Copy the mesh backend. Change the Name entry to match the mesh FQDN-websockets (eg, mesh.example.com-websockets).
Change the Name for the server to mesh-websockets.
In the Timeout / retry settings section, change the entries in Connection timeout and Server timeout to 3000.
In the Advanced settings section, change the timeout tunnel entry in the Backend pass thru box to 3600000.
Scroll down, save, and apply changes when asked.
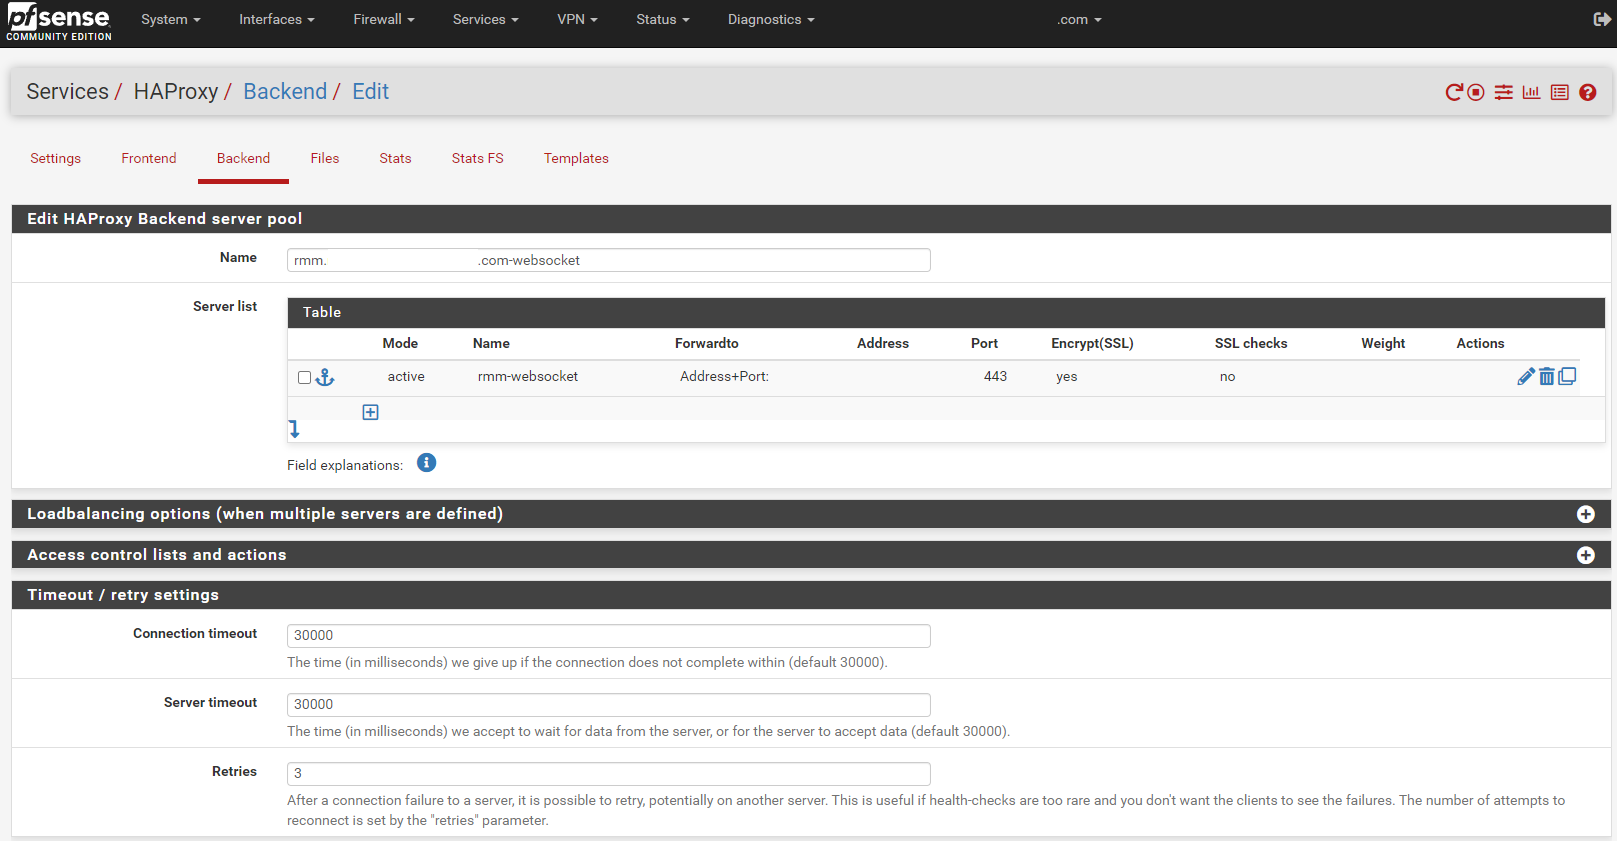
Copy the mesh-websockets backend. Change the Name entry to match the rmm FQDN-websocket (eg, rmm.example.com-websocket).
Change the Name for the server to rmm-websocket.
In the Timeout / retry settings section, change the entries in Connection timeout and Server timeout to 30000.
Scroll down, save, and apply changes when asked.
Shared HTTP to HTTPS redirect frontend
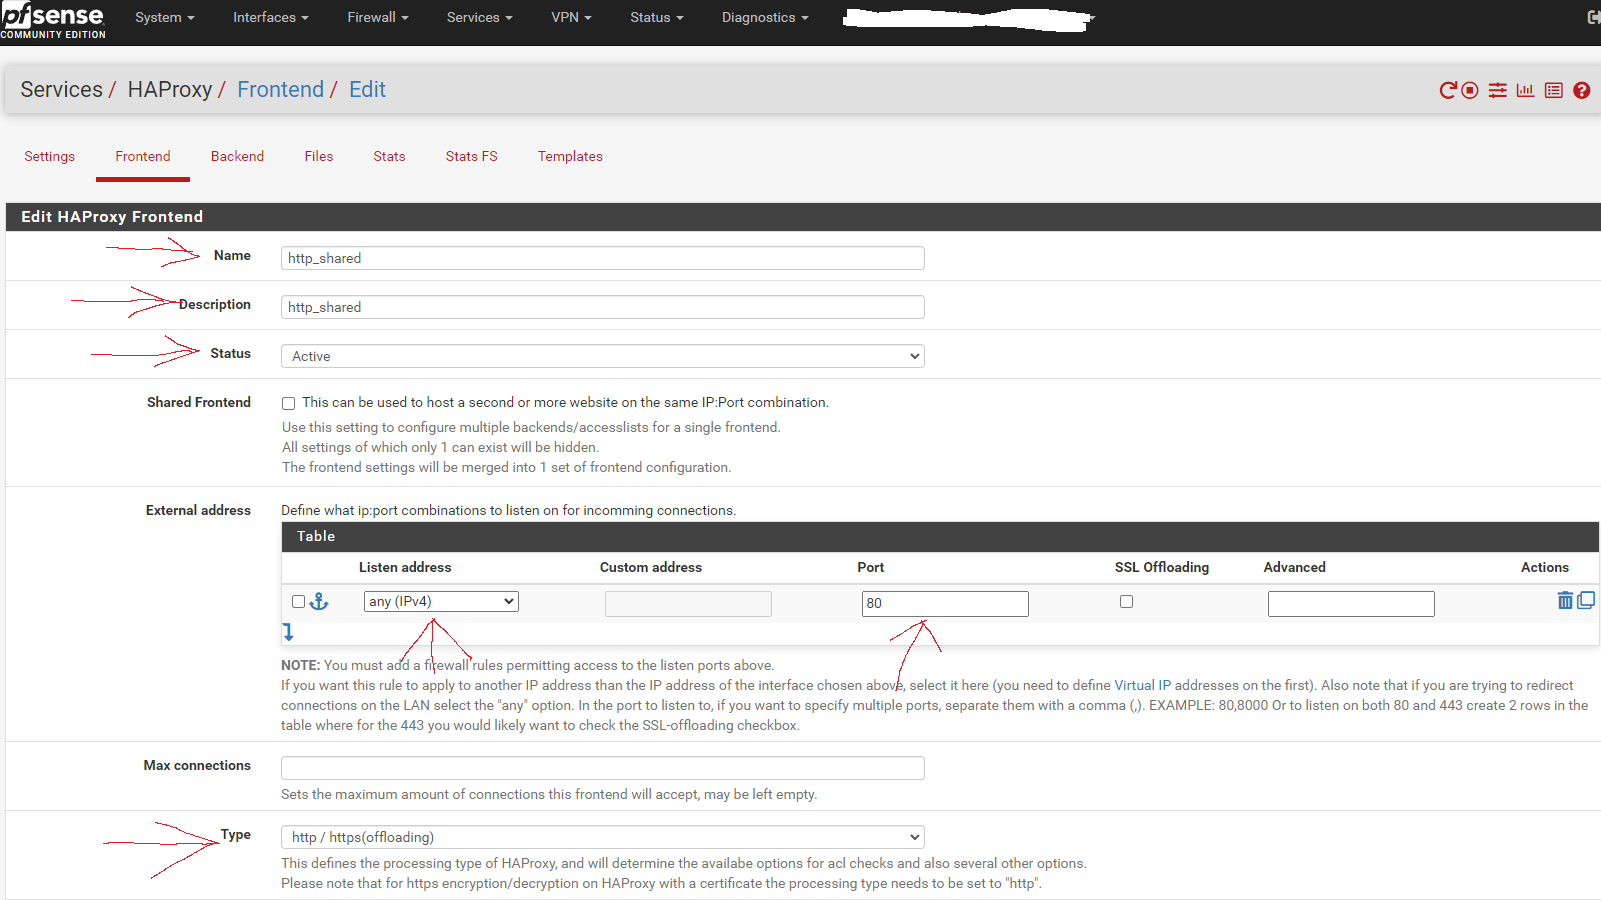
Now go to the Frontend tab. Click the button to add a new frontend.
Fill in the entries as shown in the screen capture below:
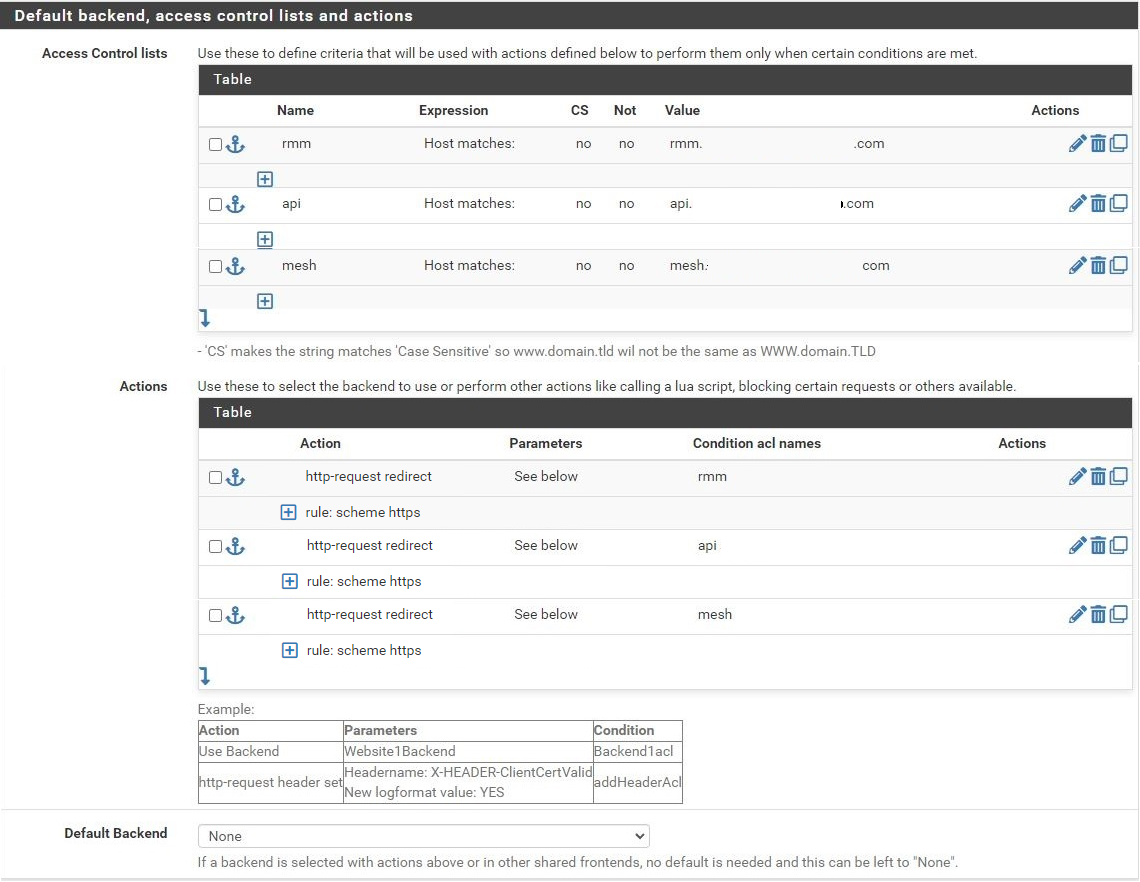
Scroll to the section titled "Default backend, access control lists and actions" and in the Action Control lists area click the down arrow to create a new acl. Enter rmm in the Name field, change the Expression to Host matches, and enter the FQDN for rmm into the Value field (eg, rmm.example.com).
Copy the rmm acl. Change the Name to api, and the Value field to the FQDN for api into the Value field (eg, api.example.com).
Copy the api acl. Change the Name to mesh, and the Value field to the FQDN for mesh into the Value field (eg, mesh.example.com).
Scroll down to the Actions area of the section and click the down arrow to create a new action. In the Action field, select http-request redirect, enter scheme https into the rule field, and enter rmm into the Condition acl names field.
Copy the action you just created, and change the Condition acl name to api.
Repeat this again, and change the Condition acl name to mesh.
Scroll down and select None for the Default Backend.
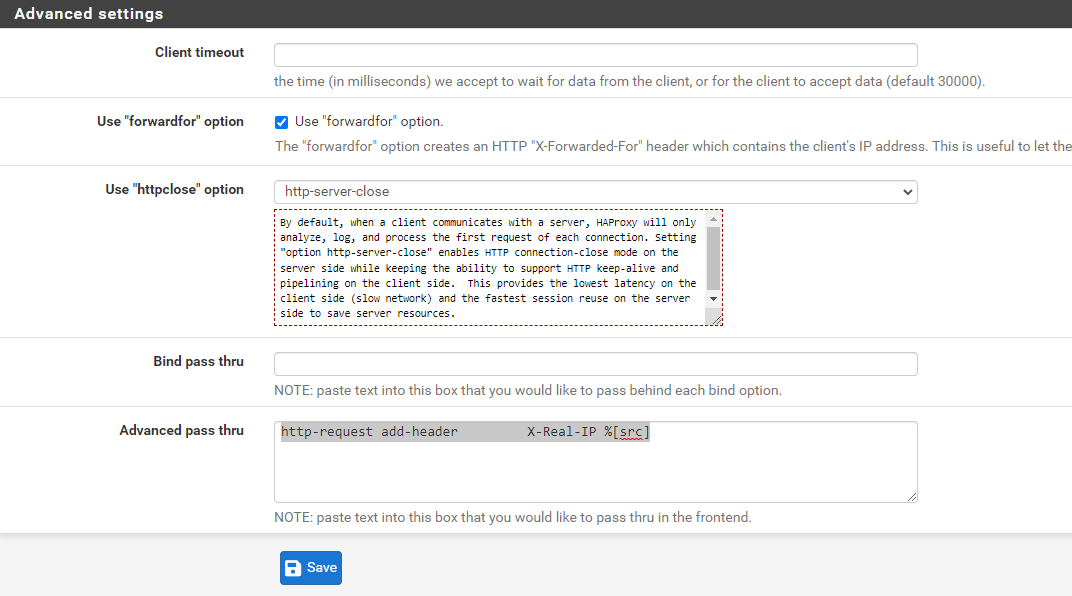
Scroll down to the Advanced settings section. Tick the Use "forwardfor" option box, select http-server-close for Use "httpclose" option, and add/copy-paste
http-request add-header X-Real-IP %[src]to the Advanced pass thru text box.
Save and apply changes.
Shared HTTPS frontend
Fill in the entries as shown in the screen capture below:
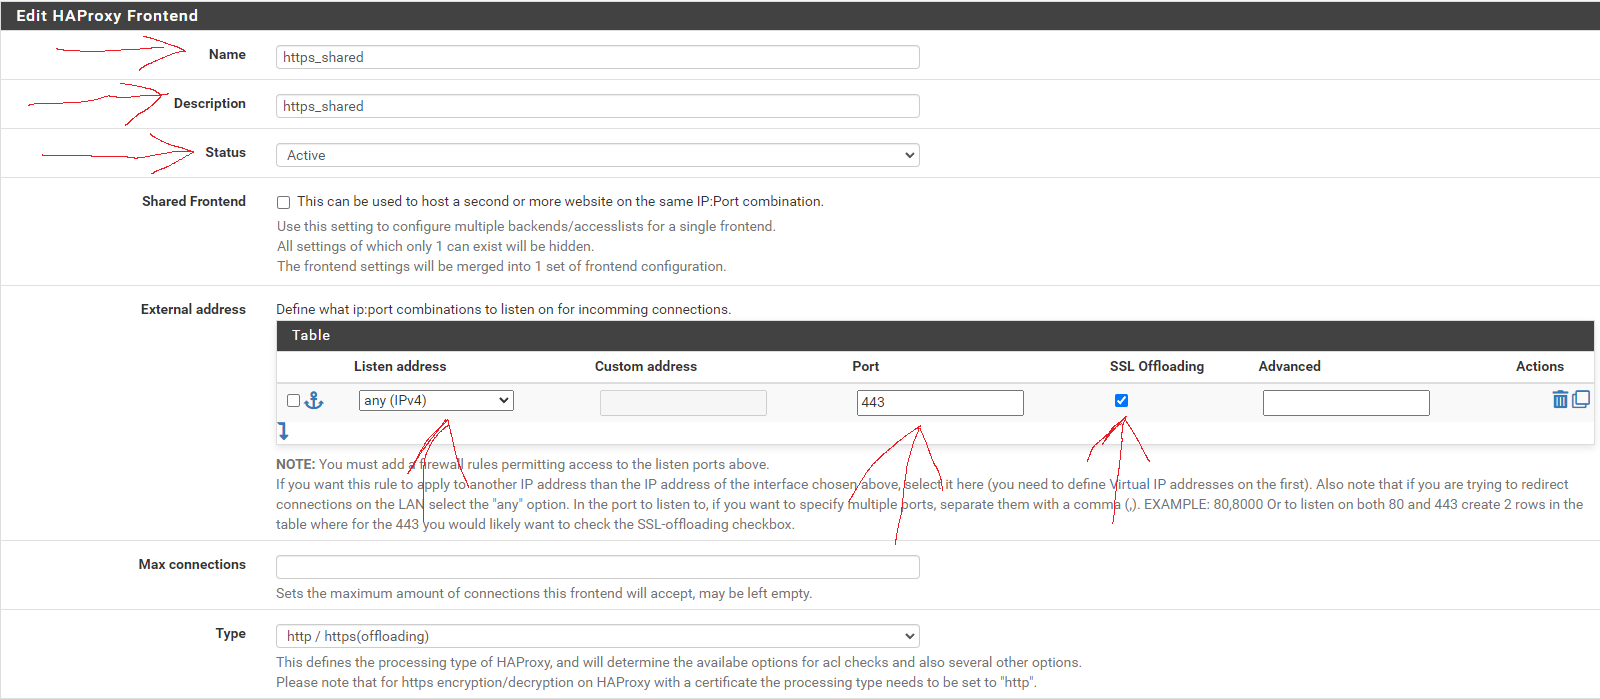
No entries are necessary in the Default backend, access control lists and actions section, just make sure to set the Default Backend to None.
As before, scroll down to the Advanced settings section, tick the Use "forwardfor" option box, select http-server-close for Use "httpclose" option, and add/copy-paste
http-request add-header X-Real-IP %[src]to the Advanced pass thru text box.
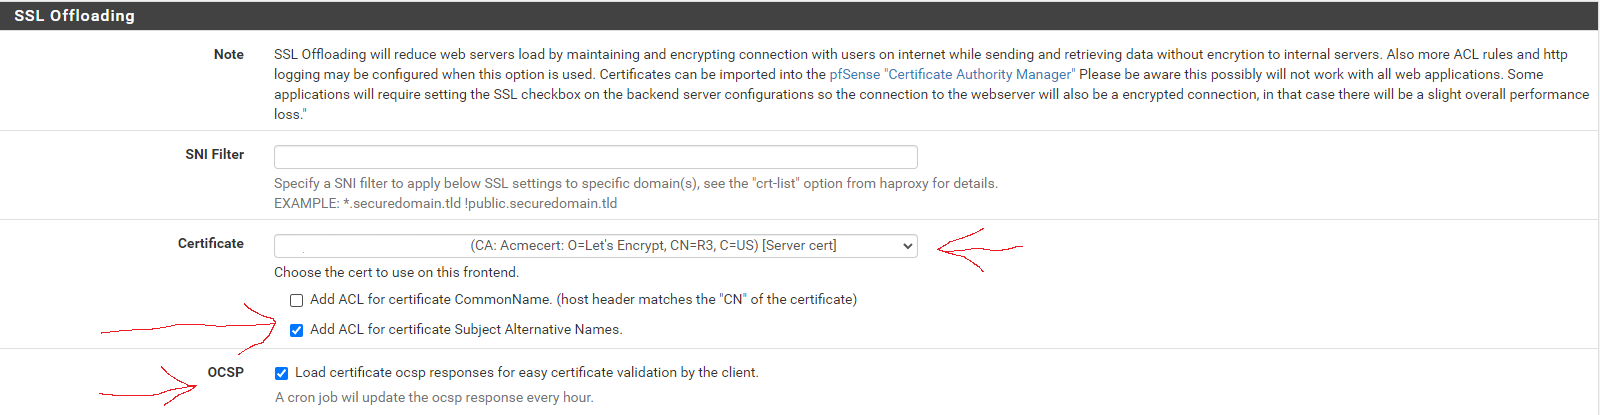
Next, scroll down to the SSL Offloading section. In the Certificate area, select the wildcard certificate for the domain and tick the box to Add ACL for certificate Subject Alternative Names.
In the OCSP area, tick the option box.
Save and apply changes.
T-RMM frontend
Action order matters!!!
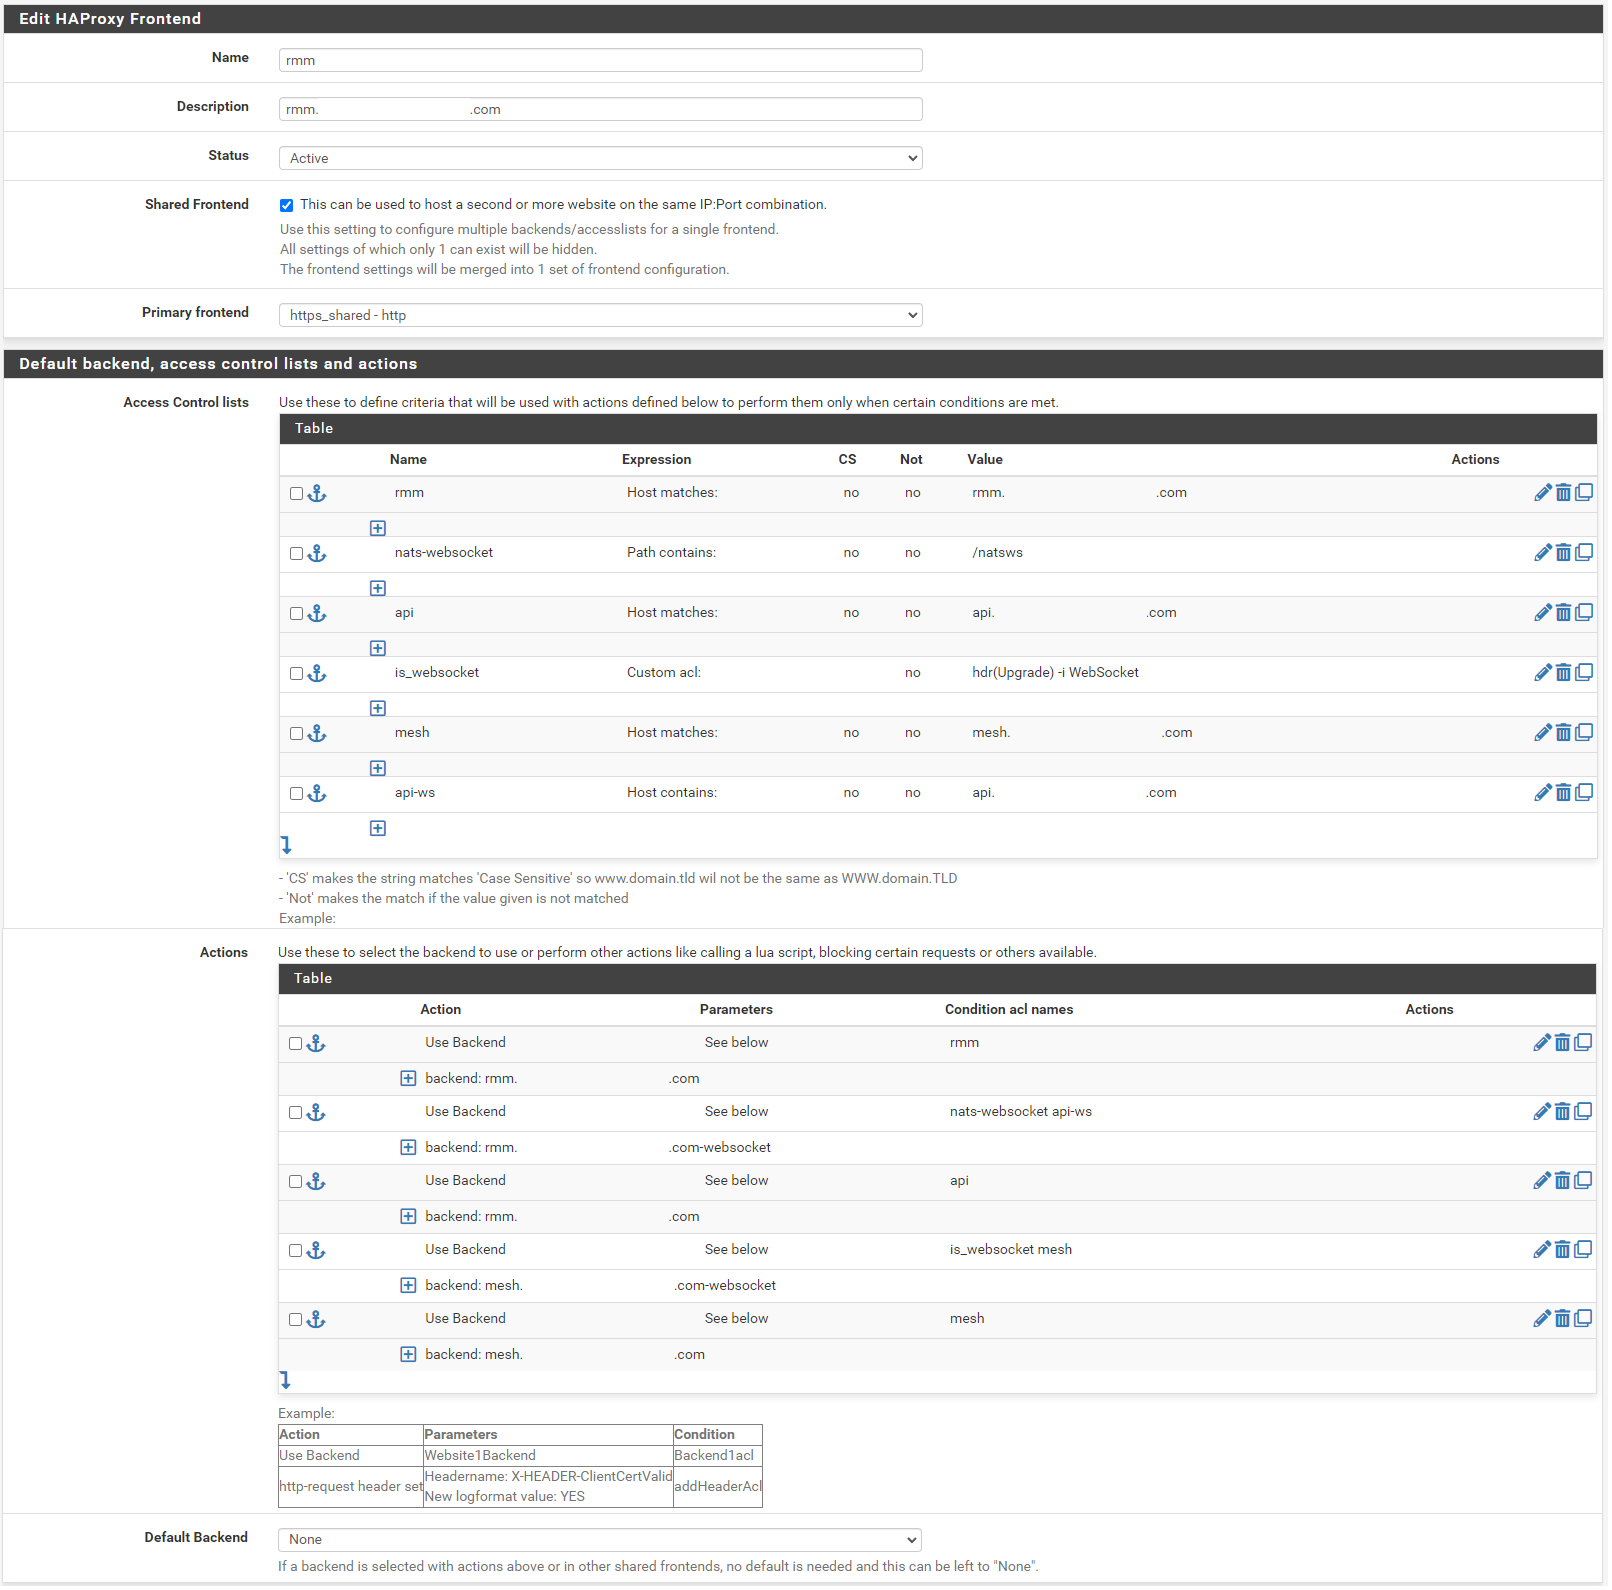
In the Name field, enter t-rmm. In the Description field, enter the rmm FQDN (eg, rmm.example.com). Set the Status to active, tick the Shared Frontend box, and select https_shared - http as the Primary frontend.
Scroll to the section titled "Default backend, access control lists and actions" and in the Action Control lists area click the down arrow to create a new acl. Enter rmm in the Name field, change the Expression to Host matches, and enter the FQDN for rmm into the Value field (eg, rmm.example.com).
Add a new acl. Change the Name to nats-websocket, set the Expression to Path contains, and enter /natsws as the Value.
Copy the rmm acl. Change the Name to api, and the Value field to the FQDN for api into the Value field (eg, api.example.com).
Add a new acl. Change the Expression to Custom acl: , in the Name field enter is_websocket , and in the Value field enter hdr(Upgrade) -i WebSocket .
Copy the api acl. Change the Name to mesh, and the Value field to the FQDN for mesh into the Value field (eg, mesh.example.com).
Copy the api acl. Change the Name to api-ws, set the Expression to Host contains, and the Value field to the FQDN for api into the Value field (eg, api.example.com).
Scroll down to the Actions area of the section and click the down arrow to create a new action. In the Action field, select Use Backend, select the rmm backend you created earlier, and enter rmm into the Condition acl names field.
Copy the rmm action you just created, change the Condition acl name to nats-websocket api-ws, and change the backend to the rmm-websocket backend (eg, rmm.example.com-websocket).
Copy the initial rmm action you created, and change the Condition acl name to api.
Create a new action. In the Action field, select Use Backend, select the mesh websockets backend, and enter is_websocket mesh into the Condition acl names field.
Copy the api action, select the mesh backend, and change the Condition acl name to mesh.
Scroll down and select None for the Default Backend.
Save and apply changes.
The websites/services should now be available internally and externally at the configured URLs, with SSL encryption, and automatic HTTP to HTTPS forwarding.
No comments to display
No comments to display