Moslye Education
Mosyle MSP Training program for MSP Exam
- Getting Started
- Intro to Mosyle Education
- Navigating the Interface
- Account organization and profile assignments
- Supported features and Apple integrations
- Mosyle Manager app & Self-Service
- Configuring Account Preferences
- Subscription Models
- Planning your Deployment
- Introduction
- Enrollment Methods
- Authentication & Assignment Options
- Integrations
- Management Profiles and Configurations
- Setting up a Mosyle account
- Enrollment
- What is MDM enrollment
- Mosyle MDM Enrollment options
- Automated Device Enrollment
- Device Enrollment
- User Enrollment
- Users & Hierarchy
- Inventory Management
- App deployment and management
- App Installation w/ Apple Apps and Books
- Enterprise App Installation
- Mosyle Catalog App Installation
- Install PKG
- App Center
- Management Profiles & Device Configuration
- Management profiles
- Commands Activity Log
- Managing OS Updates
- Device Restrictions & Passcode Policies
- Managing WiFi Connectivity
- Kernel Extensions, System Extensions, Privacy Preferences
- Securing Devices
- Erasing Devices
- Classroom Tools
- Mosyle OneK12 features
- Best Practices
Getting Started
What's needed before you get started
Welcome to the Mosyle Education Certification! Before getting started it's recommended that you have access to the following items so you can apply the skills and knowledge while learning to ensure full understanding.
-
Trial instance of Mosyle Education. If you do not have a trial account just yet, you can request one here: https://myschool.mosyle.com/signup/
- Mac running the latest macOS version available (recommended)
- iPhone or iPad running the latest iOS/iPadOS version available (recommended)
Throughout the Mosyle Education Certification we'll be walking through a number of settings that can be managed using Mosyle MDM and how they are configured. It is recommended to have access to your Mosyle Education account, and test devices available to apply various configurations to the devices, which may include erasing the device. Please be sure the devices used while completing the certification are test devices that won't be impacted if they are erased.
Network Requirements
In order for devices to successfully communicate with Mosyle and Apple, the following domains and ports will need to be released. Mosyle utilizes dynamic load balancing, therefore we do not have a specific IP range as servers can be added or removed at any time. It's recommended to release the Mosyle wildcard in the network to ensure all Mosyle domains and subdomains are allowed.
Required Mosyle domains:
- *.mosyle.com
- *.mosyle.io
Required domains for the Mosyle CDN:
- macosagent.azureedge.net
- mosylemanagerweb.blob.core.windows.net
- macosagents.blob.core.windows.net
Required Ports:
| Service Name | Port | Protocol |
| Web Service (http) | 80 | TCP |
| Web Service (https) | 443 | TCP |
| Push Notification | 2195, 2196, and 2197 | TCP |
| Mosyle macOS Agent Push Notification | 3000 | TCP |
| MDM Enroll | 1640 | TCP |
| APNs | 5223 | TCP |
| Internet Control (Web Filter) | 3180 | TCP |
| Apple Classroom | 3284 and 3285 | TCP/UDP |
Required Apple domains:
Be sure to release the entire IP range for Apple: 17.0.0.0/8, as well as all ports used by Apple software products which can be found here: https://support.apple.com/en-us/HT202944
It's also recommend to release all hosts and ports used for Apple products on Enterprise networks, which can be found here: https://support.apple.com/en-us/HT210060
Hardware and Software Requirements
To ensure the best experience, it's recommended to keep devices updated to the latest OS version as some features have specific operating system requirements.
However, the following devices can be enrolled in Mosyle:
- iPhone and iPod touch with iOS 5 or later
- iPad with iOS 5 or later or iPadOS 13.1 or later
- Mac computers with OS X 10.7 or later
- Apple TV with tvOS 9 or later
NOTE: The Mosyle Education macOS agent is officially tested and supported on the two latest versions of macOS. It can be installed on macOS versions prior to this, however, the functionality of the agent on macOS versions earlier than the previous two is unknown.
Intro to Mosyle Education
Navigating the Interface
Mosyle Education is organized into 7 tabs which can be accessed using the bottom menu bar within the platform:
- Dashboard
- My School
- Management
- Security
- DNS Filtering
- Class Manager
- Support
NOTE: The Security and DNS Filtering tabs are available only for Mosyle OneK12 subscriptions.
Dashboard
The Dashboard for each account can be customized to show the school or district logo in the upper left corner. Any MDM Alerts for iOS/iPadOS, macOS, or tvOS will be available directly in the dashboard. Clicking on any of the alerts will bring additional details showing which devices are impacted.
The number of licenses available, as well as the number of enrolled devices per OS platform will be displayed in the upper middle, with quick access to your favorite Management profiles directly underneath. Clicking any of the favorited profiles will result in being redirected to the Management profile in order to view any details or make any necessary edits or adjustments.
On the right side of the dashboard, the metrics for the security of your devices will be displayed, such as the Device Scout score of your enrolled devices and any infections found by Detection & Removal. Clicking either of these options will redirect you to the appropriate area within the Security tab.
Directly below the security metrics will be access to any/all support tickets submitted and show the status of the ticket. Click any of the ticket titles to bring up the ticket thread, or click the button to Go to Support to navigate to the Support tab.
In the upper right hand corner, you'll see the name of the user currently logged into the Mosyle web panel as well as the time remaining in the session. Clicking Settings will bring up account settings such as the timezone, date and time formatting, two-factor authentication, and the option to change the password. To logout, click Logout.
My School
The My School tab includes all information relevant to your school or district. Within this tab, you can:
- Create/Renew Push Certificate
- Integrate Apple School Manager
- Configure enrollment settings
- Manage the school Hierarchy (Locations, Grade Levels, Courses & Classes, etc.)
- Manage Shared Device Groups
- Manage Users
- Configure device assignment settings
- Integrate with Active Directory, API, or OAuth
- View Action Logs
- Configure Preferences
- Manage Subscription
Management
The Management tab is where all device information and configuration can be found. Here you can:
- View device inventory and export reports
- Manage Dynamic Device Groups
- View Pending and Failed Commands
- Manage content purchased in Apple School Manager
- Create and deploy Management profiles
The Management tab is separated based on OS so only relevant profiles and commands are available based on which OS is being managed. To navigate between the different OS platforms, click the dropdown menu in the top left.
Security
The Security tab provides access to configure and manage Device Scout, Detection & Removal, and Admin On-Demand.
DNS Filtering
The DNS Filtering tab provides access to configure and manage DNS Filtering configurations.
Class Manager
The Class Manager provides access to Class Management tools for teachers.
Support
The Support tab provides access to all content available in the Help Center as well as direct access to the Mosyle Support Team via tickets.
Account organization and profile assignments
Mosyle is organized so that the management and configurations of devices is as intuitive as possible, allowing you to assign configurations based on the user who is using the device, the grade level or class the assigned user is associated with, or the shared device group or dynamic device group the device belongs to.
By importing user data, all users are organized just as they are in your directory service - including grade levels, courses, and classes. This data can then be used for device assignment, as well as profile and configuration assignment.
In Mosyle, all device management and configurations start with the creation of “management profiles”. When creating the management profile, you can define the necessary configurations and settings and then assign the profile to any users, grade levels, classes, devices, shared device groups, dynamic device groups, etc. as needed. This way devices will automatically receive the configuration when the user is assigned to the device, or the device is assigned to a shared or dynamic device group.
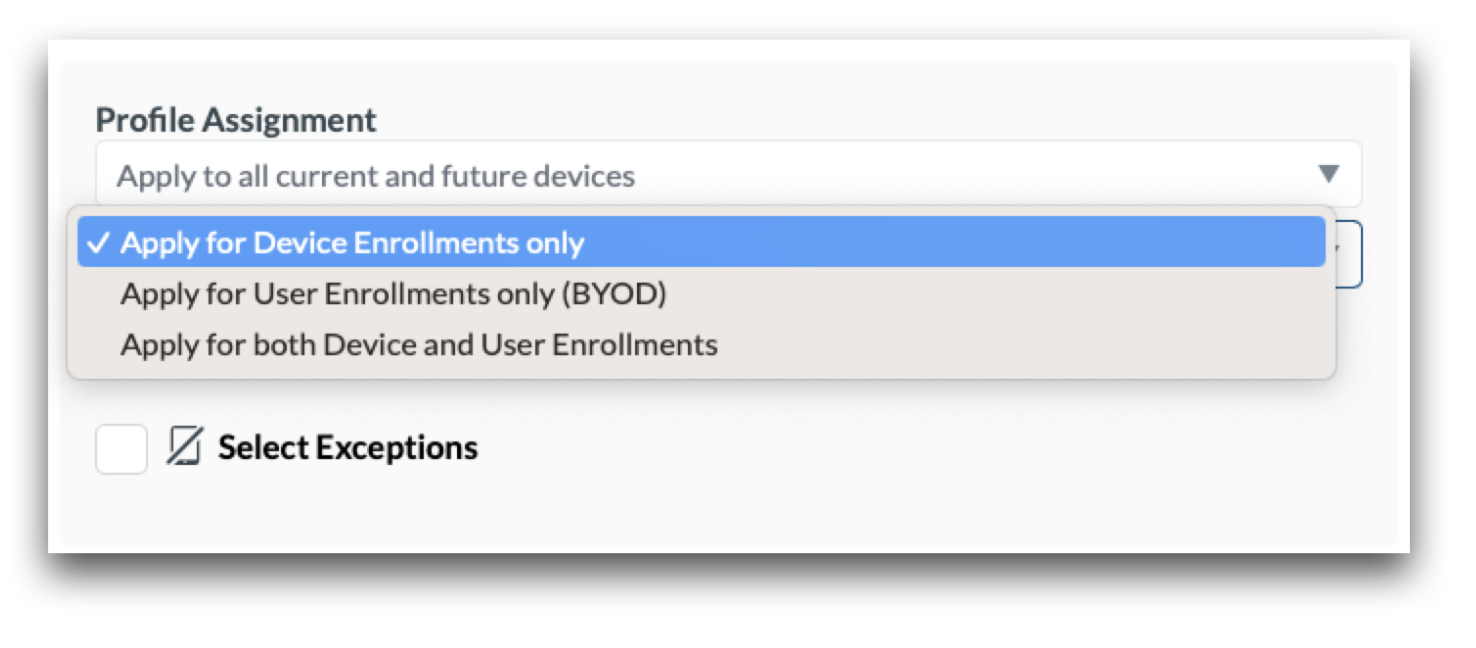
Use the dropdown to navigate between the Device Enrollment and User Enrollment to target devices based on the enrollment method used.
Supported features and Apple integrations
Mosyle fully supports integrating with Apple School Manager for device management and enrollment (MDM server tokens), and Apps and Books management (Apps and Books content tokens). Support for multiple tokens is also available.
On iOS and iPadOS devices, Mosyle utilizes the full Apple MDM Protocol for management functionality. You can choose to deploy the Mosyle Manager application to obtain additional information, such as bluetooth status, WiFi SSID, location information, and allow messages/notifications to be sent. The Mosyle Manager application is not required in order for Mosyle to manage iPhone and iPad devices.
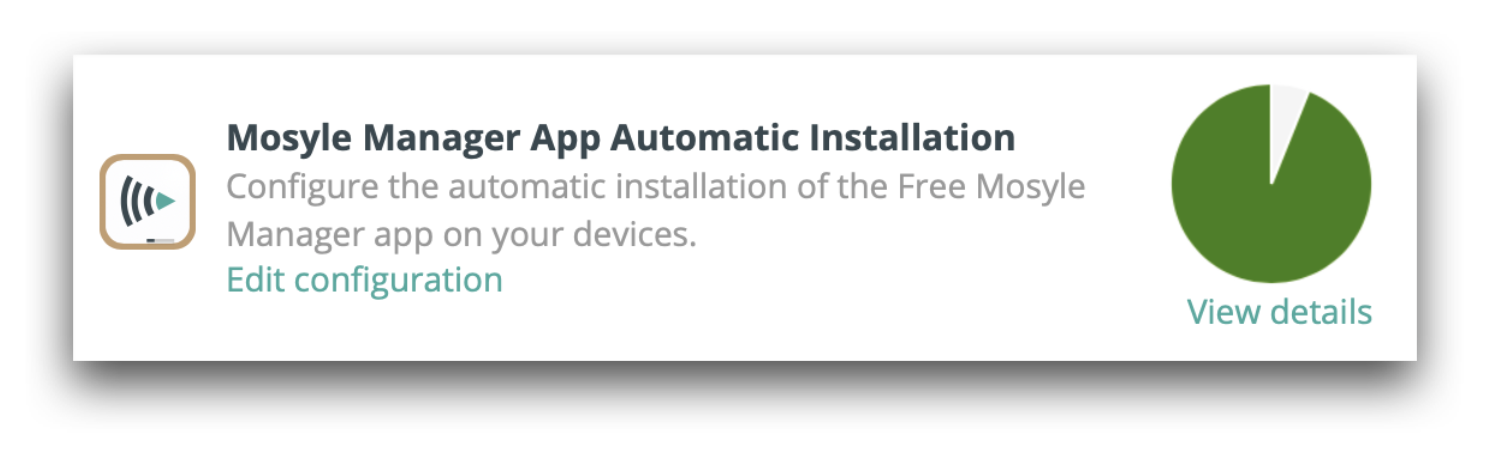
If you decide to deploy the Mosyle Manager application to the iOS/iPadOS devices, you can obtain the free licenses in Apple School Manager and configure the Automatic Installation profile under the Management tab > Install App.
On macOS devices, Mosyle fully supports Apple's MDM Protocol while also utilizing our Mosyle MDM agent to provide additional management functionality that may not be currently available through MDM Protocol. The agent is not required in order for Mosyle to manage Mac computers via MDM Protocol.
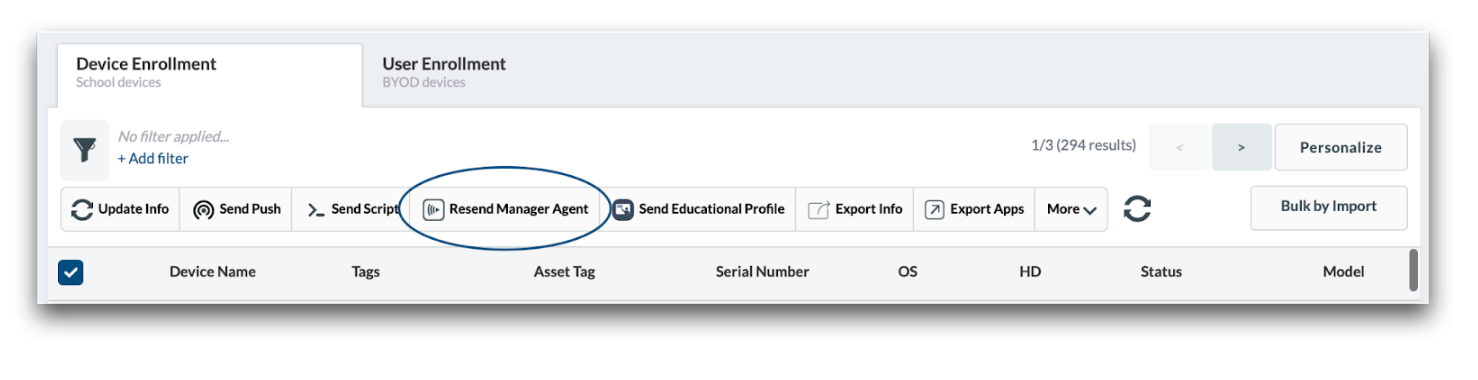
The Mosyle agent is automatically installed alongside the Mosyle Manager application on macOS devices enrolled via Device Enrollment or Automated Device Enrollment. You can request to reinstall the agent on devices at any time by clicking the option to “Resend Manager agent”. The agent is required for the following management options and features:
- Install PKG and DMG
- Mosyle Catalog
- Allowed/Blocked Apps
- Apple Remote Desktop permission configurations
- Custom Commands
- Local User
- Wallpaper
- Device Scout for macOS
Additional features and functionality supported by Mosyle's agent can be added in the future.
NOTE: The Mosyle Education macOS agent is officially tested and supported on the two latest versions of macOS. It can be installed on macOS versions prior to this, however, the functionality of the agent on macOS versions earlier than the previous two is unknown.
Mosyle Manager app & Self-Service
The Mosyle Self-Service is available for devices enrolled via Device Enrollment. Self-Service can be accessed using the Mosyle Manager app on iOS/iPadOS devices and through the Manager.app on macOS devices. Self-Service provides Administrators with the ability to allow end users to request the installation of apps, web clips, profiles, and more.
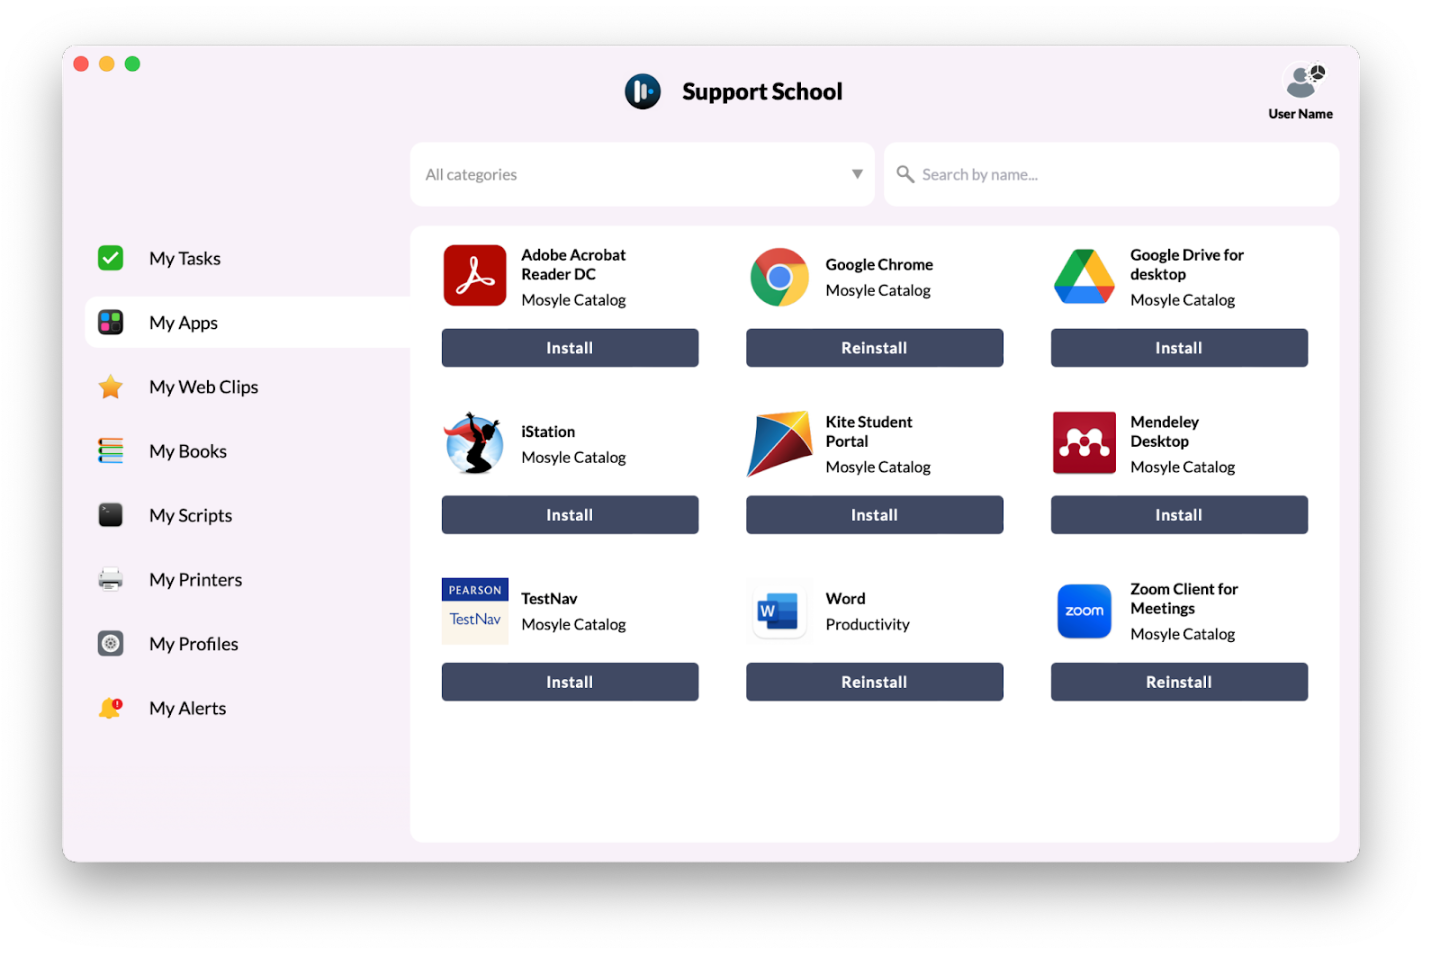
iOS/iPadOS
The Mosyle Manager application is not automatically installed on iOS/iPadOS devices. By default, devices enrolled will receive a Mosyle web clip so users can access Self-Service. If the Mosyle Manager App Installation profile is configured and the app deployed to devices, the web clip will be removed.
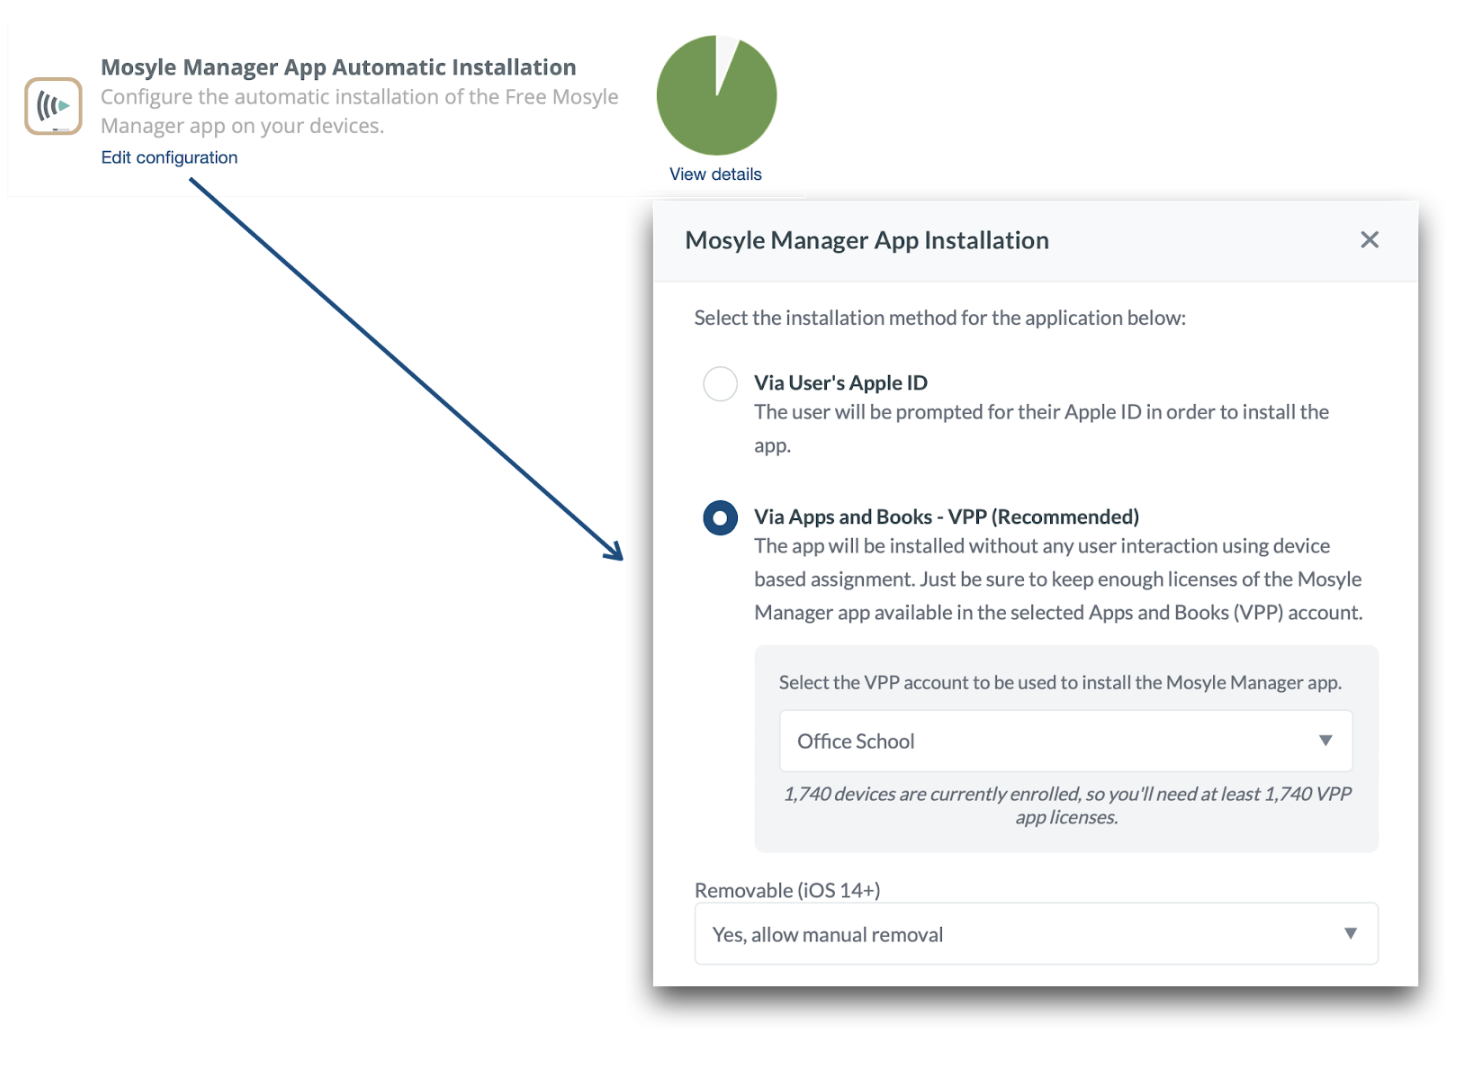
To configure the automatic installation of the Mosyle Manager app, first obtain licenses for the app in Apple School Manager. Once licenses are available and the Apps and Books token is integrated, go to Management > Install App (iOS/iPadOS) > Click Edit Configuration for the Mosyle Manager App Automatic Installation profile. Choose the Apps and Books token to use for licensing and assign the configuration to users/devices. Click Save.
macOS
The Manager.app is automatically installed on macOS devices enrolled using Automated Device Enrollment and Device Enrollment. If needed, it can be reinstalled on devices using the command in Management > Devices > Devices Overview > Resend Manager agent.
Configuring Account Preferences
Account wide preferences can be configured under My School > Preferences. Options available include:
- Single Sign-On: Configure use of Identity Provider credentials (Google, Azure, AD FS, Active Directory, OAuth) to login to the Mosyle web panel, iOS/iPadOS app, or macOS app.
- Action Logs: Review actions taken within the account, including the user who initiated the action along with the date/time and corresponding IP address.
- Your Logos & Icons: Personalize your Mosyle account with school or district logos and icons. In this area you can upload your school/district logo to be displayed in the Mosyle Dashboard upon logging in.
- MSP/Resellers: Connect the account with a Mosyle registered MSP or Reseller.
- Mosyle Beta: Read about available Mosyle Beta features and programs, with the ability to opt-in to participate.
- Other Settings: Configure specific settings for iOS/iPadOS and macOS devices, as well as general account preferences, Admin Authentication Policy, and the Login Screen Wallpaper.
- Subscription: Check and manage subscription status.
- Reports: Access and download requested reports.
Subscription Models
Mosyle Education has three subscription options - Free, Premium, and OneK12. More information about subscription options can be found here: https://school.mosyle.com/pricing
Planning your Deployment
Introduction
The basis for any deployment includes the following:
- How will devices be enrolled?
- How will devices be assigned - to users, shared device groups, etc.?
- Will users be imported and from which source?
- Who will complete the enrollment process - IT or end users (students/teachers)?
- What configurations should be applied and which apps should be installed?
The following sections provide information on what can be accomplished using Mosyle for your deployment to help with the discussion and decision-making for the questions above.
Enrollment Methods
When planning your deployment, you need to consider how the devices will be enrolled. When possible, it's always recommended to erase devices and enroll them fresh into the MDM using Automated Device Enrollment. If it's not possible, you can use any other enrollment method.
Most deployments utilize Automated Device Enrollment or some combination of Automated Device Enrollment and Device Enrollment.
Automated Device Enrollment
Mosyle supports Automated Device Enrollment which provides the ability to enroll devices over-the-air by syncing an enrollment profile with Apple servers. Using Automated Device Enrollment, users can easily complete enrollment by erasing the device and then going through the Setup Assistant. After connecting the device to a network connection, it will retrieve the enrollment profile from Apple servers and complete the enrollment. With Automated Device Enrollment, devices can be handed directly to users so they can complete the enrollment to accomplish a zero-touch deployment.
Enrolling with Automated Device Enrollment locks the MDM enrollment profile on the device so that it cannot be manually removed by the user.
NOTES:
- iPhone and iPad devices must be erased in order to be enrolled using Automated Device Enrollment
- Mac computers can be enrolled using Automated Device Enrollment without erasing by using a Terminal command. The user will need Admin rights to complete the installation of the enrollment profile and some settings configured in the Automated Device Enrollment profile may not apply using this method.
Device Enrollment
If erasing devices is not possible, you can still enroll them using Device Enrollment. For iPhone and iPad devices, you can complete enrollment using Apple Configurator 2 or by entering the Safari enrollment URL. For Mac computers, you can complete enrollment by entering the Safari enrollment URL and manually installing the MDM enrollment profile. Users will need Admin rights to complete the installation of the MDM enrollment profile.
This method of enrollment requires a more hands-on approach to ensure users are properly installing the MDM profile. Keep in mind, the MDM enrollment profile cannot be locked on the device and can be manually removed when using this method of enrollment.
User Enrollment
Users can complete User Enrollment by logging in to the device or specified URL with their Managed Apple ID. User Enrollment is beneficial in environments where students or teachers bring their own devices and need access to school or district resources, such as apps or books.
User Enrollment requires users to be registered in Mosyle with their school/district Managed Apple ID.
Authentication & Assignment Options
As mentioned, Mosyle is organized to make management and the configuration of devices as intuitive as possible, allowing you to assign configurations based on the user who is using the device, the grade level or class the assigned user is associated with, or the shared device group or dynamic device group the device belongs to.
Since configurations can be assigned to specific users, it's important users are assigned or associated with the specific device, or devices, they use. Assignment of devices can be fully automated so that students or teachers simply authenticate with their school credentials and Mosyle will automatically pair them with the device. In order to do this, users must be imported into Mosyle.
An ideal zero-touch deployment flow would include users imported into Mosyle and devices enrolled using Automated Device Enrollment, along with prompting users for authentication during the enrollment in order to complete the device assignment. From there, management profiles and applications that are assigned to the user will automatically be deployed upon device enrollment. This enrollment example is dependent on the user completing the device enrollment.
If the IT team or a provisioning service will be enrolling devices, user authentication during enrollment may not be ideal. Instead, device assignment can be completed by students or teachers authenticating in the Mosyle Manager app on iOS/iPadOS or via a login event on macOS, either through the native macOS login window or Mosyle Auth.
Integrations
Mosyle supports integration with Apple School Manager and Active Directory to import students, teachers, staff, grade levels, and classes. If the school data is not available in ASM or Active Directory, it can be created manually within the web panel, or in bulk using the Spreadsheet import or API integration.
When importing users, it's important to ensure the correct email address and user ID is imported in Mosyle. If app and book deployment using user-based license assignment will be used, or User Enrollment will be used, it's important to also import the user's Managed Apple ID.
Management Profiles and Configurations
Any and all configurations and profiles created and assigned to the device will be applied immediately upon enrollment. Configurations and profiles assigned to the user, grade level, course/class, or shared device group will be applied once the device is assigned to the user or shared device group.
This allows you to build out all management configurations needed so that once devices are enrolled and assigned, they will be provisioned and protected as expected and ready for use.
Setting up a Mosyle account
Apple Integrations
- Push Certificate details: topic UDID, serial number, expiration date and time, number of devices enrolled under the specific Push Certificate, an export of the devices enrolled under the specific Push Certificate
- Date and time the event occurred
- User who completed the action
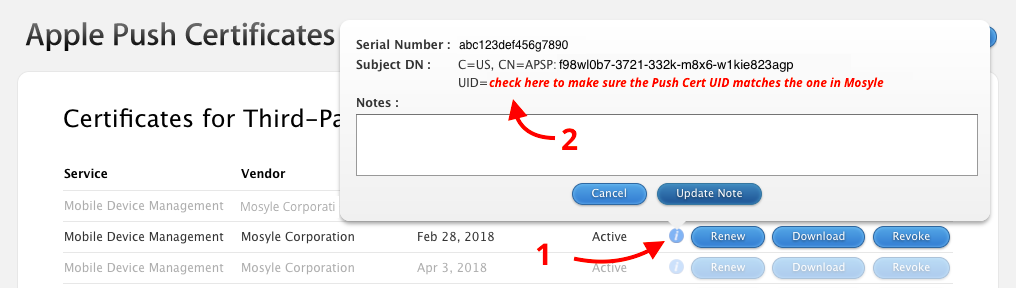
When renewing the Push Certificate, be sure to confirm the Push Certificate ID in Apple's Push Portal to make sure it matches the topic UDID shown in the Mosyle interface. If it's not possible to renew the original Push Certificate, the devices will need to be re-enrolled in Mosyle.
NOTE: For the security of customer accounts, MSPs do not have access to the Push Certificate area when accessing the account from the Mosyle Partner Portal.
Resources
Recommended resources
- A school or district generic Apple ID (not a personal Apple ID or one that is associated with a specific user)
- Apple School Manager account
- User account with Administrator or Device Enrollment Manager privileges in Apple School Manager
- User account with Administrator or Content Manager privileges in Apple School Manager
Apple School Manager (ASM)
To enroll devices using Automated Device Enrollment, an MDM server for Mosyle must be created in ASM and the MDM server token must be integrated into Mosyle.
Complete the steps below to integrate your Apple School Manager account with Mosyle:
- Go to My School > Apple Basic Setup
- Click Apple School Manager
- Click “Add new account” and follow the on-screen instructions
Once the Mosyle MDM server is created in Apple School Manager you can assign devices to the Mosyle MDM within Apple School Manager. For more information about assigning devices to an MDM server in Apple School Manager, check Apple's documentation.
Additional MDM server tokens can be integrated in Mosyle from Apple School Manager using the steps above.
To restrict access to the Apple School Manager token to make changes, update, or renew the token, click the integration under My School > Apple Basic Setup > Apple School Manager, and uncheck the box for “All current and future locations”. Select only the locations to have access to the integration. Location Leaders not assigned to the specified locations will not have access to the token.
After integrating the token from Apple School Manager into Mosyle, you can click it at anytime to view the following information:
- MDM Server Name
- Administrator who completed the integration
- Organization Name
- View/Update the name of the token integrated in Mosyle
- View/Update access to the integration
- Renew or replace the integration token
- Save the integration to update any info
- Delete the integration
- Sync preferences and/or request a manual sync of user/roster data
Syncing data from Apple School Manager
The Apple School Manager integration provides the opportunity to sync students and teachers, along with any class roster data that has been imported to Apple School Manager directly into Mosyle. After integrating the MDM server token into Mosyle, go to My School > Apple School Manager > Click “Sync Hierarchy”. Within this screen you can edit any sync preferences or manually pull fresh data and start the import.
Enrolling devices from Apple School Manager
To view devices assigned to the Mosyle MDM server from ASM, and the status of the enrollment profile, go to My School > Apple Basic Setup > Enrollment > Automated Device Enrollment > View devices. The status of each device is displayed and is color-coded for quick and easy status identification. Mosyle will automatically sync with Apple servers every 2-3 hours to update this information. If you have recently assigned devices to Mosyle and need to configure them immediately, click Update to request a sync.
In order for the device to successfully enroll in the Mosyle MDM using Automated Device Enrollment, the enrollment profile must be synced with Apple servers. When devices are erased and connect to WiFi, or the Terminal command is used on macOS, they will reach out to Apple's cloud configuration servers to retrieve any enrollment information. So long as the Automated Device Enrollment profile is synced with Apple server's the device should proceed through Remote Management during the setup.
If you run into any issues during the enrollment process, please check the Help Center and/or get in touch with our Support Team via tickets.
Apple Apps and Books
In order to install apps or books on devices using licenses purchased in Apple School Manager, the Apps and Books content token must be integrated in Mosyle.
Complete the steps below to integrate your Apple School Manager account with Mosyle:
- Go to Management > Applications
- Click Apple Apps and Books (VPP)
- Click “Add account” and follow the on-screen instructions
Once the Apps and Books content token is integrated into Mosyle, app and book licenses will be available for distribution. Additional Apps and Books tokens can be integrated in Mosyle from Apple School Manager using the steps above.
IMPORTANT: The Apps and Books content token from Apple School Manager should only be integrated in one MDM solution at a time to prevent licensing conflicts. Even if the token shows unclaimed or revoked from another solution, it's recommended to fully delete it to avoid conflicts.
To restrict access to the Apps and Books token to install apps, or make changes to the token, click “Edit” for the integration under Management > Applications > Apple Apps and Books (VPP), and uncheck the box for “All current and future locations”. Select only the locations to have access to the integration. Location Leaders not assigned to the specified location(s) will not have access to the token. Licenses for apps and/or books from the token will be unable to be assigned to users or devices not associated with the specified location(s).
To manage teacher access to the licenses available in the Apps and Books token, you can check or uncheck the box “Allow teachers to use the licenses from this account to install applications from the "Study Apps" list when starting a class. All licenses will be assigned using the method "device based"”. With this option checked, teachers will be able to select apps available on the Apps and Books token to include in their list of Study Apps in the Mosyle Class Manager.
After integrating the content token from Apple School Manager into Mosyle, you can click “Edit” at anytime to view the following information:
- Organization ID
- Apple ID for the Administrator who completed the integration
- Email address for the Administrator who completed the integration
- ASM Location Name
- View/Update the name of the token integrated in Mosyle
- View/Update access to the integration
- Renew or replace the integration token
- Save the integration to update any info
- Delete the integration
- More options: Revoke all VPP app assignments or Revoke assignments from unknown devices and users
Clicking the token integration will display more information regarding the apps and books purchased along with the licensing information, such as how many licenses used versus how many licenses available.
- Click the Apps or Books tab along the top to view a list of all app and book licenses purchased and assigned to the token. Mosyle will automatically sync with the Apple servers every 2-3 hours to identify any newly purchased content, however a fresh sync can be requested at any time by clicking the Update button.
- Within the list, click on a specific app or book to view additional details such as the device serial numbers or users to which the app or book licenses are assigned and the profiles in which the content is included. In the detailed view of the app licenses, you can also choose to revoke licenses or update the license list.
- Click the eyeball icon to hide the app or book from being available to install on devices, and click the information icon to view App Store details.
The Invites tab will show a list of users to whom invites have been sent and are either pending acceptance or have been accepted. Invites are required in order to utilize user-based assignment of app or book licenses. When sending invites, you have the option to email the invite to the user so that it can be accepted with their consumer Apple ID so that licenses can be assigned; or you can automatically invite users via their Managed Apple ID that was created in the same Apple School Manager account as the Apps and Books token. Invites can be downloaded, resent, or revoked by selecting the checkbox of the invite and clicking the corresponding icon.
Licenses will be assigned to the Apple ID that is used to accept the invite. Therefore, it is critical that invites are accepted with the same Apple ID logged in on the device to ensure the content downloads. If the invite is accepted with a different Apple ID than what is logged in on the device, the app or book will not download.
NOTE: Books can only be assigned via user-based license assignment and licenses cannot be revoked.
Token Integration
After the MDM server token or Apps and Books token is integrated into Mosyle, it will need to be renewed annually. It is not necessary for the same user to renew the token each year.
If the user who integrated the token changes their password in ASM, their role/permissions change, or is deleted, the token will be invalidated and a new token will need to be integrated. Additionally, for security purposes, any time a new token is downloaded from ASM, the previous token will be revoked.
Other Integrations
Purpose
Mosyle is organized so the management of devices is as intuitive as possible, allowing you to assign configurations based on the user who is using the device and/or the location, grade level, or class the user is associated with. Since configurations can be assigned to specific users and/or their association with a grade level or class, or to a specific group of shared devices, it's important users are assigned or associated with the specific device or devices they use and/or devices are assigned to the appropriate shared device group. Assignment of devices can be fully automated so that users simply authenticate with their school or district credentials and Mosyle will automatically pair the user with the device. In order to do this, users must be imported into Mosyle.
You can quickly import users, locations, grade levels, and courses/classes from Apple School Manager using the ASM integration. If your data has not been imported into Apple School Manager, you can use Active Directory, the Mosyle API, a Spreadsheet import, or create any hierarchical data manually if needed.
Once the school or district data is imported into Mosyle and devices are assigned to their corresponding user, you can effectively scope configurations based on the specific user needs. For example:
- A specific app that needs to be deployed to all students in a specific grade level;
- Restrictions that should only be enforced on devices assigned to students.
Resources
Recommended resources
- Access to a Mosyle Education account
- User account with Administrator or User privileges in Apple School Manager or Active Directory
Configuring Apple School Manager Integration
Location, Grade Levels, Courses/Classes, and Users can be imported into Mosyle from Apple School Manager. Apple School Manager provides multiple methods for importing the school or district data, including from a Student Information System (SIS) directly into ASM, using an SFTP upload, or importing users from Google Workspace or Microsoft Azure AD
When importing data from ASM into Mosyle, in order for a user to be properly assigned to a location, grade level, and user type (Student or Teacher), they must be associated with a Class. Currently, ASM does not provide information regarding a user's type or location. In order to correctly import users as Students or Teachers and assign them to the appropriate location and grade level within Mosyle, the user's association with a Class is used to infer the user type and location. If users are not assigned to a Class, they will not be imported unless the option to “Import Users without a Location” is selected in the Sync Parameters.
Complete the steps below to import data into Mosyle from Apple School Manager:
- If the MDM server has already been created in Apple School Manager, skip this step and go to step 2. Otherwise, go to My School > Apple Basic Setup > Apple School Manager > Add new account. Follow the on-screen instructions to complete the integration.
- After the integration is complete, click Sync Hierarchy under the Apple School Manager token
- Click "Edit Sync Preferences" to configure the following settings:
- Sync automatically: configure the time of day the daily automatic sync will run
- Only add new data and do not edit existing data
- User ID (Identifier): Choose what to use for the user's ID when syncing data from ASM. Choices include Person Number, Person ID, Managed Apple ID Prefix, SIS username, Email address, Managed Apple ID.
- E-mail: Choose what to use for the user's email address when syncing data from ASM. Choices include the same e-mail address registered in ASM, the Managed Apple ID, or the Managed Apple ID without the subdomain. Students are not required to have an email address registered in Mosyle, click the checkbox “Do not import email attribute for students” if you do not wish to have the student email addresses imported into Mosyle.
- User without Location: This option exists due to Mosyle being unable to import users unless a class is assigned. Select this option if you have users without a class that need to be imported into Mosyle. The users will be imported without any grade level or location assigned.
- Class Period Name: Choose what to use for the name of the class when syncing data from ASM. Choices include Class ID, Class Number, Name, or Display Name.
- Locations to Sync: Check the box next to all locations to be synced from ASM. Locations not selected will not be imported.
Once the integration is completely set up, you can click Pull fresh data to preview the data to be imported into Mosyle. If needed, make any necessary changes under “Edit Sync Preferences” and Pull fresh data again. When all data in the preview looks correct, click Start Integration to begin importing the data.
Mosyle identifies users via the user ID and/or the email address. In the event a user's information needs to be updated, make the changes as needed in Apple School Manager or in the Sync Parameters, making sure at least one of the identifiers remain the same. Pull fresh data and complete the integration to update the user.
Configuring Active Directory Integration
Complete the steps below to add an Active Directory integration and import users, grade levels, and/or class periods into Mosyle Education:
- Go to My School > Integrations > + Activate New Integration
- Select Active Directory
- After Activating the integration, click “Add new profile” > Active Directory LDAP
When configuring the Active Directory integration three tabs will be available, two of which need to be configured to successfully import users and user groups: Setup and Synchronization. The Setup tab is where the Active Directory server information will be added. Be sure to release the IPs listed in the interface so that Mosyle is able to establish a connection. Mosyle only supports secure connections (LDAPS or LDAP over TLS).
The Synchronization tab is where mapping and configurations will be made to import users, grade levels, and/or class periods. In this area you can specify the following sync options:
- Only add new data and do not edit existing data
- Welcome email
- Setup and configure the time for the automatic sync
When completing the mapping, filter the users, grade levels, and/or class periods by specific filters or attributes so that only the users and groups you wish to import are imported into Mosyle.
Once the integration is completely set up, you can click the integration name to request a fresh data sync and import users.
Configure the Authentication tab to allow users to authenticate in Mosyle with their Active Directory credentials. Check the box to indicate “Use the AD to validate user and password” and enter the attribute that is used to authenticate. Be sure to test the integration to make sure all is authenticating as expected.
NOTE: AD FS and General OAuth are available for user authentication purposes only. Users, grade levels, and class periods cannot be imported using these integrations.
If you need any assistance with the Active Directory integration, visit the Help Center for more information or submit a Support Ticket.
Configuring Spreadsheet and Mosyle API Integrations
If your school or district doesn't have Apple School Manager or Active Directory, users, grade levels, and classes can be imported using a Spreadsheet or the Mosyle API Integration.
Complete the steps below to add an integration and import users and user groups in Mosyle Education:
- Go to My School > Integrations > + Activate New Integration
- Choose from: Mosyle API Integration or Spreadsheet Importing
- After Activating the integration, toggle on the API Integration or Download the templates for the Spreadsheet integration.
Mosyle API Integration
After toggling on the API Integration, you can choose to restrict the access to specific IPs or leave it open by editing the Access Method.
To create users via the API, you'll make requests to the /users endpoint. To create classes via the API, you'll make requests to the /classes endpoint. Additional documentation, as well as a sample json that is compatible with Postman and Insomnia, is available in the Mosyle interface.
Spreadsheet Integration
Users, grade levels, locations, and courses/classes can be imported directly into Mosyle from a CSV or XLSX Spreadsheet. After downloading the template for the Spreadsheet integration, fill it out and upload the file to Mosyle. Be sure to not delete any headers or sheets (even if empty).
Enrollment
What is MDM enrollment
In order for a device to be managed by Mosyle MDM, it first needs to be enrolled. The enrollment process involves the download and installation of an enrollment profile, either automatically or manually, which will establish secure communication between the device and the Mosyle MDM server. Once the enrollment profile is installed on the device, it is considered managed by the MDM and can receive profiles and commands.
The MDM enrollment profile can be viewed on a device at any time.
- iOS and iPadOS devices: Settings > General > VPN & Device Management
- macOS devices: System Preferences > Profiles or System Settings > Privacy & Security > Profiles
- tvOS devices: Settings > General > Profiles
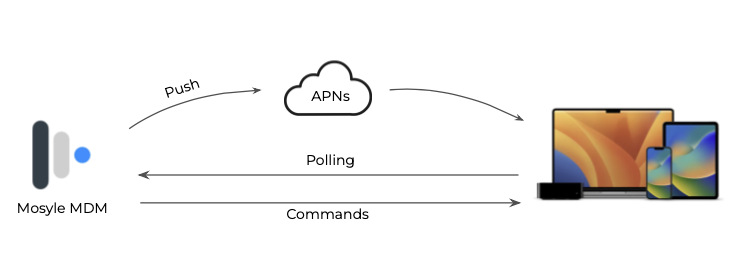
After a device is enrolled, the Mosyle MDM maintains communication using the Apple Push Notification service (APNs). Any time a command is generated or a profile is requested to be installed or removed, the MDM sends a push notification to the device via APNs to instruct the device to contact the MDM server. The device then contacts the MDM server to retrieve and act upon the command.
Mosyle MDM Enrollment options
Mosyle supports enrollment of devices using Automated Device Enrollment, Device Enrollment, and User Enrollment. Navigate to My School > Apple Basic Setup > Enrollment to view the options available.
The top middle dropdown menu will allow you to choose between iOS/iPadOS, macOS, and tvOS to access specific enrollment information for each OS.
The options listed under Device Enrollment include Automated Device Enrollment, Apple Configurator 2 (iOS/iPadOS and tvOS) and Manual enroll via Safari (URL). Enrollment using one of these methods is recommended for devices owned by the school or district. Click each tile to view more information or configure specific enrollment settings.
User enrollment is available for user owned iOS/iPadOS and macOS devices. Click the user enrollment tile to configure specific settings.
Automated Device Enrollment
What is Automated Device Enrollment
Automated Device Enrollment provides an automated approach to enrolling devices owned by the school or district the moment they are unboxed. In order to enroll using Automated Device Enrollment, devices must exist in an Apple School Manager account and be assigned to the Mosyle MDM server. Devices purchased from Apple or an Apple Authorized Reseller or carrier can be automatically added to the Apple School Manager account. Other devices can be manually added to Apple School Manager using Apple Configurator 2 (certain restrictions apply). Click here for more information on manually adding devices to Apple School Manager.
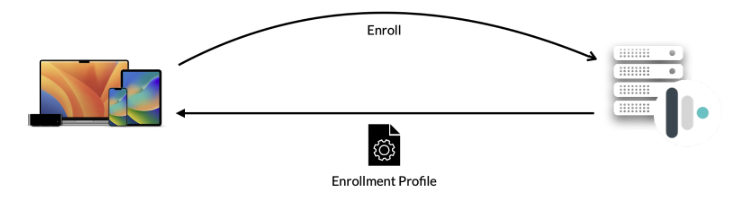
Devices assigned to the Mosyle MDM server from Apple School Manager can be assigned to an Automated Device Enrollment profile created in Mosyle to be synced with Apple's Cloud Configuration servers. Doing this will ensure devices automatically download the enrollment profile when the devices are powered on for the first time, or erased and the OS reinstalled, and connected to the network. Different settings can be configured in the Automated Device Enrollment profile to dictate the Setup Assistant steps that will be presented when enrolling devices.
In addition to the benefit of over-the-air hands off deployment and enrollment of devices, enrolling devices using Automated Device Enrollment provides:
- Supervision of devices;
- Ability to lock the MDM profile on the device so it cannot be manually removed;
- Ability to block users from enabling User-Initiated Activation Lock;
- Ability to automatically advance through Setup Assistant steps for Mac computers and Apple TVs connected to Ethernet;
- Ability to customize Setup Assistant screens;
- Ability to enroll iPadOS devices as Shared iPad
During Automated Device Enrollment, devices will attempt to retrieve/download the cloud configuration profile that is synced with Apple servers. In order to successfully retrieve the profile and complete enrollment it's critical the network allows for proper communication, including access to all Mosyle and Apple domains. Click here for information on which hosts and ports are required for Apple products.
Enrolling devices using Automated Device Enrollment
The first steps to enrolling devices into Mosyle using Automated Device Enrollment include:
- Integrating the Apple School Manager account with Mosyle
- Assigning devices in Apple School Manager to the Mosyle MDM Server
- Creating and syncing an Automated Enrollment profile
Steps 1 and 2 have been reviewed in previous lessons. In the next sections we'll review the many configuration options available in the Mosyle Automated Device Enrollment profile.
All Mosyle accounts include a Default enrollment profile which has basic enrollment settings configured. All devices assigned to the Mosyle MDM server will be assigned to the Default profile unless they are manually assigned to a different enrollment profile. Modify the Default profile at any time to meet the needs of the school or district.
View devices assigned to the Mosyle MDM server and their current status by going to My School > Apple Basic Setup > Enrollment > Automated Device Enrollment > View devices. The following statuses are retrieved from Apple servers and will be listed for each device:
- Associated with the ASM: Date and time the device was assigned to the Mosyle MDM from ASM
- Profile associated: Date and time the Automated Device Enrollment profile was assigned to the device and synced with Apple servers
- Profile installed: Date and time Apple servers recognize the device retrieved and installed the Automated Device Enrollment profile
Each status is color-coded to assist with quick identification. If needed, the devices and their current status can be exported from this screen using the “Download devices” option at the bottom of the list.
Update the list of devices and their status by clicking the “Update” button in this screen.
Tip: It's recommended to work within your Mosyle Education account while going through this section to configure the Automated Device Enrollment profiles to meet your school or district's needs.
Automated Device Enrollment configurations for iOS/iPadOS
Use the Automated Device Enrollment profile(s) to specify how the devices will behave after they're unboxed, or after Erasing all Content and Settings. Multiple enrollment profiles can be created if needed.
To start, go to My School > Apple Basic Setup > Enrollment > Automated Device Enrollment. Choose the iOS/iPadOS platform from the dropdown menu at the top. Click the Default profile to make any changes or adjustments, or create a new profile by clicking “New profile”. The Automated Device Enrollment profiles are separated into different sections. Each is addressed below.
Profile Name
Enter a name for the enrollment profile. Only Mosyle Administrators will see this information, so feel free to use a name that will help organize and identify the enrollment settings configured.
The default enrollment profile will be named the same as the Mosyle account. You can update the name at any time by clicking the profile and editing this field.
Check the options you want to activate on the device
- Allow devices to connect to a Mac: Unchecking this option will prevent iOS/iPadOS devices from pairing with a computer. This option is deprecated on devices running iOS/iPadOS 13 and later. For those devices you can use the restriction “Do not allow host pairing” to prevent users from being able to connect and pair the device with a computer.
- Install MDM Profile (mandatory): It is required for devices assigned to the Automated Device Enrollment profile to automatically download and install the Mosyle MDM enrollment profile.
- Supervise the devices (mandatory): By default, all devices enrolled using Automated Device Enrollment will be supervised. Supervision typically indicates the device is owned by the school/district and provides access to more management functionality.
- Do not allow manual removal of the MDM: When enrolling devices using Automated Device Enrollment you have the ability to lock the MDM enrollment profile on the device, preventing users from being able to manually remove the profile. This is recommended.
-
Multi-user (Apple Shared iPad): Check the box to configure devices as Apple Shared iPad devices. Click here for more information about Apple Shared iPad. When configuring devices as Shared iPad devices, you can configure additional settings such as user storage space and session timeout by clicking the button to “Configure Shared iPad”. When configuring the maximum number of shared users, keep iPad storage and partitioning in consideration.
- Allow User-Initiated Activation Lock: By default, devices enrolled using Automated Device Enrollment will block the ability for end users to enable Activation Lock with their personal Apple ID. If you wish to allow end users to enable Activation Lock with their personal Apple ID, check this box.
Each new enrollment profile created in Mosyle will automatically have the default settings configured. Feel free to check any new options or uncheck options as needed.
Supervision Identity
The Supervision Identity is required in order to pair a device with a computer when the restriction “Do not allow host pairing” is applied. When the restriction is applied, devices will not be able to connect or pair with computers. By installing the Supervision Identity on the Mac, you grant permission for the device to pair with the computer. Devices will only be able to pair with computers that have the Supervision Identity certificate installed.
The options that can be configured in Mosyle include:
- No Supervision Identity: If the restriction “Do not allow host pairing” is applied, the device will not be able to pair or connect to any computer.
- Upload your own Supervision Identity: With this option, you'll need to generate the Supervision Identity using Apple Configurator 2 on a Mac and upload it to the Automated Device Enrollment profile in Mosyle. The Supervision Identity must be uploaded and the profile saved and synced prior to the device enrollment in order to be properly applied. Devices enrolled with the enrollment profile will automatically understand to trust devices with the uploaded Supervision Identity installed.
- Download and use a Mosyle Supervision Identity: With this option selected, devices enrolled with the enrollment profile will automatically understand to trust devices that have the Mosyle Supervision Identity installed. This option must be selected and the profile saved and synced prior to the device enrollment in order to be properly applied. When you need to pair a device with a computer, you can download the Supervision Identity from within Mosyle to install it on the device.
In most cases when pairing is required, a command from Mosyle MDM can be sent to the device to remove the restriction profile and allow host pairing. If the device loses network connectivity and is unable to receive commands from the MDM to remove the restriction profile, the Supervision Identity is useful to allow pairing access.
Devices will be used in which model?
- Devices on Limbo: Devices enrolled in Limbo will not be assigned to a specific user or Shared Device Group.
- Devices for 1:1 users: Devices enrolled for 1:1 users can be assigned to specific users during the enrollment process.
- After the enrollment allow device usage - devices will be placed in limbo until the user logs in: This option will allow the device use immediately after enrollment. Select this option if you are planning to assign the devices using Custom Setup Assistant, pre-assign using a spreadsheet, or if the device was previously enrolled and assigned to a user.
- Require user authentication: This option will allow you to force users to authenticate with Active Directory during the enrollment, or force users to login to the Mosyle Manager application after the device is enrolled. Do not use this option if using the Custom Setup Assistant for user authentication.
- Devices for Shared Device Groups: Devices enrolled for Shared Device Groups can be assigned to a specific group during the enrollment process.
If you choose to enroll devices to limbo and they are assigned after the enrollment, if the device is ever wiped it will automatically re-enroll in Mosyle and will automatically be reassigned to the user. If you do not want this to happen, please check the option to Return devices to assignment model selected above after wipe.
Select the location responsible for the devices
Here you can choose which of the locations in Mosyle the device should be assigned after it is enrolled. If the device will be assigned 1:1 to a user or to a Shared Device Group, the device will assume the location of the user or shared group.
Customize Setup Assistant (Available only for iOS 13+)
The options available allow you to customize the end user experience during the enrollment process. Include items such as a welcome message, an End User License Agreement Screen, and/or authentication. Each option is described in more detail below. As items are added, they can be rearranged by dragging and dropping the tile in any order desired.
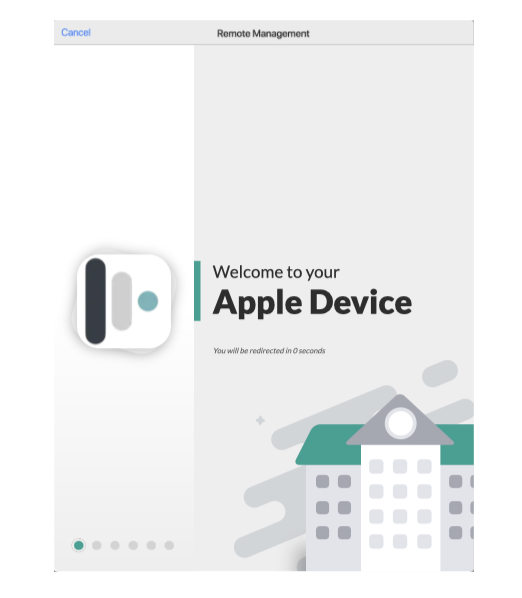
- Welcome: Customize a welcome message for end users during the enrollment. Use the Personalize area to change the font and color scheme. Users will remain on this screen for 8 seconds before being redirected to any other screens or proceeding through the Setup Assistant.
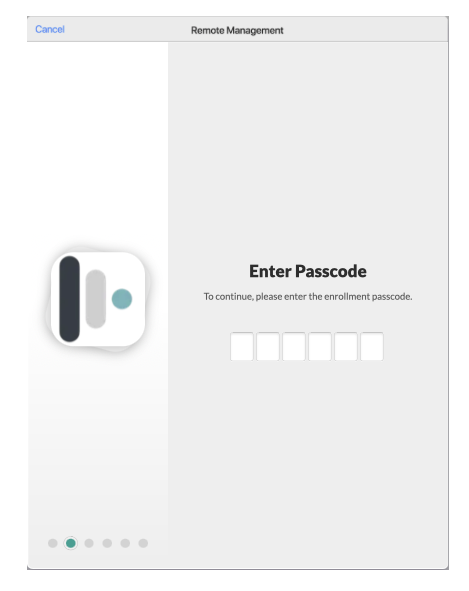
- Set Enrollment Passcode: Configure a predefined enrollment passcode that must be entered in order to proceed through the Setup Assistant and Automated Device Enrollment. This option can be used as an alternative to having users authenticate during the enrollment while still securing which devices can be enrolled.
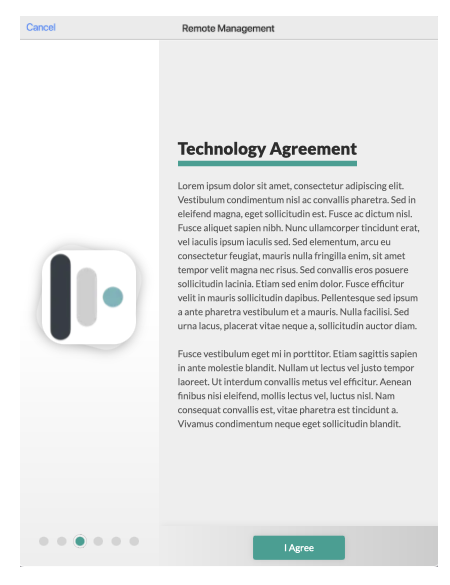
- End User License Agreement Screen (EULA): Customize an End User License Agreement (EULA), Acceptable Use Policy, or any other text that must be accepted in order to proceed through Automated Device Enrollment. If users do not agree, they will be unable to proceed through Automated Device Enrollment and the device will not be enrolled in the Mosyle MDM.
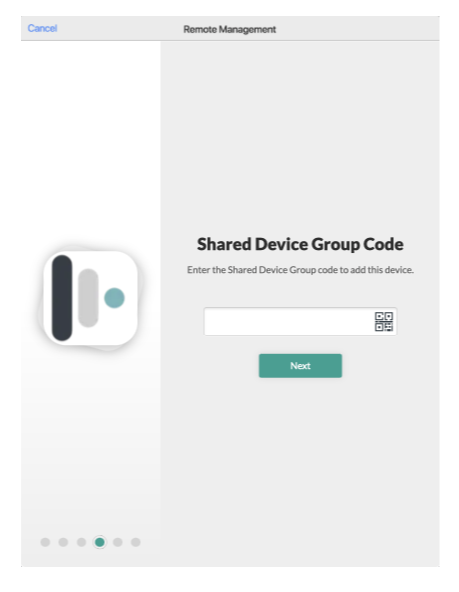
- Add to a Shared Device Group: Prompt users to enter the Access Code for a Shared Device Group during the enrollment to assign the device to the Shared Device Group immediately after enrollment. To find the Shared Device Group access code, go to My School > Hierarchy > Shared Device Groups > Select the shared device group. Once the device is assigned to the Shared Device Group, it will receive any and all management profiles and configurations assigned to the group.
- Mosyle User Authentication*: Prompt users to enter their unique user Access Code during the enrollment to assign the device to the user. This option should not be used in conjunction with any other Single Sign-On options or with the above option to Require user authentication. When using this option to complete the device assignment, the user must exist in Mosyle. To find the user's Access Code, go to My School > Users > Search for the user > Click the user's name > The user's unique Access Code will be displayed.
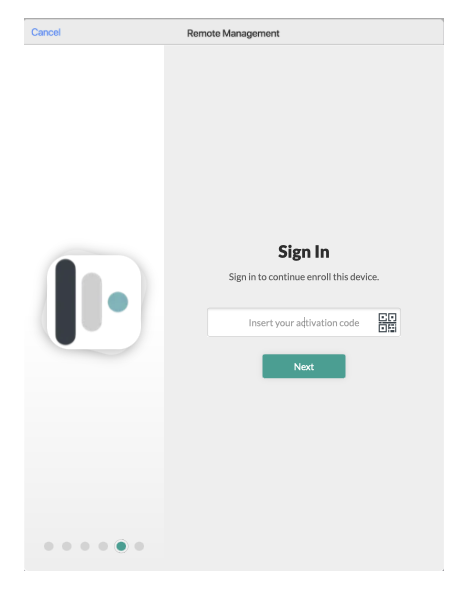
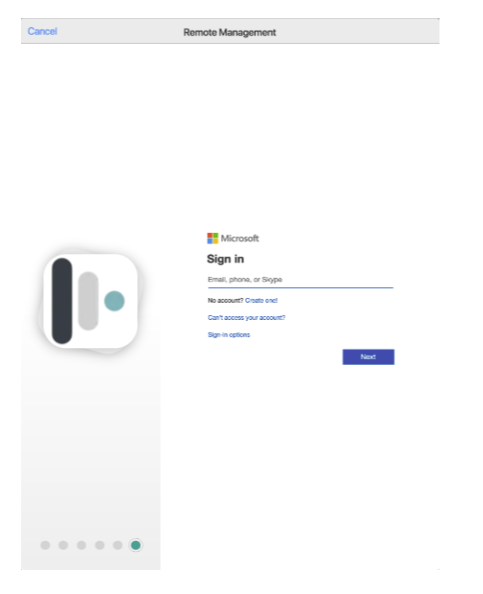
- Single Sign-On Authentication*: Prompt users to authenticate with their school or district Google, Microsoft, or Active Directory (LDAP or ADFS) credentials during the enrollment to assign the device to the user. This option should not be used in conjunction with the Mosyle User Authentication option or with the above option to Require user authentication. When using this option to complete the device assignment, the user must exist in Mosyle. If users are authenticating with Google or Microsoft, the email address in Mosyle must match the email address used to authenticate. If users are authenticating with Active Directory (LDAP or ADFS), the User ID in Mosyle must match the Active Directory query attribute (ex: samaccountname).
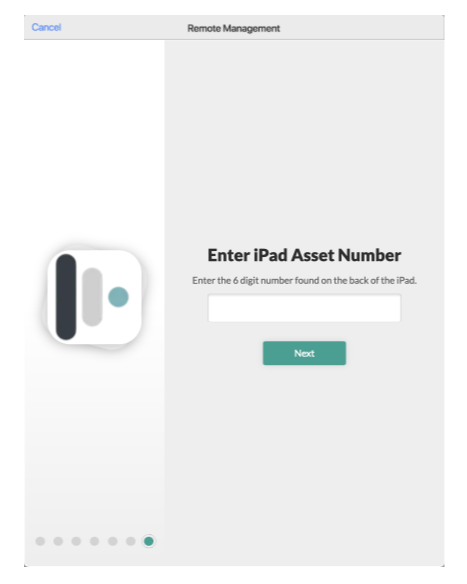
- Set device attribute: Prompt users to enter any device information during enrollment that will be available in Mosyle as the device Tag or Asset Tag. If you are using this option, you can then use the %Tags% or %AssetTag% variables to rename devices in the Automated Enrollment profile. A common use case for this option is to have users enter a device asset number so that it is available in Mosyle for inventory purposes. Tags and Asset Tags can be added after devices are enrolled under the Management tab.
*When using the options in the Custom Setup Assistant to complete device assignment (Mosyle User Authentication and Single Sign-On Authentication), be sure the Device Assignment options configured in your account are correct. To confirm, go to My School > Users > Device Assignment > User Authentication Assignment. Be sure the option under the heading 'Assignment through SSO Authentication during Automated Device Enrollment' is configured with the selection Auto-assign the device to the Authenticated user during the SSO Sign In.
Select the iOS/iPadOS devices that will receive this profile
Choose the device serial numbers to receive the enrollment profile. Assign all devices or specific devices to the enrollment profiles as needed to meet the needs of your school or district.
By default, devices that are erased and re-enrolled in Mosyle will automatically keep the user assignment. Therefore, if you wish to always enroll devices as freshly unassigned devices check the box for “Enroll devices as unassigned devices”.
Select the options that will not be presented to the user in Setup Assistant
Check any of the Setup Assistant steps you wish to skip during the enrollment. Uncheck any steps you wish to present to the user during the enrollment. Anything skipped during the enrollment can always be configured at a later time through the device Settings unless it is configured to be restricted.
It's recommended to not skip the Location Services prompt so that users will be prompted to enable Location Services during enrollment, which will ensure the device date and time is correct.
Phone & Email Support (optional)
These fields are optional. If information is entered here it will be displayed on the Remote Management screen during the enrollment as the School/District Support Email and Phone Number.
Rename devices after enrollment
Automatically rename devices during the enrollment flow using device or user variables. If users are authenticating during the enrollment and completing the device assignment, any available 1:1 variables can be used for the renaming. If prompting users to enter Tag or Asset Tag information with the Custom Setup Assistant, use the corresponding variables to rename the devices.
After configuring the Automated Device Enrollment profile for iOS/iPadOS devices, click Save. View the device list to ensure the devices show a “Profile Associated” (Enrollment > Automated Device Enrollment > View Devices). Once the devices show a “Profile Associated” they are ready to be enrolled.
iOS and iPadOS devices will prompt the enrollment process in one of two ways:
- Brand new devices can simply be unboxed and turned on. Select the Language, Region, and connect to Wifi. Once connected to Wifi the device will prompt to proceed with the Remote Management.
- Devices that have already been setup or have been in use can be erased using Erase all Content and Settings either from the device Settings or through Apple Configurator 2. Once the device is erased, it will prompt to select the Language, Region, and connect to Wifi. Once connected to Wifi the device will prompt to proceed with the Remote Management.
Automated Device Enrollment configurations for macOS
Use the Automated Device Enrollment profile(s) to specify how the devices will behave after they're unboxed, or after erasing and reinstalling the macOS. Multiple enrollment profiles can be created if needed.
To start, go to My School > Apple Basic Setup > Enrollment > Automated Device Enrollment. Choose the macOS platform from the dropdown menu at the top. Click the Default profile to make any changes or adjustments, or create a new profile by clicking “New profile”. The Automated Device Enrollment profiles are separated into different sections. Each is addressed below.
Profile Name
Enter a name for the enrollment profile. Only Mosyle Administrators will see this information, so feel free to use a name that will help organize and identify the enrollment settings configured.
The default enrollment profile will be named the same as the Mosyle account. You can update the name at any time by clicking the profile and editing this field.
Check the options you want to activate on the device
-
If enabled, macOS will automatically advance through all Setup Assistant screens: Using this option will enable the Auto Advance functionality provided by Apple which allows you to skip all Setup Assistant screens by connecting a macOS device running macOS 11 or later to Ethernet during enrollment. Since all Setup Assistant steps will be skipped when using this option, it's required to choose the Language and Region that will be configured on the Mac. Check out Apple's documentation for more information about Auto Advance.
- Install MDM Profile (mandatory): It is required for devices assigned to the Automated Device Enrollment profile to automatically download and install the Mosyle MDM enrollment profile.
- Do not allow manual removal of the MDM: When enrolling devices using Automated Device Enrollment you have the ability to lock the MDM enrollment profile on the device, preventing users from being able to manually remove the profile. This is recommended.
- Install Rosetta 2: In order for Intel versions of applications to run on Apple silicon Macs, Rosetta 2 will need to be installed. Configure this option to automatically install Rosetta 2 during enrollment. If this option is selected and the enrollment profile is assigned to Intel devices, the installation of Rosetta 2 will fail as it is not supported, but it will not have any impact on the enrollment.
- Allow User-Initiated Activation Lock: By default, devices enrolled using Automated Device Enrollment will block the ability for end users to enable Activation Lock with their personal Apple ID. If you wish to allow end users to enable Activation Lock with their personal Apple ID, check this box.
- Allow Bootstrap Token: It is recommended to check this option so the bootstrap token is configured to be allowed and will be escrowed to Mosyle. Starting with macOS 10.15, the bootstrap token is used to grant a secure token to mobile accounts as well as to the additional admin account created during Automated Device Enrollment. On devices running macOS 11 and later, the bootstrap token is used to grant a secure token to any user logging into the Mac. Mac computers with Apple silicon, enrolled via Automated Device Enrollment, require the bootstrap token to authorize the installation of kernel extensions and software updates via the MDM. Additionally, the bootstrap token is used to authorize the Erase All Content and Settings (EACS) command on Mac computers with the T2 security chip or Apple silicon running macOS 12.0.1 or later.
The following options are the same as the iOS/iPadOS configuration. Please see “Automated Device Enrollment configurations for iOS/iPadOS” for additional information.
- Devices of this profile will be used in which model
- Select location responsible for the device
Each new enrollment profile created in Mosyle will automatically have the default settings configured. Feel free to check any new options or uncheck options as needed.
Customize Setup Assistant (Available only for macOS 10.15+)
The options available in the Custom Setup Assistant for macOS are the same as the options for iOS/iPadOS, allowing the possibility to provide a consistent enrollment experience across all devices in the fleet. Please see “Automated Device Enrollment configurations for iOS/iPadOS” for additional information.
If using the Auto-Advance enrollment options, it's recommended to skip as many Setup Assistant steps as possible to fully leverage the Auto-Advance enrollment process.
Select the Macs that will receive this profile
Choose the device serial numbers to receive the enrollment profile. Assign all devices or specific devices to the enrollment profiles as needed to meet your organization needs.
Select the options that will not be presented to the user in Setup Assistant
Check any of the Setup Assistant steps you wish to skip during the enrollment. Uncheck any steps you wish to present to the user during the enrollment. Anything skipped during the enrollment can always be configured at a later time through the device System Settings unless it is configured to be restricted.
It's recommended to not skip the Location Services prompt so that users will be prompted to enable Location Services during enrollment, which will ensure the device date and time is correct.
Account Configuration
Define whether or not the user will be prompted to create a local user account during the Setup Assistant, and/or configure a local administrator account on the Mac using the options below.
To prompt the creation of a local user account on the Mac during the Setup Assistant, check the box for “Prompt user to create an account”. After checking the box, you'll have additional option available:
- Choose the user type: Administrator or Standard user. When creating a Standard user account, you must also create a managed administrator account using the option “Create additional local admin during Setup Assistant”.
- Choose whether or not to pre-fill account information: Enter the full name and/or username for the user account created. If users will be authenticating with the Custom Setup Assistant to complete the device assignment, variables within Mosyle can be used for these fields. If the account information isn't pre-filled, the end user will be able to enter their own values for the Full Name and Username to be used when creating the local user account on the Mac.
- Check the box “Do not allow the user to modify the pre-filled information above” to prevent the user from changing the Full Name and Username when creating the local user account on the Mac.
If you plan to use Mosyle Auth 2 to create user accounts, or users will be logging in using a network/mobile account or another account created outside of Setup Assistant, uncheck the box for “Prompt user to create an account”. In doing so, after downloading and installing the enrollment profile it will boot to the Login Window without requiring the user to manually create a local user account.
Since the Mac requires at least one Admin account during setup, when skipping the manual creation of a local user account you'll be required to create a managed administrator account using the option “Create additional local admin during Setup Assistant”. When creating the managed administrator account:
- Enter the Full Name for the administrator account on the Mac
- Enter the Username for the administrator account on the Mac
- Password: Choose to use either a single password for the administrator account on all devices, or automatically create a randomized password for the administrator account on each device. When using the randomized password, the password can be viewed in the Device Information and can be rotated as needed.
- Hide account: Choose if the account will be hidden from other users when accessing Users & Groups in System Preferences or when accessing the Login Window.
- Set this account as managed: Choose if the account will be considered a “managed” account on the Mac and eligible for user channel profiles.
Phone & Email Support (optional)
These fields are optional. If information is entered here it will be displayed on the Remote Management screen during the enrollment as the School/District Support Email and Phone Number.
Rename devices after enrollment
Automatically rename devices during the enrollment flow using device or user variables. If users are authenticating during the enrollment and completing the device assignment, any available 1:1 variables can be used for the renaming. If prompting users to enter Tag or Asset Tag information with the Custom Setup Assistant, use the corresponding variables to rename the devices.
After configuring the Automated Device Enrollment profile for macOS devices, click Save. View the device list to ensure the devices show a “Profile Associated” (Enrollment > Automated Device Enrollment > View Devices). Once the devices show a “Profile Associated” they are ready to be enrolled.
macOS devices can be enrolled in the following ways:
- Brand new devices can simply be unboxed and turned on. Select the Language, Region, and connect to Wifi. Once connected to Wifi the device will prompt to proceed with the Remote Management.
- Brand new devices can be unboxed, connected to Ethernet and turned on. If Auto-Advance options are selected, the device will skip all Setup Assistant options and land at the prompt to create a local user account, or at the Login Window if skipping the local user account creation.
- Devices that have already been setup or have been in use can be erased via Recovery Mode, using Erase all Content and Settings in System Preferences, or restored using Apple Configurator 2. Once the device is erased and the macOS reinstalled, it will prompt to select the Language, Region, and connect to Wifi. Once connected to Wifi the device will prompt to proceed with the Remote Management. If connected to the network using Ethernet and Auto-Advance options are selected, the device will skip all Setup Assistant options and land at the prompt to create a local user account, or at the Login Window if skipping the local user account creation.
-
Devices that have already been setup or have been in use and cannot be erased can be enrolled using Automated Device Enrolment with the following Terminal command: sudo profiles renew -type enrollment
- Note: This enrollment option does not support the Account Configuration settings configured in the enrollment profile.
Automated Device Enrollment configurations for tvOS
Use the Automated Device Enrollment profile(s) to specify how the devices will behave after they're unboxed, or after Erasing all Content and Settings on the Apple TV. Multiple enrollment profiles can be created if needed.
To start, go to My School > Apple Basic Setup > Enrollment > Automated Device Enrollment. Choose the tvOS platform from the dropdown menu at the top. Click the Default profile to make any changes or adjustments, or create a new profile by clicking “New profile”. The Automated Device Enrollment profiles are separated into different sections. Each is addressed below.
Profile Name
Enter a name for the enrollment profile. Only Mosyle Administrators will see this information, so feel free to use a name that will help organize and identify the enrollment settings configured.
The default enrollment profile will be named the same as the Mosyle account. You can update the name at any time by clicking the profile and editing this field.
Check the options you want to activate on the device
-
If enabled, the device will tell tvOS Setup Assistant to automatically advance through its screens: Using this option will enable the Auto Advance functionality provided by Apple which allows you to skip all Setup Assistant screens by connecting a tvOS device running tvOS 10.2 or later to Ethernet when enrolling. Since all Setup Assistant steps will be skipped when using this option, it's required to choose the Language and Region that will be configured on the Apple TV. Check out Apple's documentation for more information about Auto Advance.
- Install MDM Profile (mandatory): It is required for devices assigned to the Automated Device Enrollment profile to automatically download and install the Mosyle MDM enrollment profile.
- Supervise the devices (mandatory): By default, all devices enrolled using Automated Device Enrollment will be supervised. Supervision typically indicates the device is owned by the school or district and provides access to more management functionality.
- Do not allow manual removal of the MDM: When enrolling devices using Automated Device Enrollment you have the ability to lock the MDM enrollment profile on the device, preventing users from being able to manually remove the profile. This is recommended.
Devices will be used in which model?
Apple TVs can only be enrolled as Limbo devices.
Select the location responsible for the devices
Here you can choose which of the locations in Mosyle the device should be assigned after it is enrolled.
Select the Apple TVs that will receive this profile
Choose the device serial numbers to receive the enrollment profile. Assign all devices or specific devices to the enrollment profiles as needed to meet the needs of your school/district.
Select the options that will not be presented to the user in Setup Assistant
Check any of the Setup Assistant steps you wish to skip during the enrollment. Uncheck any steps you wish to present to the user during the enrollment. Anything skipped during the enrollment can always be configured at a later time through the device Settings unless it is configured to be restricted.
If using the Auto-Advance enrollment options, it's recommended to skip as many Setup Assistant steps as possible to fully leverage the Auto-Advance enrollment process.
Phone & Email Support (optional)
These fields are optional. If information is entered here it will be displayed on the Remote Management screen during the enrollment as the School/District Support Email and Phone Number.
Rename devices after enrollment
Automatically rename devices during the enrollment flow using device variables.
After configuring the Automated Device Enrollment profile for tvOS devices, click Save. View the device list to ensure the devices show a “Profile Associated” (Enrollment > Automated Device Enrollment > View Devices). Once the devices show a “Profile Associated” they are ready to be enrolled.
Apple TVs can be enrolled in the following ways:
- Brand new devices can simply be unboxed and turned on. Select the Language, Region, and connect to Wifi. Once connected to Wifi the device will prompt to proceed with the Remote Management.
- Brand new devices can be unboxed, connected to Ethernet and turned on. If Auto-Advance options are selected, the device will skip all Setup Assistant options and land at the homescreen.
- Devices that have already been setup or have been in use can be erased using Erase all Content and Settings either from the device Settings or through Apple Configurator 2. Once the device is erased, it will prompt to select the Language, Region, and connect to Wifi (If Auto-Advance is not configured). Once connected to Wifi the device will prompt to proceed with the Remote Management.
After enrollment
Once devices are enrolled in the Mosyle account, they can be fully managed by all available and compatible configuration profiles and commands. Enrolled devices can be found under the Management tab > Devices Overview. Click the device name to bring up the Device Info window.
Device Enrollment
What is Device Enrollment
Device enrollment is available for devices that are not purchased from Apple or an Authorized Reseller or carrier and therefore are not eligible for Automated Device Enrollment. Device enrollment allows the device to be manually enrolled in the MDM using Apple Configurator 2 or by entering the enrollment URL into Safari.
Enrolling iOS/iPadOS and tvOS devices using device enrollment does not guarantee device supervision unless they are enrolled using Apple Configurator 2 and supervision is applied. Devices enrolled using device enrollment will not have the ability to lock the MDM enrollment profile, allowing end users to remove the profile at any time from the device Settings or System Settings.
During device enrollment, devices will attempt to retrieve/download the enrollment profile and the user will need to manually approve and install the profile installation. In order to successfully retrieve the profile and complete enrollment it’s critical the network allows for proper communication, including access to all Mosyle and Apple domains. Click here for information on which hosts and ports are required for Apple products.
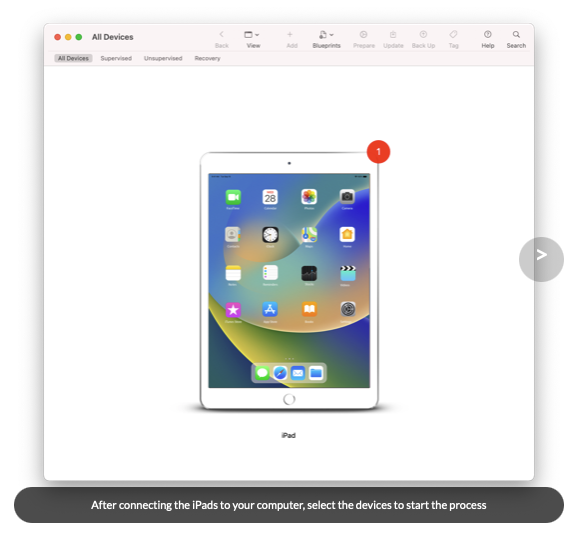
Enrolling devices using Apple Configurator 2
To enroll iOS, iPadOS, or tvOS devices using Apple Configurator 2, the enrollment URL will need to be added to Apple Configurator 2 during the “Prepare” workflow. The enrollment URL can be found in Mosyle under My School > Apple Basic Setup > Enrollment > Apple Configurator 2.
Within the Mosyle interface a step-by-step tutorial is provided to walk through the enrollment using Apple Configurator 2. It's important to enable Supervision to get the most out of the management features and functionality available.
Notes:
-
Apple Configurator 2 can be used to add iOS, iPadOS, and tvOS devices to Apple School Manager, then assigned to the Mosyle MDM server for Automated Device Enrollment. See Apple's documentation for more information.
-
Apple Configurator 2 for iPhone can be used to add Mac computers to Apple School Manager, then assigned to the Mosyle MDM server for Automated Device Enrollment. See Apple's documentation for more information. Apple Configurator 2 for iPhone cannot be used to manually enroll Mac computers into Mosyle MDM.
- Devices manually added to Apple School Manager using Apple Configurator 2 are subject to a 30-day provisional period during which time the user can release the device from Apple School Manager, supervision, and device management.
Device Enrollment using the Safari URL
To enroll iOS, iPadOS, or macOS devices manually, the enrollment URL can be entered into the Safari browser to download the MDM enrollment profile. When enrolling devices using the Safari URL, they can be enrolled as general, unassigned devices, or enrolled and assigned to a specific user. Depending on the enrollment preference, the enrollment URL can be found in Mosyle in a few areas:
- Generic enrollment URL: My School > Apple Basic Setup > Enrollment > Manual enroll via Safari (URL)
- Personalized enrollment URL: My School > Users > Select the specific user > The enrollment URL will be listed in the user profile.
Once the profile is downloaded, users will be prompted to install the enrollment profile under the device Settings or System Settings. To install the enrollment profile on Mac computers, the user must have Admin rights.
Notes:
- For iOS and iPadOS devices, manually enrolling a device will not ensure device supervision. Device supervision will need to be enabled using Automated Device Enrollment or via Apple Configurator 2.
- Mac computers running macOS 11 or later will be considered supervised when manually enrolled.
Additional manual enrollment settings can also be configured under My School > Apple Basic Setup > Enrollment > Manual enroll via Safari (URL). The options available include:
- Do NOT allow enrollment using Safari or the Mosyle Manager app: Selecting this option will block any users from being able to manually enroll in the Mosyle MDM account.
- Always allow enrollment using Safari or the Mosyle Manager app: Selecting this option will allow any user who accesses the enrollment URL and downloads the enrollment profile to enroll in the Mosyle MDM account.
- Require prior authorization to enroll using Safari or the Mosyle Manager app: Selecting this option will only allow authorized users and/or devices to enroll in the Mosyle MDM account. Users are authorized by authentication, and devices able to manually enroll are those that have been pre-authorized using a spreadsheet upload.
Once devices are enrolled in the Mosyle account, they can be found under the Management tab > Devices Overview. Click the device name to bring up the Device Info window.
User Enrollment
What is User Enrollment
User Enrollment is available for devices that are not owned by the school or district, rather are personally owned devices. User Enrollment requires Managed Apple IDs to establish a user identity on the device.
With User Enrollment, organization data is separate from user data and the MDM can only access and manage certain aspects of the device. For more information about User Enrollment, visit Apple's documentation.
Resources
Recommended resources
- Access to a Mosyle Education account
- Managed Apple ID
- iOS/iPadOS test device to complete enrollment
- macOS test device to complete enrollment
Enrolling devices using User Enrollment
To enroll iOS, iPadOS, or macOS devices using User Enrollment, the device must support User Enrollment, the user must have a Managed Apple ID, and the user must be registered, with the Managed Apple ID, in Mosyle under My School > Users.
When enrolling via User Enrollment, users will enter the enrollment URL into the Safari web browser and authenticate with their Managed Apple IDs to download and install the enrollment profile. Once the enrollment profile is installed, the Mosyle MDM will be able to communicate with and manage the device. Once enrolled, users will see the Managed Apple ID account configured in Settings > Passwords & Accounts on iOS/iPadOS devices and in System Settings on macOS devices.
To obtain the User Enrollment URL and configure additional options, go to My School > Apple Basic Setup > Enrollment > Click “Configure User Enrollment”.
Within the User Enrollment configuration area, choose the settings to best meet the needs of your school or district. To allow User Enrollment, check the box to Allow User Enrollment (BYOD).
User Enrollment screen
Customize the screen user's will see when enrolling via User Enrollment. Choose between using the Standard screen, a Personalized screen, or use your own HTML code.
URL for User Enrollment
Customize the URL user's will enter into Safari when enrolling via User Enrollment. Choose between using the Standard URL, a Premium URL, or a Custom URL.
Install Self-Service app after enroll
Choose whether or not the Mosyle Manager application will be installed on devices enrolled via User Enrollment.
Users allowed to complete User Enrollment
Allow or restrict the use of User Enrollment to specific users in the school or district.
Enrolling devices using Account-driven User Enrollment
Account-driven User Enrollment can be used for devices running iOS/iPadOS 15 or later. This method of User Enrollment still requires the user to have a Managed Apple ID, and the user must be registered, with the Managed Apple ID, in Mosyle under My School > Users.
When enrolling via Account-driven User Enrollment, users will go to the device Settings > General > VPN & Device Management > Click “Sign in to work or school account” > Authenticate with school/district credentials. After authenticating, the enrollment profile is downloaded and can be installed. Once the enrollment profile is installed, the Mosyle MDM will be able to communicate with and manage the device.
To enable Account-driven User Enrollment and additional options, go to My School > Apple Basic Setup > Enrollment > Under the iOS/iPadOS enrollment options, click “Configure User Enrollment”.
Using the dropdown menu at the top, select Account-driven User Enrollment and check the box to Allow Account-driven User Enrollment.
User Enrollment screen
Customize the screen user's will see when enrolling via User Enrollment. Choose between using the Standard screen, a Personalized screen, or use your own HTML code.
Well-known host
This is where the user will authenticate with school/district credentials to download the enrollment profile. Mosyle provides the option to use a Mosyle well-known endpoint and to define the unique identifier to authenticate in order to retrieve the enrollment profile. Schools/Districts can also host the well-known endpoint at their domain to which end users must authenticate.
Required App for MDM
Starting with iOS/iPadOS 15.1 and later, schools can require an application to be installed via the MDM on User Enrolled devices without first prompting for end user approval. Use this area to select a required application, such as a custom application, VPN or web filtering application.
Install Self-Service app after enroll
Choose whether or not the Mosyle Manager application will be installed on devices enrolled via User Enrollment.
Users allowed to complete User Enrollment
Allow or restrict the use of User Enrollment to specific users in the school or district.
Once devices are enrolled in the Mosyle account, they can be found under the Management tab > Devices Overview > User Enrollment tab. Click the device name to bring up the Device Info window.
Users can manually remove the MDM enrollment profile at any time through the device Settings or System Settings. In doing so, the device will be removed from the Mosyle interface.
Users & Hierarchy
Users & Hierarchy
Purpose
As mentioned previously, importing users, grade levels, and/or classes allows for devices to be assigned to their corresponding users and for configurations and profiles to be customized based on the device user. While importing users, grade levels, and/or classes is not required, we've found it facilitates ease of device management for Administrators.
Use the Apple School Manager or Active Directory integrations to import user data into Mosyle. Additional options such as a Spreadsheet import or use of the Mosyle API integration are also available.
Once User data is imported into Mosyle, it can be found under My School > Users. Locations, Grade Levels, Courses, and Shared Device Groups can be found under My School > Hierarchy.
Resources
Recommended resources
- Access to a Mosyle Education account
- User account with Administrator or User privileges in Apple School Manager or Active Directory
Locations, Grade Levels, Courses, and Shared Device Groups
All management profiles are assigned based on the Hierarchy configured in Mosyle, starting with Locations. Using this Hierarchy, you can assign management profiles as broadly as you would like (ex: All current & future devices) or as granularly as you would like (ex: A specific student device from a specific location). Additionally, Mosyle Admin users can be created that only have access to specific locations; and, access to Apple School Manager, Apps and Books, and Active Directory integrations can be configured based on Locations to ensure devices, users, and content remains organized as needed.
Hierarchy
Locations can be created manually, imported using a spreadsheet, imported from Apple School Manager or Active Directory. Once Locations have been created, you will be able to assign access for integrations such as Apps and Books token and Apple School Manager based on the locations. You are also presented with the option to create Location assigned Administrators. Additionally, you'll be able to view any profiles assigned to each location as needed.
Grade Levels can be created manually, imported using a spreadsheet, or imported from Apple School Manager or Active Directory. After creating Grade Levels, you'll be able to view what grades are assigned to various locations within your account, the students assigned, and any grade level based profiles.
Courses and Classes can be created manually, imported using a spreadsheet, or imported from Apple School Manager or Active Directory. Assigning students to classes will allow teachers to take advantage of the Mosyle Class Manager, as well as automatically configure the teacher devices with admin-created classes for the Apple Classroom app.
Profile Assignment
Management profile assignment always begins with the Location, from here you can filter by grade levels, classes, shared carts/groups, and individual users. Assignments in Mosyle can be completed in the following way:
- All current and future devices - this will include all devices enrolled in the account regardless of the assignment and/or Location
- All current and future devices from Specific Locations - this will include all devices enrolled in the account that are assigned to a User or Shared Cart/Group associated with the selected Devices in Limbo can belong to all Locations depending on your configured Preferences.
-
Specific Users or Devices - with this option you'll start by selecting the Locations to filter the assignment. Once the Locations are selected, you can choose from the following assignment options.
- Users: All Current & Future Students/Teachers/Staff/Admin; Specific Class Periods; Specific Grade Levels; Specific Users
- Shared Devices: All Current & Future Shared Devices; Specific Carts/Groups; Specific devices
- Limbo Devices: All Current & Future Limbo Devices; Specific devices
- Dynamic Device Groups
- Security Groups: automatic groups created from Device Scout and Detection & Removal
Academic Year
The Academic Year tool was designed to help Administrators clean and update data imported from Apple School Manager or Active Directory for the new school year. Using the Academic Year tool, student data will be updated to reflect new grade levels and courses/classes while automatically updating all Management profiles assigned and installed.
To access and update data for the new school year, follow the steps below:
- Make sure all data (including courses/classes) is updated in ASM and/or AD
- Go to My School > Hierarchy
- Click Academic Year
- Click Start and choose the integration
- Follow the onscreen prompts
- Once the data is synced, a preview of any/all changes will be displayed
- If all looks ok, click Start Integration
The Academic Year area also provides tools to clean up data in your Mosyle account, including:
- Export current hierarchy
- Delete grade levels without students assigned
- Delete class periods without students assigned
- Delete courses without class periods
- Delete students without grade levels and class periods assigned
- Delete teachers without class periods
User Types & Permissions
There are multiple types of users available in Mosyle Education and can be viewed and accessed under My School > Users:
- Students: this user will not have access to manage any devices and/or users
- Teachers: this user will only have access to manage the student devices within their assigned classes
- Staff: this user will not have access to manage any devices and/or users
- Location Leader: this user will have access to users and devices associated with the individual location(s) they are assigned and will only be able to view profiles that are assigned only to users/devices associated with their location. To allow Location Leaders to view profiles assigned to other devices/users, you can check the box for “Allow Location Leaders to view this profile”. Note: they will only be able to view and not edit the configuration.
- Primary Leader or Leader: this user will have full access within their Mosyle Education instance, to manage all devices enrolled and all users registered within the account
Students and Staff can be imported using one of the methods mentioned earlier and do not have access to the Mosyle MDM web panel. Teachers can also be imported using the methods mentioned, but will have access to only the Class Manager portion of the Mosyle MDM web panel. For security purposes, Location Leaders and Leaders are required to be manually created.
When creating Leaders, you can choose the type of Leader account to be created, either a Location Leader or Leader. Location Leaders will only be able to manage the users and device groups that are assigned to their location and will have limited visibility to the rest of the school or district users and devices.
Under the Advanced Options area, additional settings can be configured for the Leader user accounts:
- Remove all restrictive profiles when the user logs in: This will trigger the removal of restrictive profiles, such as Restrictions or Allowed/Blocked app profiles, on any device the Leader user logs in to the Mosyle Manager application. Doing this will allow the Administrator full access to the device to troubleshoot in any way necessary.
-
Limit User Permissions: Create roles with specified permissions to limit the Leader's access to certain areas of the Mosyle MDM. When selecting permissions for the roles, choose from: View, Create, Update, and Delete permissions.
- View: Leaders with “View” permissions can only see the profile or area within the platform and cannot make any changes, updates, or delete. This includes sending any commands to devices via the Devices Overview area or Device Information.
- Create: Leaders with “Create” permissions can see already created profiles and areas within the platform, as well as create new profiles/users/groups if needed. Users with this permission cannot edit/update or delete any already created profiles/users/groups.
- Update: Leaders with “Update” permissions can see already created profiles and areas within the platform, as well as update existing profiles/users/groups if needed. Users with this permission will be able to send any/all commands via the Devices Overview and Device Info area.
- Delete: Leaders with “Delete” permissions can see already created profiles and areas within the platform, as well as delete any existing profiles/users/groups if needed.
User Roles and Permissions can be updated at any time as needed by clicking a specific Administrator > Advanced Options > Click “Select” under Limit User Permissions > Edit for the role to be edited. Choose and update the permissions and click Save. Save the Administrator. Once saved, the permissions will be updated for any other Administrators/Leaders with that same role.
User Security Settings
Administrator users can login to Mosyle MDM via the Mosyle web panel and teachers can login to the Mosyle Class Manager at https://myschool.mosyle.com. By default, each session is limited to 15 minutes unless selecting the “Keep me logged in” option. If the “Keep me logged in” option is not checked when accessing the account, users will be logged out after 15 minutes. When clicking the “Keep me logged in” option, the session duration will depend on what is configured in the Admin Authentication Policies under My School > Preferences > Other Settings > Admin Authentication Policy.
By default, students and staff are not required to have a password and will be automatically logged in to the Mosyle Manager application when the device is assigned. If the school or district would like to enforce students and staff to have a password when logging into the Mosyle Manager application, use the Single Sign-On configuration for the iOS/iPadOS and/or macOS application under My School > Preferences > Single Sign-On.
Admin Authentication Policy
Access to the Mosyle MDM web panel should be handled with caution, and access should be provided on a need-only basis. In addition to providing access to only those who absolutely need access, Authentication policies can be configured to ensure extra security of the account.
To configure these policies, go to My School > Preferences > Other Settings > Admin Authentication Policy.
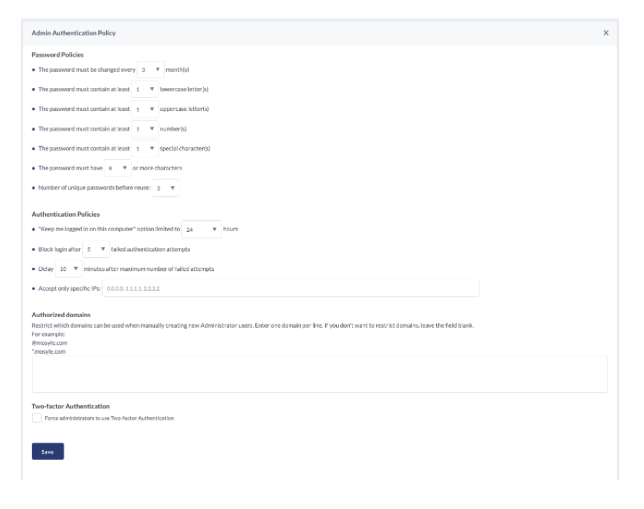
Password Policies
The password policies allow you to configure specifications on how the password should be handled when logging into the Mosyle web panel with an Administrator account. Options include how frequently the password should be changed, character requirements, and how many unique passwords must exist before one can be reused.
If Single Sign-On is configured to authenticate with the Identity Provider credentials when logging into the web panel, the Password Policies configured will be ignored as it is expected the Identity Provider configurations to supersede the configurations in Mosyle.
Authentication Policies
The authentication policies allow you to configure specifications regarding account and authentication access. Options include configuring the maximum session time, how many authentication attempts are allowed before login is blocked, time delay before a user can attempt to login again after so many failed attempts, and allow access from only specific IPs.
Within this area restrictions can be applied so that Administrator accounts can only be created for users with emails of a specific domain, and two factor authentication can be enforced for all Administrator accounts.
User Photos
If desired, user photos can be uploaded to the Mosyle MDM or students can be permitted to add their own photos. These photos will show within the Mosyle Manager application and in the Admin web panel.
To upload User Photos or configure it so students can add their own photos, go to My School > Users > Users Photos.
Device Assignment & User Authentication
Purpose
When enrolling devices into Mosyle Education, there are three models of assignment to choose from:
- Limbo: When enrolling a device into a Limbo state, the device is neither assigned to a User or a Shared Device Group. This allows for the device to potentially belong to all locations or no locations for purposes of receiving more generalized Management Profiles.
- 1:1: This option indicates the device will be enrolled and assigned to an individual end-user.
- Shared: When enrolling devices as Shared devices, they can be grouped together in Shared Device Groups. This is an easy way to organize a static group of devices. For iOS/iPadOS devices that will be designated as Shared, they can be either Mosyle Shared or Apple Shared iPad devices.
In order to scope configurations and profiles based on users or device groups, the Users and/or Shared Device Groups will need to be registered in Mosyle and devices will need to be assigned to their corresponding user or group. Device Assignment can be accomplished in multiple different ways using Mosyle MDM.
The ideal workflow when using Mosyle MDM is to automate the device assignment as much as possible to promote a hands-off deployment.
When a device isn't assigned to a specific user or shared device group, it is displayed as a “Limbo” device in Mosyle. Limbo devices can be configured by assigning configurations and profiles to all current and future devices and/or Limbo devices, rather than the user or shared device group.
Notes:
- Apple TVs are always enrolled as Limbo devices. For these devices, profiles and configurations will need to be assigned based on the device or dynamic device group.
- Devices enrolled using User Enrollment will be automatically assigned to the user based on the Managed Apple ID used to complete the enrollment.
Assigning Devices to Users
Configure Device Assignment Settings by going to My School > Users > Device Assignment. Here you can choose from the following:
- User Authentication Assignment: Configure device assignment behavior based on user authentication. Detailed information is included below.
- Random Automatic Assignment: Randomly pair an unassigned device with a selected user.
- Spreadsheet Assignment: Upload a spreadsheet with the device serial number and corresponding User ID to complete device assignment.
Devices can also be assigned to users manually at any time within the Mosyle MDM web console by viewing the Device Information or User Information.
-
Device Info: When assigning a single device to a user, you can use the Device Info screen to complete the assignment. To do this, go to Management > Devices > Devices Overview > Click the device name to open the Device Info window. Next to Type, click Change and choose either 'Change to 1:1 (assign to student)', 'Change to 1:1 (assign to user)', or 'Change to shared' and select the user or Shared Device Group to assign the device.
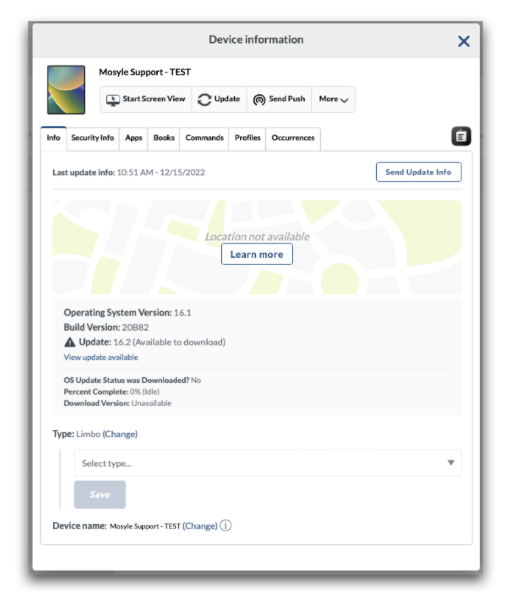
-
User Profile: When assigning a single device to a user, you can use the User Profile screen to complete the assignment. To do this, go to My School > Users > Find and select the user > Click Assign one Device > Select the device.
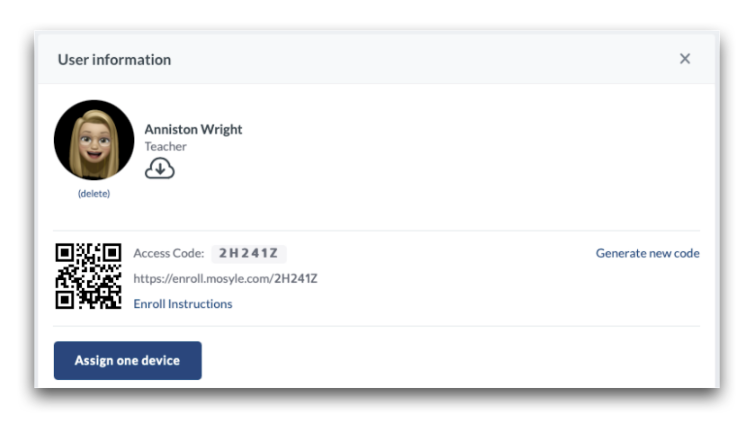
User Authentication Assignment
By default, when a user authenticates on a device, the device will be assigned to the user and remove the assignment of any other device of the same OS from the user. Administrators can modify or adjust this behavior within the User Authentication Assignment settings under My School > Users > Device Assignment.
The User Authentication Assignment settings offers three main options:
- Only auto-assign devices not already assigned to a user: This option will ensure that a user is assigned to the device in Mosyle when authenticating via the specified method ONLY if the device was not already assigned to a user. If the device was already assigned and another user logs in, the device will remain assigned to the original user.
- Auto-assign the device to the user: This option will ensure that a user is assigned to the device in Mosyle when authenticating via the specified method. Devices that are already assigned will change assignment when the new user authenticates and devices not already assigned will be assigned. When this option is configured, the assignment can be removed when a user logs out of the application.
- Do NOT auto-assign the device to the user: This option will prevent users from being assigned to a device when authenticating via the specified method.
Devices assigned to Shared Device Groups will never automatically be converted to 1:1 devices. When a user authenticates on a Shared Device, it will remain shared but will reflect the current user logged in so that any/all profiles assigned to the user can be applied.
Assignment Methods
Methods for assigning devices to end users via authentication include the following:
- Personalized enrollment URL: When devices are enrolled manually using the Safari URL, users can use their own personalized enrollment URL to complete the enrollment and assignment of the device. Find the user's enrollment URL under My School > Users > Click the User to view the enrollment URL.
- Mosyle app login: Users can login to the Mosyle Manager app with their Mosyle access code, User ID, email address, or Single Sign-On credentials to complete the device assignment. To allow users to login to the Mosyle Manager app with their Single Sign-On credentials, configure Single Sign-On for the iOS/iPadOS and macOS apps under My School > Preferences > Single Sign-On./li>
- SSO Authentication during Automated Device Enrollment: Users can authenticate with their Single Sign-On credentials within the Custom Setup Assistant to complete the device assignment.
- Mac user account login: Users can login to their local user account on the Mac to complete device assignment if the local user account name is the same as their User ID in Mosyle.
- Mosyle Auth: Users can login to the Mac using their SSO credentials via Mosyle Auth to complete the device assignment.
In most cases, user authentication with their school or district Single Sign-On credentials is the preferred method due to the user familiarity with the credentials and ability to automate the assignment flow. Three frequently used methods for assigning devices to users are described below.
Completing Device Assignment during Automated Device Enrollment (iOS/iPadOS & macOS)
The Custom Setup Assistant is available within the Automated Device Enrollment profile which allows Administrators to prompt users during the enrollment to authenticate with either their Mosyle access code or their Single Sign-On credentials (Google, Azure, AD FS, or Active Directory). My School > Apple Basic Setup > Enrollment > Automated Device Enrollment > Customize Setup Assistant > Mosyle User Authentication or Single Sign-On Authentication. This option is available for both iOS/iPadOS and macOS devices allowing the enrollment flow to be consistent across all devices.
Configuring this option, users will be prompted to authenticate during the Automated Device Enrollment which will complete the device assignment. In order to complete the device assignment, the users must be imported and registered in Mosyle with the email address used to authenticate. This method of authentication and device assignment brings multiple benefits:
- Enrollment security considering only users within the Mosyle account will be able to successfully authenticate;
- Ability to rename devices during enrollment based on user information;
- Ability to pre-assign profiles and configurations to specific users, grade levels, or courses/classes which will be installed immediately upon enrollment;
- Ability to pre-fill local user account information on the Mac;
- Hands-off approach to device enrollment and assignment.
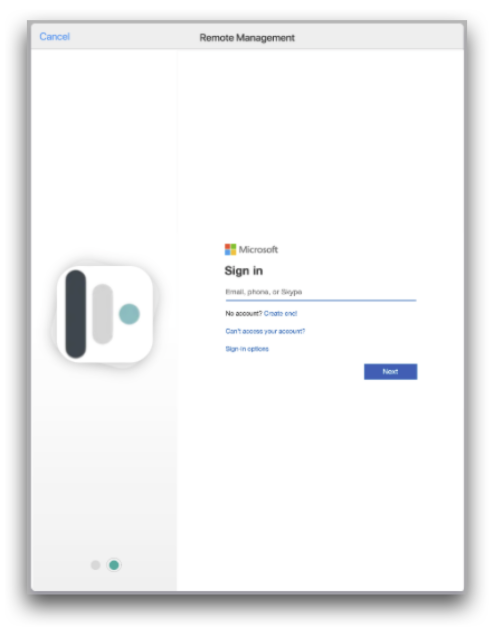
Completing Device Assignment using the Mosyle Manager app (iOS/iPadOS & macOS)
If the enrollment will be completed by the IT department, or use of the Custom Setup Assistant is not possible within the school or district, user authentication through the Mosyle application can complete the device assignment. With this method, the device will be enrolled and remain in limbo until a user logs in to the Mosyle Manager app to complete the device assignment.
By default, the Mosyle Manager application accepts login using the user's Mosyle access code, User ID, or email address. Admin users and Teachers will be required to enter their Mosyle password. Students and Staff users aren't required to have a password unless Single Sign-On authentication is configured.
Administrators can configure the Mosyle Manager application to accept login using Single Sign-On credentials such as Google, Azure, AD FS, or Active Directory by configuring the Single Sign-On profile under My School > Preferences > Single Sign-On > Login on Mosyle iOS app and/or Login on Mosyle macOS app.
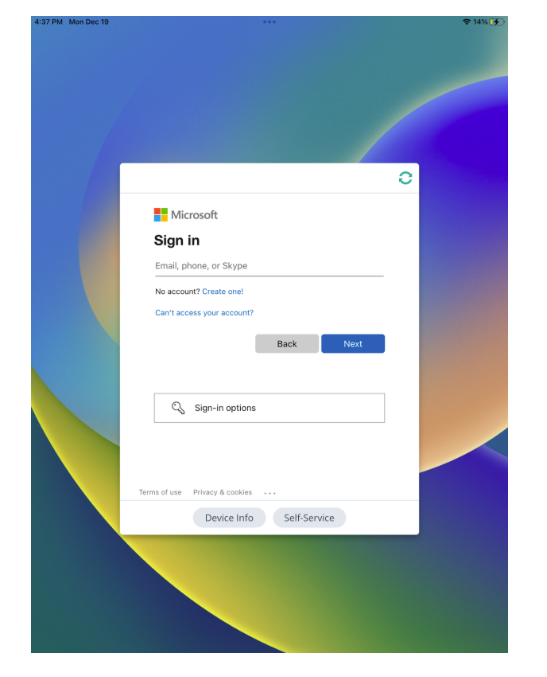
Completing Device Assignment during macOS login
On Mac computers, device assignment can be completed based on the user logging in on the device.
Mac user account login
When users login on the Mac, so long as the account name matches the User ID in Mosyle the device will be assigned to the user upon logging in on the Mac.
This assignment option can be used for devices that have been enrolled via Automated Device Enrollment or manually. When enrolled via Automated Device Enrollment, the user can be prompted to create the local user account with their User ID during the Setup Assistant and upon logging in, the device will be assigned to the user. If using the Terminal command to enroll via Automated Device Enrollment or manually enrolling a device, when logging in with an account on the Mac be sure the account name matches a User ID in Mosyle to complete the device assignment.
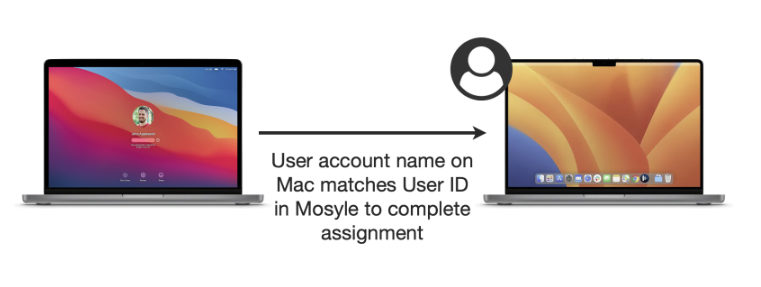
Mosyle Auth
Users logging into the Mac using Mosyle Auth will automatically complete the device assignment (depending on Device Assignment settings). This assignment option is useful for devices enrolled via Automated Device Enrollment where the local user account creation during the Setup Assistant is skipped. This way, the device will go through the enrollment and launch the Mosyle Auth login window. Upon logging in, the device will be assigned to the user.
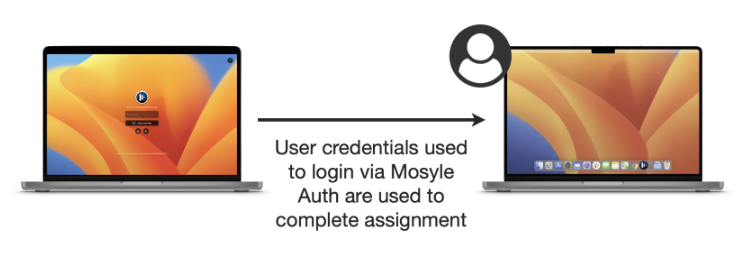
Multiple Device Assignment
The default device assignment behavior in Mosyle follows a 1-to-1 model, therefore if the user logs in and/or is assigned to another device, they will be unassigned from the first device. However, we understand in some scenarios users may have more than 1 device assigned. Using the options and workflows listed below will ensure a previously assigned device will not be unassigned when the user authenticates on another device to complete the assignment.
The workflow used to assign multiple devices will depend on the planned deployment flow. A maximum of 10 devices per OS platform can be assigned to each user, in other words, up to 10 iOS/iPadOS and 10 macOS devices can be assigned to each user.
-
Automated Device Enrollment
If devices are enrolled using Automated Device Enrollment and users are authenticating during enrollment to complete the device assignment, multiple devices can be assigned upon enrollment by configuring the account Settings under My School > Preferences > Other Settings > General Preferences > Check the box 'Allow for multiple device assignment on enroll'.
-
Device Info and/or User Profile
Multiple devices can be assigned to a user through the Device Info screen by going to Management > Devices Overview > Click a device in Limbo to bring up the Device Info window > Next to 'Type', click Change and select 'Change to 1:1' and select the user to assign the device. If the user already has a device assigned, check the box: 'A 1:1 device is already assigned to this user. Check this box to keep the already assigned device and also assign the additional device you selected. The previous device WILL NOT be moved to Limbo.'
Assigning multiple devices to a user can also be completed directly in the User Profile by going to My School > Users > Find and select the user > Click Assign device to this user > Select the device.
-
API Integration
The 'assign_device' operation via the API can be used to assign multiple devices to users. If a device is already assigned to the user, the device assigned using the API will be in addition to the current device. Go to My School > Integrations > Mosyle API Integration for more information and documentation.
Assigning Devices to Shared Device Groups
If you need to create a group where devices will be entering or leaving the group based on some specific criteria, it's recommended to use Dynamic Device Groups found under the Management tab.
Assigning devices to a Shared Device Group can be completed using a few different methods in Mosyle. The method used will depend on the planned deployment flow. Methods for assigning devices to Shared Device Groups are similar to those used for 1:1 devices and are listed below.
Completing Assignment during Automated Device Enrollment
If you are enrolling devices using Automated Device Enrollment, you can complete the assignment during the enrollment using:
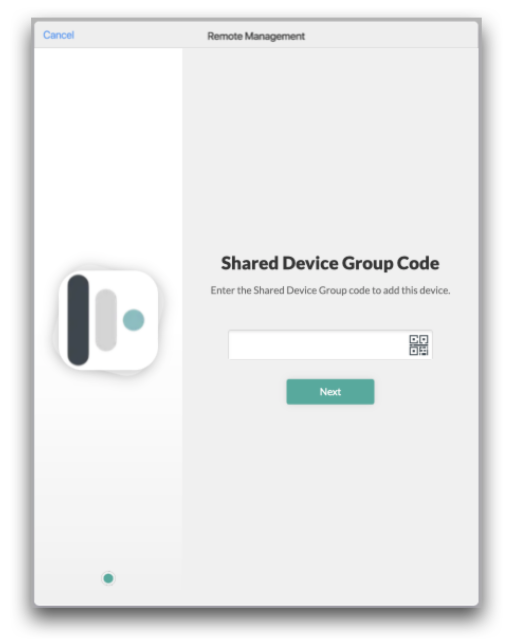
Completing Assignment using the Mosyle Manager app
End-users can complete the device assignment by entering the Shared Device Group access code or scanning the QR code in the Mosyle application. In this scenario, devices will first be enrolled into Limbo. Once enrolled, users will launch the Mosyle app and scan the QR code, or enter the 6 digit access code for the Shared Device Group to complete the assignment.
Completing Assignment in the Mosyle Web Console
Mosyle Administrator users can complete the device assignment by logging into the Mosyle console and using:
- Spreadsheet: When assigning devices in bulk to the Shared Device Groups, you can use the Spreadsheet option. Go to Spreadsheet > Download the XLSX template for Shared Device Groups. Fill out the template with the shared group info and enter the serial numbers in the last column, comma-separated. When finished, upload the spreadsheet to complete the assignment.
- Shared Device Groups: To assign devices to the group, go to My School > Hierarchy > Shared Device Groups > Click the Group > Edit > Select the devices to be added to the shared group.
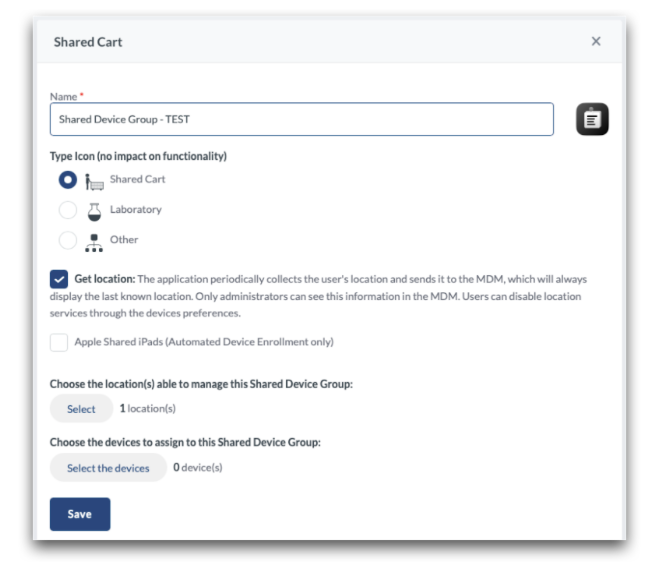
Devices in Limbo
Devices in Limbo are devices that are not assigned to a User or a Shared Device Group. Devices in Limbo can be associated with all locations in the account, or specified to belong to only one location.
To configure Limbo devices to be assigned to all locations, go to My School > Preferences > Other Settings > General Preferences > Check the box "Limbo devices belong to all locations". Click Save.
To configure Limbo devices to be assigned to a specific location, you can specify the location in the Automated Device Enrollment profile, or modify the locations by going to Management > Devices Overview > Bulk by Import > Download the template for Update Location. Fill out the template and upload.
Devices can be changed to Limbo devices using the following methods:
- Deleting the user or Shared Device Group the device is assigned to;
- Management > Devices Overview > Select the devices > More dropdown: Change to Limbo;
- Management > Devices Overview > Device Info > Type: Change to limbo
Once a device is in Limbo, it can be assigned to any user or Shared Device Group as needed.
Inventory Management
Devices Overview
Overview
Devices enrolled in the Mosyle account are listed under Management > Devices Overview for their respective platform. Change platforms by clicking the dropdown menu in the top left under Manage OS to choose between iOS/iPadOS, macOS, and tvOS.
In the top right, the Personalize button allows each Admin to personalize the data displayed on the Devices Overview screen when they login and access. This allows the ability to display data relevant to the school or district.
Administrators can use the Bulk by Import feature to upload a spreadsheet to change Device Names, Tags, Asset Tags, and the Lock Screen Message for multiple devices at once
Device Information
Clicking a device name will bring up device specific detailed information in the Device Information view. The menu in the Device Information view provides access to many of the same commands offered in the Devices Overview area. Information regarding the specific device is available within each of the tabs.
iOS/iPadOS Device Information
The Device Information for iOS/iPadOS devices includes seven tabs: Info, Security Info, Apps, Books, Commands, Profiles, Occurrences.
The Info tab provides information regarding the device hardware and the OS. Key pieces of information in this area include:
- Update Info: The last time the device checked in with the Mosyle MDM servers to provide an update on the device status. The Device Information command is sent automatically every hour to update the status of the data on the first tab. The full Update Info consists of many commands to gather data for all tabs in the Device Information view, and is automatically sent every 24 hours. Note: Location information and WiFi SSID rely on the Mosyle application having access to location services permissions.
- Operating System Information: Includes the current operating system version, any available updates, and the status of any downloaded OS updates. Send commands to update the OS using the commands in Devices Overview, Device Information, or Single Shot profile.
- Other information included in this tab include: Device Name, Serial Number, Enrollment Date & Status, Supervision Status, and more.
The Security Info tab provides information regarding the status of Activation Lock, Find My, and if a passcode is present on the device. If User-Initiated Activation Lock is allowed, the Activation Lock bypass code can be found in this tab. This information is updated every 24 hours as part of the full Update Information. If you wish to update sooner, click the “Send Update Info” button within the tab.
The Apps tab provides information regarding the apps assigned and installed on the device. Likewise, the Books tab provides information regarding any media assigned and installed on the device. The apps and books information is updated every 24 hours as part of the full Update Information. If you wish to update sooner, click the “Send Update Info” button within the tab.
Apps
The Apps tab is organized into four sections: Installed, Profiles, Study Apps, and VPP Licenses.
- Installed: Lists the apps that are currently installed, or in the process of installing, on the device. For devices enrolled via Automated Device Enrollment and Device Enrollment, this list will include any apps installed via the MDM as well as any apps installed manually. System apps are not provided by the device to the MDM, therefore they are not included. Devices enrolled via User Enrollment will only display apps installed through the MDM. Apps with the trashcan icon next to them are considered “managed” apps and can be remotely updated and removed via the MDM. Apps with the gear icon are considered “unmanaged” apps and cannot be remotely updated and removed via the MDM without prompting the end user.
- Profiles: List of all apps assigned to the device in Install App profiles. Resend the command to install the app using the paper airplane icon or delete the app using the trashcan icon. The installation status will also be listed in this area. Installation status can include: Installed, Installing, Pending to Install, Waiting on VPP, PromptingUpdate, Error, Removed, etc.
- Study Apps: List of all apps assigned to the device by teachers using Study Apps. Resend the command to install the app using the paper airplane icon or delete the app using the trashcan icon. The installation status will also be listed in this area.
- VPP Licenses: List of all VPP licenses assigned to the device and/or to the user assigned to the device. The method of license assignment will be listed - Assigned to device or Assigned to user. Revoke any licenses as needed.
Books
The Books tab is organized into three sections: Installed, Profiles, and VPP Licenses.
- Installed: Lists the books that are currently installed, or in the process of installing, on the device. This list will only include books installed via the MDM. Books can be removed from the devices by clicking the trashcan icon. Note: Books can be installed on iOS and iPadOS devices using Apple Apps and Books, by uploading a PDF, epub, or iBooks file, or using a direct URL.
- Profiles: List of all books assigned to the device in Install Book profiles. Resend the command to install the book using the paper airplane icon or delete the book using the trashcan icon. The installation status will also be listed in this area. Installation status can include: Installed, Pending to install, or removed.
- VPP Licenses: List of all VPP licenses assigned to the user assigned to the device. Books installed via Apps and Books can only be assigned via User-based license assignment. Book licenses cannot be revoked once assigned.
The Commands tab will show a list of any pending or failed commands for the individual device. By default, the Mosyle MDM will attempt to resend any pending or failed commands every 15 minutes. However, a push can be manually sent as well to call the device to the MDM server to retrieve any pending/failed commands. If needed, the commands can be cleared from this area as well. Note: Devices locked with a passcode will not accept commands to change any configuration/settings on the device while locked. Unlock the device in order for the commands to go through.
The Profiles tab lists any and all profiles assigned to the device and the current installation status. The profile installation status is updated any time a profile is sent to the device to be installed, and every 24 hours as part of the full Update Information. If you wish to update sooner, click the “Send Update Info” button within the tab. Potential statuses are listed below:
- Installed: The profile is installed on the device. The installation status will reflect as “installed” after the MDM receives an “acknowledgement” response to the command to install the profile from the device and if the device indicates the profile is installed in the Update Info response.
- Pending to Install: The command to install the profile is currently pending. A pending status can be due to the device being offline, locked, or not connected to the internet.
- Removed: The profile is not installed.
- Manually Removed: The profile was manually removed from the device via the MDM.
- Disabled: The profile is toggled off and not currently active, the profile is no longer installed.
- Exception: The profile is not installed as the device or user is listed as an exception in the profile.
- On Hold: The profile is configured with the option “Do not auto-install the profile after saving”. The profile will not be installed until a manual request is made to install the profile from Device Info or from Self-Service.
- Not Compatible: The profile is not compatible with the current device hardware/software, or the current assignment status. For example, a profile using a user's variable will not install on a device that is not assigned.
The Occurrences tab provides information regarding any profiles that may be installed that are no longer assigned, or any profiles that are assigned but are not installed. It is typical for this tab to be empty.
macOS Device Information
The Device Information for macOS devices includes six tabs: Info, Security Info, Apps, Commands, Profiles, Occurrences.
The Info tab provides information regarding the device hardware and the OS. The information is similar to that received by iOS/iPadOS devices. Information obtained by Mosyle is retrieved via Apple's MDM Protocol commands as well as through the Mosyle MDM agent. The “Last Update Info” date and time will reflect the date and time of the last info retrieved via Apple's MDM Protocol. Device Information command is sent automatically every hour to update the status of the data on the first tab. The full Update Info consists of many commands to gather data for all tabs in the Device Information view, and is automatically sent every 24 hours. Request an Update Info at any time to refresh the information in the tabs.
The Security Info tab provides information regarding the status of Activation Lock, Firewall, FileVault, Bootstrap Token, and includes the DEP Admin Password. If User-Initiated Activation Lock is allowed, the Activation Lock bypass code can be found in this tab. This information is updated every 24 hours as part of the full Update Information. If you wish to update sooner, click the “Send Update Info” button within the tab.
The Apps tab provides information regarding the apps assigned and installed on the device. The list of apps is updated every 24 hours as part of the full Update Information. If you wish to update sooner, click the “Send Update Info” button within the tab. The tab is organized into four sections similar to the iOS/iPadOS Device Information. The App Profiles list will include Install App profiles using Apps and Books and Mosyle Catalog, as well as apps pushed using the Install PKG profile.
*Note: Installation status for apps installed using the Install PKG profile relies on the correct bundle identifier for the app being defined during the PKG creation. If the wrong bundle ID is used, the installation status will be incorrect.
Similar to iOS/iPadOS devices, the Commands tab lists any pending or failed commands for the individual device.
The Profiles tab lists any and all profiles assigned to the device and the current installation status. The profile installation status is updated any time a profile is sent to the device to be installed, and every 24 hours as part of the full Update Information. If you wish to update sooner, click the “Send Update Info” button within the tab. The tab is organized into two sections:
- Profiles: Lists any/all profiles installed on the device using Apple's MDM Protocol payload configurations. The profile installation status is similar to that for iOS/iPadOS devices.
- Custom Commands: Lists any/all Custom Command profiles assigned to the device, Device Group or Alert criteria, as well as Mosyle Management profiles that utilize solely the Mosyle agent (Local User profile). View the results from the command, the code sent, and/or resend the command at any time.
The Occurrences tab provides information regarding any profiles that may be installed that are no longer assigned, or any profiles that are assigned but are not installed. It is typical for this tab to be empty.
tvOS Device Information
The Device Information for tvOS devices includes six tabs: Info, Security Info, Apps, Commands, Profiles, Occurrences. Each tab is similar to the tabs available for the iOS/iPadOS devices. The Device Information command is sent automatically every hour to update the status of the data on the first tab. The full Update Info consists of many commands to gather data for all tabs in the Device Information view, and is automatically sent every 24 hours. Request updated information at any time by clicking Update Info.
Shared Device Groups
Overview
Creating a Shared Device Group
When creating a Shared Device Group, add the group name and configure the settings as described below:
- Type Icon: Choose an icon for the Shared Device Group. This is just a visual icon for the Mosyle console and will not impact functionality or any features of the group.
- Get location: Choose whether or not you want the Mosyle application to prompt for location services on iOS/iPadOS devices.
- Apple Shared iPads: If the devices assigned to this group will be Apple Shared iPad devices, check this box and configure any additional settings. (iOS/iPadOS Only)
- Choose the location(s) able to manage this Shared Device Group: Select which location(s) in Mosyle will have access to this group. The location(s) selected will impact the following - which Apps and Books tokens can be used to install apps on the devices in the Shared Device Group, which teachers can see and select the Shared Device Group when using the Mosyle Class Manager, which Location Admin users can see and manage the Shared Device Group.
- Choose the devices to assign to this group: Here you can select which devices should be assigned to the Shared Device Group.
Shared Device Group for Apple Shared iPad devices
When creating a Shared Device Group for Apple Shared iPad devices, the following preferences can also be configured:
- Enable diagnostic submission: Check the box to enable diagnostic submission
- Enable app analytics: Check the box to enable app analytics
- Passcode Lock Grace Period: By default, Apple Shared iPad devices will lock after 2 minutes of inactivity. With this option, you can choose how long of a grace period is allowed after the device locks before the user has to enter a passcode in order to unlock. If nothing is configured here, the device will lock after 2 minutes of inactivity and the user will have to enter their passcode in order to unlock.
- Passcode type: This is the configuration for the complexity of the passcode that should be expected on the Apple Shared iPad device. This should match the complexity of the user passcodes in Apple School Manager. You can choose from the following options: Complex, 4 digits, 6 digits, or Keep same info from ASM.
- Choose the classes to configure the iPads: Select the classes to be displayed on the Shared iPad Lock Screen. This setting configures the Educational Profile that will be sent to the device to configure the rosters on the Lock Screen.
Devices enrolled as Apple Shared iPad devices will be temporarily assigned to the user logging in with the Managed Apple ID registered in Mosyle. Profiles and configurations can be applied to the entire device, or scoped to individual users so they are only applied when that specific user logs in.
When using temporary or guest sessions, only the profiles and configurations applied to the device will be applied.
If the number of resident users or quota size needs to be updated after the device is enrolled, it can be done under Management > Devices Overview or Device Info > More dropdown menu: Change Shared Config. The following options are available:
- Set specific quota size
- Set the number of resident Users
- Temporary session only
- Temporary session timeout
- User session timeout
Assigning Devices to Shared Device Groups
As previously reviewed, devices can be assigned to Shared Device Groups during Automated Device Enrollment or after enrollment by editing the Shared Device Group or from the Device Info window.
Move Devices Between Shared Device Groups
Devices can be moved between Shared Device Groups of the same type. For example, devices in a Shared Device Group for Mosyle Shared devices can be moved between other Shared Device Groups with Mosyle Shared devices. Devices that are configured as Apple Shared iPad devices cannot be moved to Shared Device Groups that are configured with Mosyle Shared devices.
To change devices from Apple Shared iPad devices to Mosyle Shared, they will need to be wiped and re-enrolled. Similarly, to change from Mosyle Shared to Apple Shared iPad, the Automated Device Enrollment profile will need to be updated and the device will need to be wiped and re-enrolled.
Dynamic Device Groups
Overview
Dynamic Device Groups are a useful way to organize groups of devices based on certain criteria. The criteria can be static values, information that can dynamically change, or some combination of the two. Profiles and other configurations can be assigned to Dynamic Device Groups so that all devices in the group will receive the same profiles and/or apps. Any new devices added to the group, either manually or based on criteria will also receive the configurations.
Creating a Dynamic Device Group
Dynamic Device Groups can be created within Mosyle under Management > Device Groups > Add new Dynamic Device Group.
When creating a Device Group, add the group name and choose the criteria to determine which devices will be dynamically added and removed from the group. When finished click Save.
After saving a group, the Device Group Information shows the devices in the group as well as multiple features:
- Refresh: Manually refresh the group
- Update List Automatically: Select to refresh the group every day between 3 a.m. and 4 a.m. your local time
- Assigned Profiles: Review the profiles assigned to the group
- Edit Criteria: Change the configuration of the group
The list of devices in the Device Group will be listed similar to the devices listed in Devices Overview, providing multiple commands as well as options for exporting data.
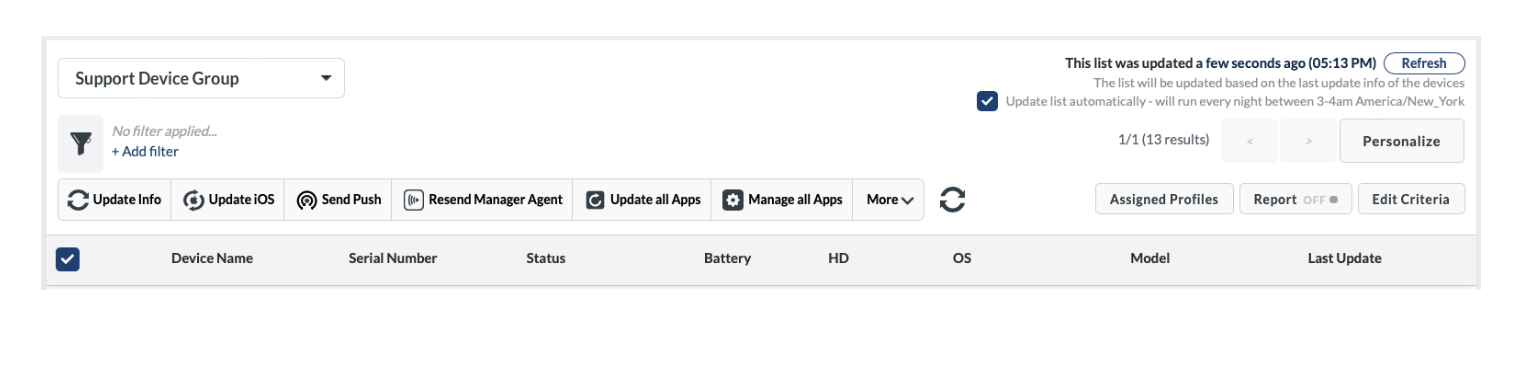
To delete a Device Group, click “Edit Criteria” and scroll to the bottom. Click “Delete” in the bottom right.
Dynamic Device Group Criteria
Device Groups can be created using a variety of criteria. Criteria available includes both static information such as specific device serial numbers or models, and dynamic information such as OS version or app installation status.
When using criteria to populate devices into the Device Group, the Assigned to specific Location(s) and Last Update Info criterion is required. The Assigned to specific Location(s) indicates which devices should be added to the group based on the locations in which the devices are assigned. If devices are enrolled in Limbo, be sure to consider their location assignment. The Last Update Info indicates which devices should be added to the group based on the last time they updated information with the MDM. Other criteria are optional and added under Your Criteria. The drop-down menu features four types of criteria:
- Device Criteria: Information that the devices return to the MDM via Device Info (every hour) or Update Info (every 24 hours), such as storage or operating system version
- Mosyle Criteria: Information managed by the MDM, such as the assignment status or DEP profile that the devices installed on enrollment
- Custom Attributes: Attributes that an administrator created from a custom command (macOS only)
- Custom Commands: Scripts from a Custom Commands profile (macOS only)
After adding criteria, request a status update from devices by selecting Send an Update Info to All Devices, and then click Save. This ensures the correct devices are added to the group.
Multiple criteria can be used with logical operators AND and OR. Each criteria also has its own logical operators that are relevant to the rule configured, such as: “is”, “is not”, “like”, “is equal to”, “is not equal to”, “is greater than”, “is greater than or equal to”, “is less than”, “is less than or equal to”, “contains”, and “does not contain”. Criteria can be moved and rearranged into any order, or removed, in order to meet the needs of the school or district. Custom command responses can also be used for Dynamic Device Group criteria for macOS devices.
Dynamic Device Groups can be updated at any time by manually refreshing the group under Management > Device Groups > Click the group > Refresh, or configure to automatically update. To automatically update Device Groups every 24 hours between 3am and 4am local time, check the box for “Update list automatically”.
Note: To use Custom Attributes and Custom Commands for Device Group criteria, the Mosyle Manager app must be installed on the Macs.
Use Case
Dynamic Device Groups can be used for a variety of purposes when managing devices. One example includes targeting specific devices that need OS updates. Using the criteria for “OS Update” is “Available”, devices that are reporting available OS updates will automatically be populated to the group. The Single Shot profile can then be assigned to the Device Group to initiate the OS updates based on the defined schedule. Once configured, the OS update routine is then automated based on the Device Group criteria and its assignment to the Single Shot profile.
Basic Inventory Reports
Overview
Mosyle provides an extensive amount of data for devices enrolled in the MDM. Data can be exported from multiple areas within the product. Exports with minimal information are typically downloaded immediately, exports with larger amounts of data will be generated and available under My School > Preferences > Reports. The download link is for single use only.
Exporting User Data
User data can be exported by going to My School > Users > Select all users to be exported > Click the download icon and choose from the available options. The spreadsheet will include the user's name, user ID, personalized access code, personalized enrollment URL, email address, Managed Apple ID, user type, serial number of the assigned device, and any user groups the user is assigned.
Exporting Action Logs
Actions taken within the account by Administrators can be exported by going to My School > Preferences > Action Logs > Export. The spreadsheet will include the action, details, user name, action date, and IP from which the account was accessed and the action taken.

Exporting Device Data
The list of devices enrolled can be viewed at any time by going to Management > Devices Overview. From this area, Administrators can request the export of the following information:
- Export Info: A spreadsheet listing device information. Personalize the export to include only the data needed. Available data to be exported includes serial number, device UDID, device name, asset tag, tags, OS version, model, capacity, HD available, WiFi MAC address, MDM status, Enrollment information, and more.
- Export Apps: A spreadsheet listing the device name, serial number, tags (iOS only), app name, bundle ID, management status (iOS only), path (macOS only), version, category, size, enrollment type, user ID, user type, and update status. For apps installed on iOS/iPadOS devices, the spreadsheet also includes license information such as if the app is paid or free, app store vendable, or installed using Apple Apps and Books (VPP).
- Export Books (iOS/iPadOS only): A spreadsheet listing the device name, serial number, tags, name of the managed media installed, author, enrollment type, user ID, and user type. Note: The MDM only obtains a list of books installed via the MDM and are considered “managed”.
- Export Profiles: A spreadsheet listing the device name, serial number, tags, profile name, profile status, date modified, and last update info.
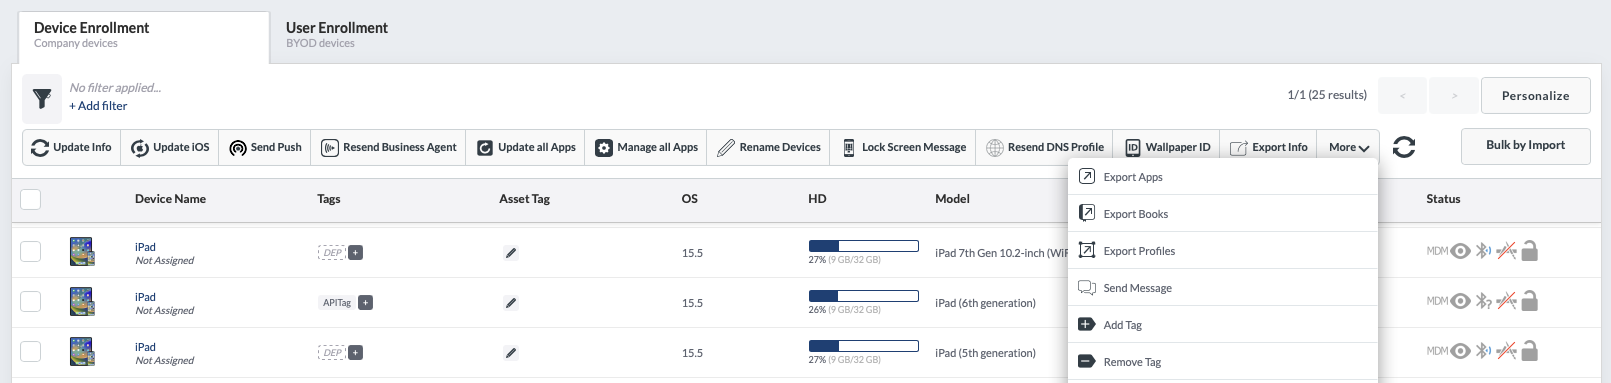
This information can also be exported for individual Dynamic Device Groups under Management > Device Groups > Select the Device Group from the dropdown menu > Export Info.
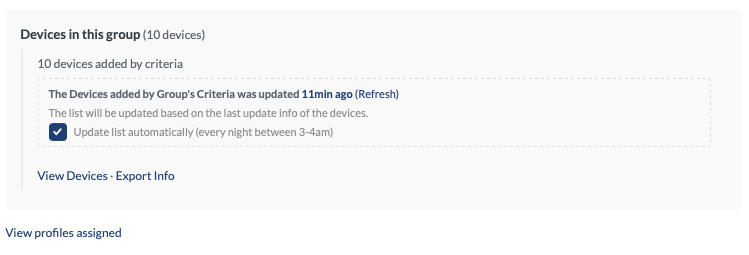
Exporting Commands Activity Log
In the event a large number of commands are pending, it's helpful to export the command activity for a holistic view of the type of commands pending and if there are any trends to which devices have pending commands. To export, go to Management > Commands Activity Log > Click either the Pending or Failed tab > Export.

Exporting Alerts
Export a list of devices identified by specific Alert criteria under Management > Alerts > Export Alerts.
Exporting App Data
App data can be exported from within the App Center under the Management tab > Applications. Select the apps you wish to export and click “Export apps” in the menu. Information such as the app name and details, as well as the device serial number the app is installed will be included in the spreadsheet.

Exporting Security Information
When utilizing Mosyle's Device Scout, Detection & Removal 2, and Admin On-Demand, Administrators have the ability to export device details relevant to each feature as well as the corresponding Logs. Export the devices and their security details by clicking the Devices menu option under the Security feature heading. Click the button in the upper right showing the number of devices that match the applied filters. Logs can be exported under the Logs tab.
Exporting DNS Filtering Logs
When using Mosyle's DNS Filtering, Administrators can export logs of requests as needed. To export, first filter the logs based on specific criteria such as a certain URL, start and end date, specific device, or by status (allow/deny). After applying the filters, click Export in the upper right corner.
Alerts
Overview
Mosyle Alerts provide Administrators important information regarding device status in the environment. In the Dashboard, default Alerts created by Mosyle are categorized by device type (iOS / iPadOS, macOS, tvOS) along with the number of affected devices.
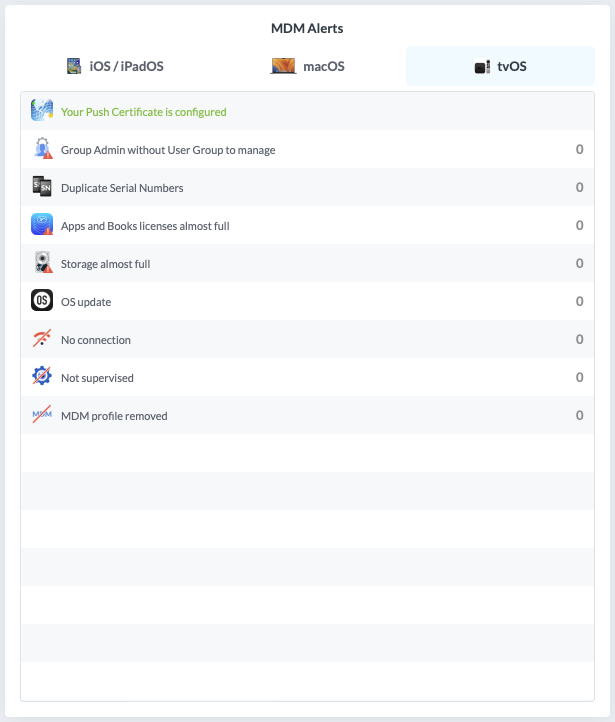
Viewing Alerts
To view all default alerts, or create custom alerts, go to Management > Alerts.
Alerts are grouped into four tabs based on alert types, 1:1 users, Devices in Shared Device Groups, and devices in Limbo. Types refers to the kind of alerts, such as devices with OS updates available or full storage. The remaining three tabs refer to the assignment model of the affected devices.
Click each of the alerts to open a pop-up window with more information or click View History for historical analysis based on users and devices. If it's a custom alert, a unique icon and name can be entered to identify it. All alerts are automatically refreshed every 30 minutes.
Adding Custom Alerts
Add custom alerts specific to the school environment by going to Management > Alerts > Add Custom Alert. By design, custom alerts work similar to Dynamic Device Groups. The Location and Last Update Info criteria is required. Other criteria are optional and can be added under Your Criteria. Multiple criteria can be used with logical operators AND and OR. Each criteria also has its own logical operators that are relevant to the rule configured. The drop-down menu features four types of criteria:
- Device Criteria
- Mosyle Criteria
- Custom Attributes (macOS only)
- Custom Commands (macOS only)
After adding criteria, request a status update from devices by selecting Send an Update Info to All Devices, and then click Save. This ensures the correct devices are added to the alerts.
For example, if we are interested in the Battery Health of the devices in our fleet, a Custom Command can be used for criteria to retrieve the battery health information (Add Custom Alert > Add New Alert > New Custom Command). After entering the Custom Command, the expected response to add devices to the alert can be entered. In this example, we want to be alerted for devices with failed battery health so our expected response to the command is “Battery Health Failed”. The Custom Command will run on every Device Info to retrieve the current status of the device so it can be added or removed from the alert as needed.
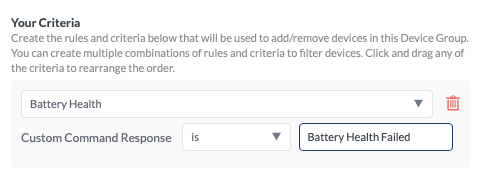
Note: To use Custom Attributes and Custom Commands for alert criteria, the Mosyle Manager app must be installed.
Configuring Email Alerts
Alerts can be configured to be sent via email by going to Management > Alerts > Alerts via Email > Config. Toggle on the email alerts, choose what alerts to receive emails about and how frequently, and then save. The frequency is once a day, every new alert, or none. Emails are sent only to the administrator who has configured them.
In case a report of the alerts is needed, click Export Alerts at the bottom of the page, select the alerts, and then click Export Info. The report will be available under My School > Preferences > Reports.
DNS Filtering Alerts
Alerts specific to DNS Filtering can also be configured so that selected Administrators receive emailed alerts regarding browser activity. To configure the DNS Filtering alerts, go to DNS Filtering > Click the profile > Select the Alerts tab > Add New Alerts.
Name the Alert and choose an icon. Enter the specific domains or filter you wish to be alerted. Choose the frequency in which to receive emails and select the Administrators to receive the email alerts.
App deployment and management
App Installation w/ Apple Apps and Books
Overview
Remotely installing and updating apps is a critical task when managing devices. For this reason, Mosyle supports the installation of apps using managed distribution to devices and/or users. The Install App profile under the Management tab provides the ability to install, reinstall, update, and configure apps in bulk.
Once Install App profiles are created in the account, Administrators can search and filter the profiles based on the profile name and/or category.
As a reminder, the Mosyle Manager application is available for devices enrolled via Automated Device Enrollment and Device Enrollment and provides Administrators with the ability to allow users to complete the installation of apps, web clips, profiles, and more.
To automatically install the Mosyle Manager app so users can access Self-Service on iOS/iPadOS devices, first obtain licenses for the app in Apple School Manager. Once licenses are available and the Apps and Books token is integrated, go to Management > Install App (iOS/iPadOS) > Click Edit Configuration for the Mosyle Manager App Installation profile. Choose the Apps and Books token to use for licensing and click Save.
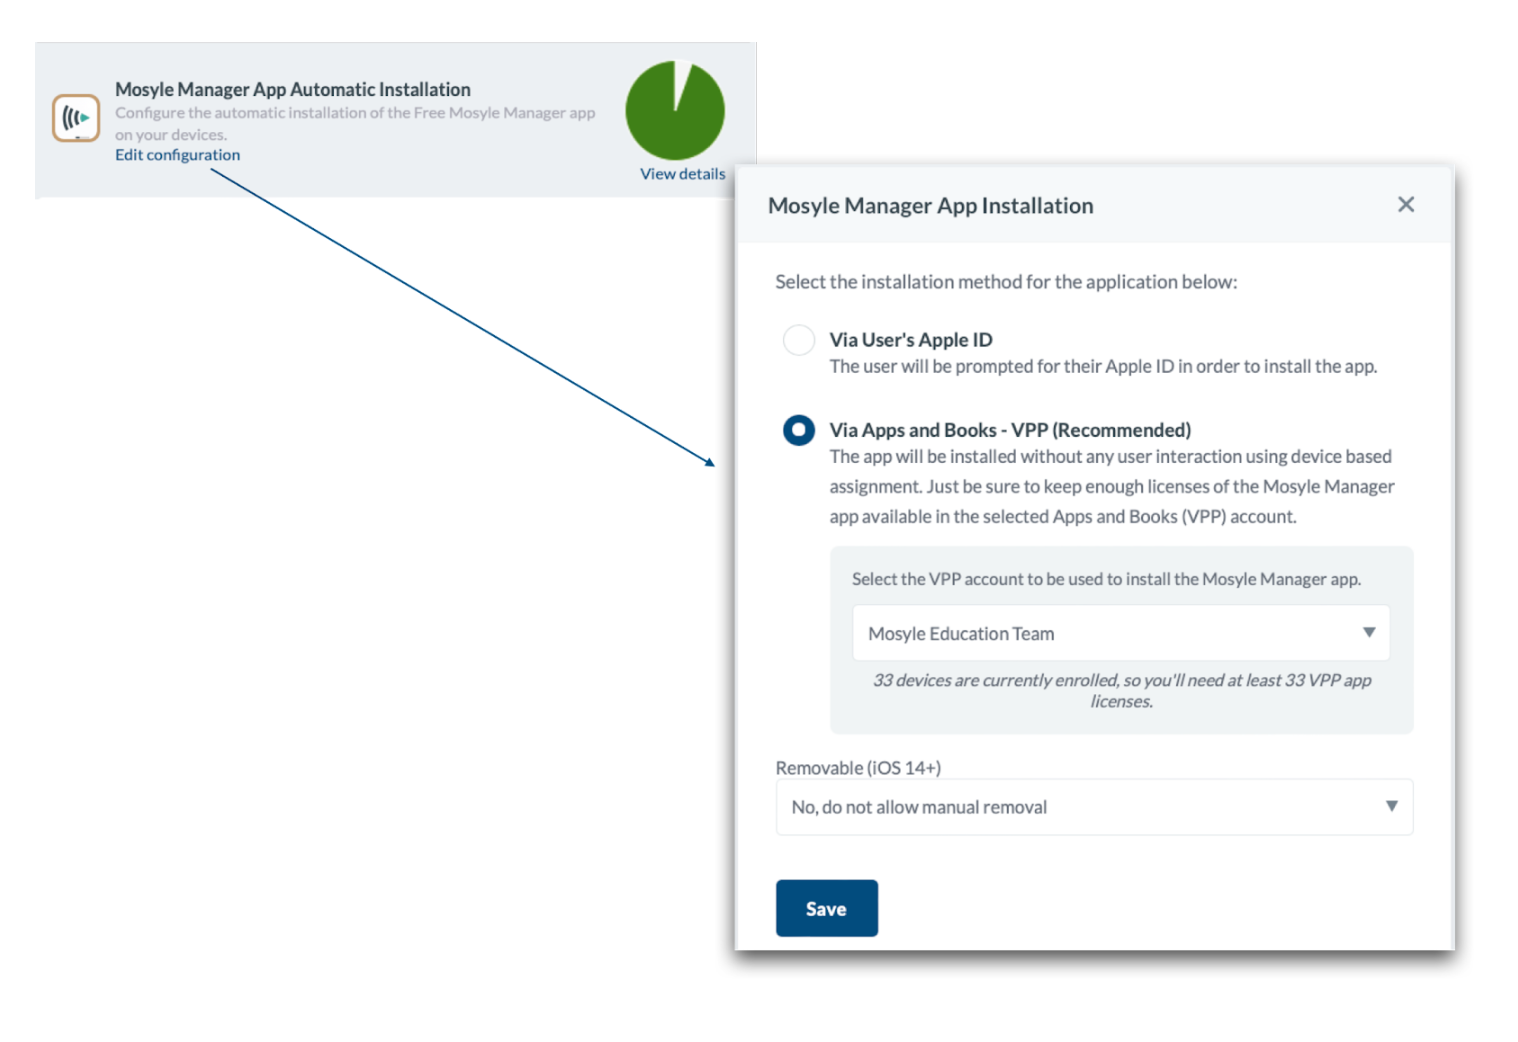
The Manager.app along with the Mosyle agent is automatically installed on macOS devices enrolled using Automated Device Enrollment and Device Enrollment. If needed, it can be reinstalled on devices using the command in Management > Devices Overview > Resend Manager agent.
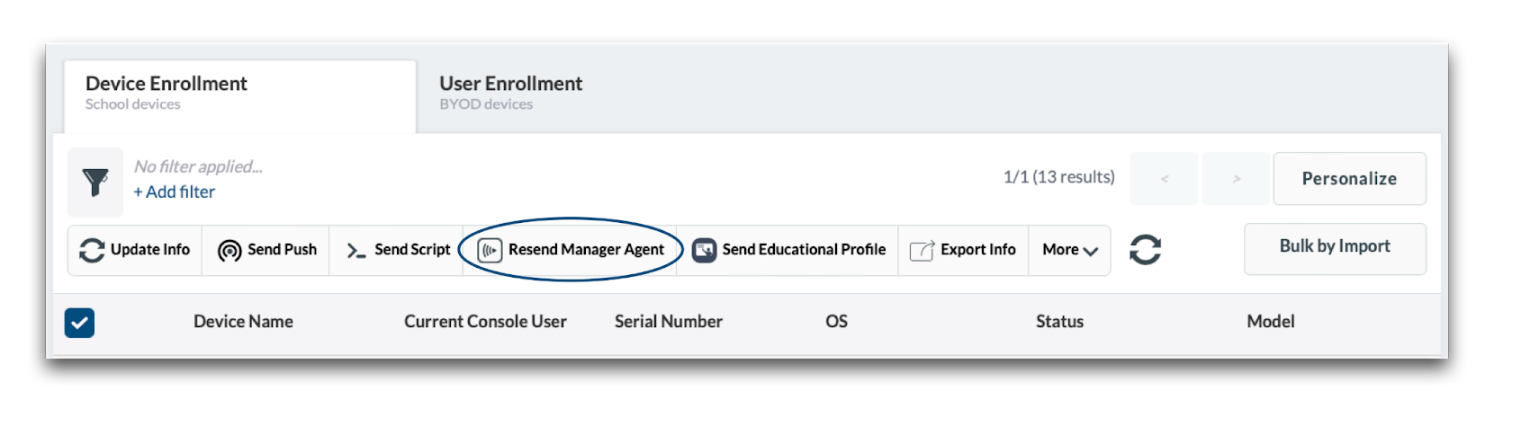
Installation Source & License Assignment
To install apps, go to Management > Install App.
Install App profiles can be created to install a single app or groups of apps, to multiple groupings of users and devices. When creating a new configuration profile, name the profile and select the installation source which indicates the source of the app license. For apps available in the App Store, including free apps, it's recommended to obtain licenses using Apple School Manager so they can be deployed using the Apple Apps and Books (VPP) token as the installation source. Similarly, to deploy Custom Apps available in a school or district's Apple School Manager account, choose Apple Apps and Books (VPP) token as the installation source.
*Choosing the App Store as the installation source for iOS or iPadOS devices will result in users being prompted to enter a personal/consumer Apple ID in order to download/install the assigned applications.
After selecting the installation source as Apple Apps and Books (VPP), choose the method in which the license for the app will be assigned. Choosing a device-based license assignment (recommended) will assign the app license to the device serial number, allowing the installation process to be silent to the end user, requiring no user interaction.
Tip: When enrolling via User Enrollment, user-based license assignment is required. This type of license assignment will assign the app license to the user's Apple ID and requires users to be registered in Mosyle with a valid Managed Apple ID and an invite to be associated with the user (Management > Applications > Apple Apps and Books > Invites). The same Apple ID that is associated with the invite must be logged in on the device.
Next, choose the app or apps to be installed and select the users, devices, and/or device groups to assign the profile to in the Profile Assignment area.
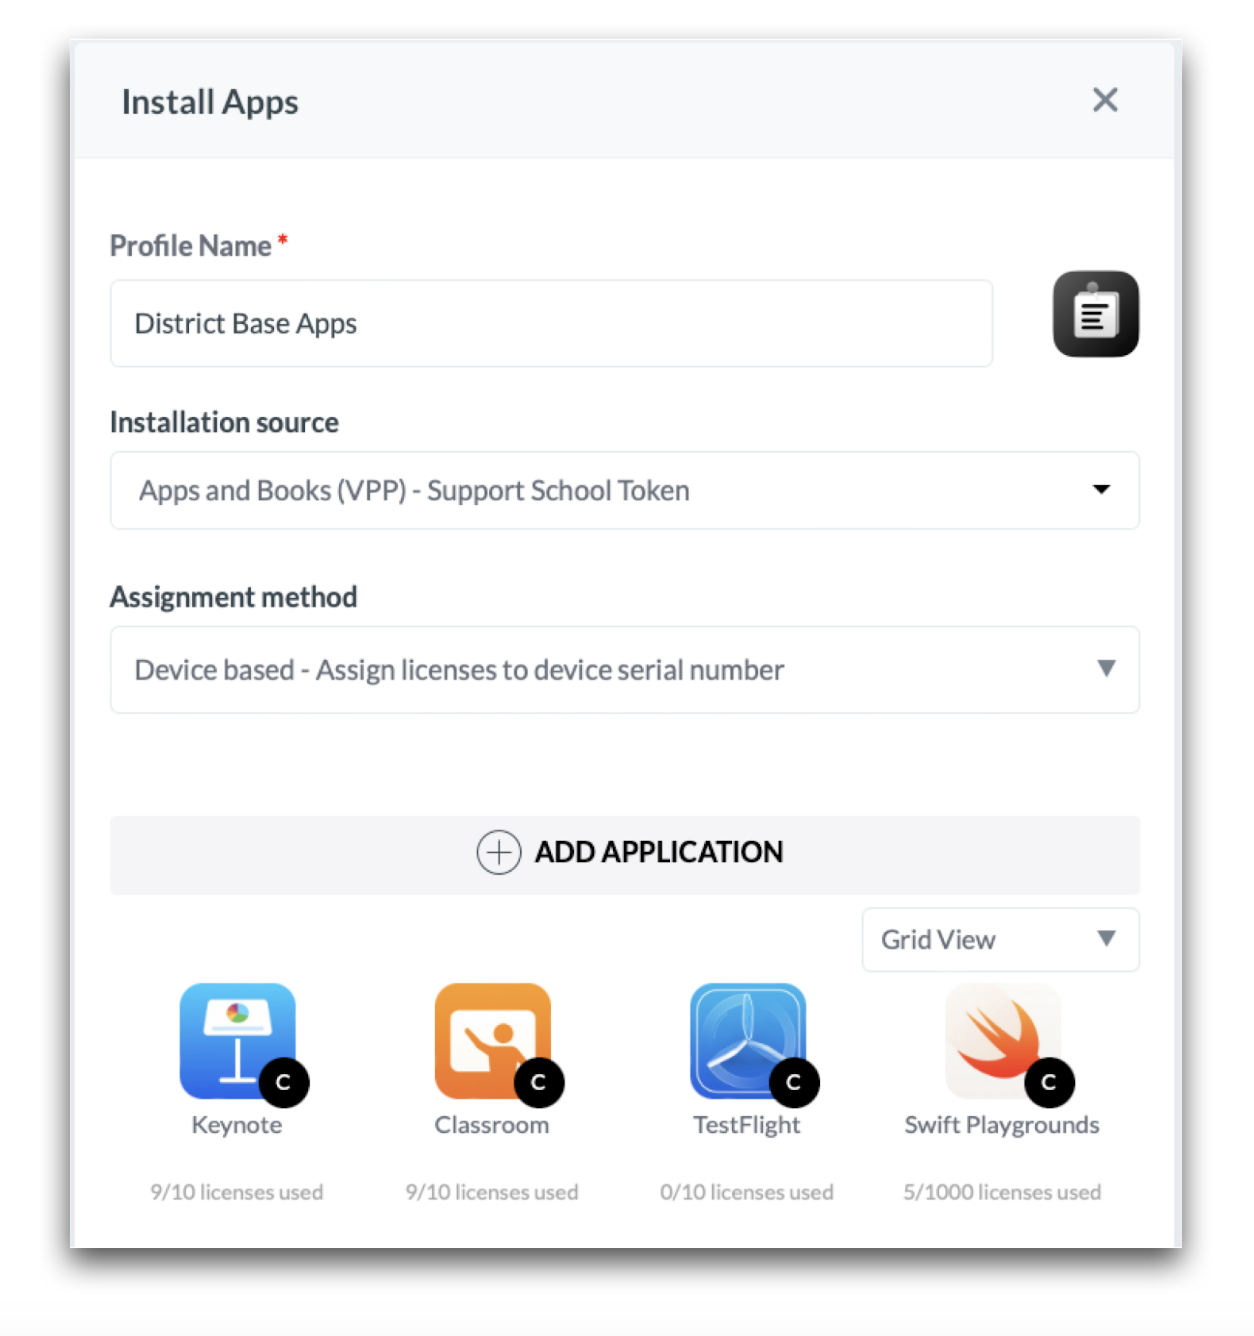
Installation Options
Additional options can be configured when creating an Install App profile in Mosyle. These additional options provide Administrators the ability to control whether apps are automatically installed, available in Self-Service, updated automatically, and/or removed when the assignment is removed.
- Auto-Install apps: Choose whether or not the apps will be automatically installed when the device is assigned to the profile. This includes immediate installation after enrollment if the device is assigned to a specific User, Grade Level, Class Period, Device Group, or Shared Device Group that is assigned to the Install App profile. If apps are not automatically installed on devices, the installation will need to be manually requested via Device Info in the Mosyle console, or via Self-Service. Additionally, apps on iOS/iPadOS devices can be assigned to users for temporary use. After the set number of days, the app can automatically be removed and the license revoked.
- Self-Service Apps: Choose whether or not the apps will be available to end users in the Self-Service app. If available in Self-Service, users can request the installation and updates for the apps at any time using the Mosyle Manager application.
- When editing the profile (iOS/iPadOS only): Choose whether or not apps will automatically be removed if they no longer exist in the profile, or if the device is no longer assigned to the profile. More details below.
- Update Apps: Choose whether or not apps will automatically be updated. More details below.
- Reinstall Apps: Choose whether or not apps will automatically be reinstalled if they have been removed manually or through the Mosyle console.
- Categories: Apps can be organized in Self-Service through the use of Categories. Apps in profiles with the same category will be grouped together in the Self-Service Apps tab.
- Select how to use Apps and Books (VPP) licenses: Choose whether or not to assign an Apps and Books (VPP) license for an app if it has already been installed manually on the device using an Apple ID.
Managing App Updates
The Install App profile can be configured to automatically update apps. Mosyle regularly scans the App Store for updated versions of apps. If an updated version is detected, commands to update the apps can be sent automatically. There are multiple options regarding app updates to choose from:
- Update outdated apps automatically AND alert end users: Using this option you can configure apps to update automatically after a specified delay period. Users will be prompted that an update is available and the specified amount of time to initiate the update through the Self-Service app. At the end of the timeframe, if the app hasn't been updated, the update will run automatically by Mosyle ensuring the app is up to date.
- Update outdated apps automatically without alerting end users: Using this option, app updates will run automatically by Mosyle as soon as a new version of the app is identified and available. Note: This can potentially impact users when using certain applications, as the update could attempt to run while the app is in use.
- Do not update outdated apps automatically: Using this option, apps will not be updated automatically. In order for the apps to be updated, Administrators will need to save the Install App profile again or push updates via some other method.
Requests to update apps can also be pushed from the App Center, Devices Overview/Device Information, or using the Single Shot profile. The Single Shot profile provides the ability to configure a schedule for when the commands for app updates will be sent.
Notes:
- Apps available in the App Store are identified as outdated by comparing the app version installed on the device with the app version available in the App Store, and by the hasupdateavailable key returned with the value 1 by the device.
- Since Custom Apps are not available in the App Store, when an update is available for a Custom App it's recommended to request the sync with Apple School Manager to ensure the correct app version information is available to Mosyle. To do this, go to Management > Apple Apps and Books > Click the Apps and Books token > Click the small information icon to request the sync. ⓘ
- Custom App updates are identified by comparing the app version installed on the device with the app version available in Apple School Manager.
- If an app update is pushed while the app is open, the user will be prompted to allow or deny the app update. This will be displayed in Mosyle as “PROMPTING UPDATE”.
- Apps are unable to be updated while they are actively locked in App Lock.
Managing the Removal of Apps
The Install App profile can be configured to automatically remove applications no longer assigned to iOS/iPadOS devices in the profile. Choose between the following options:
- Do not uninstall apps: Using this option, apps will remain installed on the devices even if the device is no longer assigned to the profile, or the app is removed from the profile. The app licenses will also remain assigned to the devices until manually revoked.
- Uninstall apps after considering all other assigned profiles: Using this option, apps will be uninstalled from devices if the app is removed from the profile or the device is no longer assigned to the profile and the app is not assigned to the device in any other Install App profiles. Because Mosyle scans all other profiles to ensure the app is not assigned to the device in any other way before uninstalling, the commands to remove the app could take up to 2-3 days.
- Uninstall apps immediately after the profile is saved: Apps will immediately be removed from devices after a change is made to the profile to remove a recipient and/or an app and the profile is saved.
Managed apps can also be removed from devices under Devices Overview and in the App Center. If the apps are not yet managed by the MDM, the user will be prompted to enter their Apple ID and password to first confirm management of the app before the app can be removed by the MDM.
- Devices Overview: Go to Management > Devices Overview. Select the devices that will have their apps removed and click More in the toolbar. Scroll down the menu to find Remove All Apps. The command offers three options: Remove all apps; Remove all managed and unmanaged apps not assigned to device (Apps not in App Install profiles); and Remove all managed apps not assigned to the device (Apps not in App Install profiles).
- App Center: Go to Management > Applications, click App Center, select the apps and then click Remove Apps. It's recommended to revoke all app licenses.
Managed App Configuration (iOS/iPadOS)
App Configuration is supported by devices running iOS 7 or later and is available in the Install App profile, allowing you to send custom configurations supported by the app developers to applications. Some examples include configuring a specific license or key code for an application. Hover an app in the profile to show the 'C' button in the bottom corner and then click on it to open the App Configuration window. Check the box for “Prepare and Apply an AppConfig PLIST”. If the app's software developer has provided keys and values for the configuration, or an XML file, paste the contents starting with and ending with . When finished, click Confirm.
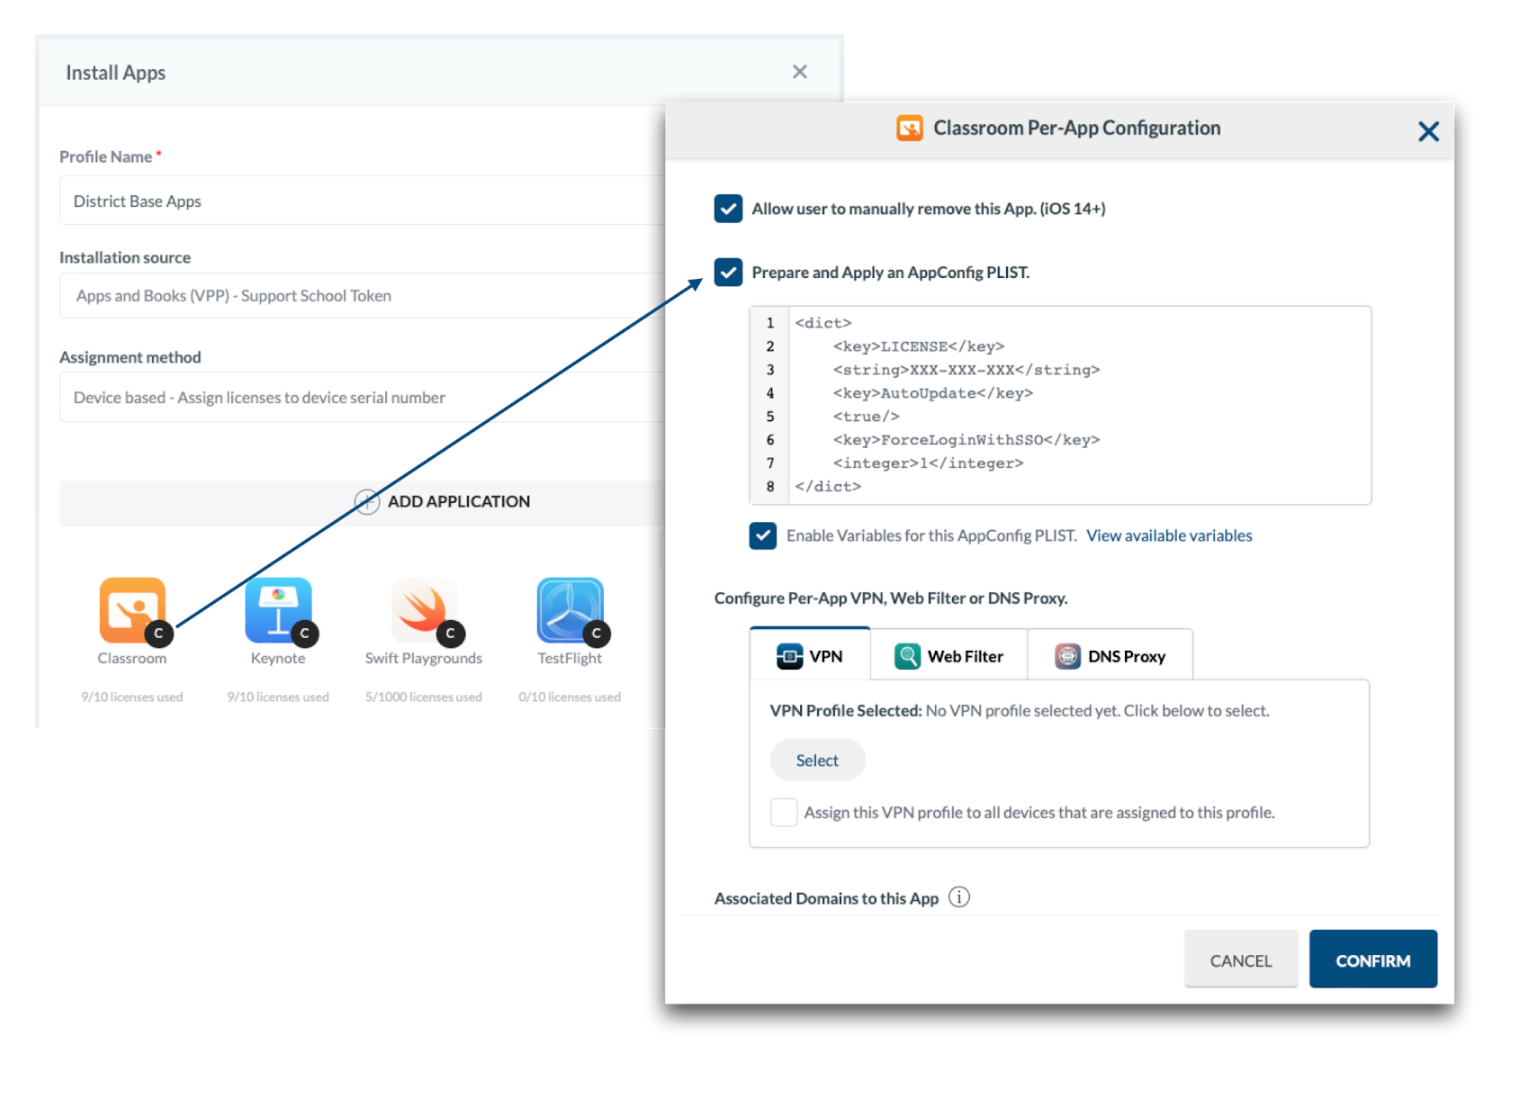
Installation Flow & Status
Once an Install App profile is created and assigned to users/devices, the View Details area will display the installation status of the apps. There are multiple steps to the installation process for apps, starting with the license assignment. Because of this, it's important to understand the flow in which apps are installed on devices via the MDM.
Before commands to install an application are sent to the device, the MDM first assigns the app license to the device. Once the app license assignment is confirmed to be successful, the MDM generates and sends the command to install the app to the device. The device then validates the app license with Apple servers and proceeds to fetch the app file from the App Store or from a local network caching server. The diagram below gives a broad overview of this flow.
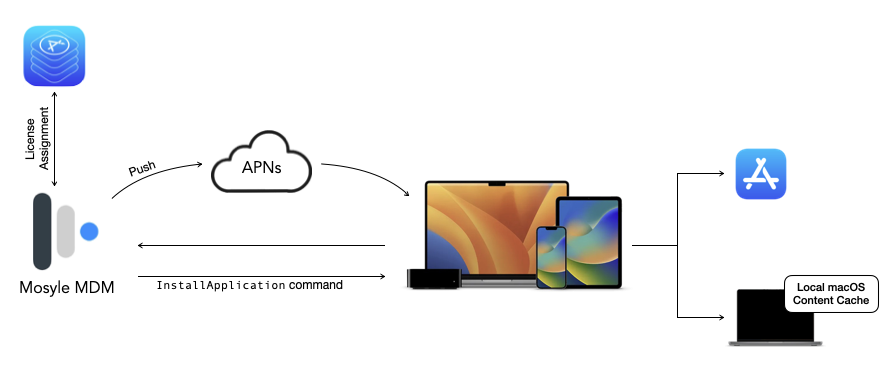
Note: This flow is specific for installing apps using device-based license assignment.
The View Details area of the Install App profile provides insight into the status of the app installation process. The app installation status will display if the command is pending or failed, any errors occurred, the app is downloading/installing, installed, outdated, removed, or available in Self-Service.
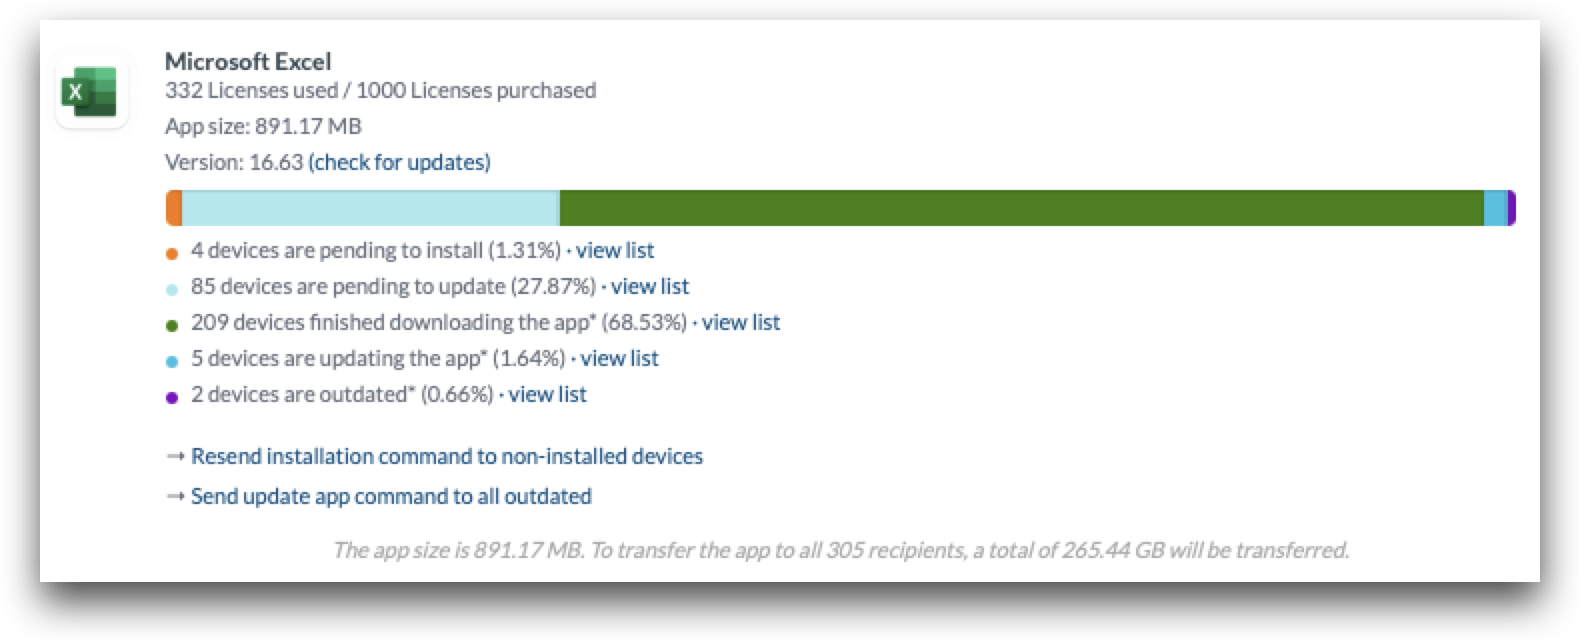
Important Notes:
- Mosyle MDM does not host App Store applications. Devices will need to be able to access Apple content servers to successfully download, install, and update apps.
- Mosyle MDM does not specify app versions when installing apps. The command to install applications simply contains the ID of the app from the App Store. The version installed on the device will be based on which app file the device retrieves from the App Store or local network caching server.
Visit Apple's documentation regarding Content Distribution with MDM for more information.
Enterprise App Installation
Overview
Mosyle supports the installation of proprietary in-house apps on iOS and iPadOS devices through the Install Enterprise profile. The installation of Enterprise apps requires self-hosting, or hosting via Mosyle's CDN, as well as the management of provisioning profiles and distribution certificates.
Reminder: Custom Apps available to organizations within their Apple School Manager account can be deployed using the Install App profile and choosing the Apple Apps and Books (VPP) token as the installation source.
Recommended resources
- Access to a Mosyle Education account
- A device enrolled into the account
- IPA file URL
Adding Enterprise Apps
To install proprietary in-house apps on iOS and iPadOS devices, go to Management > Install Enterprise.
Before creating the Install Enterprise profile, the .ipa file must be hosted and publicly accessible, requiring no user interaction to download. Once hosted, click the Enterprise Apps tab > Add new Enterprise App and enter the .ipa file URL. After entering the URL, Mosyle will automatically retrieve the app name, bundle identifier, and version information. An app icon can be uploaded to the Mosyle console for easy identification of the app within the console and Self-Service.
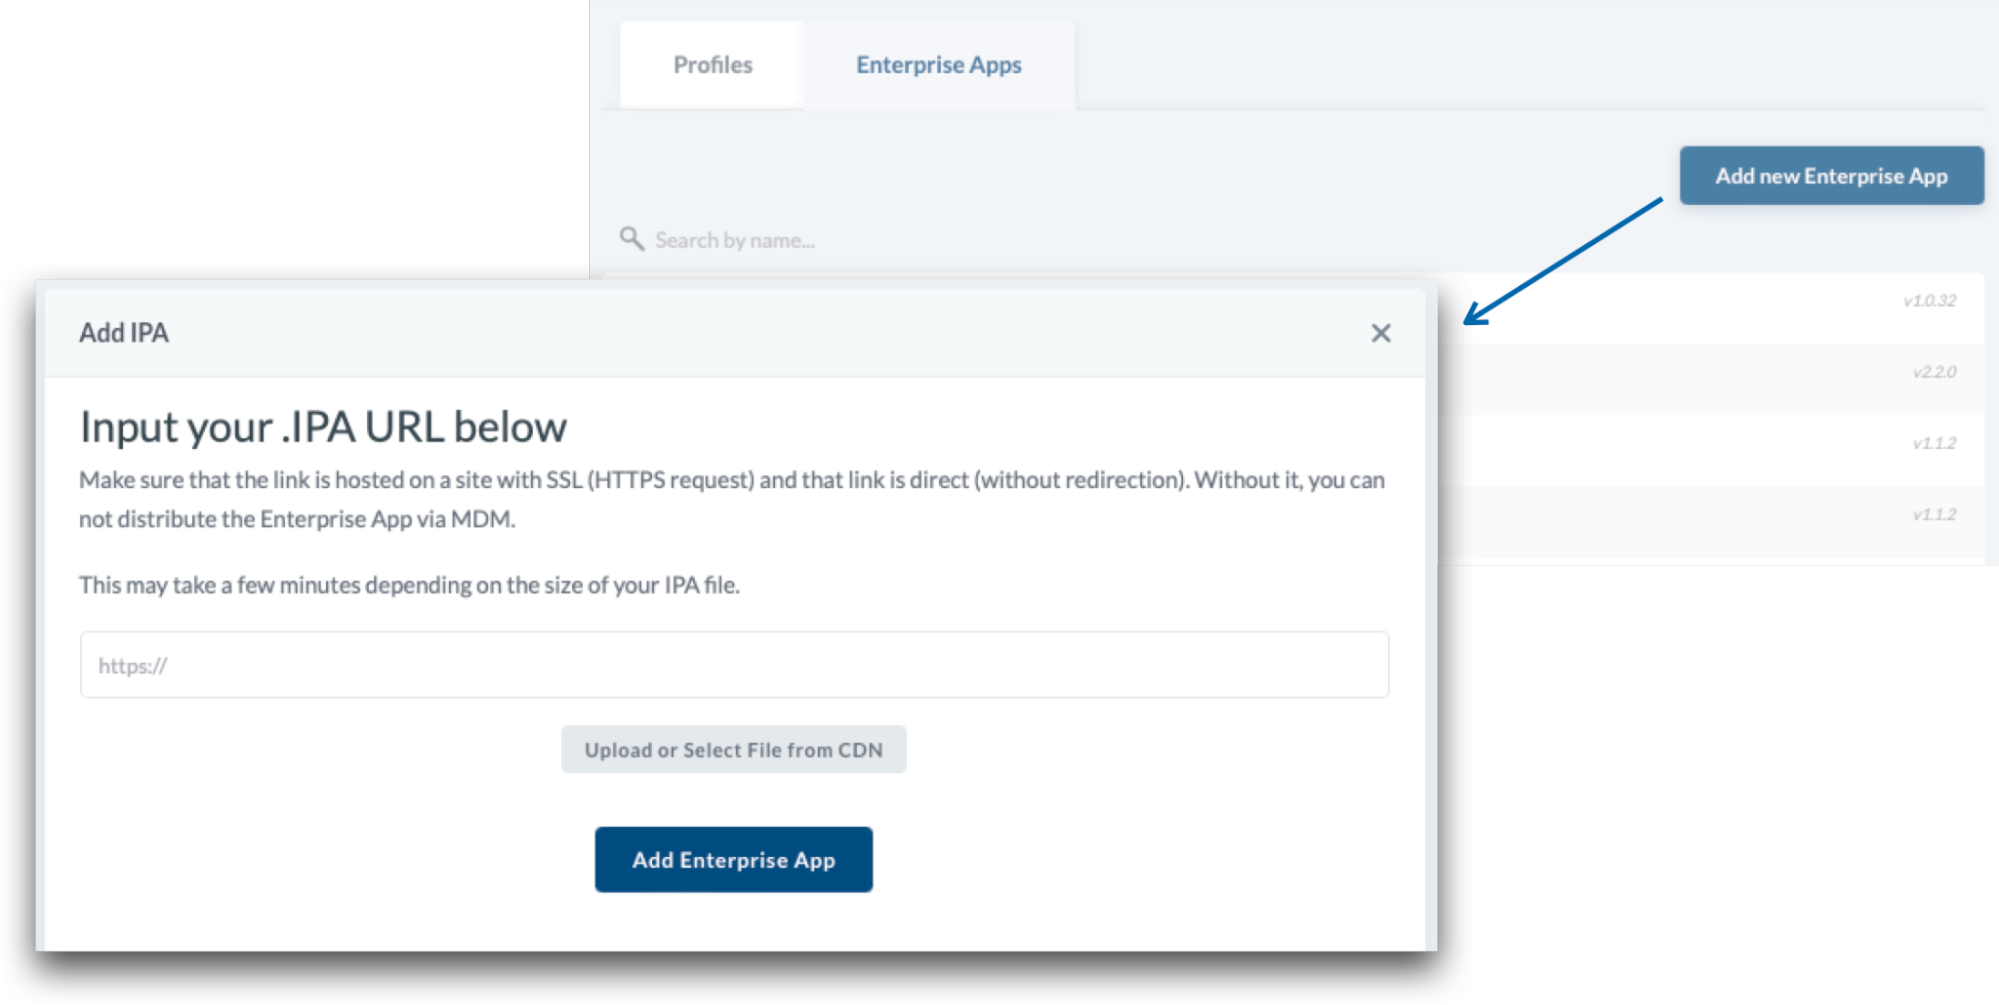
Mosyle provides its own private cloud hosting solution that allows you to host packages directly in the MDM. If the account has access to the Mosyle CDN, simply upload the .ipa file under the Enterprise apps tab to create the app.
Creating Install Enterprise app profile
After Enterprise Apps are created in Mosyle, click the Profiles tab > Add new profile. Name the profile and select any of the Enterprise apps available in the account to be installed on the devices.
Similar to the Install App profile, options are available for auto-installation, whether the app will be available in Self-Service, as well as uninstall, reinstall, and update behavior.
Updating Enterprise Apps
To deploy updates to Enterprise apps, the .ipa file URL for the updated version will need to be added to Mosyle. Once added, the Install Enterprise profile will need to be updated to include the new version. The old version can be deleted from Mosyle under Management > Install Enterprise > Enterprise Apps, click on the previous version of the app and then click Delete in the bottom-right corner of the profile (optional).
After the new version is added to the profile, if the profile is configured to update apps automatically, upon saving the profile commands will be generated to install and update the app on the devices.
Note: Mosyle uses version comparison to determine if an app is outdated. Be sure the value of any new app versions are greater than the current version.
Managing the Removal of Enterprise Apps
Enterprise apps can be automatically uninstalled when the Install Enterprise profile is edited using the Advanced Options in the profile.
Managed Enterprise apps can also be removed from devices via Devices Overview and the App Center.
- Devices Overview: Go to Management > Devices Overview. Select the devices that will have their apps removed and click More in the toolbar. Scroll down the menu to find Remove All Apps. The command offers three options: Remove all apps; Remove all managed and unmanaged apps not assigned to device (Apps not in App Install profiles); and Remove all managed apps not assigned to the device (Apps not in App Install profiles).
- App Center: Go to Management > Applications, click App Center, select the apps and then click Remove Apps.
Installation Status
Once an Install Enterprise profile is created and assigned to users/devices, the View Details area will display the installation status of the app.
Mosyle Catalog App Installation
Overview
Mosyle Catalog provides the ability to install, update, and manage third party applications that are not available in the Mac App Store, without having to manually download and host PKG or DMG files. Installing apps using Mosyle Catalog can also automatically install any additional permissions needed for the app, such as Privacy Permissions, System Extensions, or Kernel Extensions.
Whenever available, the Universal version of the application will be installed through the Mosyle Catalog. If a Universal version of the app is not available, the appropriate version of the app will be installed on compatible devices - Apple silicon versions of the app will be installed on Apple silicon devices, and Intel versions of the app will be installed on Intel devices. If only the Intel version of the app is available by the app developer, then the Intel version of the app will be installed on devices. In this scenario, it's recommended that Rosetta 2 is installed on Apple silicon devices.
Apps added to the Mosyle Catalog are based on customer requests. All apps offered in the Mosyle app catalog are owned, distributed, and maintained by each respective software developer. When sending installation commands, Mosyle uses direct download links provided by each respective software developer, thus all packages are offered as-is, without warranty, and the functionality, compatibility, and/or availability of each package cannot be guaranteed by Mosyle. Any licensing or rights to the third party software packages is not offered by Mosyle.
The installation of apps using the Mosyle Catalog requires the Mosyle Manager app to be installed on the Macs. Installation of apps using the Mosyle Catalog is not supported on User Enrolled devices.
Creating Install App profile using Mosyle Catalog
To install macOS apps using the Mosyle Catalog, go to Management > Install App > Add new Profile > Choose the installation source “Mosyle Catalog”.
To view the list of applications available in Mosyle Catalog, click the “+ Add Application” button. Within this area, all applications available to be installed are listed along with any permissions required. To view the permissions required for the app, click the link “View permissions for this app”. If you prefer to manually manage the permissions by creating the required management profiles, uncheck the box for “Automatically grant permissions required”.
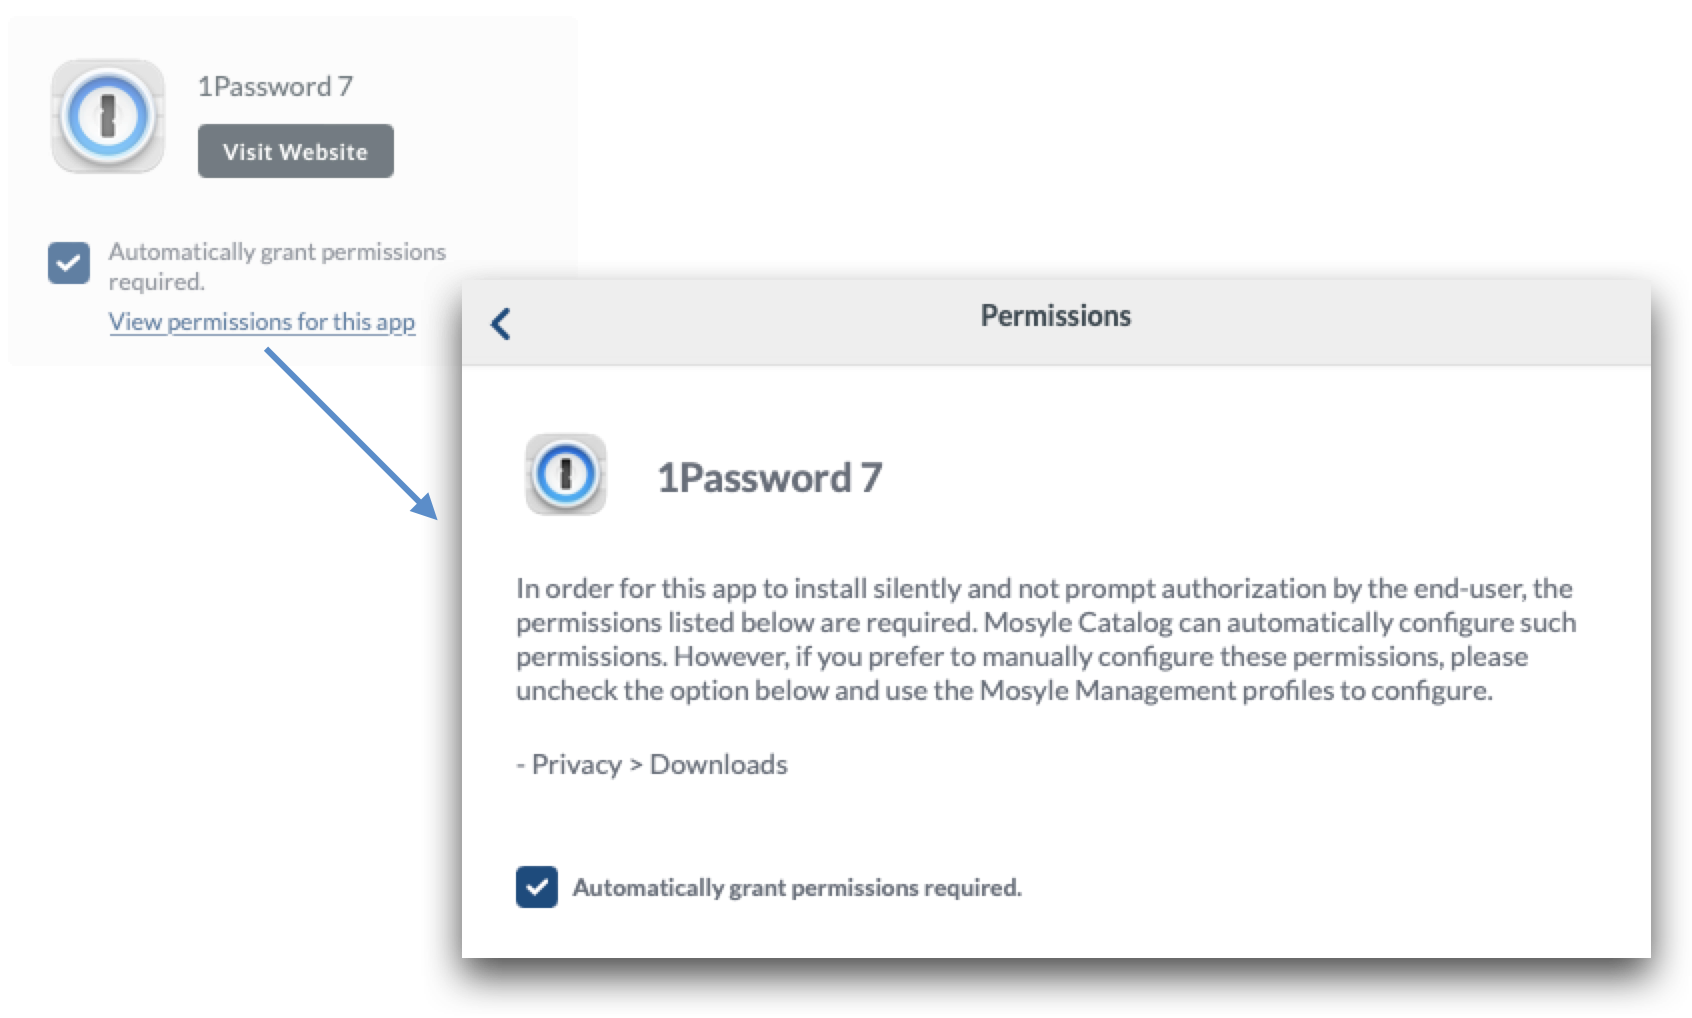
Choose the app or apps to be installed and select the users, grade levels, devices, and/or groups to assign the profile to in the Profile Assignment area.
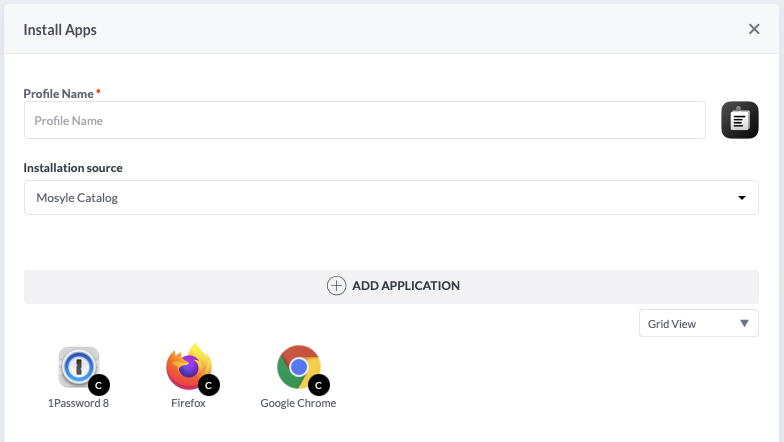
Installation Options
Similar to installing apps from Apple Apps and Books, additional options can be configured when creating an Install App profile in Mosyle.
Administrators can control whether apps are automatically installed or available in Self-Service. If choosing the option to “Do not install all apps after saving the profile”, it's recommended to use the option to “Show the apps in Self-Service” so that users can manually request the installation of the apps as needed.
If the option is selected to “Install all apps after saving the profile”, apps will be immediately installed after enrollment if the device is assigned to a User, Grade Level, Course/Class Period, Shared Device Group, or Dynamic Device Group that is assigned to the Install App profile. Administrators can also choose whether apps that have been manually removed should be automatically reinstalled under “Show advanced options”.
Updating Apps in Mosyle Catalog
The Install App profile with Mosyle Catalog can be configured to automatically update apps without having to manually update and host the PKG and DMG. Mosyle scans for updated versions of the apps every 24 hours. If an updated version is detected, commands to update the apps can be sent automatically. There are multiple options regarding app updates to choose from:
- Update outdated apps automatically AND alert end users: Using this option you can configure apps to update automatically after a specified delay period. Users will be prompted that an update is available and the specified amount of time to initiate the update via the Self-Service app. At the end of the timeframe, the update will be run automatically by Mosyle ensuring the app is updated.
- Update outdated apps automatically without alerting end users: Using this option, app updates will run automatically by Mosyle as soon as it is detected a new version of the app is available. Note: This can potentially impact users when using certain applications, as the update could run while the app is in use.
- Do not update outdated apps automatically: Using this option, apps will not automatically be updated. In order for the apps to be updated, Administrators will need to save the Install App profile again or push updates via some other method.
Requests to update apps can also be pushed from Device Information, by clicking the paper airplane option to install/update the app, or requested using Self-Service.
Managing the Removal of Mosyle Catalog Apps
Mosyle Catalog apps can be automatically uninstalled when the Install App profile is edited using the Advanced Options in the profile. To configure the profile so that applications are automatically removed when they are no longer assigned to devices in the profile use one of the following options:
- Do not uninstall apps: Using this option, apps will remain installed on the devices even if the device is no longer assigned to the profile, or the app is removed from the profile.
- Uninstall apps after considering all other assigned profiles: Using this option, apps will be uninstalled from devices if the app is removed from the profile or the device is no longer assigned to the profile and the app is not assigned to the device in any other Install App profiles. Because Mosyle scans all other profiles to ensure the app is not assigned to the device in any other way before uninstalling, the commands to remove the app could take up to 2-3 days.
- Uninstall apps immediately after the profile is saved: Apps will immediately be removed from devices after a change is made to the profile to remove a recipient and/or an app and the profile is saved.
Installation Status
Once an Install App profile is created and assigned to users/devices, the View Details area will display the installation status of the app.
Install PKG
Overview
Mosyle supports the installation of applications not available in the App Store on macOS devices through the Install PKG profile. The installation of these apps require the PKG, DMG, or ZIP file to be hosted so that they are publicly accessible and directly downloadable without redirection and/or user interaction. They can be self-hosted on a local server (such as SMB), third party CDN, or hosted using Mosyle's CDN.
Despite only specifying “PKG” in the profile name, Mosyle supports the deployment of apps from PKGs, DMGs, and/or ZIP files. The PKG must be a flat PKG. It's recommended each PKG only contain a single application.
Adding PKGs
To install PKGs on macOS devices, go to Management > Install PKG.
Before creating the Install PKG profile, the PKG, DMG, or ZIP file used to install the application must be created, hosted, and publicly accessible, requiring no user interaction to download. Many app developers provide a PKG, DMG, or ZIP file that can be hosted and used to remotely deploy the app to multiple devices. If the file is not provided, you can generate the PKG for the app using the Mosyle Manager app (PKGs tab > Add new package > Generate .PKG with Mosyle Manager).
After generating or obtaining the PKG file, it must be hosted so that devices can access and retrieve the file to complete the installation. Mosyle provides its own private cloud hosting solution that allows you to host packages directly in the MDM. If the account has access to the Mosyle CDN, upload the PKG, DMG, or ZIP file under the CDN tab to host.
Once hosted, click the PKGs tab > Add new package > Already have a .PKG.
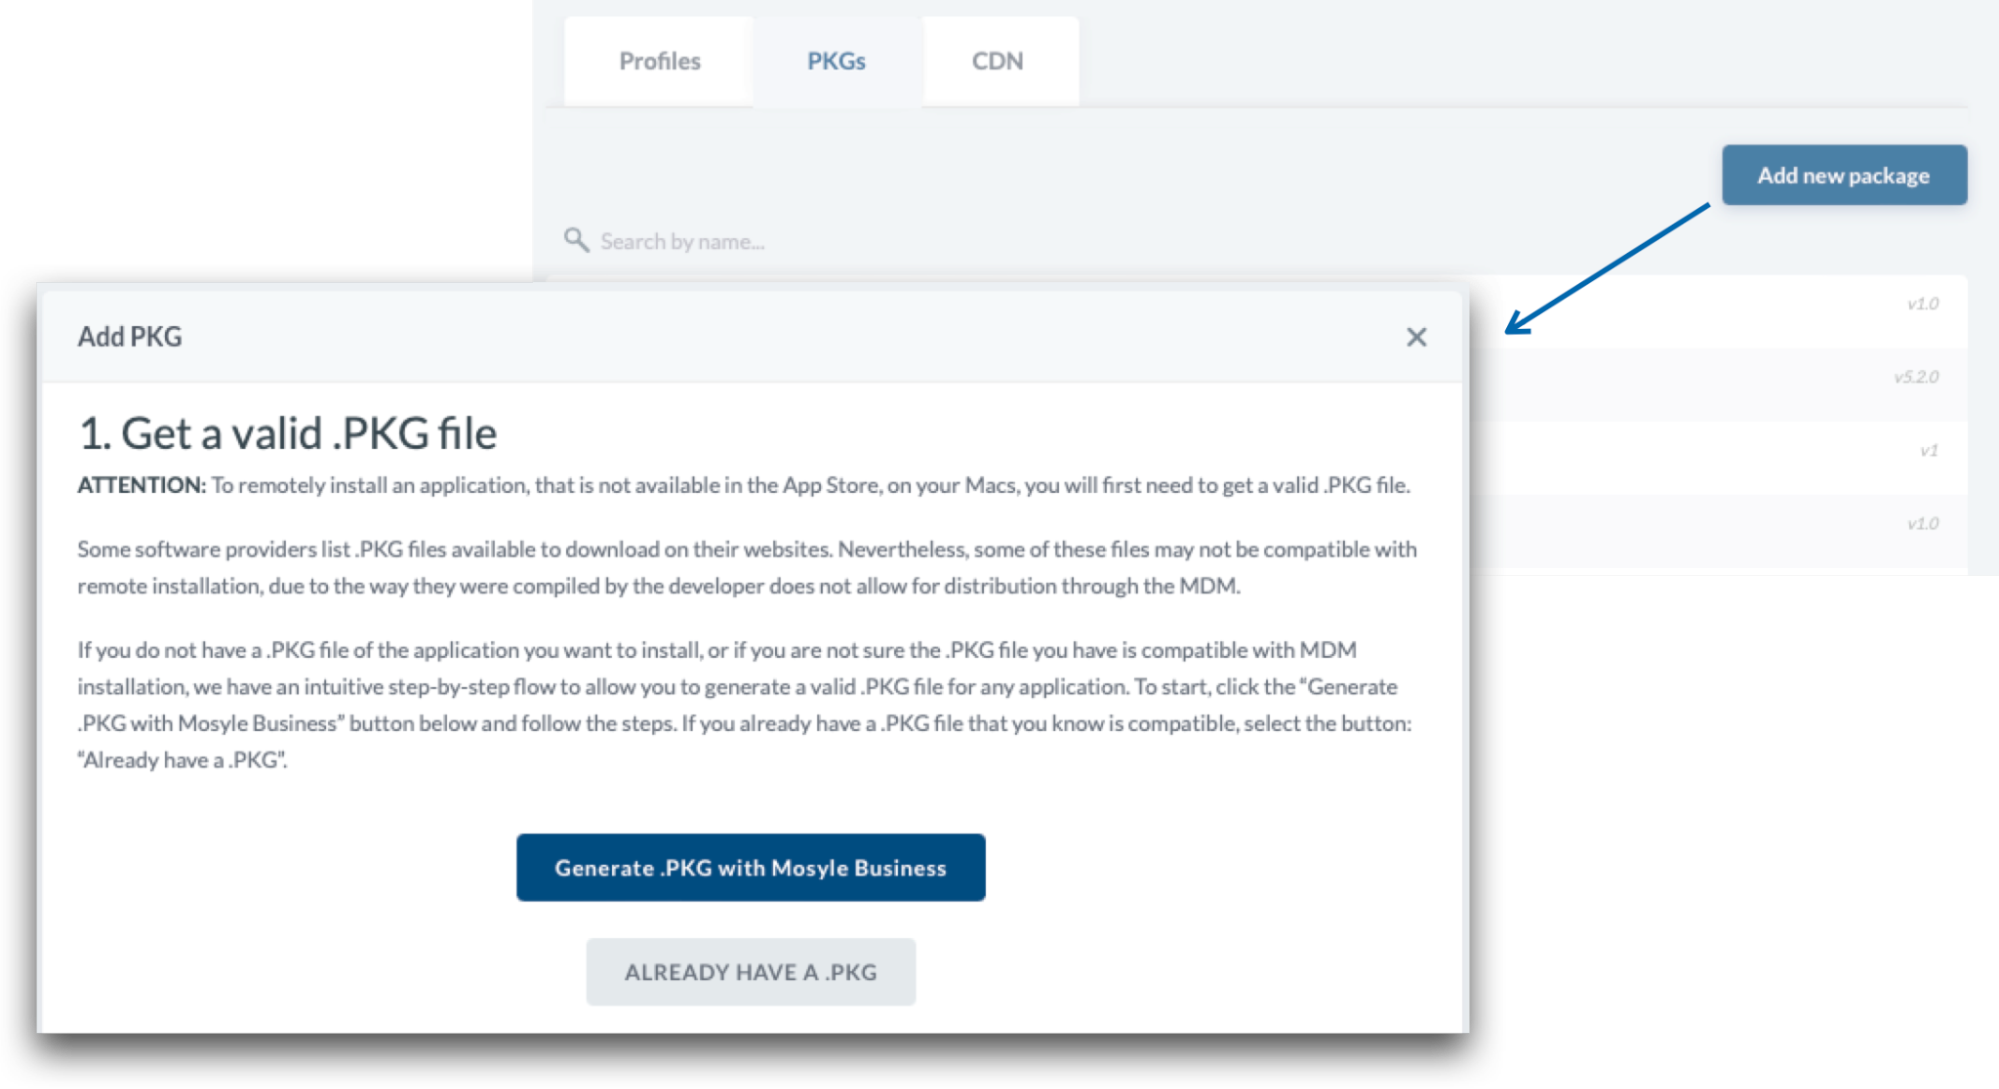
Choose from the following options to configure the app information, which is used to track installation status and if the app is outdated or not:
- Automatically set App info: Mosyle will automatically validate the PKG and retrieve the app bundle ID and version. If hosting internally, do not select this option. After selecting this option, enter the URL for the PKG, upload the PKG to the Mosyle CDN, or select an already uploaded PKG from the CDN. Enter authentication credentials if required.
- Manually set App info: Manually add the app information, such as the bundle ID and version.
When editing or manually entering the app information for the PKG, the following fields are available:
- App Name
- Dropdown menu to select if the file is for an app or an OS update
- URL: Enter the URL of the hosted file, upload the file to the Mosyle CDN, or select an already uploaded file from the CDN
- App Bundle: Enter the bundle identifier for the app. This is used to track the installation status of the app. If the bundle identifier is incorrect, the installation status will be inaccurate.
- App Version: Enter the version of the app that is included in the PKG, DMG or ZIP file. This is used to track whether the app installed on the devices is outdated or not.
- Pre-Install or Post-Install Scripts: Enter any scripts that need to be run either before or after the app is installed. This is useful for license registration purposes.
- App icon: Upload an app icon to the Mosyle console for easy identification of the app within the console and Self-Service.
- Needs authentication: If the PKG URL requires authentication to be accessed, enter it here.
- Validate file integrity: Check the file integrity after downloading the PKG to ensure the intended file is downloaded.
- This app is signed: Check this box if the PKG will need to be installed on devices enrolled via User Enrollment. Signed applications can be installed using Apple's MDM protocol, rather than the Mosyle agent.
- Priority URLs: Add internal or public URLs to have priority during the download. If the device cannot find the file in the listed priority URLs, it will be downloaded using the initial URL entered for the PKG.
Once all app information has been entered, click Save.
Creating Install PKG profile
After the PKGs are created in Mosyle, click the Profiles tab > Add new profile. Name the profile and select any of the PKGs available in the account to be installed on the devices.
If the app is signed and it is being installed on User Enrolled devices, check the box to “Install with Apple Protocol”. This will use the MDM protocol command to install the PKG rather than using the Mosyle agent. Keep in mind, PKGs installed using MDM protocol must contain a single, signed application installed into /Applications. If the app is being installed on devices enrolled using Automated Device Enrollment or Device Enrollment, it's recommended to leave this option unchecked.
Options are available for auto-installation, delayed installation, and whether the app will be available in Self-Service.
- Install all apps after saving the profile: The apps will be automatically installed when the device is assigned to the profile. This includes immediate installation after enrollment if the device is assigned to a User, Grade Level, Course/Class, Shared Device Group, or Dynamic Device Group that is assigned to the Install App profile. If apps are not automatically installed on devices, the installation will need to be manually requested via Device Info in the Mosyle console, or via Self-Service.
- Show an alert pop-up: Choose to notify users of the installation and allow them to delay the installation as needed. Limit the number of times the installation can be delayed.
- Self-Service apps: Choose whether or not the PKGs will show in the Self-Service application for end users to install as needed.
Managing Updates with Install PKG
To deploy updates to apps installed via Install PKG, a new PKG must be created and hosted with the new app version and added to Mosyle. Be sure to update the version field when adding the updated PKG. Once added, the Install PKG profile will need to be updated to select the new/updated version. The old version can be deleted from Mosyle under Management > Install PKG > PKGs, click on the previous version of the app and then click Delete in the bottom-right corner of the profile (optional).
After the new version is added to the profile, if the profile is configured to update apps automatically, upon saving the profile commands will be generated to install and update the app on the devices.
Note: Mosyle uses version comparison to determine if an app is outdated. Be sure the value of any new app versions are greater than the current version.
Managing the Removal of Apps
Some apps installed using the Install PKG profile on devices running macOS Big Sur or later can be considered "managed" and therefore, can be removed using an MDM command. In order for an enterprise app (PKG) to be considered a managed app on macOS, it has to meet certain criteria:
- It must be signed
- It cannot contain any nested packages
- It must contain only a single app
- It must be installed in the /Applications folder
If the app is managed, it can be removed through Device Info under the Apps tab. If the app is not a managed app, or the device is not running macOS Big Sur or later, you can remove the app from the Mac using the uninstaller provided by the app developer, or a custom command such as: rm -rf /Applications/PATH_TO_APP.app
Custom Configuration of PKGs
Applications that require specific configurations, such as a registration code or license key, can be installed on devices using the Install PKG profile. When creating the PKG in Mosyle, enter the configurations necessary as a pre- or post-install script so that they are applied either before or after the installation of the app. Check the app developer documentation for more information on any configuration specifications.
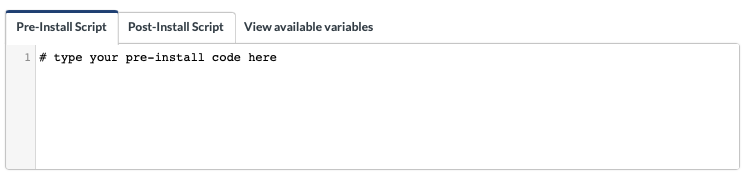
If preferred, the installation of applications with specific configurations can also be done using the Custom Commands.
Installation Status
Once an Install PKG profile is created and assigned to users/devices, the View Details area will display the installation status of the app. The verification that the app has been installed relies on the bundle ID entered when creating the PKG in Mosyle. If the bundle ID for the app is incorrect, the installation status will remain as “Installing” or “Removed” due to Mosyle being unable to match the bundle ID of the PKG with a bundle ID of an app installed on the device.
App Center
Overview
The App Center itemizes all apps installed on managed devices based on platform (iOS / iPadOS, macOS, tvOS). It includes detailed information about an app's name, bundle identifier, category, status, how many devices it's installed on, and if it's managed (iOS / iPadOS).To access the App Center, go to Management > Applications > App Center.
Filter the apps by clicking Add Filter at the top of the screen. Filter the list using the Filter options along the top, or enter search criteria to find a specific device or app. The information provided by the filters is also designed to be sorted with a simple click of a column name or edited with a click of the search.
Commands available along the toolbar of the App Center include:
- Update Info: Pings devices to check in with the MDM. Check a device's last communication in Management > Devices Overview > Click on the device's name > Info
- Export Apps: Emails a report of the apps in CSV or XLSX format
- Remove Apps: Uninstalls managed apps (iOS / iPadOS and macOS 11+). It's recommended to revoke app licenses (VPP).
- Revoke Licenses: Unassign app licenses from selected devices (iOS / iPadOS). Check available licenses in Management > Applications > Apple Apps and Books (VPP) > Update
- Update Apps: Forces apps to auto-update (iOS / iPadOS)
- Manage Apps: Transfers app ownership from user to MDM. The command will prompt users to enter an Apple ID.
- Refresh button: Click the curling arrows to refresh the list
Notes: Manage Apps supports macOS devices running 11 or later. In order for an enterprise app to be manageable on macOS, it has to meet certain criteria: it must not contain any nested packages, it must contain only a single signed app, and it must be installed in /Applications.
Additional Information
Within the App Center you can see the Install app or Install PKG profiles the app is assigned to as well as the installation status of the app. Use the Filters to search for apps installed or not installed through profiles, installation source, managed status, and more.
Click the “View” link under the Profiles column to view the Install app or Install PKG profile associated with the app.
Click the “View” link under the Installed column to view the installation status of the app or PKG. The installation status should reflect the same information that is presented in the “View Details” area of the Install App profile.
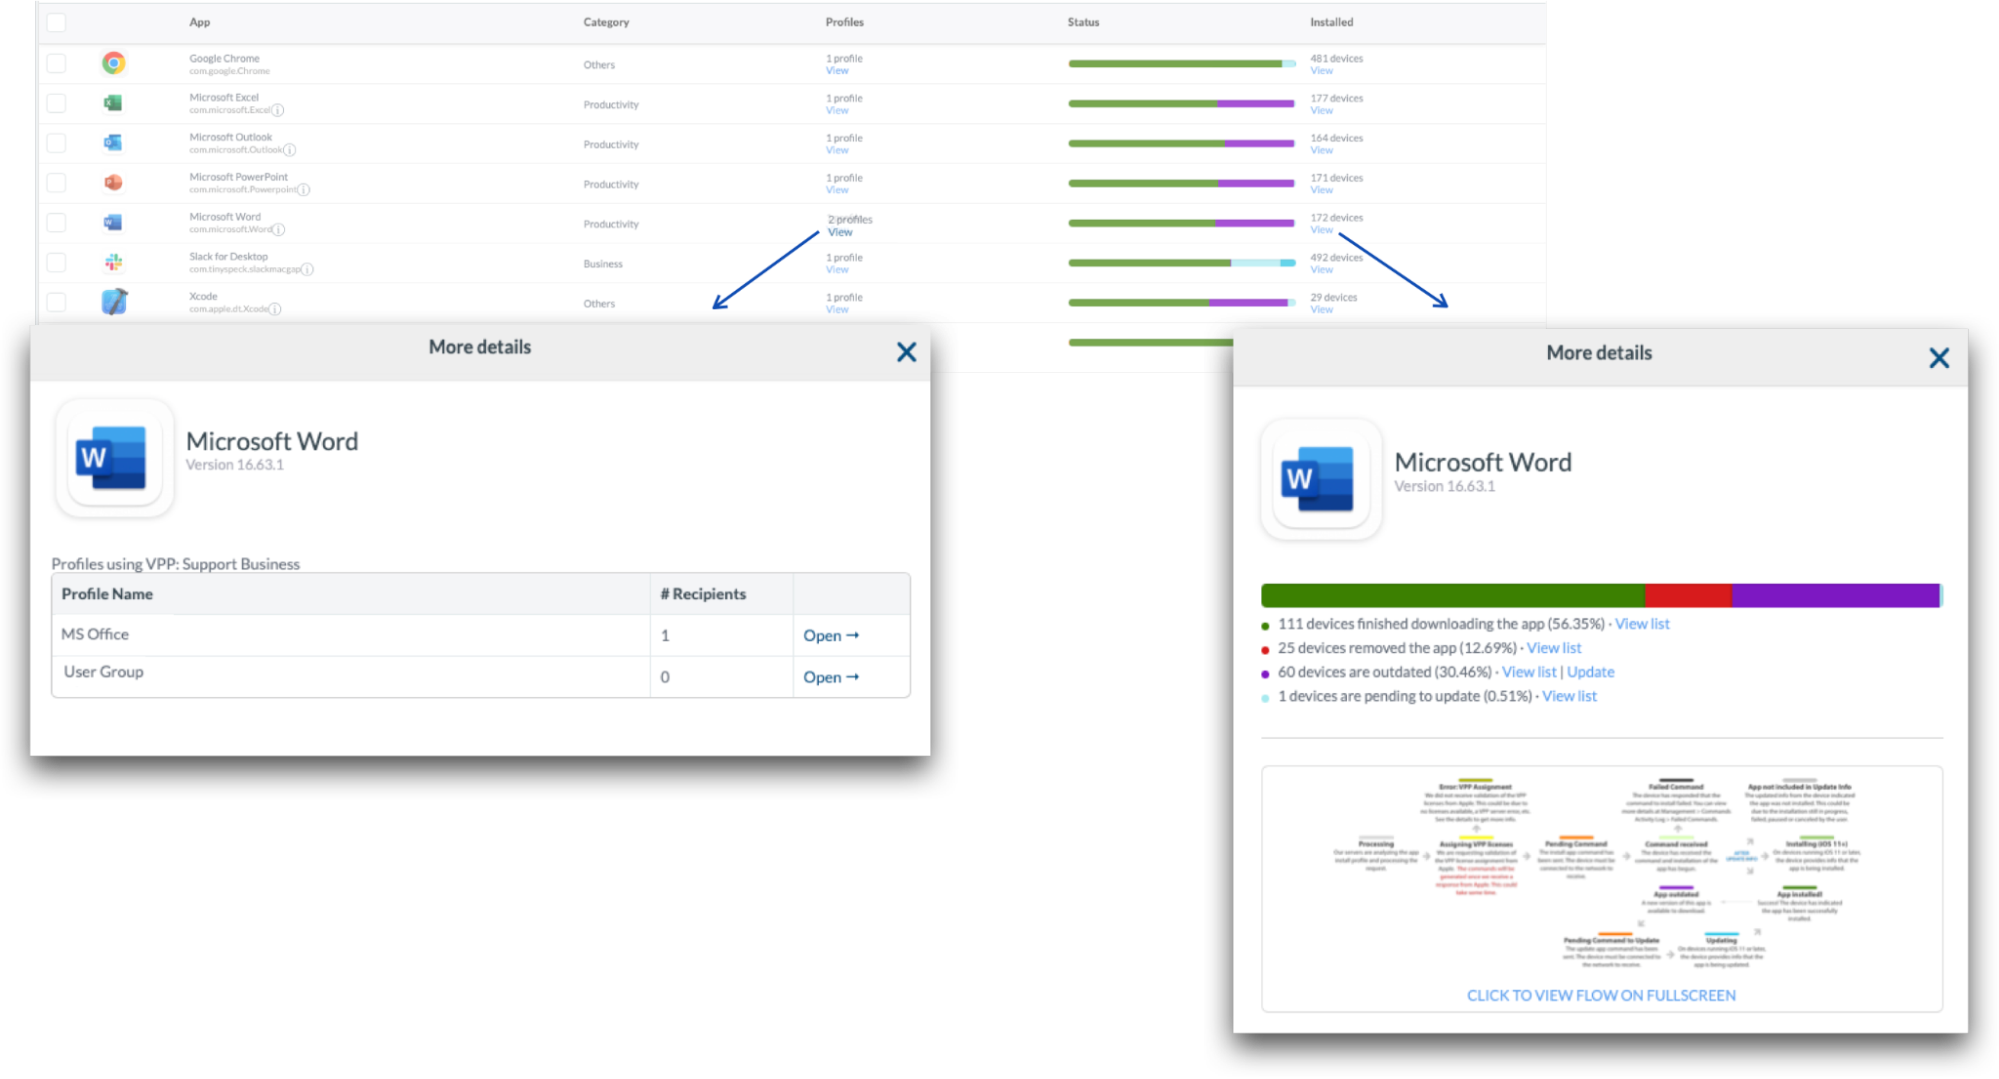
Management Profiles & Device Configuration
Management profiles
Overview
The Management Tab in the Mosyle Web Panel is organized by OS platform and provides Administrators a variety of Management profiles which can be customized to automate the application of policies and restrictions to fit the needs of each school or district. Some profiles have specific requirements such as supervision or a certain OS version. Requirements will be listed within the profile.
Activating and Deactivating Management Profiles
The list of Management profiles can be found in the menu on the left and are organized in alphabetical order, with the exception of Install App and Install Enterprise/PKG. Each account, upon first setup, is equipped with a standard set of commonly used Management profiles. Additional Management profiles are available and can be activated by clicking “+ Activate New Profile Type”. Enter keywords to search for a specific profile, or click the link to read more about the Management profile.
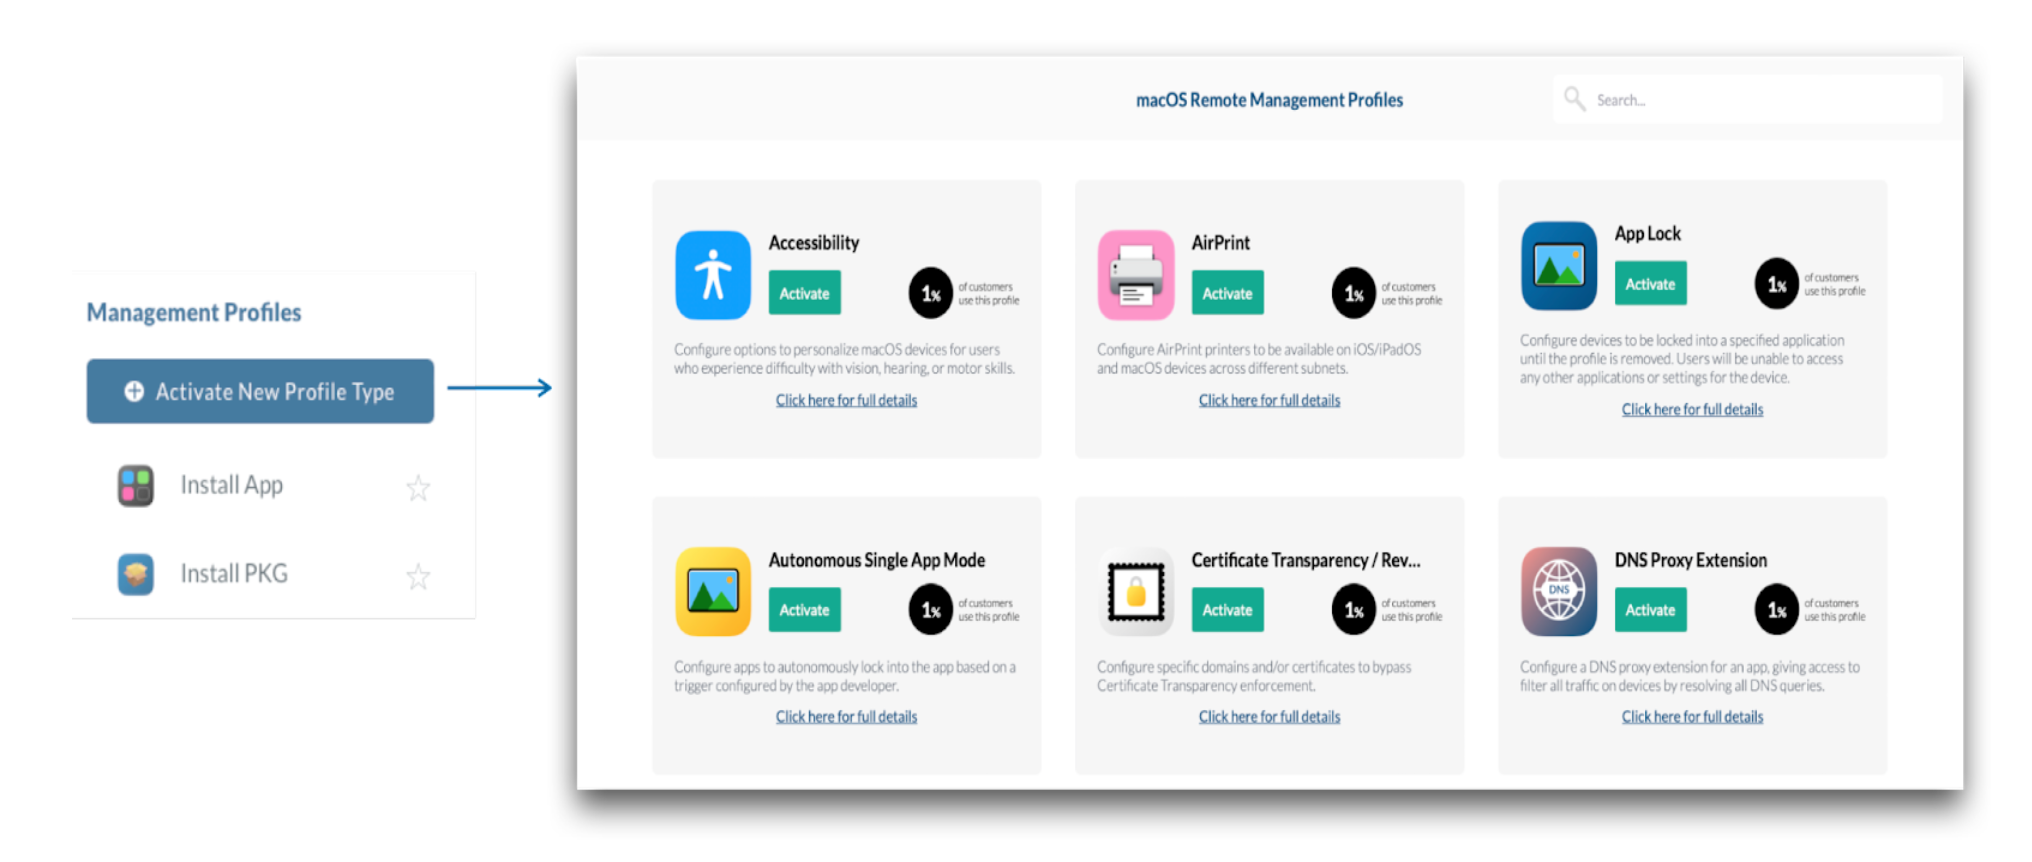
If the school or district does not have a need for a specific Management profile, select the profile from the menu on the left and click “Deactivate”. Only Management profiles that aren't in use and don't have any configuration profiles can be deactivated.
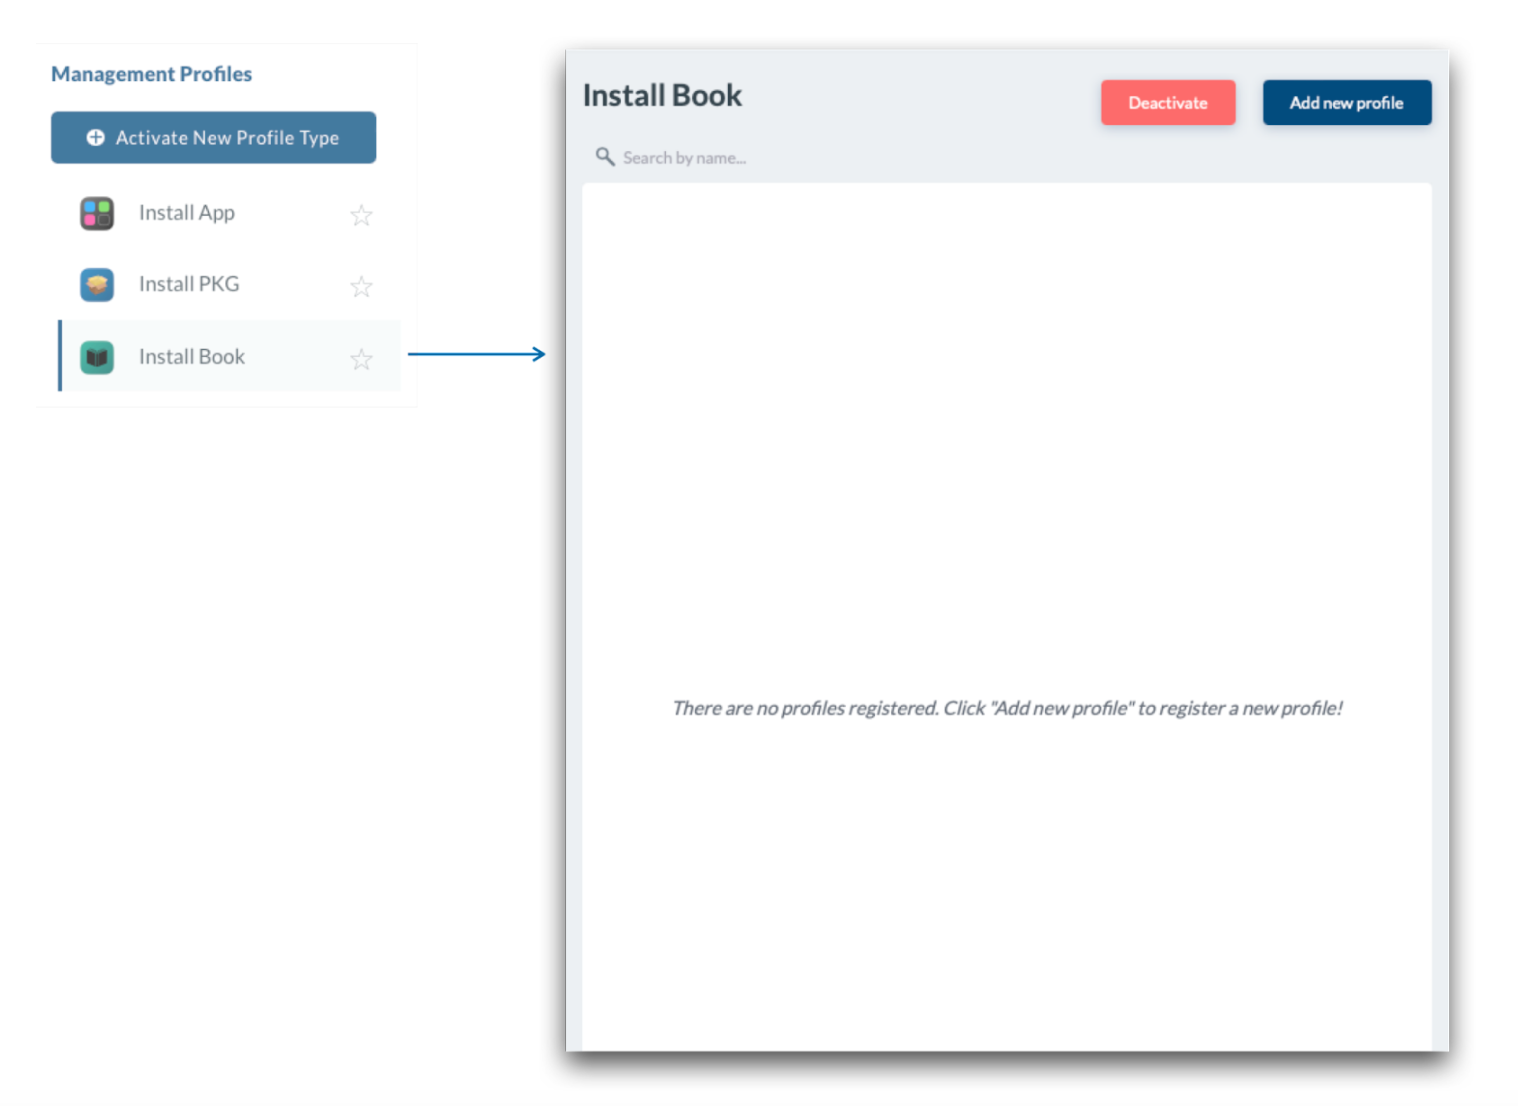
Favorite Management Profiles
Frequently used Management profiles can be marked as a “Favorite” so that they appear at the top of the list, and on the Dashboard under the Profiles. To add a profile as a favorite, click the ⭐ icon. The favorite profiles are customizable for each Admin user.
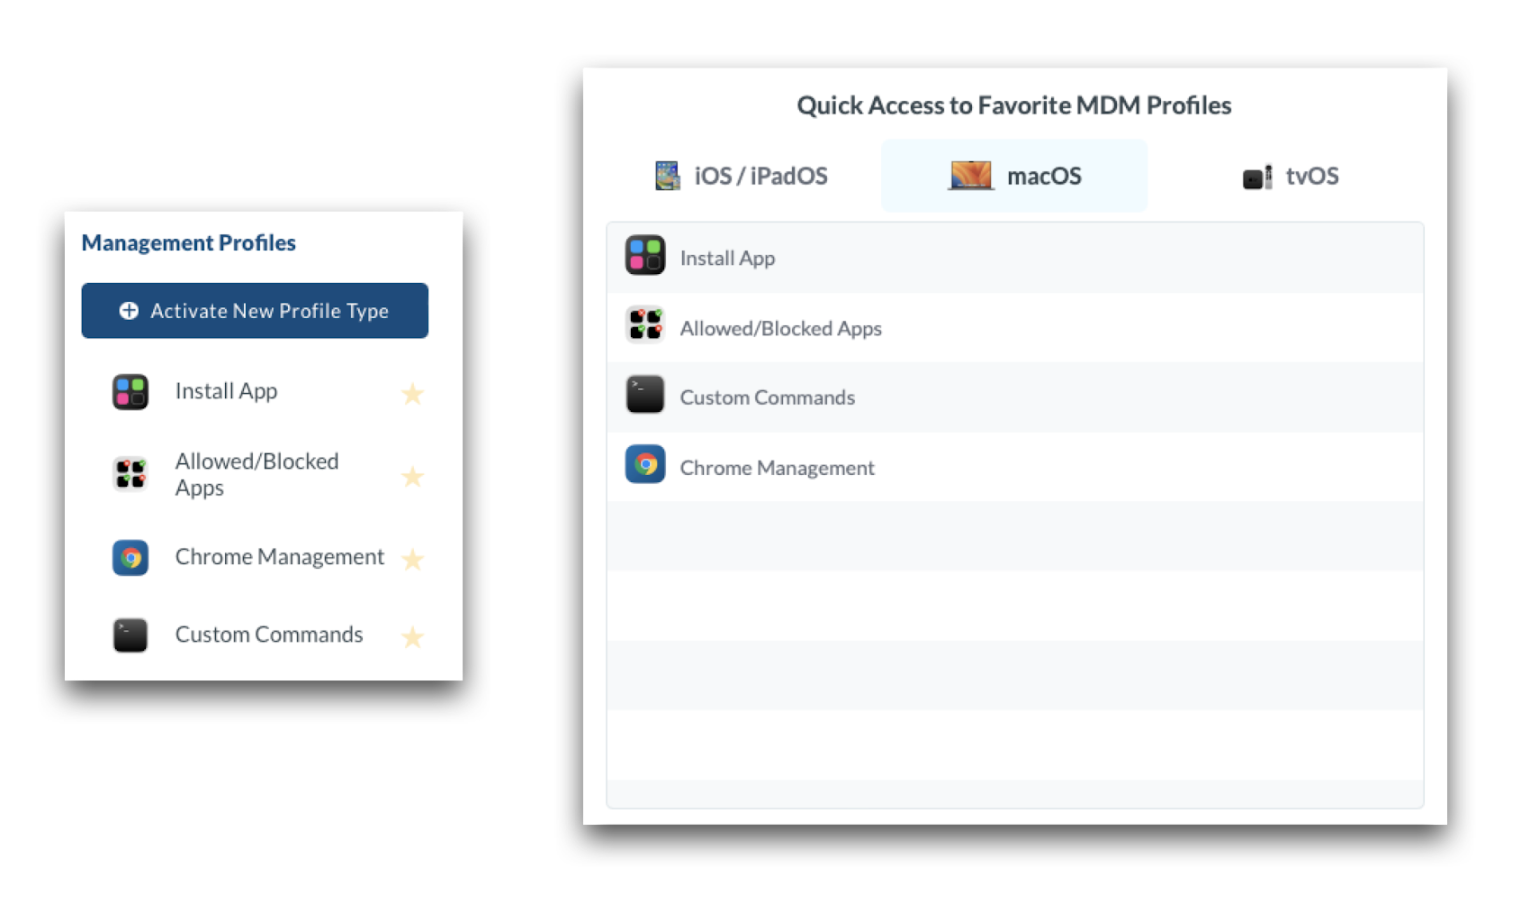
Profile Scopes
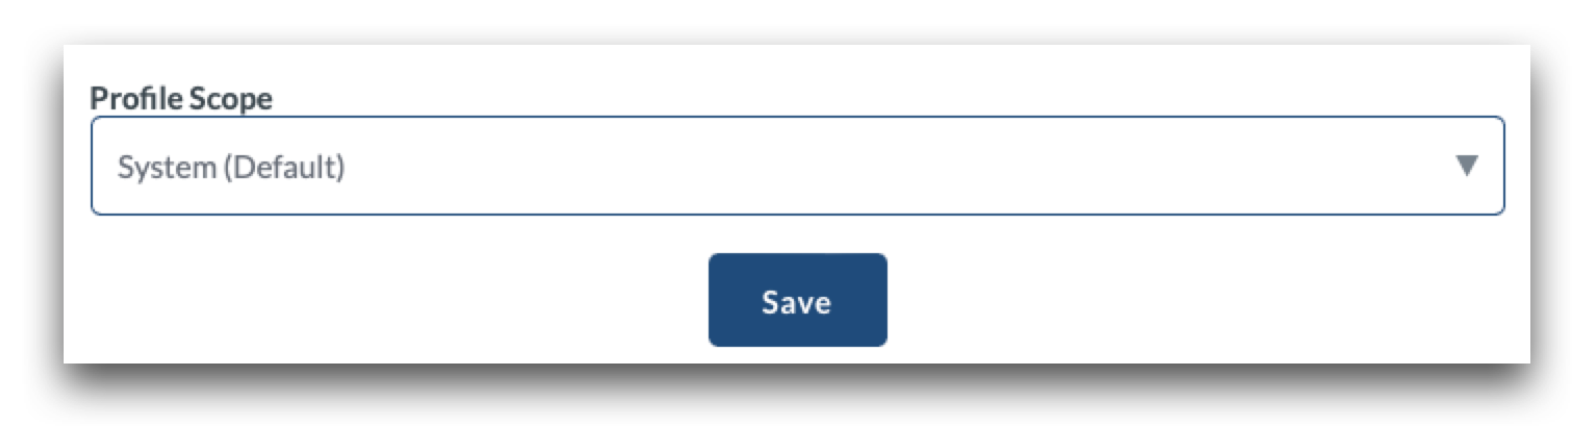
System Scope
Profiles installed at the system scope apply the configured preferences at the system level, affecting all user accounts on the device and show under System Settings > Privacy & Security > Profiles > Device Profiles. Typically, settings configured via Management profiles are enforced on the device and cannot be manually changed.
User Scope
Profiles installed at the user scope apply the configured preferences only for the specific user accounts who are assigned and eligible for user scope profiles. User accounts are eligible for user scope profiles in the following scenarios:
- The account that was manually created in Setup Assistant during Automated Device Enrollment (macOS);
- The Admin account created via the Automated Device Enrollment profile and the option to 'Set as managed' is selected (macOS);
- The Admin account that enrolled the device from Terminal (macOS);
- The Admin account that enrolled the device from Safari (macOS);
- The account that enrolled the BYOD device (macOS);
- Any mobile or network accounts created when the device is bound to Active or Open Directory (macOS);
- Managed accounts created using Mosyle Auth 2 (macOS);
- Any accounts logging into Shared iPad (iPadOS)
When assigning profiles via the user scope, be sure to assign the profile to users rather than to devices. Profiles installed at the user scope on macOS devices show under System Settings > Privacy & Security > Profiles > User Profiles.
Notes:
- If 'Prompt user for account creation' is skipped in Automated Device Enrollment, a user scope is not created on a macOS device unless the local administrator is configured to 'Set as managed'.
- The user scope is created for only one account on devices running macOS 10.12 or later, unless the device is bound to Active or Open Directory or Mosyle Auth 2 is used.
- If a user scope does not exist and is required in the environment, it's recommended to re-enroll the device.
Scheduling Profiles
Management profiles such as restrictions and allowed/blocked apps, provide options for scheduling their automatic installation and removal. This is useful in a variety of environments, some examples listed below:
- Block specific apps during the school day, but allow access after school.
- Lock devices into a specific kiosk or app for a specific class period, but release the lock for all other classes.
For profiles that support time based scheduling, there is an option to apply the profile “Fulltime (24x7)” or “Schedule choosing a time profile”.
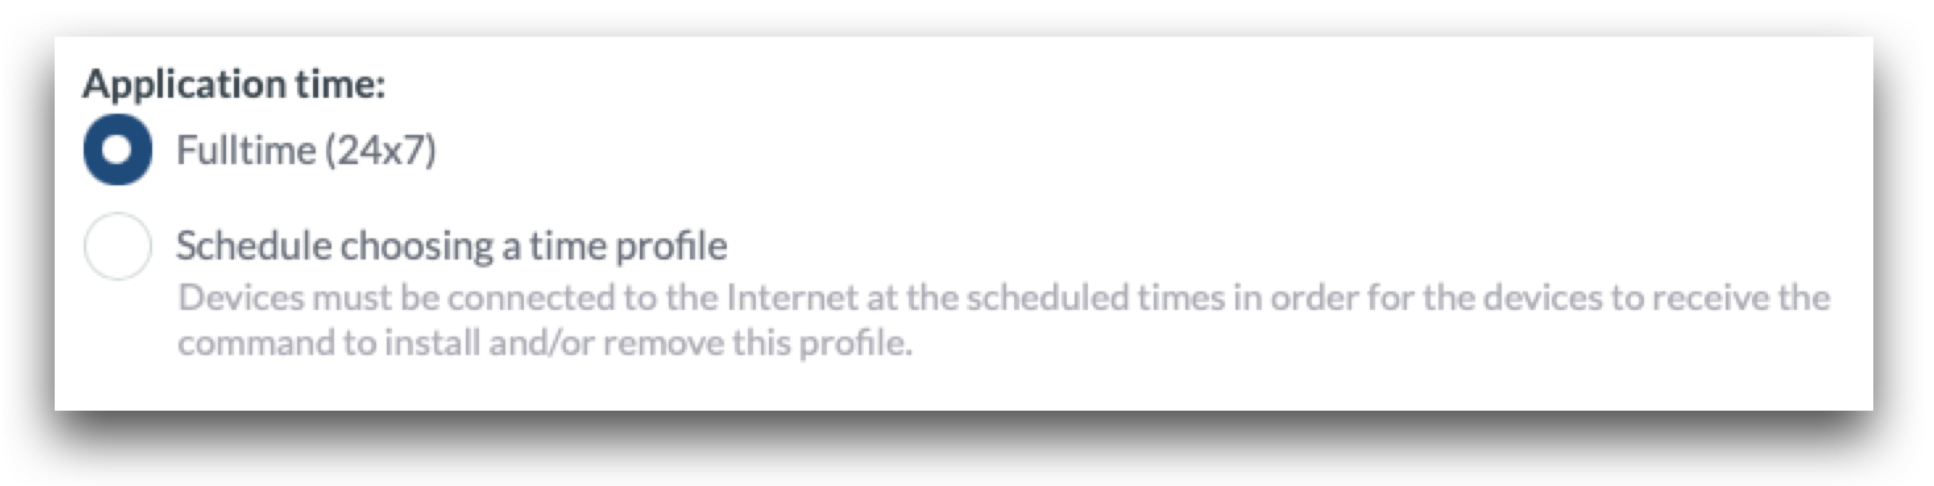
Applying the profile full time will install the profile and enforce the settings until it is unassigned or removed. In the case of an App Lock or Kiosk Mode profile, Administrators have the option to install the profile only once or to resend the profile every 24 hours. When selecting the option to resend every 24 hours, the profile will install and be configured to automatically remove from the device after 24 hours. Mosyle will simultaneously send a command to reinstall the profile. This option for the 24 hour expiration is provided as a potential failsafe for devices in the event they lose network connectivity so that the profile will automatically be removed locally, releasing the device from the App Lock so it can be reconnected.
In a scenario where the profile is not resent every 24 hours, if the device loses network connectivity, the command from Mosyle to remove the App Lock will be unable to go through. If this happens, the device will need to be connected to ethernet, paired with a computer, or erased in order to remove the App Lock and regain access to the device.
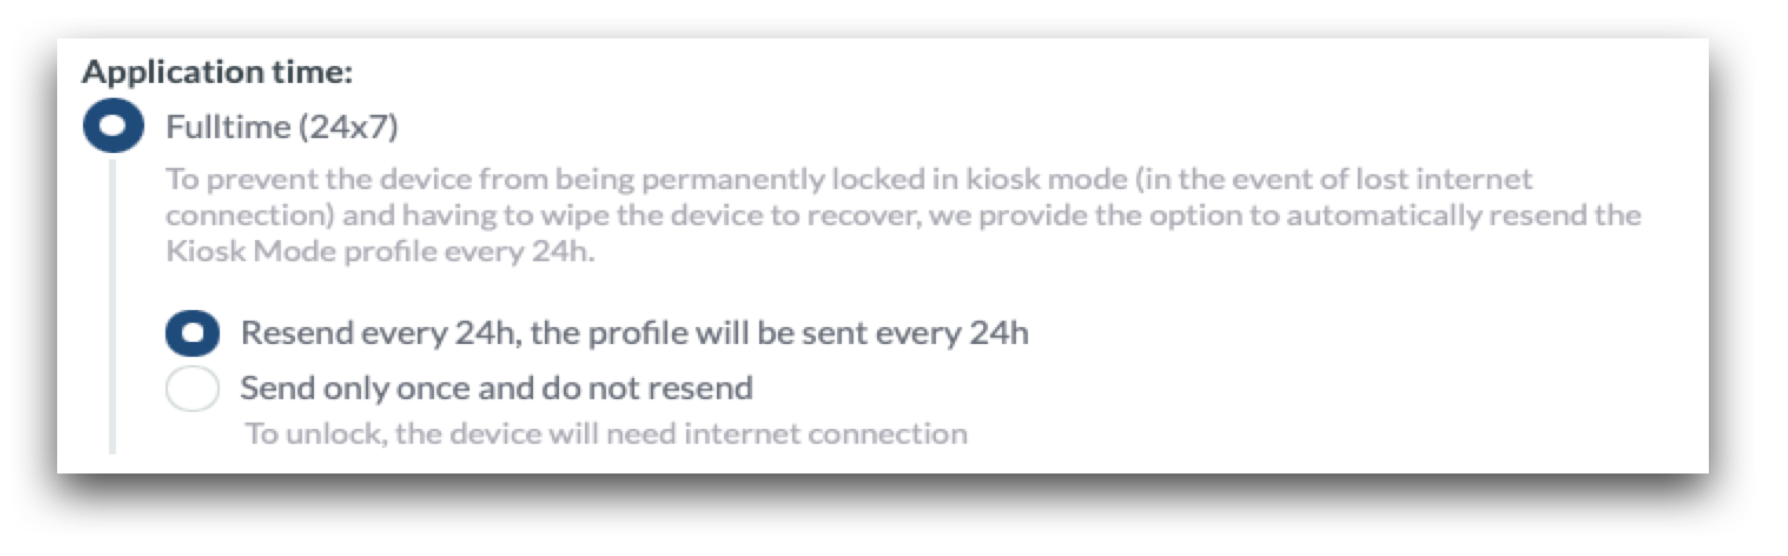
When scheduling the profile using a time schedule, click Select to create a new time profile or choose an existing time profile to define when the configuration will be installed and removed.
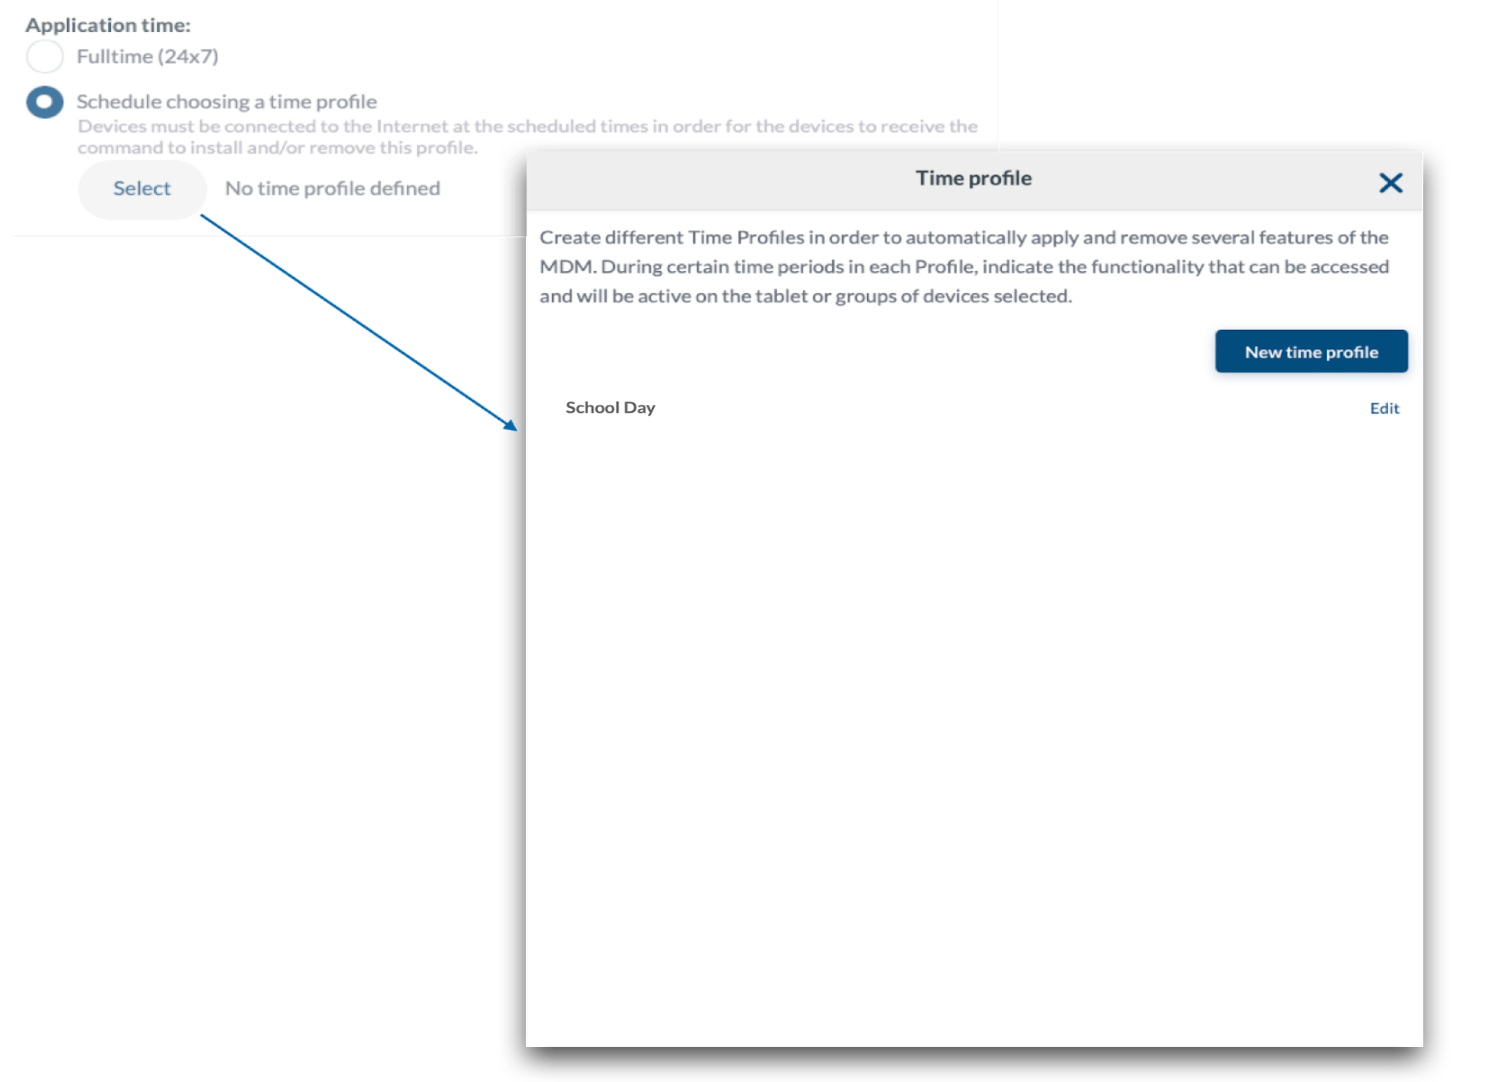
To choose an existing time profile click on the time profile; click “Edit” to edit an existing time profile. To create a new time profile click “New time profile”. Enter a name for the time profile, choose the time zone, and choose whether to restrict access or not, click Save. On the next screen, enter the start time in which the management profile will be sent, and an end time to designate when Mosyle will send a profile removal command. Select the days the schedule will be applied and click Add time. When finished, click the back arrow in the upper left corner and then select the time profile to apply it to the management profile.
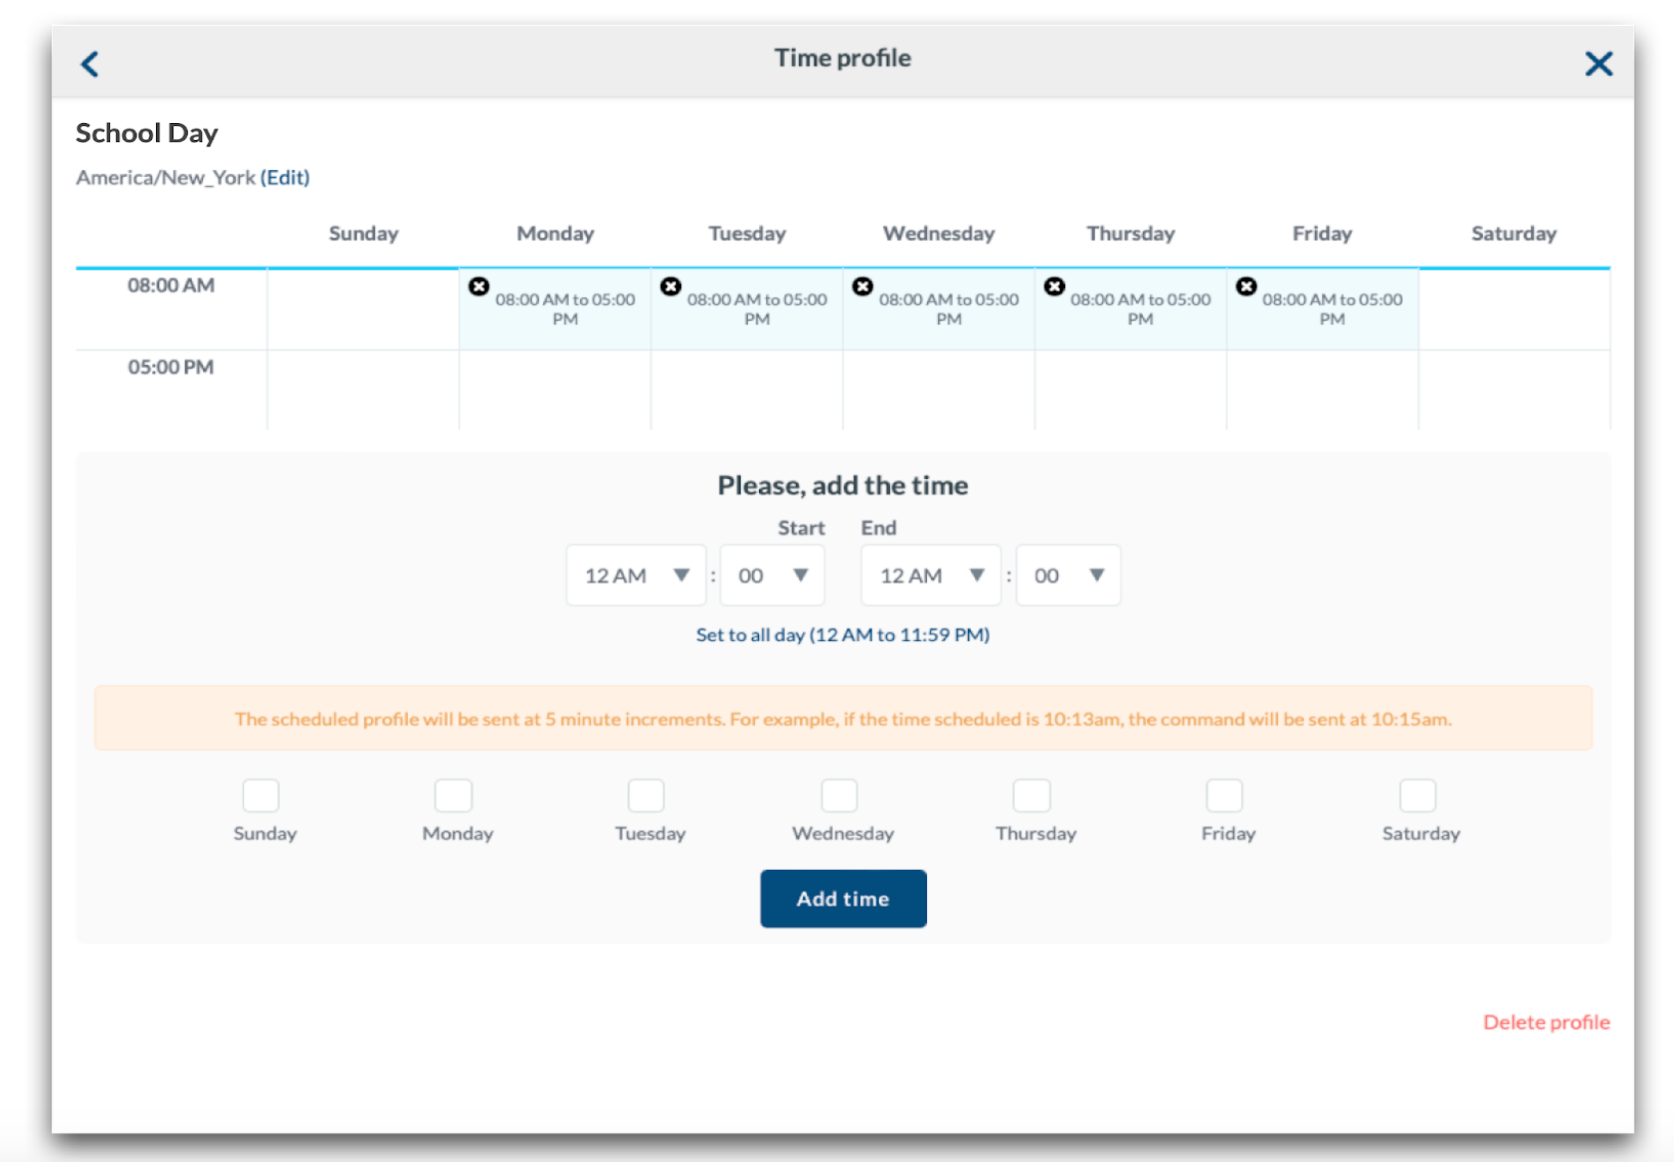
Installation Options in Profiles
Some profiles include additional installation options within the profile to control when the profile is pushed to the devices. The options include:
- Do not reinstall the profile during the assignment/login: This will prevent the profile from reinstalling on devices it is already installed when users login to the device, or when the device is assigned to the user.
- Do not remove the profile when the assignment is removed or during logout: This will prevent the profile from being removed if the user or device is removed from the assignment of the profile or after a user has logged out.
- Do not auto-install the profile after saving: This will prevent the profile from automatically installing after the profile is saved or after the profile is assigned. The profile will show "On Hold" in the Device Information screen and under the profile Compliance Status until it is manually installed.
- Show this profile at the Self-Service Page: This will add the profile to Self-Service in the Education app under the “Profiles” tab so users can install on-demand as needed.
Using Variables in Profiles
Many profiles support the use of variables to automate the inclusion of user or device information in profile fields, saving administrators time. Variables pass user information based on the data contained within each user's profile under the Organization tab. Check the link within the profiles to view the available variables. Check the box to indicate the profile is using variables to ensure the payload is properly configured.
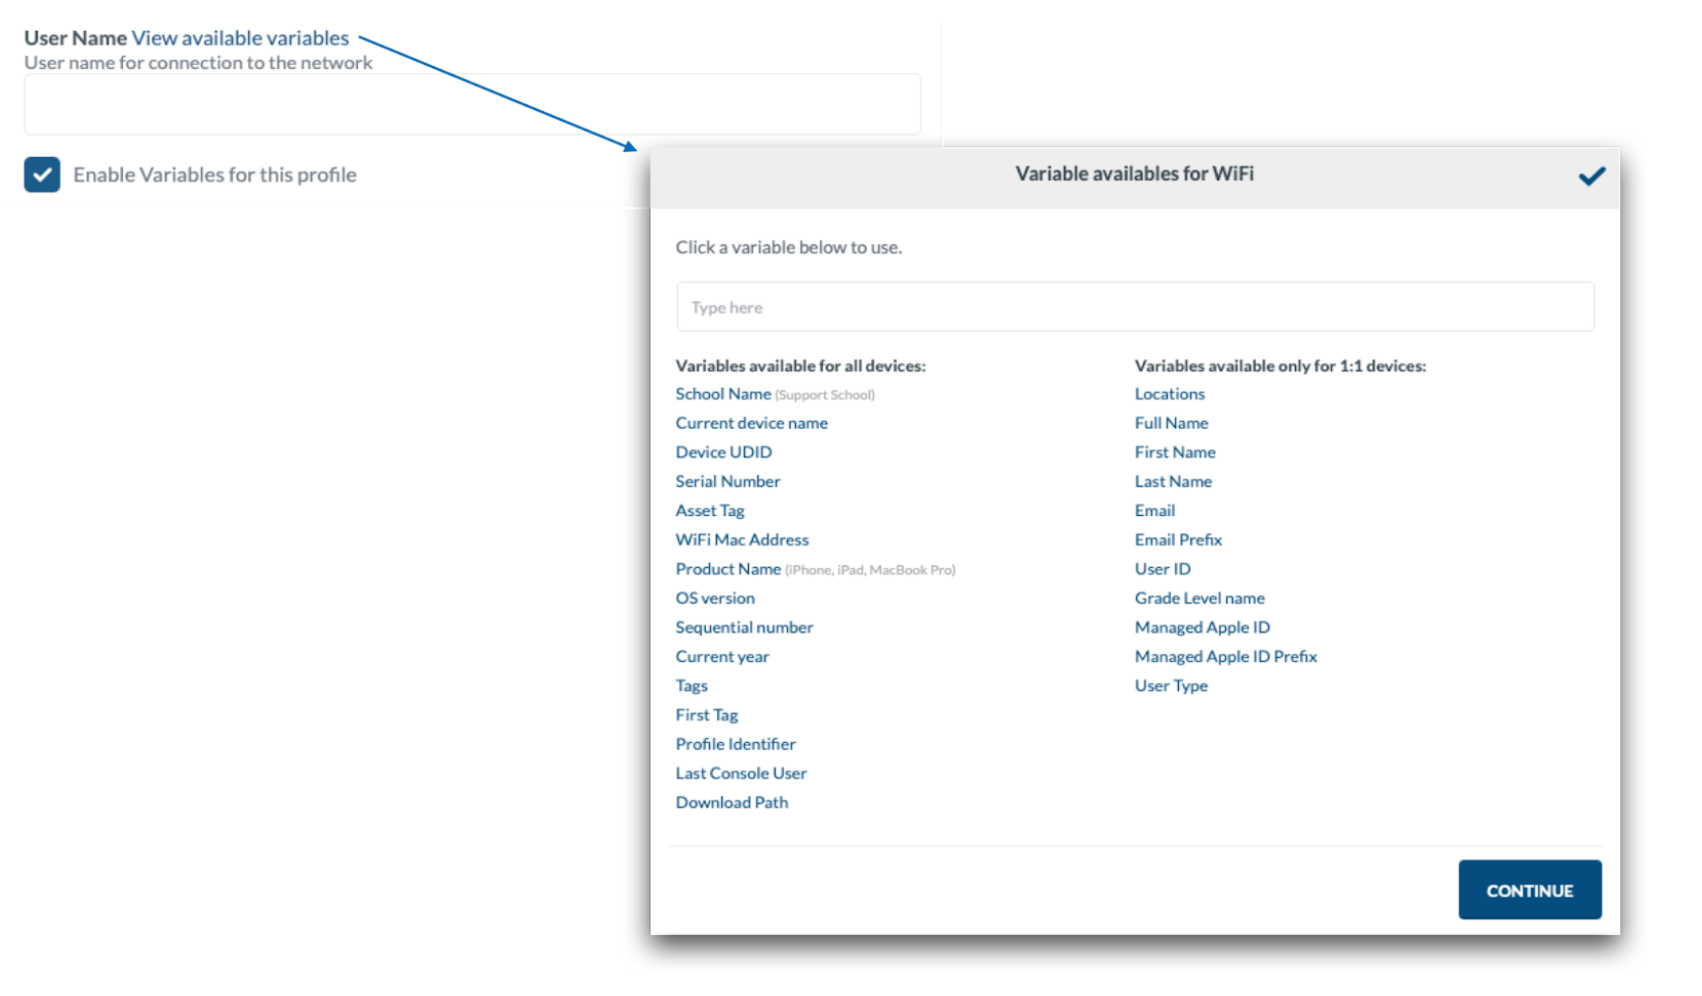
Compliance Status
After a Management profile is created and saved, the profile Compliance Status will be displayed and accessible under the “View Details” link for the profile. Devices with the profile installed will be listed, along with devices where the profile is pending to install, either because the device is turned off or offline, or devices with the profile removed. At any time a Push can be sent to call devices to the MDM server to retrieve the command to install the profile.
Profiles showing a compliance status as “Not compatible” will occur if the device does not meet compatibility requirements of the profile, or if the profile contains variables and Mosyle is unable to fill the variables. For example, a profile using user variables such as User ID or Email, but the device is not assigned to a specific user. In this scenario, the variables are unable to be filled, therefore the profile will be listed as “Not compatible”.
Commands Activity Log
Overview
The Commands Activity Log provides an overview of all pending and failed commands. Filter commands, send a push to the devices, or clear specific commands with a few clicks. To access the Commands Activity Log, go to Management > Devices > Commands Activity Log.
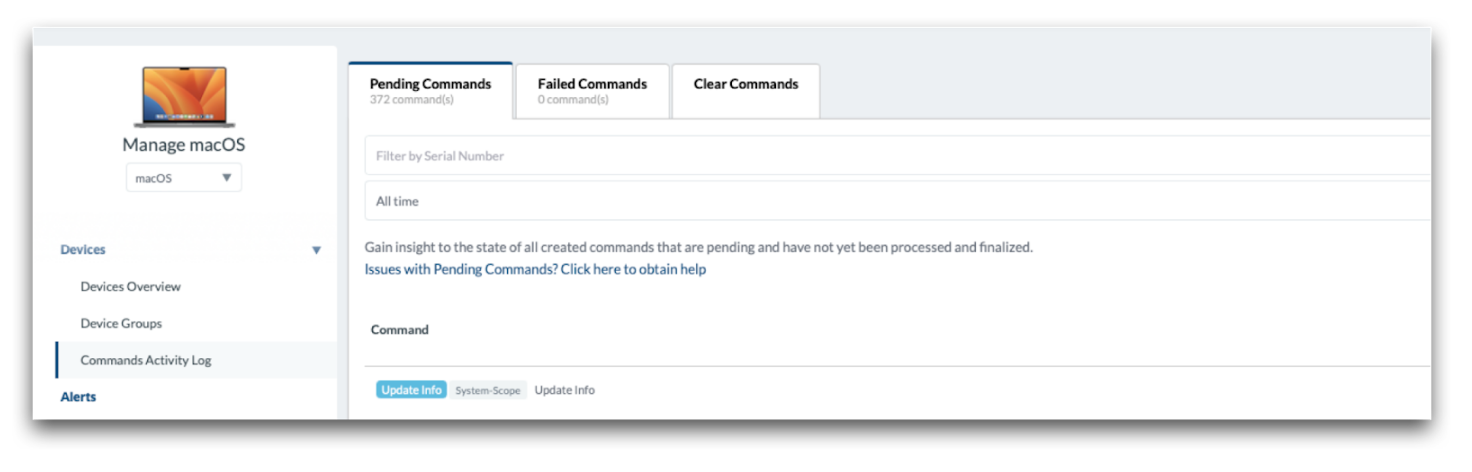
Pending Commands and Failed Commands
The Pending Commands tab shows commands that have not been delivered to or acknowledged by devices. The Failed Commands tab shows commands received by devices but failed or received some other error. Ten commands are shown per page with information about the type of command, the scope, the device's name, the device's serial number, the date of the command, and the last time the device communicated with the MDM.
Administrators can filter the commands by serial number and then narrow their search by time frame, including today's date, this week, this month or all-time, or by type of command. After filtering the commands, click Send a Push to Devices to communicate with the devices and resend pending and failed commands.
If the commands remain pending or failed, troubleshoot your local network for firewalls or proxies, or get in touch with the Mosyle Support team for assistance. Click Export to request a CSV file of the current pending or failed commands. Review the export for any trends, such as a common last connection date for devices, or repeat devices in the list of pending commands. This data can assist with isolating communication issues with devices.
Notes: If a device's last connection was prior to the command date, it's possible the device is no longer communicating with the MDM. First, check to make sure the MDM profile is still installed on the device, then select the device and send an Update Info command from Management > Devices Overview.
Clear Commands
The Clear Commands tab lists all commands available for clearance. Filter the commands by date, devices, pending or failed. Select the commands from the list and click Submit to clear them.
Commands that have been cleared will not be automatically resent to devices. If a command is cleared, it will need to be manually regenerated to be sent to the device.
If a historical analysis is needed of cleared commands, click View Cleaning History. A pop-up will show who, when, and how many commands were cleared. To restore commands sent in the last two days, click Restore.
Managing OS Updates
Overview
Mosyle encourages administrators to update devices to the latest OS version available when possible. Both major and minor, or incremental, updates can be managed, downloaded, installed, and/or deferred using Mosyle. The OS update process is a two-step process:
- The OS update is first downloaded on the device
- The OS update is then installed on the device
Devices must be online, supervised, charged, meet the minimum OS requirement, have sufficient storage available, and a battery percentage of at least 50 percent when receiving the OS update command.
Devices cannot downgrade to an older version than their existing version and must be compatible with the version selected. If incompatible, the command will not be sent. Only copies of operating system versions that are actively being signed by Apple can be installed on devices.
Software Delay
The MDM is unable to block or prevent OS updates, however the Software Delay profile allows Administrators to defer OS updates and upgrades. Using the Software Delay profile, Administrators can configure devices so that OS updates are not visible to end users up to 90 days from the release date. Delaying software updates provides time to test the latest release and ensure all apps and systems work as expected before updating the fleet.
The Software Delay settings will not prevent the MDM from pushing OS updates to devices or querying available OS updates.
To create a Software Delay profile, go to Management > Click the Software Delay profile. Choose from the options available.
Delaying iOS/iPadOS Updates
On iOS/iPadOS devices, you can delay the software updates from being visible to end users for up to 90 days.
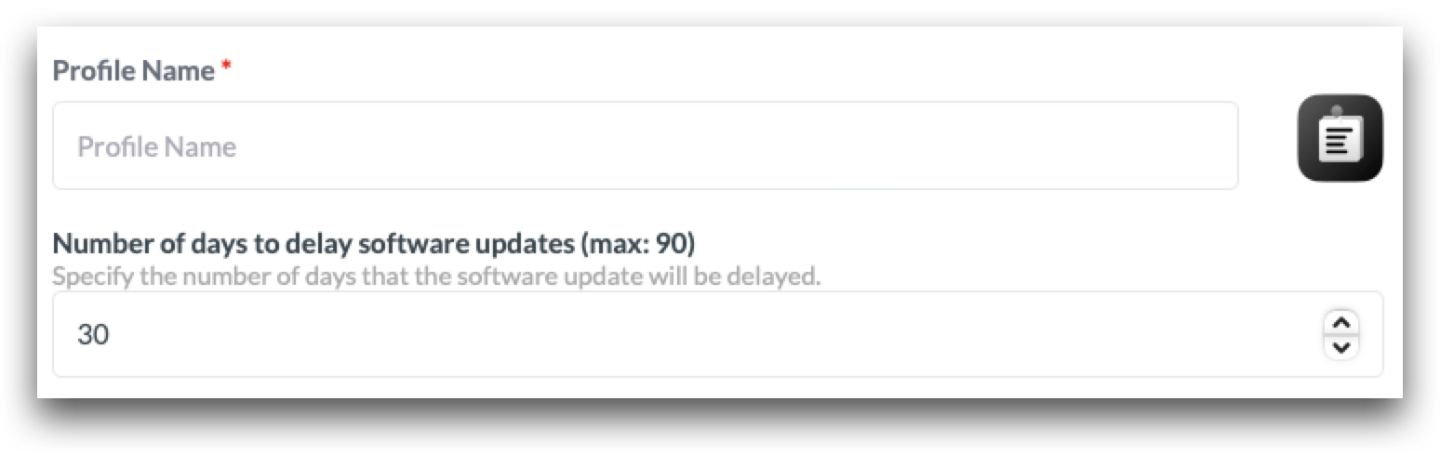
Delaying macOS Updates
On macOS devices, you can delay major or minor software updates, and/or App updates, from being visible to end users for up to 90 days.
The options available when delaying macOS software updates include:
- Delay Updates for both the Operating System and Apps (macOS 11+): This will delay visibility for any and all OS updates and non-OS updates for end users.
- Delay Updates for Apps (macOS 11+): This will delay visibility for any and all non-OS updates, such as Safari updates, for end users.
- Delay Updates for the Operating System (macOS 10.13.4+): This will delay visibility for any and all OS updates, including both major and minor updates.
- Only delay incremental updates for the Operating System (macOS 11.3+): This will delay visibility for only minor OS updates, for example, an update from macOS 12.0.1 to macOS 12.1.
- Only delay major updates for the Operating System (macOS 11.3+): This will delay visibility for only major OS updates, for example, an update from macOS 11.6.2 to macOS 12.
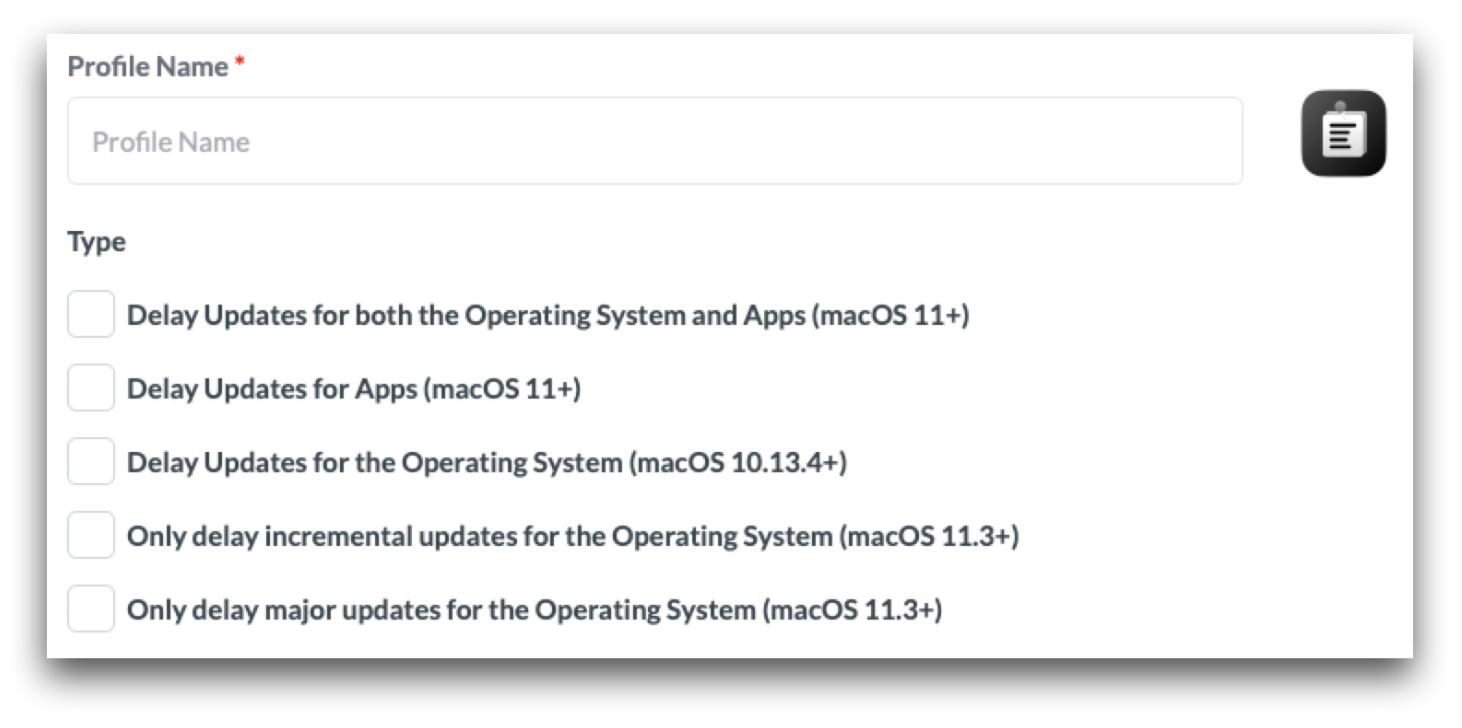
Software Update Settings
Software Update settings include which OS will show available to end users on iOS and iPadOS devices when more than one is available, automatic security updates (iOS/iPadOS 16+), and background OS update behavior on Mac computers.
To create a Software Update profile, go to Management > Click the Software Update profile. Choose from the options available.
The Software Update profile does not push OS updates. To send commands to update the OS on devices, use Devices Overview or Single Shot.
iOS/iPadOS Software Update Settings
Recommendation Cadence (iOS/iPadOS 14.5+ and tvOS 15+): The software updates that will be visible when more than one is available.
Automatic Security Updates (iOS/iPadOS 16+): Configure the automatic security update settings on the device.
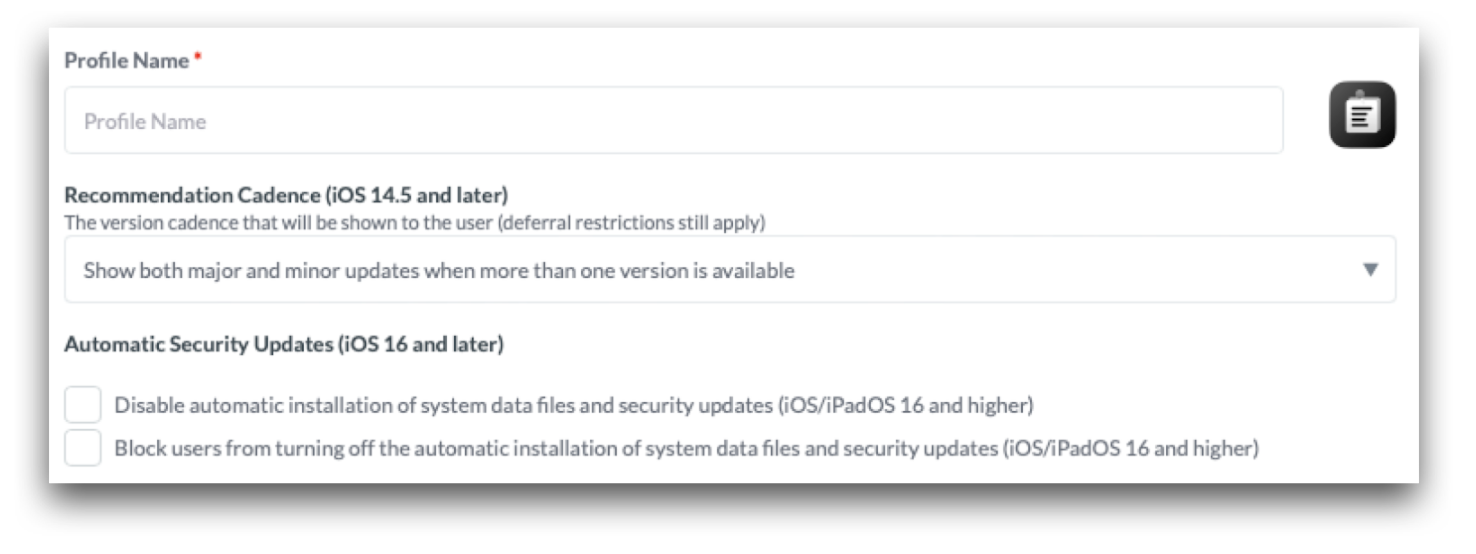
macOS Software Update Settings
The Software Update profile configures the advanced options on macOS devices in System Settings > General > Software Update > . If the profile is installed, the options will be grayed out for users.
Once configured, native OS protocols will control when the macOS device is updated. This is similar to configuring these settings natively on the device but without allowing the end-user to change it afterwards.
Available options for macOS devices:
- Specify the software update server (macOS 10.15 or earlier)
- Allow installations of beta or pre-released macOS releases
- Automatically install app updates from the App Store (macOS 10.15+)
- Automatically install macOS updates (macOS 10.15+)
- Automatically check for updates (macOS 10.15+)
- Download newly available updates in the background (macOS 10.15+)
- Install system data files (macOS 10.15+)
- Install security updates (macOS 10.15+)
- Restrict app installations to admin users only (macOS 10.15+): This option will prompt Admin credentials in order to install OS updates, including when the OS update is pushed from the MDM.
More information about each of the options above can be found in Apple's Change Software Update preferences on Mac documentation.
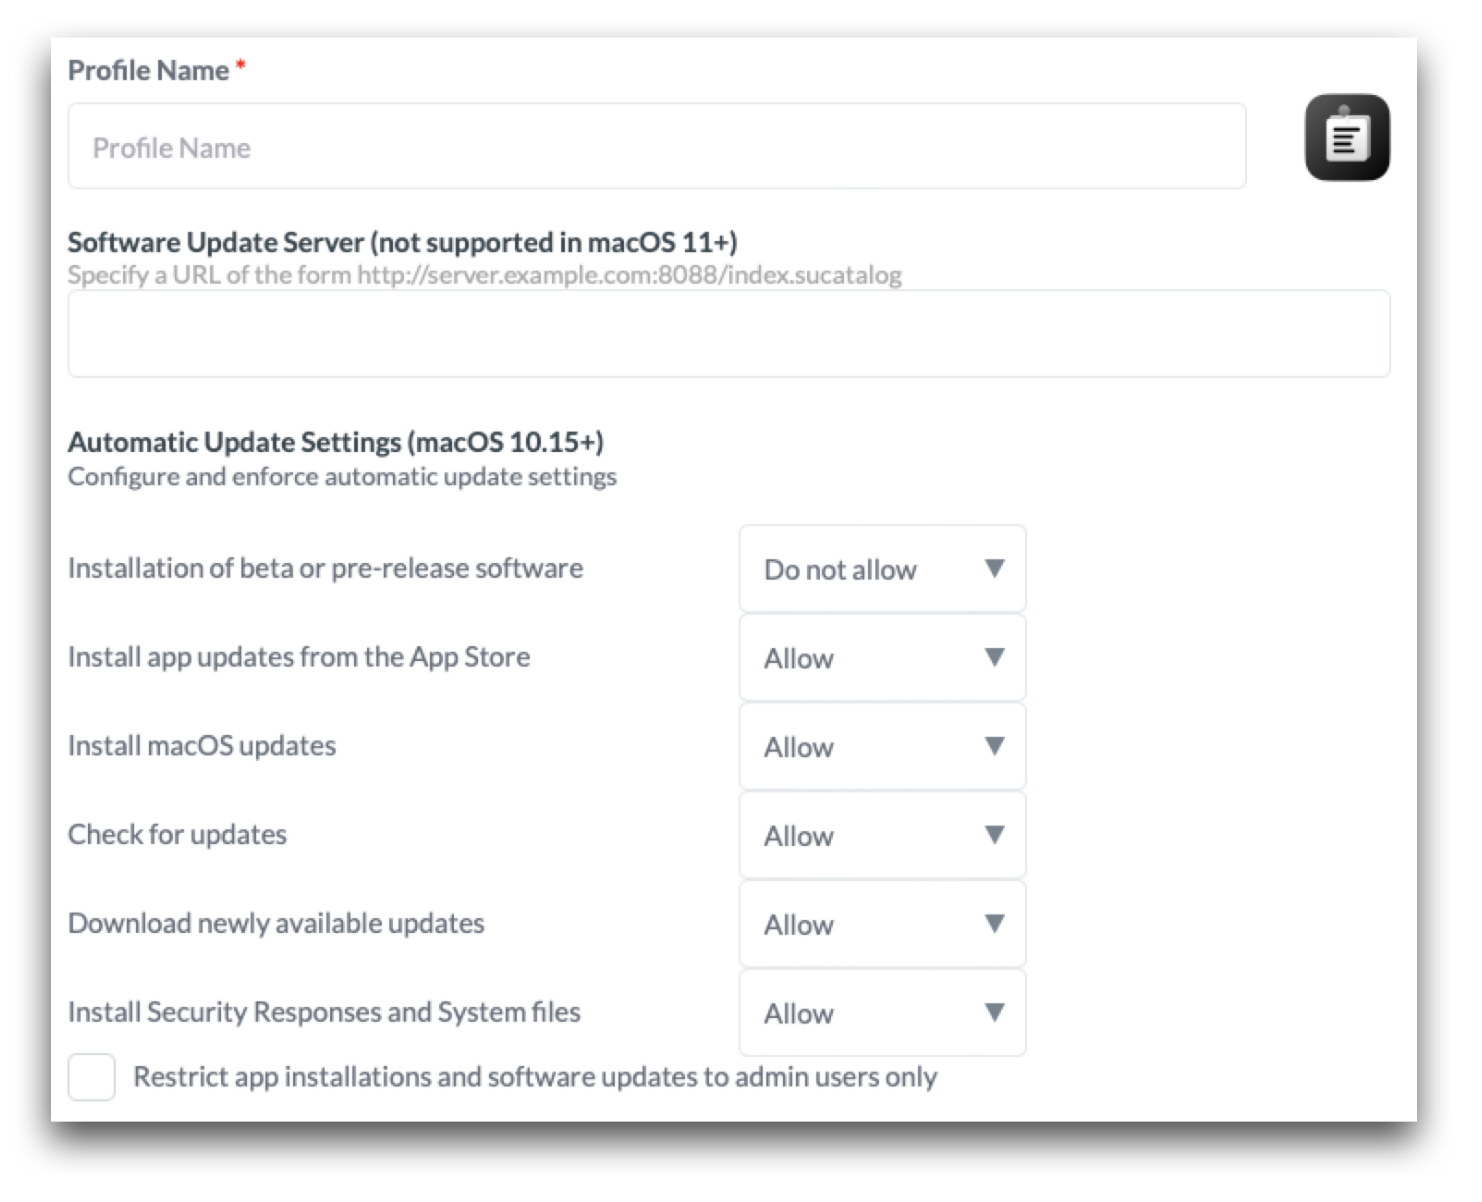
Deploying iOS & iPadOS Updates
Devices will report the latest available OS updates to the MDM via the AvailableOSUpdate query. Any additional OS updates available are identified using Apple Software Update Servers and the software update ID for the device. Updates that have expired, or are no longer signed by Apple, cannot be pushed from the MDM.
Devices running iOS 10.2 or earlier, must be supervised and enrolled through Automated Device Enrollment in order for the MDM to push OS updates to the device. Devices running iOS 10.3 or later just need to be supervised.
If an iOS/iPadOS device has a passcode, the user will need to authorize the update by entering their passcode, allowing them to defer the update a limited number of times. After the user reaches the limit, the system will prompt to update every time the device returns to the home screen.
Update through Devices Overview
Update the operating system (OS) on iOS, iPadOS and tvOS devices in Management > Devices Overview. The toolbar shows the command based on the platform selected, such as Update iOS or Update tvOS, and offers multiple options for updates:
- Download or install the software update, depending on the current device state (Default behavior): This will either download the software update if it hasn't already been downloaded, or install the software update if one has been downloaded.
- Download the software update without installing it
- Install an already downloaded software update
After selecting the command, select the OS version to install. Check the status of the update in Management > Devices Overview > Click on the device's name to bring up Device Info > Operating System Version.
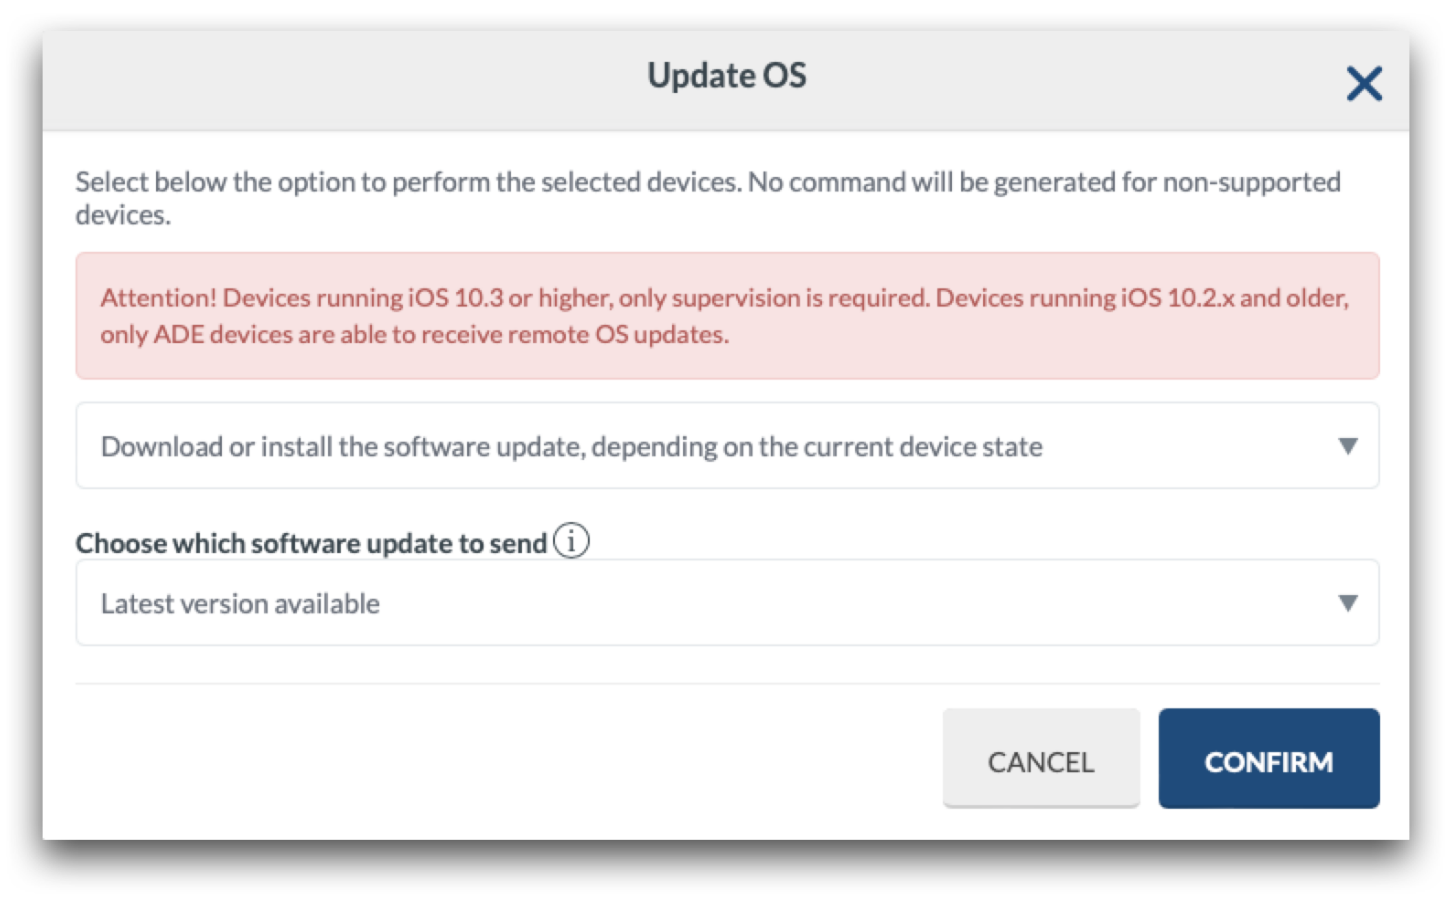
Update through Single Shot Profile
Update the operating system (OS) on iOS, iPadOS and tvOS devices in Management > Management Profiles > + Activate New Profile > Single Shot. The Single Shot profile provides the ability to send the commands to update the OS at a time that is convenient for users, such as outside of school hours. Since the OS update is performed in two steps, it's recommended to configure two Single Shot profiles:
- The first to download the OS update: Choose the action 'Update iOS' and the option 'Download the software update without installing'. Choose the OS version to download.
- The second to install the OS update: Choose the action 'Update iOS' and the option 'Install an already downloaded software update'. Choose the OS version to install.
Choose when the commands will be sent - when saving the profile and based on a schedule, only when saving the profile, or based on schedule only. The option “when saving the profile” includes when the profile is saved and when the device is enrolled or assigned to the profile. When scheduling the commands, it\’s recommended to schedule at a time that will not impact device use.
Deploying macOS Updates
Devices will report the latest available OS updates to the MDM via the AvailableOSUpdate query. Updates that have expired, or are no longer signed by Apple, cannot be pushed from the MDM.
Devices running earlier versions than macOS 11 must be supervised and enrolled through Automated Device Enrollment. Devices running macOS 11 or later, only supervision is required. Mac computers with Apple silicon must have a bootstrap token to allow the MDM to push and install software updates.
Update through Devices Overview
Update macOS on devices in Management > Devices Overview > More dropdown menu > Update macOS. The command downloads and/or installs the version available to devices.
The list of available macOS versions across the fleet will be displayed in the pop-up window, where administrators select the version to update the devices. If the device is not compatible with the version selected, or the version selected is lower than the macOS version running on the Mac, the command is not generated. Administrators can send or schedule the command. If scheduled, the command will be available for users to run from the Self-Service application after the days-long delay expires.
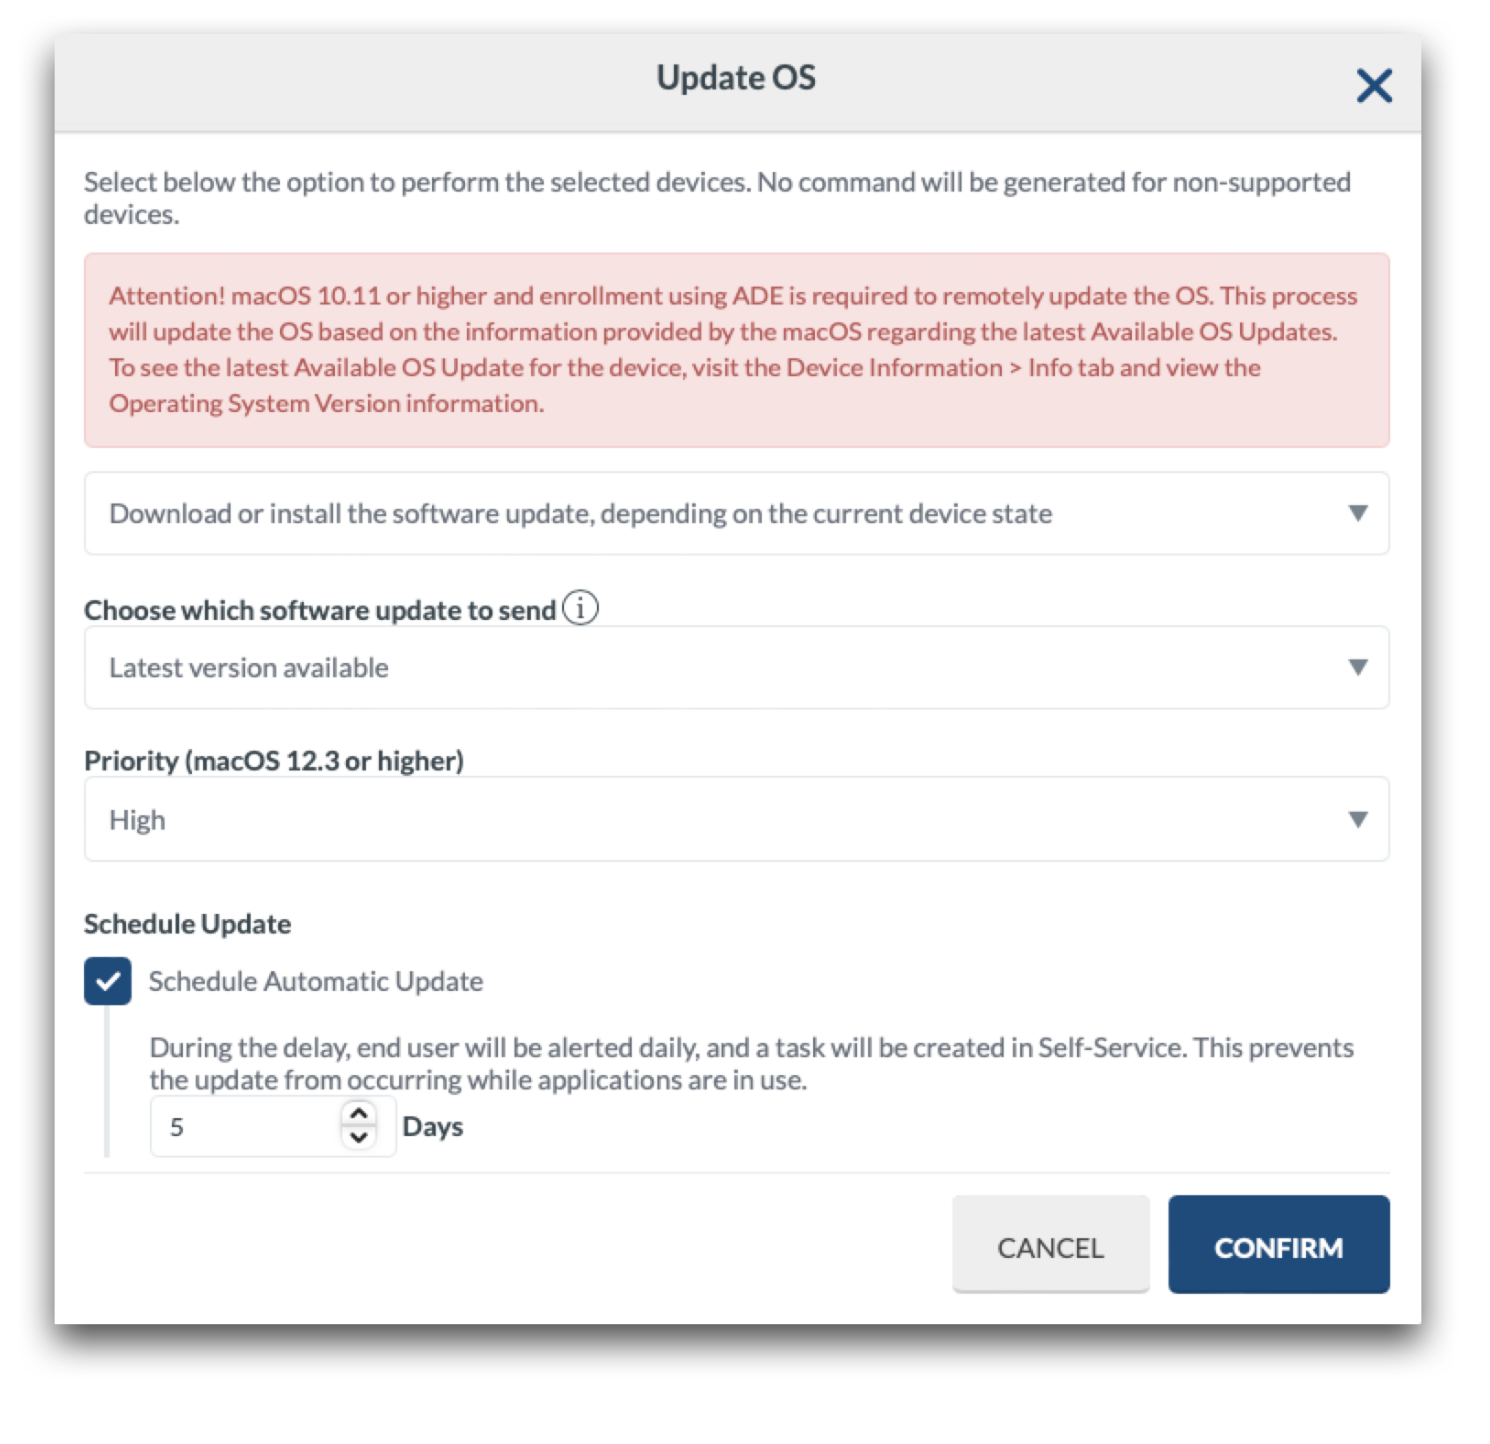
Available Commands
- Download and/or install the software update, depending on the current device state
- Download the software update without installing (macOS 11 or later)
- Download the software update and trigger restart countdown: This option is available to install the OS update immediately (InstallASAP). The command will immediately trigger the installation of an already downloaded software update, however if a software update is not already downloaded, the macOS will download the OS update and then immediately install after showing the restart countdown notification to the end user.
- Download the software update and notify the user via the App Store
- Download the software update and install it at a later time
- Download and/or install the software update, but will force a restart (with potential data loss; macOS 11 or later)
The Priority dictates the priority of the OS update. If set as “Low” the standard behavior will occur. If set as “High”, the macOS will interpret the command as if the user requested it manually on the Mac.
Update through Single Shot Profile
Update macOS on devices in Management > Single Shot. The Single Shot profile provides the ability to send the commands to update the OS at a time that is convenient for users, such as outside of school hours. Since the OS update is performed in two steps, it's recommended to configure two Single Shot profiles similar to the iOS/iPadOS updates.
Choose when the commands will be sent - when saving the profile and based on a schedule, only when saving the profile, or based on schedule only.
Automating OS Updates
Automate OS updates for devices in your school or district using a combination of Device Groups and two Single Shot profiles. Doing this will ensure the devices download and install any updates as soon as they are available. To do this, follow the steps below.
-
Create a Dynamic Device Group to identify devices that have available updates using the criteria: "OS Update" is "Available".
The Device Group will update daily and automatically add any devices that are reporting a software update is available. As soon as the devices are updated, they will no longer meet the criteria for the Device Group and will be removed from the group and no longer receive the commands to download/install software updates until a new software update is available.
-
Create a Single Shot profile to Download the OS Update on devices that are identified as having a software update available. Using the dropdown menu for Action choose "Update iOS/ tvOS/macOS" and select the option "Download the software update without installing" along with the "Latest version available".
Execute the command based on the schedule only and choose a day/time outside of school hours to avoid any interruption in use. You can schedule to run as often as you'd like or as needed. Assign the Single Shot profile to the Dynamic Device Group created earlier. As devices are added to the Device Group, the command to download the OS update will be sent based on the defined schedule.
-
Create a Single Shot profile to Install the OS Update on devices that have been identified as having a software update available and received the command to download the OS update. Using the dropdown menu for Action choose "Update iOS/tvOS/macOS" and select the option "Install an already downloaded software update" and the "Latest version available".
Execute the command based on the schedule only and choose a day/time outside of school hours to avoid any interruption in use. Be sure to schedule for days/times after the command to download the OS update was sent. You can schedule to run as often as you'd like or as needed. Assign the profile to the Dynamic Device Group created earlier. As devices are added to the Device Group, the command to install the OS update will be sent based on the defined schedule.
Additional Options
Considering OS updates can take some time, additional notifications and configurations can be used to alert users that the OS update is required. Some examples are included below:
- Wallpaper profile: Create a Wallpaper profile under the Management tab and assign it to the Dynamic Device Group with an OS update available. The wallpaper can be an image indicating the user has an OS update available and needs to update the device as soon as possible.
- Single Shot profile with Custom Pop-Up message (macOS): Create a Single Shot profile under the Management tab with the Action "Custom Pop-Up Message". Choose to “Send a new Custom Pop-Up Message”, enter a title for the pop-up notification, and choose to show a custom message. Enter the message the end-users will see in the pop-up notification that will be displayed on their Mac. Execute the command based on what will work best in your school or district and how frequently you want the users to be prompted about the available OS update. Assign to the Device Group with an OS update available.
A combination of these additional options along with the Single Shot profile to enforce the OS update has proven successful to keep devices up to date.
Device Restrictions & Passcode Policies
Device Restrictions
The Restrictions profile configures restrictions on iOS, iPadOS, macOS, and tvOS devices. Features may vary based on the type and OS version of the device, and some may require supervision.
To create a Restrictions profile go to Management > Restrictions. Select the restrictions to be applied, and choose the Application time (Full time or according to a time profile). Assign the profile to users and/or devices and click Save.
If multiple Restriction profiles are installed on a device, the OS will combine all settings for the most restrictive configuration.
Common iOS/iPadOS Restrictions
Below is a list of common restrictions applied to iOS/iPadOS devices:
- Do not allow device name change: Users cannot modify the name of the device in Settings (iOS 9 or higher)
- Do not allow Wallpaper change: Users cannot modify the device wallpaper (iOS 9 or higher)
- Do not allow passcode change: Users cannot add, change, or remove a passcode to access the device (iOS 9 or higher). This includes Touch ID or Face ID.
- Do not allow News: Users will not have access to the News App (iOS 9 or higher)
- Do not allow modifications to account settings: Users can't create new accounts or change user name, password, or other settings associated with their account. Accounts include-- Apple ID, Mail, Twitter, Facebook, Flickr and Vimeo
- Do not allow Find my Device: It turns off Find My Device in Find My App. This restriction requires supervision.
- Don't allow the installation of apps via App Store: Users will not be able to install apps from the App Store
- Do not allow access files on Network Drive: Users will not be able to access files on Network Drive. This restriction requires supervision
- Do not allow USB Files Drive: Users will not be able to access USB Files Drive. This restriction requires supervision
- Force Wifi Power On: The user will not be able to turn off WiFi
- Force automatic Date & Time: The Date & Time setting is set automatically
- Do not allow AutoFill Passwords: Users cannot use the AutoFill Passwords feature. Users also won't be prompted with the option to pick a saved password to use in password fields in Safari or other apps.
- Do not allow nearby iOS devices to share requests for a password: Users' devices will not be able to advertise themselves to nearby devices for passwords by using the Proximity AutoFill capability.
- Do not allow password sharing: Users cannot share their passwords with the AirDrop Passwords feature
Common macOS Restrictions
The macOS Restriction profile is organized into six categories/tabs. Use the option 'Do not configure the options on this tab' in the Restrictions profile to ensure any settings or restrictions within the tab are not applied and the default or manual configuration that's present on the macOS devices will remain unchanged. This feature is important in prevention of accidental deployment of configurations and impact of devices assigned to the profile.
The tabs are organized with their corresponding restrictions. After making any changes to a Restriction profile and reinstalling the profile on devices, the Mac may require a reboot for the new restriction configurations to be applied.
macOS Restrictions Tabs
- Preferences: Restrict users from accessing areas of System Preferences or System Settings on the Mac. For devices running macOS versions earlier than macOS 13, configure the System Preferences tab. For devices running macOS 13 or later, configure the System Settings tab.
- Apps: Restrict settings for applications such as Game Center, Safari Autofill, and restrictions for the installation and updates of applications. This tab also allows you to restrict applications from launching. The Allowed and Disallowed Folders options have been deprecated in macOS 10.15 and later.
- Widgets: Allow specific widgets to run. This restriction option has been deprecated in macOS 10.15 and later.
- Media: Configure media types that are allowed, such as network media (AirDrop), internal disks, external disks, disk images, DVD-RAM, CDs & CD-ROMs, DVDs, and recordable disks. This restriction has been deprecated with macOS 11.
- Sharing: Configure services to be available in the sharing menu. For devices running macOS 10.13 or later, you can configure these services using the Extensions profile.
- Functionality: Configure specific settings to allow or disallow on the Mac. Some examples include iCloud services, password sharing, password AutoFill, requiring Admin credentials for network changes, erase all content and settings, AirPrint, and content caching.
Passcode Policies
The Passcode Policies profile configures passcode criteria on iOS, iPadOS and macOS devices. It supports the system scope and user scopes on macOS devices. If user scope is chosen, please assign only users to the profile. If existing passcodes do not meet the policy standards, users will be prompted to reset their password.
The Passcode Policy profile does not create or set passcodes and is not compatible with Apple Shared iPad devices. To set the PasscodeLockGracePeriod on Apple Shared iPad devices, configure the Apple Shared iPad Shared Device Group settings.
To create a Passcode Policy, go to Management > Passcode Policies.
Features include:
- Force PIN: Prompts users to set passcode within 1 hour (iOS, iPadOS)
- Allow simple value: Permits repeating, ascending and descending characters
- Require alphanumeric value: Requires passcodes to contain at least one letter and one number
- Force Password Reset (10.13+): Prompts for reset on next user authentication (macOS). This will prompt users anytime the profile is saved and/or reinstalled.
- Minimum passcode length: Sets the minimum of characters allowed
- Minimum number of complex characters: Sets the minimum of non-alphanumeric characters allowed
- Maximum passcode age: Enter 0 to not configure, or 1 day to 730 days
- Maximum Auto-Lock: Narrows times available to users to manually set Auto-Lock. On macOS, this maximum auto-lock value configures the screen-saver settings.
- Passcode history: Enter 0 to not configure, or 1 passcode to 50 passcodes (iOS, iPadOS)
- Maximum grace period for device lock: Longest device lock grace period available to users
- Maximum number of failed attempts: Maximum failed attempts prior to the device erases
- Delay after failed login attempts: Minutes that the device is locked for after maximum failed attempts (macOS)
Additional Considerations
- When an iOS/iPadOS device is locked, some commands may not apply until it is unlocked.
- If an iOS/iPadOS device has a passcode, it will not auto-join the network until it is unlocked after a restart. This can impact commands being delivered to the device if it is not connected to the network.
- If using Mosyle Auth on macOS devices, it's recommended to configure password policies through the identity service provider (IdP).
- Local administrators created from an Automated Device Enrollment profile are not exempt from the Passcode Policies profile on macOS devices. If the policy should not be applied to the Administrator created using Automated Device Enrollment, the profile should be assigned via the User Scope to specific users.
- It's recommended to turn on Force Password Reset to prevent lockout of users whose password does not meet policy standards on macOS devices.
- If the passcode policy still applies after profile uninstallation on macOS devices, please run the following command in Terminal, which is opened from Applications/Utilities, or the Custom Commands profile: pwpolicy -clearaccountpolicies
Removing a passcode on iOS/iPadOS devices
If the passcode is forgotten on an iOS/iPadOS device, it's important to keep the device connected to the network and not restart the device. The device will remain auto-joined to the network as long as it has not been restarted or powered off. As long as the device remains connected it can receive the Remove Lock Passcode command from Mosyle to remove the passcode, Touch ID, and/or Face ID.
To remove the passcode from an iOS/iPadOS device go to Management > Devices Overview > Select the device > More dropdown menu: Remove Lock Passcode.
If the command is sent and the device is connected to the internet, it will remove the passcode and allow the device to be unlocked with the Home button. If the Passcode Policies profile is installed on the device to force a password, it will prompt the user to set a new passcode.
Managing User Accounts on macOS
Administrators can manage User Accounts on Mac computers that are supervised and enrolled in Mosyle.
To access these options, go to Management > Devices Overview > Click on a device's name to bring up the Device Information window > More dropdown: Manage Users. Here you can either change the user's password or unlock the user account after too many failed password attempts.
In order to change a user's password, Administrator credentials for an admin user with a Secure Token is required. The new password must meet password policies, including the Passcode Policies profile or active rules in Security. If FileVault is turned on, the disk must be unlocked for the device to acknowledge the commands. The device must be online at the login window in order for the commands to go through to change the user's password or unlock the device.
If the user's password is unable to be changed through Mosyle, the password can be changed using the Reset Password Assistant in recoveryOS. To reset an account's password, follow the instructions under the heading "Use the Reset Password assistant" in the Apple Support article.
Changing the ADE Admin Password
When creating the Administrator account using the Automated Device Enrollment profile, a password needed to be defined. This password can be changed by sending the Set Admin password in Devices Overview, or using the Single Shot profile to Change the Randomized DEP Admin Password.
- Devices Overview: Go to Management > Devices Overview > Select Devices > More dropdown menu: Set Admin Password. Enter the new password for the DEP Admin account.
- Single Shot: Go to Management > Single Shot profile > Change Randomized DEP Admin Password. Choose the rotation interval of 30, 60, 90, or 120 days. This option ensures that devices are rotating the DEP Admin password on a regular basis to keep devices secure.
Managing WiFi Connectivity
WiFi Authentication
The WiFi Authentication profile configures networks for devices to join. To create a WiFi Authentication profile, go to Management > WiFi Authentication. Name the profile, enter the network SSID, choose the Security Type, and enter the password to join the network. Assign the profile to users/devices and click Save.
It's important the Security type and password are correct in the profile so that the device can successfully join the network.
MAC Address Randomization (iOS/iPadOS)
Starting with iOS and iPadOS 14, devices use a unique MAC address, or network address, when connecting to each network. This is a security and privacy enhancement to prevent network administrators from tracking devices, especially in the public sphere. In a school or district, this enhancement may conflict with network protocol that filters devices based on their MAC address. If your environment is impacted, please turn off MAC Address Randomization by checking the box in the profile.
When disabling MAC Address Randomization, it is on a per-SSID basis and will result in a privacy warning being displayed in the Settings app indicating the network has reduced privacy.
Lock WiFi (iOS/iPadOS)
The Lock WiFi configures iOS and iPadOS devices to only connect to managed networks that have been configured on devices using a WiFi Authentication profile.
To create a Lock WiFi profile, go to Management > WiFi Authentication > Click the Lock WiFi tab. Name the profile and choose an Application time.
Mosyle automatically installs a backup WiFi Authentication profile on enrolled devices so that in the event a Lock WiFi configuration is applied, and the device is unable to join the managed network, a temporary SSID can be configured to allow the device to connect. To view the credentials for the backup WiFi Authentication profile, a Mosyle Administrator can click View Details for the profile then click the link “Too late? Here's how to fix this problem”.
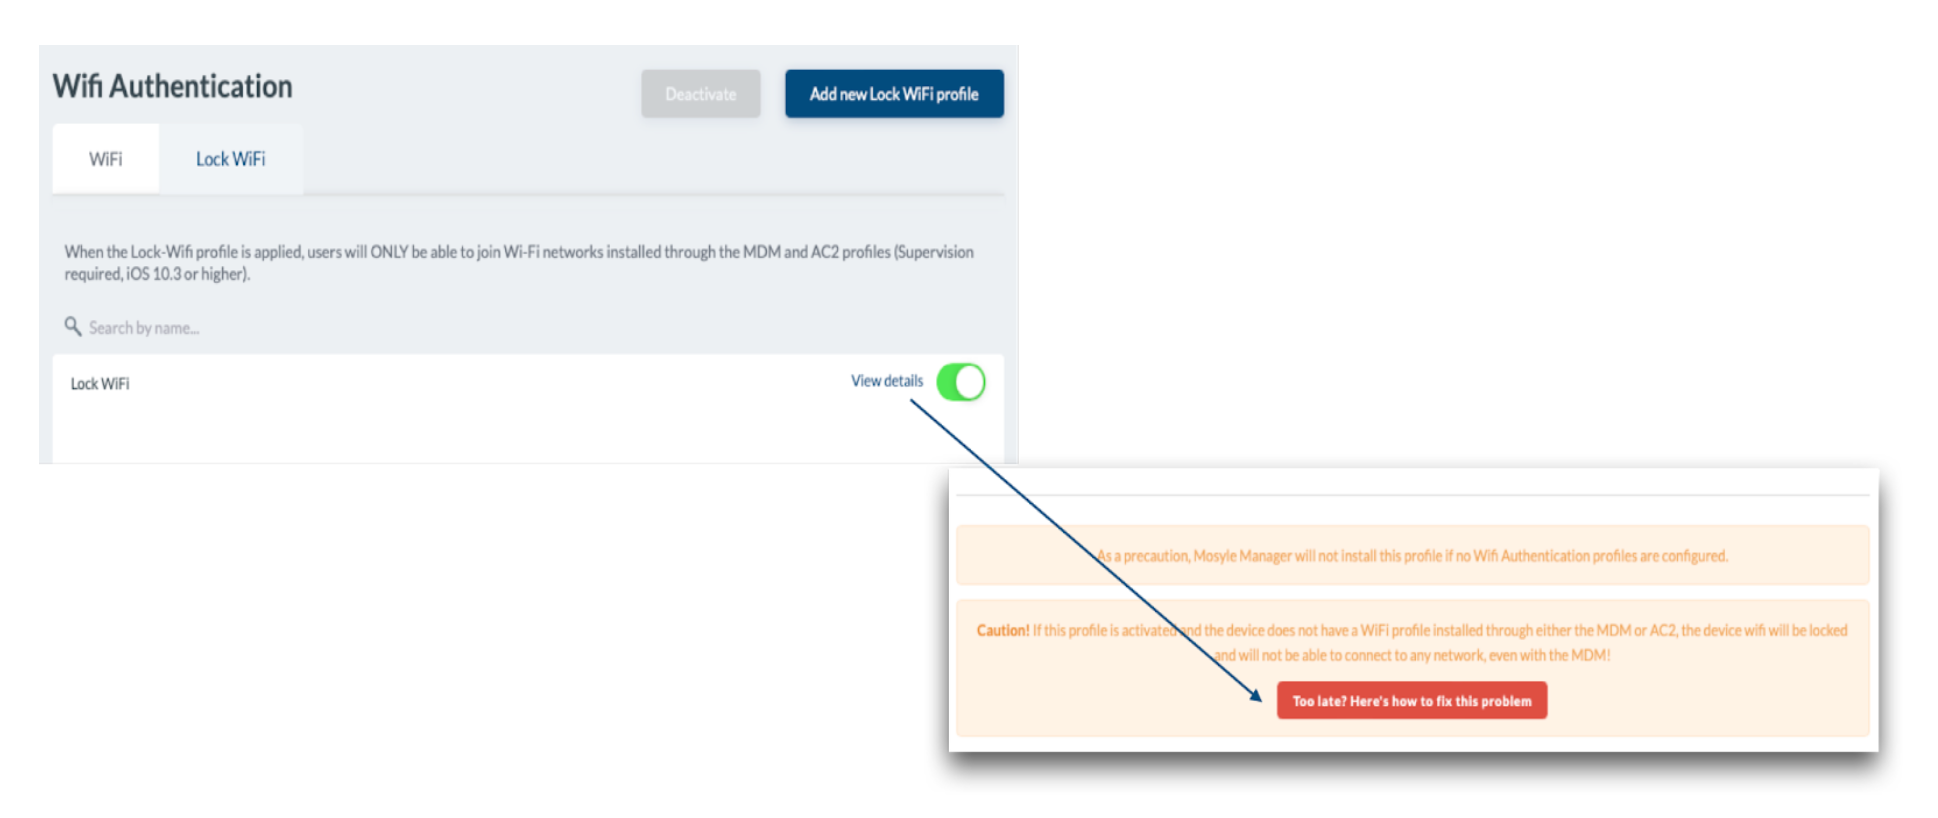
Multi-Cert Profile
The Multi-Cert Profile configures network settings that use certificates to authenticate to the network by combining related WiFi, VPN, SCEP, or AD Certificate payloads. It supports installations at the system scope and the user scope. If user scope is chosen, please assign only users to the profile.
To create a Multi-Cert Profile:
- Click on Management > Multi-Cert Profile
- Click “Add New Profile”
- Name the profile and click + Add Profile
- Click the payload
- Configure as needed and Save
- Save
- Assign the profile to users/devices
- Save
The WiFi Authentication profile and Multi-Cert profiles will be reinstalled each time they are saved. To avoid this behavior, it's recommended to select 'Do not reinstall the profile during assignment/login'.
Kernel Extensions, System Extensions, Privacy Preferences
Overview
Applications deployed to macOS devices may require the configuration of Kernel Extensions, System Extensions or Privacy Preferences. This can be remotely configured through Mosyle so the user isn't prompted to allow any additional items upon the installation of the application.
Kernel Extensions
The Kernel Extensions profile allows signed kernel extensions to load from a list of developer Team Identifiers or a list of Team Identifiers mapped to application Bundle Identifiers. Map Team Identifiers to Bundle Identifiers to allow specific Bundle Identifiers to load. Enter only the developer Team Identifier to allow all Bundle Identifiers.
Be sure to reference an application's software documentation if system extensions have replaced kernel extensions, or if both are needed. Mac computers running macOS 11 or later require user approval or manual intervention to load kernel extensions, unless it is a Mac computer with Apple silicon and Bootstrap Token is allowed for authentication. Check Apple's documentation for more information on kernel extensions and management of legacy extensions.
To create a Kernel Extensions Profile
- Click Management > Click Kernel Extensions
- Click “Add New Profile” and name the profile
-
Select options as needed:
- Allow User Override: This option allows users to approve kernel extensions that are not approved or pushed using the MDM
- Non-Admin User Approvals: This allows non-admin users to approve kernel extensions (Recommended on devices running macOS 11+)
- Allowed Team Identifiers: to approve all kernel extensions from a specified developer, enter the developer Team identifier in the field
- Allowed Kernel Extensions: to approve kernel extensions for specific bundle identifiers from a developer, enter the developer Team Identifier and the corresponding approved application Bundle Identifiers
- Assign the profile to users and/or devices
- Save
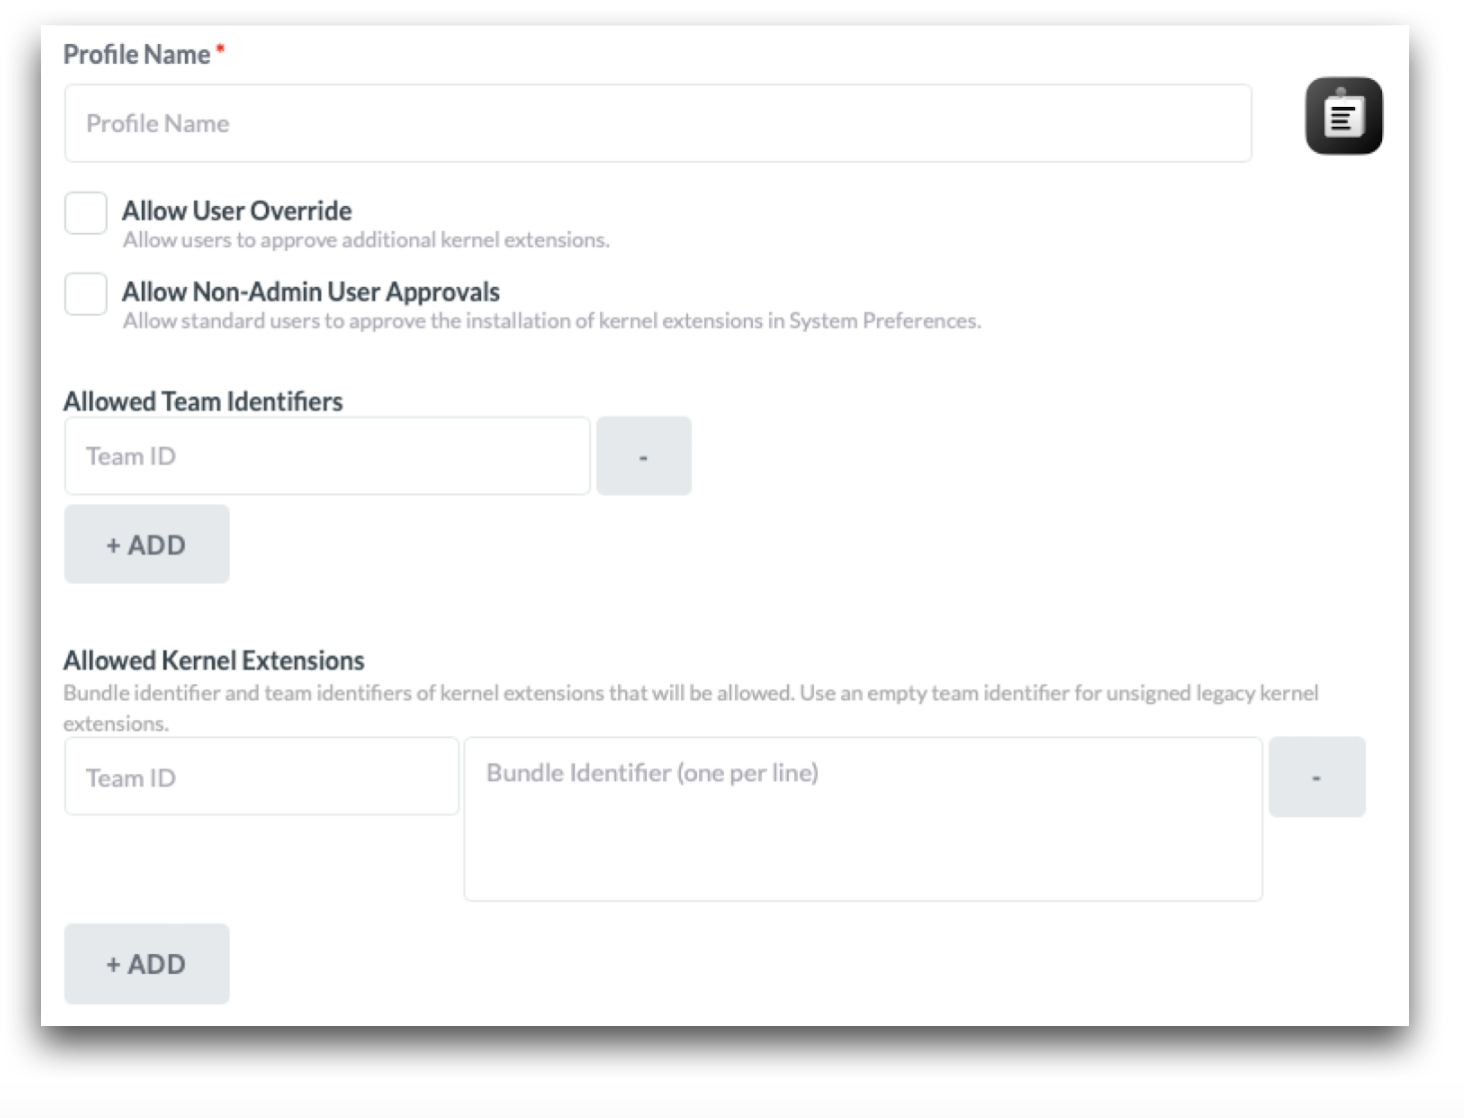
System Extensions
The System Extensions profile loads system extensions on devices running macOS 10.15 or later. System extensions run in the user space and replace Kernel extensions. As developers transition applications to use System Extensions instead of Kernel Extensions, apps may require the combination of Kernel Extensions profile in addition to the System Extensions profile in the meantime. Check the developer documentation to confirm the use of either Kernel or System Extensions. Reference Apple's documentation for more information about system extensions.
To create a System Extensions Profile
- Click Management > System Extensions
- Click “Add New Profile” and name the profile
- Choose how to allow the extensions: Allow all system extensions from specific Team IDs; allow specific system extensions from specific Team IDs; allow specific system extensions
- Enter the Team ID and Bundle ID
- Assign the profile to users and/or devices
- Save
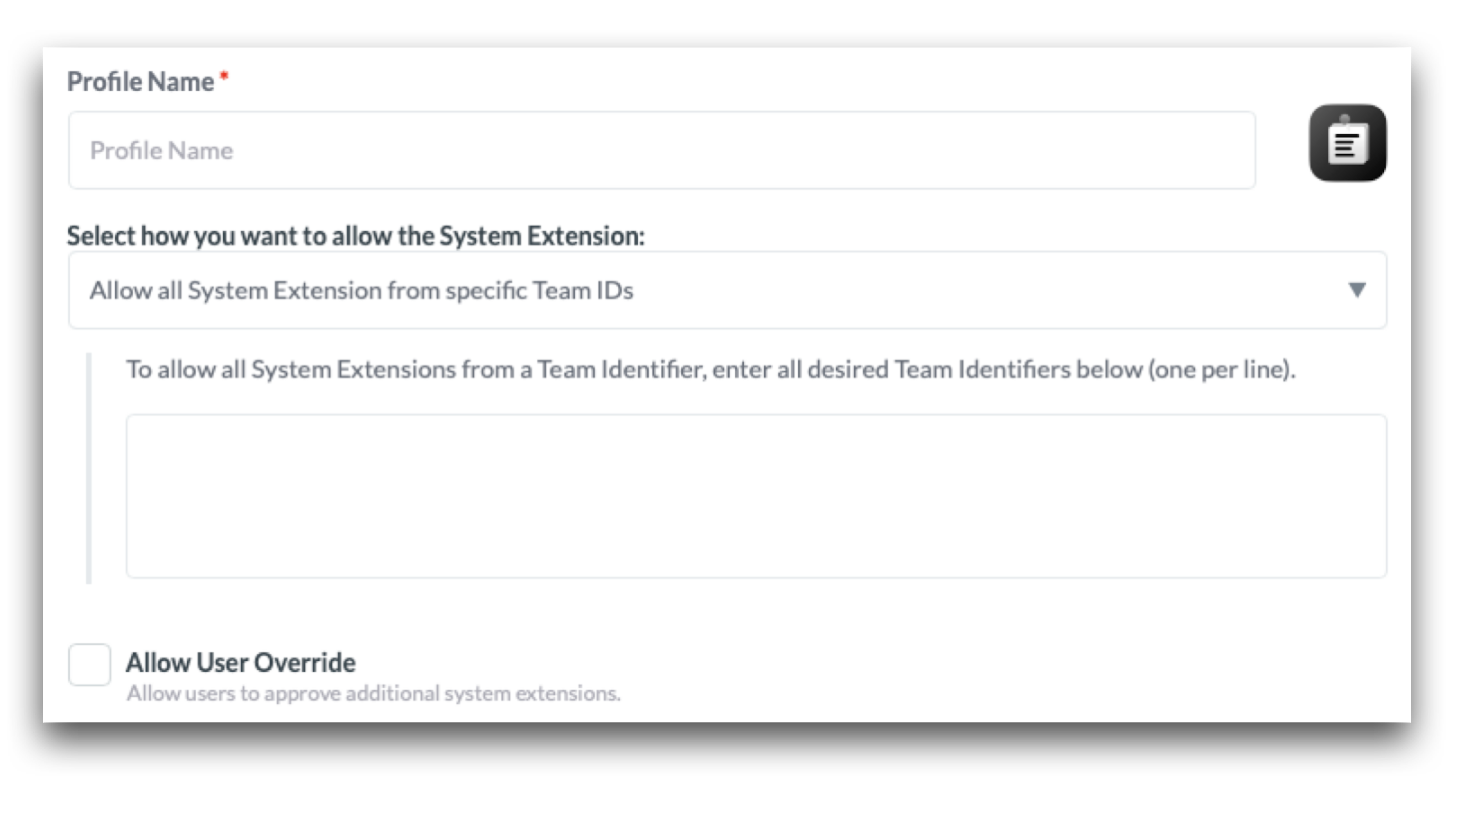
Privacy Preferences
The Privacy profile configures privacy permissions for applications. It's installed at the system level, meaning configurations will not be visible to the logged-in user in System Settings > Privacy & Security.
Apple's MDM protocol does not provide MDM solutions access to remotely grant certain privacy permissions such as Camera, Microphone, Screen Sharing/Capture, Location Services, and Listen Events (Input Monitoring). For microphone and camera, these permissions may be approved by a Standard local account. By default, Screen Capture and Listen Events require Admin credentials. For devices running macOS 11+, you can create the Privacy profile with the option "Allow Standard User to Set (macOS 11 and later)" for these two permissions.
It's recommended to configure permissions by an application's Bundle Identifier unless otherwise instructed by software documentation. For binaries, it's recommended to configure by Application Path.
To create a Privacy Profile
- Click Management > Click Security & Privacy > Privacy tab
- Click “Add New Profile” and name the profile
- Configure as needed
- Assign the profile to users and/or devices
- Save
Some features in Mosyle require the agent to have certain Privacy Permissions. Check the box “Install the Privacy Preferences Policy Control settings for the Mosyle Manager app to allow access to all necessary files and application data.”
Securing Devices
Overview
In the event a device belonging to the school or district is lost or stolen, there are remote management methods to lock the device, secure data stored, and/or prevent further use of the device.
Available options via the MDM include:
- Lost Mode (iOS & iPadOS): Lock a device with a specified message. Once locked, ping the device's location or play a sound to assist with locating the device.
- Activation Lock (iOS, iPadOS, & macOS): Lock the device so that once erased, it cannot be reactivated and set up until the user enters the Apple ID credentials to authorize the unlock or Activation Lock is disabled via the MDM. Available only for devices in Apple School Manager that are owned by the school or district.
- FileVault (macOS): Enforce FileVault to encrypt the disk and prevent unauthorized access.
- Firmware Password (macOS): Lock the device with a firmware password to block the ability to use startup key combinations and prevent users from starting up any internal or external storage device other than the selected startup disk. Available only for Mac computers with an Intel processor.
- Recovery Lock (macOS): Set a recovery lock password to prevent unauthorized access to the recovery partition on macOS devices. Available only for Mac computers with Apple silicon running macOS 11.5 or later.
- Lock device (macOS): Lock a device with a 6-digit PIN. The device cannot be accessed until the 6-digit PIN is entered. To lock Mac computers with Apple silicon, macOS 11.5 or later is required.
IMPORTANT NOTE: Mosyle will retain the Activation Lock bypass codes, FileVault Personal Recovery Key, and Lock PIN for the duration of time the device remains in the Mosyle system. If the device is removed from the MDM, the data will be removed from all Mosyle systems and cannot be recovered. Before removing devices from the Mosyle MDM, please be sure to take note of any codes, keys, or passwords that may be needed in the future.
Lost Mode (iOS/iPadOS)
To enable Lost Mode on a device, go to Management > Devices Overview > Select any/all devices to enable Lost Mode. From the More dropdown menu, choose “Activate Lost Mode”. Enter the desired message to be displayed on the device screen when it is locked (required), as well as a phone number or footnote (optional). In order for Lost Mode to be enabled on the device, it must have a valid network connection so it can receive the command from the MDM.
When Lost Mode is enabled, a banner will be presented under the Security Info tab in Device Information for the iPhone or iPad.
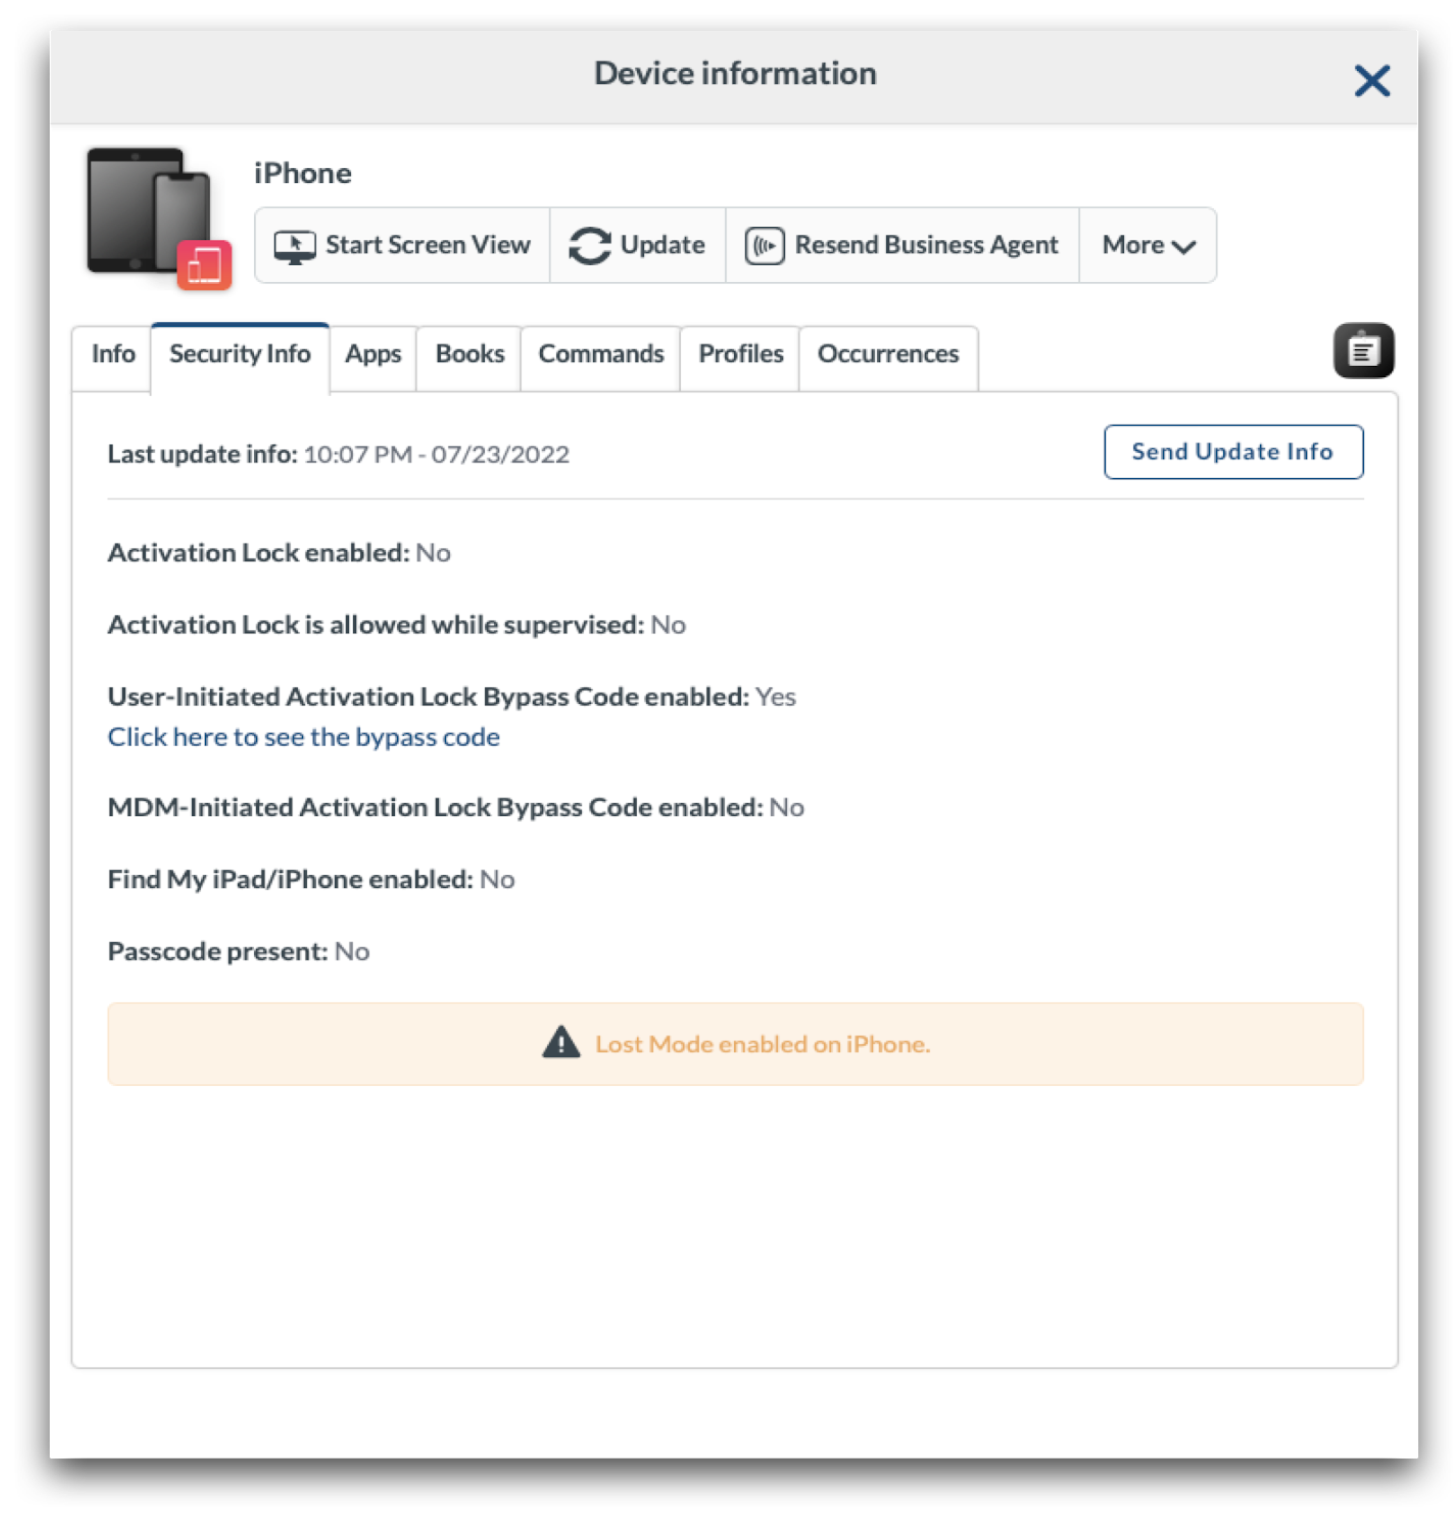
After turning on Lost Mode, the device will be locked. To play a sound or request the device location, click the More dropdown menu and choose: Request Location or Play Sound.
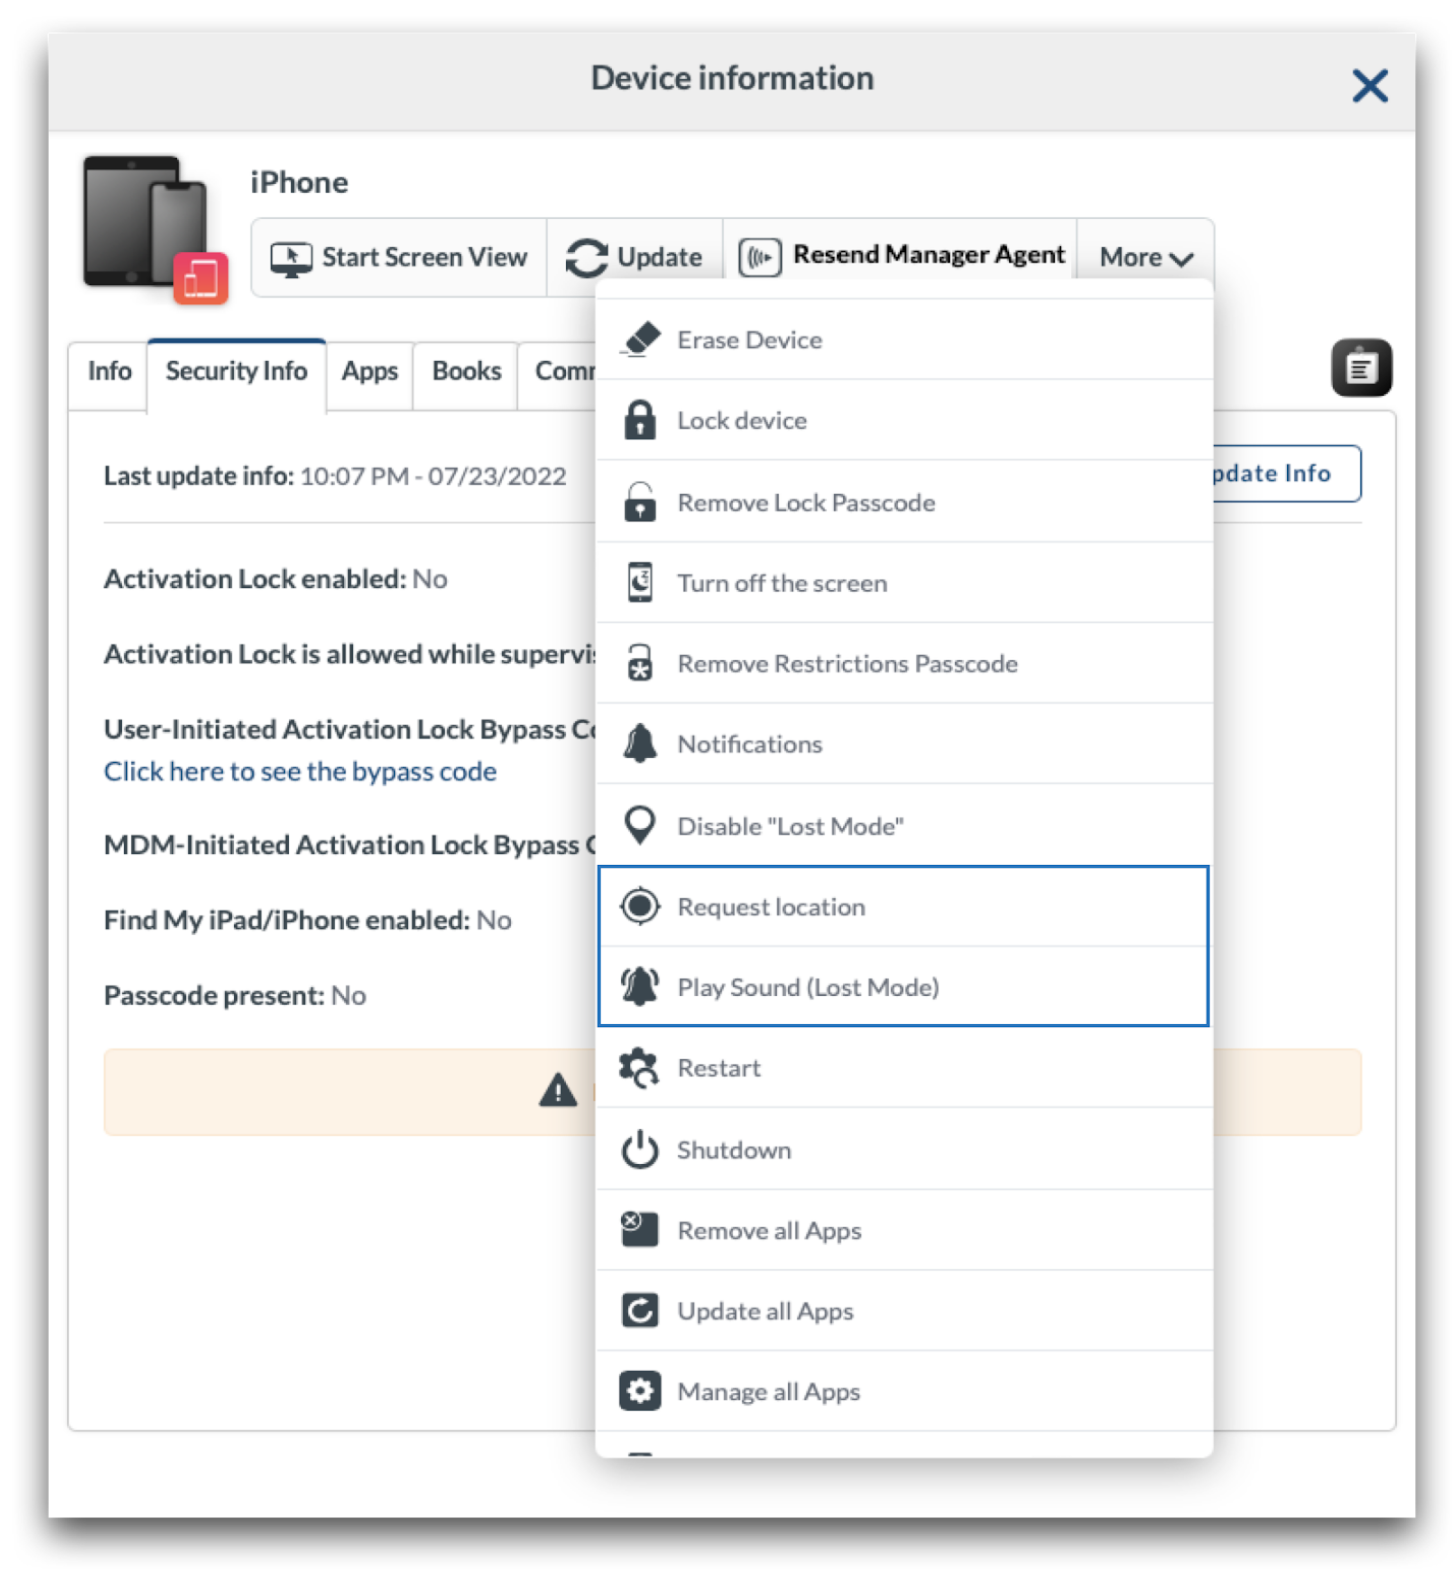
Enabling Lost Mode will not prevent someone from erasing the device. If erased and the device is part of Apple School Manager and assigned to Mosyle, it will automatically re-enroll in the MDM after connecting to a network and will re-apply Lost Mode. If the device is not part of Apple School Manager, or is not assigned to the Mosyle MDM server, it can be erased and the user will be able to proceed with normal setup.
To disable Lost Mode, go to Management > Devices Overview > Select any/all devices to turn off Lost Mode. From the More dropdown menu, choose “Disable Lost Mode”. Again, devices will need a valid network connection to receive the command to release Lost Mode.
Activation Lock
Activation Lock is a built-in security mechanism on iOS, iPadOS, and macOS devices which prevents users from being able to activate and set up a device without knowing the Apple ID credentials that enabled Activation Lock. If Activation Lock is enabled and the device is erased, the user will be presented with a screen requesting the Apple ID credentials used to enable Activation Lock in order to proceed with setup. The device will be locked and unusable until Activation Lock is released or unlocked.
Activation Lock can be managed on devices owned by the school or district, and exist in Apple School Manager. Devices can be locked with Activation Lock in two forms:
- User-initiated: Users turn on Activation Lock in Find My or iCloud with their personal Apple ID
- MDM-initiated: The MDM turns on Activation Lock
Note: A T2 chip or Apple silicon is required on macOS devices for Activation Lock.
User-initiated Activation Lock
By default, devices enrolled in Mosyle MDM using Automated Device Enrollment will be blocked from User-initiated Activation Lock being enabled, in other words users enabling Activation Lock with their personal Apple ID. If the school or district prefers users to have access to enabling Activation Lock, check the box to “Allow User-initiated Activation Lock” in the Automated Device Enrollment profile.
Upon enrollment, Mosyle requests an Activation Lock bypass code from the device. This code can be used to unlock a device which has been Activation Locked by a user. Please note, Mosyle MDM is unable to manage or unlock Activation Lock if it was enabled prior to enrolling in the MDM.
If devices have already been enrolled and you wish to either allow or block User-initiated Activation Lock:
- iOS/iPadOS: Go to Management > Devices Overview > Click the device name to bring up Device Info > More dropdown menu > Allow User-Initiated Activation Lock.
- macOS: Go to Management > Devices Overview > MDM Options > Select or deselect Allow User-initiated Activation Lock.
If a device is User-Initiated Activation Locked after being enrolled in the Mosyle MDM, it can be turned off using one of the methods below:
- Within the Mosyle console: Management > Devices Overview > Click the device name to bring up Device Info > More dropdown menu > Disable Activation Lock.
- On the Activation Lock screen on the device, enter the Managed Apple ID and password of the ASM Admin user into the Apple ID and password fields. The credentials should be for the ASM Admin user who integrated and assigned devices to the Mosyle MDM server.
-
Using the Activation Lock Bypass Code:
- iOS/iPadOS: On the Activation Lock Screen on the device, leave the Apple ID field blank and enter the User-Initiated Activation Lock Bypass Code from Mosyle in the password field.
- macOS: From the Activation Lock Screen on the device, click the Recovery Assistant menu option in the top left and select "Activate with MDM Key". Enter the User-Initiated Activation Lock Bypass Code from Mosyle in the field presented.
MDM-initiated Activation Lock
The MDM can enable MDM-initiated Activation Lock on any enrolled device that was enrolled via Automated Device Enrollment and is part of the school or district's Apple School Manager account. When enabling Activation Lock, the device is not required to have a network connection as the Activation Lock request is simply an API call between the Mosyle servers and Apple servers.
To enable Activation Lock, go to Management > Devices Overview > Click a device name to bring up Device Info > More dropdown menu: Enable MDM-Initiated Activation Lock.
If a device is MDM-Initiated Activation Locked, it can be turned off using one of the methods below:
- Within the Mosyle console: Management > Devices Overview > Click the device name to bring up Device Info > More dropdown menu > Disable MDM-Initiated Activation Lock.
- On the Activation Lock screen on the device, enter the Managed Apple ID and password of the ASM Admin user into the Apple ID and password fields. The credentials should be for the ASM Admin user who integrated and assigned devices to the Mosyle MDM server.
-
Using the Activation Lock Bypass Code:
- iOS/iPadOS: On the Activation Lock Screen on the device, leave the Apple ID field blank and enter the MDM-Initiated Activation Lock Bypass Code from Mosyle in the password field.
- macOS: From the Activation Lock Screen on the device, click the Recovery Assistant menu option in the top left and select "Activate with MDM Key". Enter the MDM-Initiated Activation Lock Bypass Code from Mosyle in the field presented.
Activation Lock Bypass Code
Each device will have two Activation Lock Bypass Codes. One code is to bypass User-Initiated Activation Lock, the other is to bypass MDM-initiated Activation Lock (if MDM Activation Lock was enabled). Be sure to use the appropriate Activation Lock Bypass Code depending on how Activation Lock was enabled. To view the Bypass Codes, go to Management > Devices Overview > Click on a device's name to bring up Device Info > Click Security Info tab.
If Activation Lock is unable to be removed, the device will need to be taken to an Apple Store with proof of purchase in order to be unlocked.
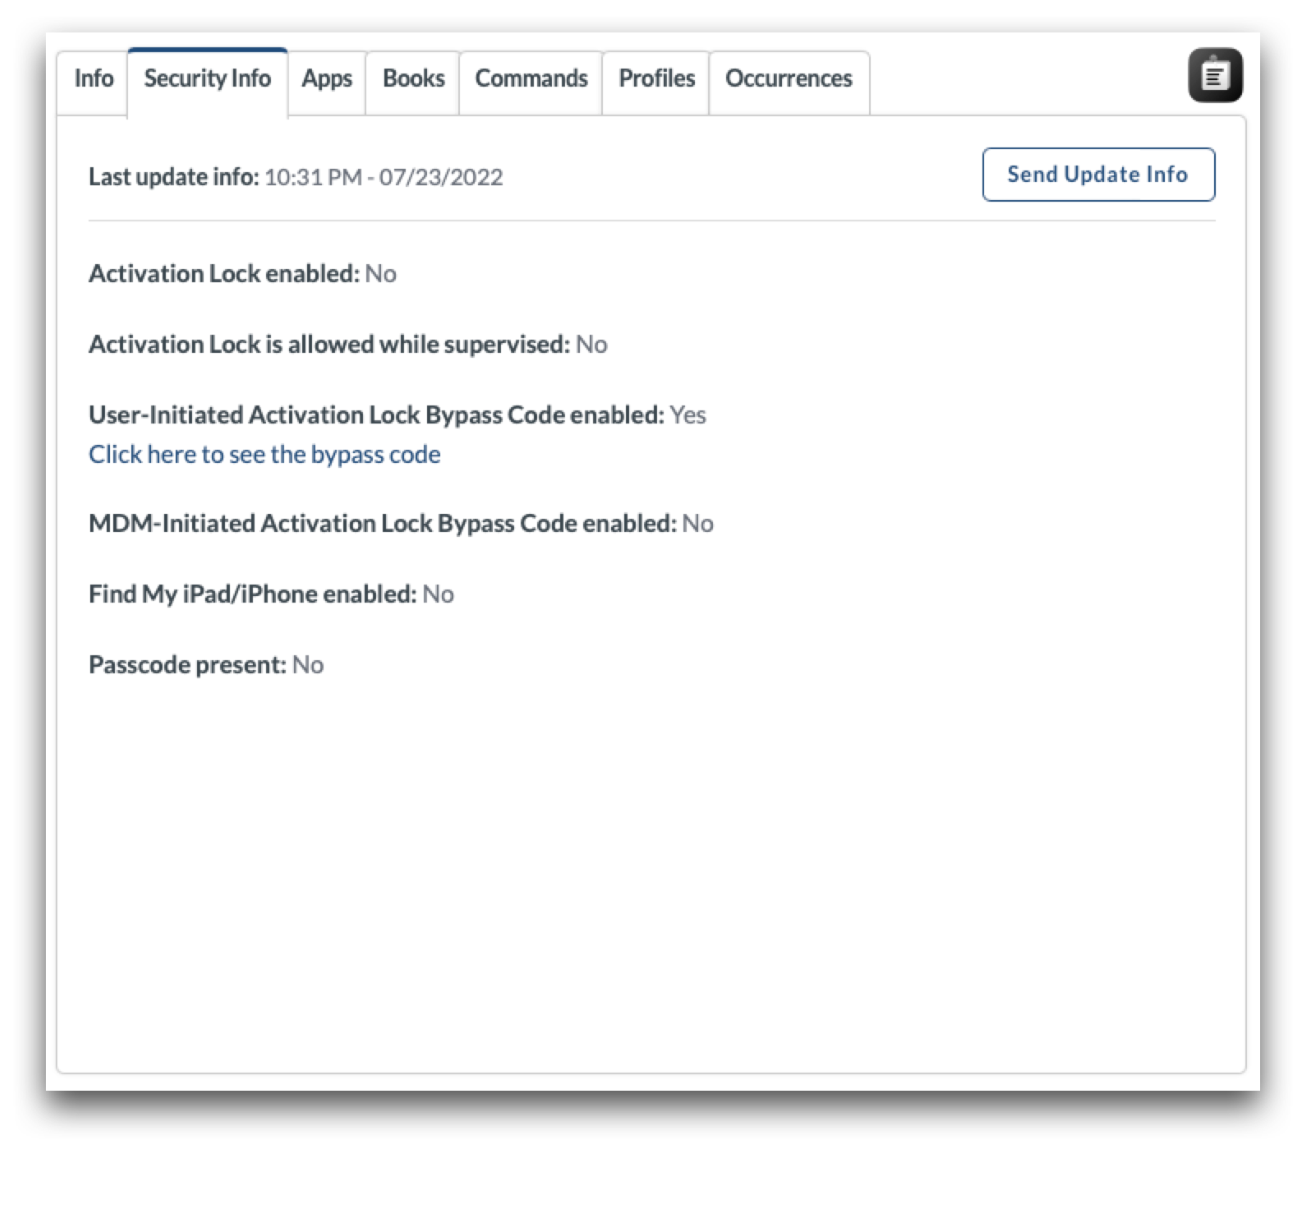
FileVault (macOS)
The Security profile in Mosyle will enforce the enablement of FileVault. Find the profile by going to Management > Security & Privacy > Security tab > Add new profile. The FileVault settings are available under the FileVault tab.
To enforce and require FileVault, check the box for “Require FileVault”. Choose whether to use an Institutional Recovery Key, Personal Recovery Key, or both. Institutional Recovery Keys are not supported on Mac computers with Apple silicon, so it's recommended to use Personal Recovery Keys.
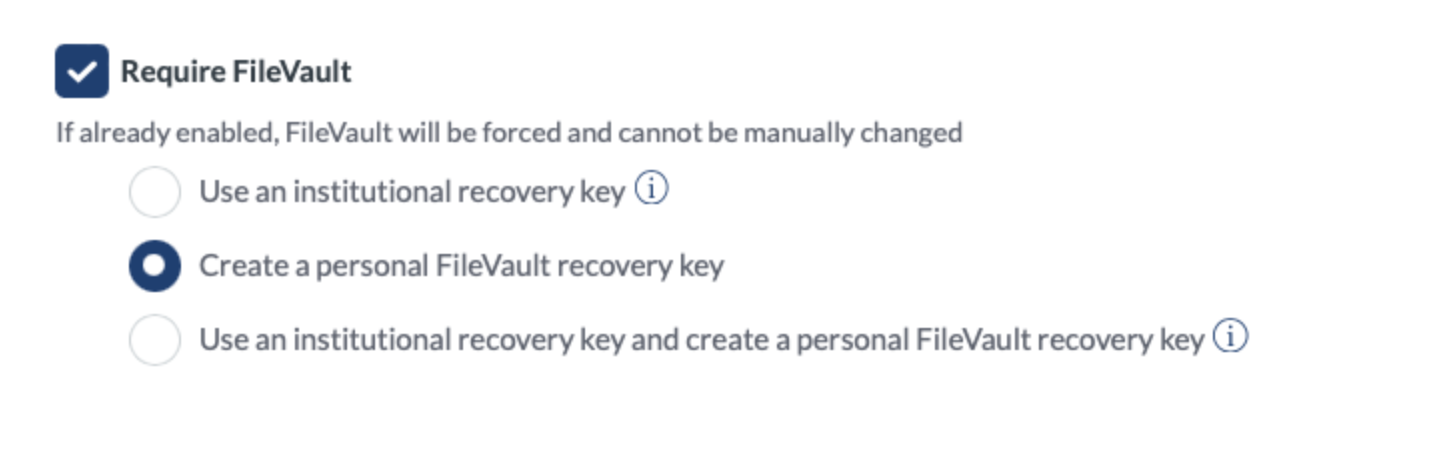
When using Personal Recovery Keys, it's recommended to escrow the key to the MDM so it's available as needed. To escrow the key, check the box “Escrow Personal Recovery Key”. Enter location information for the key and choose whether or not to show the end user the recovery key locally on the Mac when FileVault is enabled.
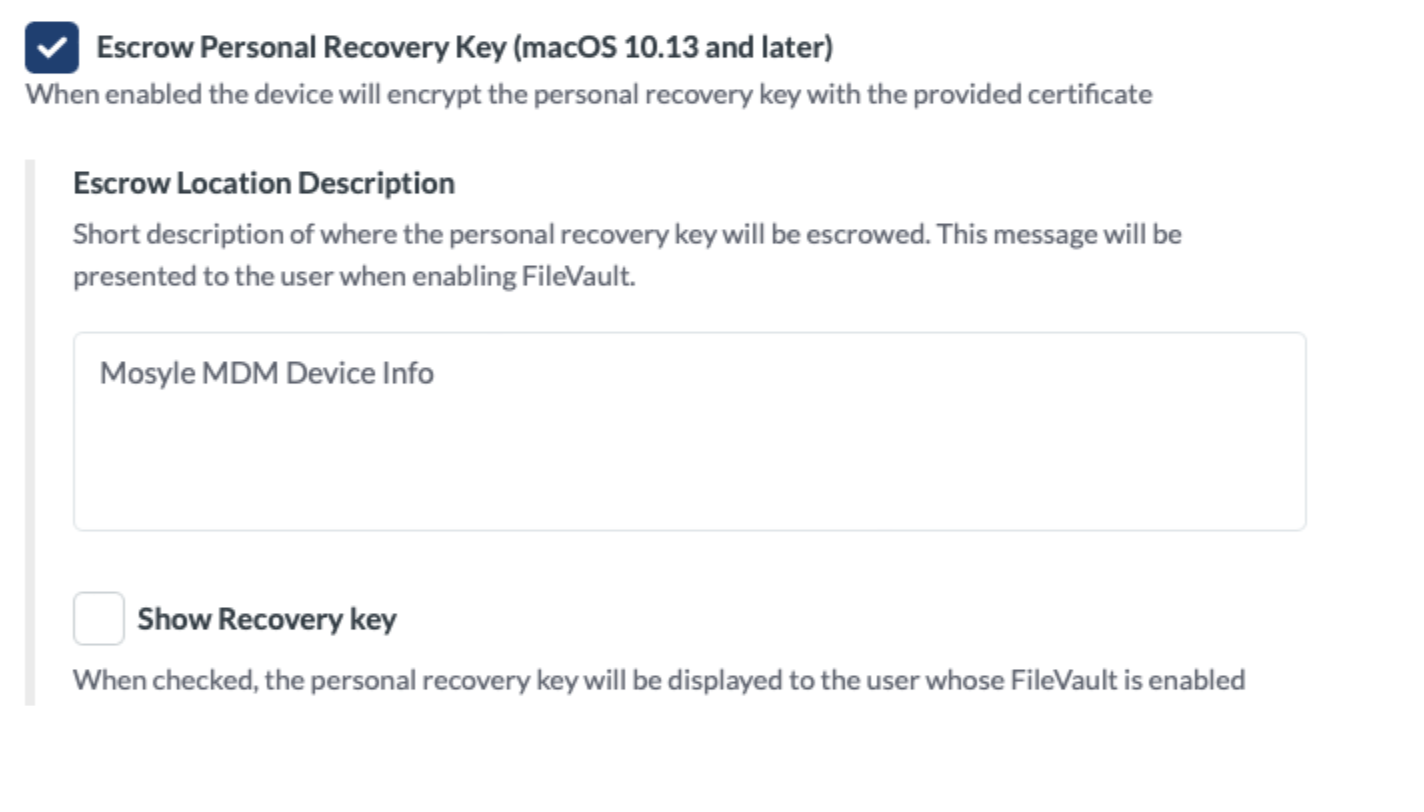
Last, choose when to prompt the user to enable FileVault. Select “Defer enabling until logout” to prompt users to enable FileVault when logging out, check the box “Ask at login” to prompt users to enable FileVault when logging in. Set the maximum number of times the user can skip the prompt to enable FileVault before being forced.
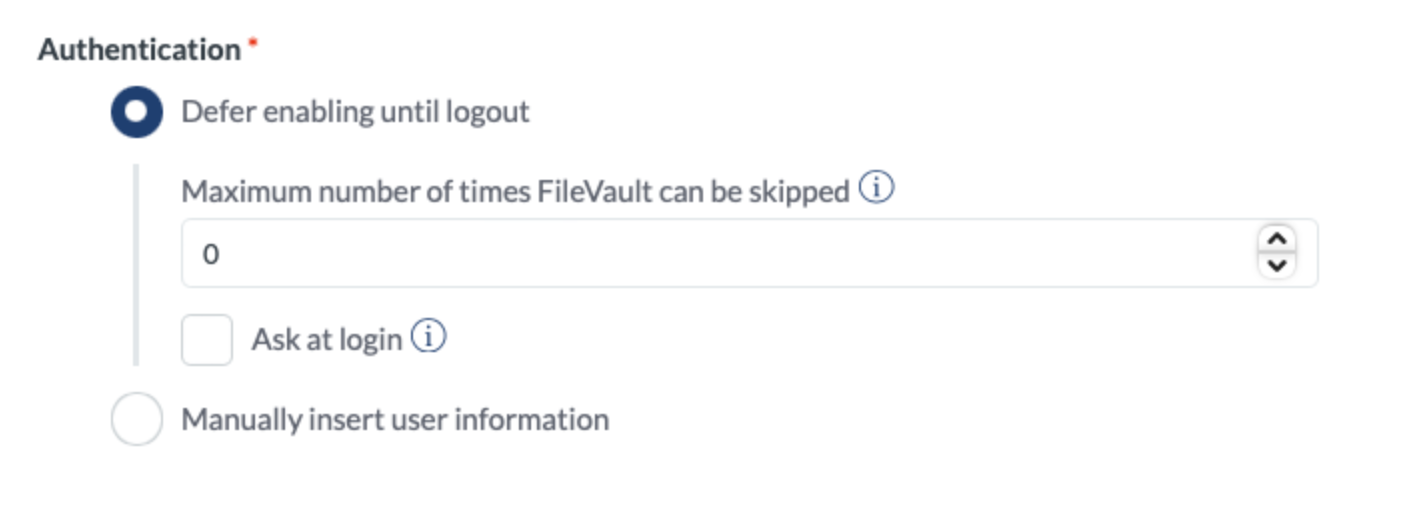
Secure Token & Bootstrap Token
Users can only enable FileVault if they have a secure token. Starting with macOS 11, the first user created on the Mac with a plain text password is granted the initial secure token.
Users granted a secure token on macOS 11 and later:
- If the device is enrolled using Automated Device Enrollment and no Local User profiles are assigned, the user created during the Setup Assistant will be granted the initial secure token.
- If a Local User profile is deployed to devices enrolled using Automated Device Enrollment, this could result in the local user account being granted the initial secure token.
- If the device is enrolled using Automated Device Enrollment, no Local User profiles are assigned, and the user is not prompted to create an account during the Setup Assistant, the first user to login on the Mac will be granted the initial secure token. This is the case for deployments using Mosyle Auth 2, devices bound to AD using network/mobile accounts, or devices that only have the admin account created through Automated Device Enrollment and the user logs in to this account.
Because the password for the additional admin account created during Automated Device Enrollment is set using a password hash, the admin account created during Automated Device Enrollment is typically not the first user to be granted a secure token. In order for the admin account created during Automated Device Enrollment to be granted a secure token, the bootstrap token must be generated and escrowed. The bootstrap token is generated and escrowed to Mosyle only after a user with a secure token logs in for the first time. Once the bootstrap token is generated and escrowed, any other user who logs in on the Mac will receive a secure token (macOS 11 and later). This means, in order for the admin account created during Automated Device Enrollment to be granted a secure token, the user account will need to login on the Mac.
Mac computers with Apple silicon, enrolled via Automated Device Enrollment, require the bootstrap token to authorize the installation of kernel extensions and software updates via the MDM. Additionally, the bootstrap token is used to authorize the Erase All Content and Settings (EACS) command on Mac computers with the T2 security chip or Apple silicon running macOS 12.0.1 or later. Mac computers with Apple silicon that are manually enrolled will need to update the Security settings in Recovery mode so the MDM can install kernel extensions, software updates, and authorize EACS.
To allow the bootstrap token, configure your Automated Device Enrollment profile to “Allow Bootstrap Token” by going to:
- My School > Apple Basic Setup
- Enrollment > Automated Device Enrollment
- Click the enrollment profile
- Check the box to “Allow Bootstrap Token” and save
- After the device is enrolled and a user with a secure token logs in, the bootstrap token will be created and escrowed in Mosyle.
Apple silicon devices that have already been enrolled via Automated Device Enrollment, but were not enrolled with the option to “Allow Bootstrap Token” can be sent a command after the enrollment to allow bootstrap token. To do this, follow the steps below:
- Management > Devices > Devices Overview
- Select the device(s) > More dropdown menu: MDM Options
- Choose the option “Allow bootstrap Token”
- After the command goes through, a user with a secure token will need to login to generate and escrow the bootstrap token. Once generated and escrowed, all other users logging in on the Mac will receive a secure token (macOS 11 and later).
Check out Apple's documentation for more information on FileVault, Secure token, and Bootstrap Tokens.
Rotating the Recovery Key
For security reasons, you may need or want to rotate the personal recovery key. You can do this in intervals of 30, 60, 90, or 120 days using the Single Shot profile under the Management tab.
- Go to Management > Single Shot
- Choose the action "Rotate FileVault key"
- Select to rotate the personal recovery key or the institutional recovery key and enter the required information
- Choose the interval for the rotation: 30, 60, 90, or 120 days
- Assign the profile to users/devices
To rotate the institutional recovery key, you must enter the username and password for an Admin user on the Mac that has a secure token and upload the new institutional recovery key. To rotate the personal recovery key, you must enter the username and password for an Admin user on the Mac that has a secure token or select the option to use the current recovery key if it is escrowed in Mosyle.
Managing devices that are already encrypted
Devices that are already encrypted can be managed so that the personal recovery is escrowed in Mosyle. Some scenarios that administrators may find the need to do this include:
- If you are migrating to Mosyle from another MDM, are unable to erase and re-enroll the Macs, and they are already encrypted.
- Devices are currently encrypted with an institutional recovery key but need to be changed to be encrypted with a personal recovery key.
Below are options and workflows that can be used to migrate encryption management:
- Decrypt the Macs, enroll in Mosyle and then install the Security profile to enforce FileVault encryption and escrow the recovery key in Mosyle.
- If you know the username and password for an Admin user on the Mac with a secure token, once the Security payload from Mosyle is installed, you can configure the Single Shot profile to rotate the recovery key. After it's rotated, it will be escrowed in Mosyle.
If you need assistance with escrowing the personal recovery key, please contact the Mosyle Support Team.
Firmware Password (macOS)
The Firmware Password profile sets a password on the firmware of Intel-based devices running macOS 10.13 or later. A firmware password prevents users who don't have the password from starting up all disks other than the designated startup disk and blocks most startup key combinations.
To add a firmware password to a Mac, go to Management > Click the Firmware Password profile > Enter the new password. If the devices already have a firmware password and it needs to be changed, select “The devices already have a firmware password” and enter the old password. To remove the firmware password, leave the new password field blank and enter the current password.
Mac computers with Apple silicon do not support firmware passwords. Mosyle is unable to remove or change a firmware password if the current password is forgotten. In a scenario where the firmware password is unknown, please contact Apple.
Recovery Lock Password (macOS)
The Recovery Lock profile sets a Recovery Mode password on Apple silicon devices running macOS 11.5 or later. A Recovery Lock password prevents users who don't have the password from booting Apple silicon devices into Recovery Mode. Recovery Lock passwords are removed when a device is erased or removed from the MDM.
To add a recovery lock password to a Mac, go to Management > Click the Recovery Lock Password profile > Enter the new password. If the devices already have a recovery lock password and it needs to be changed, select “The devices already have a recovery lock password” and enter the old password. To remove the recovery lock password, leave the new password field blank and enter the current password.
Lock Device (macOS)
Lock a device with a 6-digit PIN so it cannot be accessed until the correct 6-digit PIN is entered. To send the command to lock the Mac, go to Management > Devices Overview > More dropdown menu: Lock Device. Enter the 6-digit PIN.
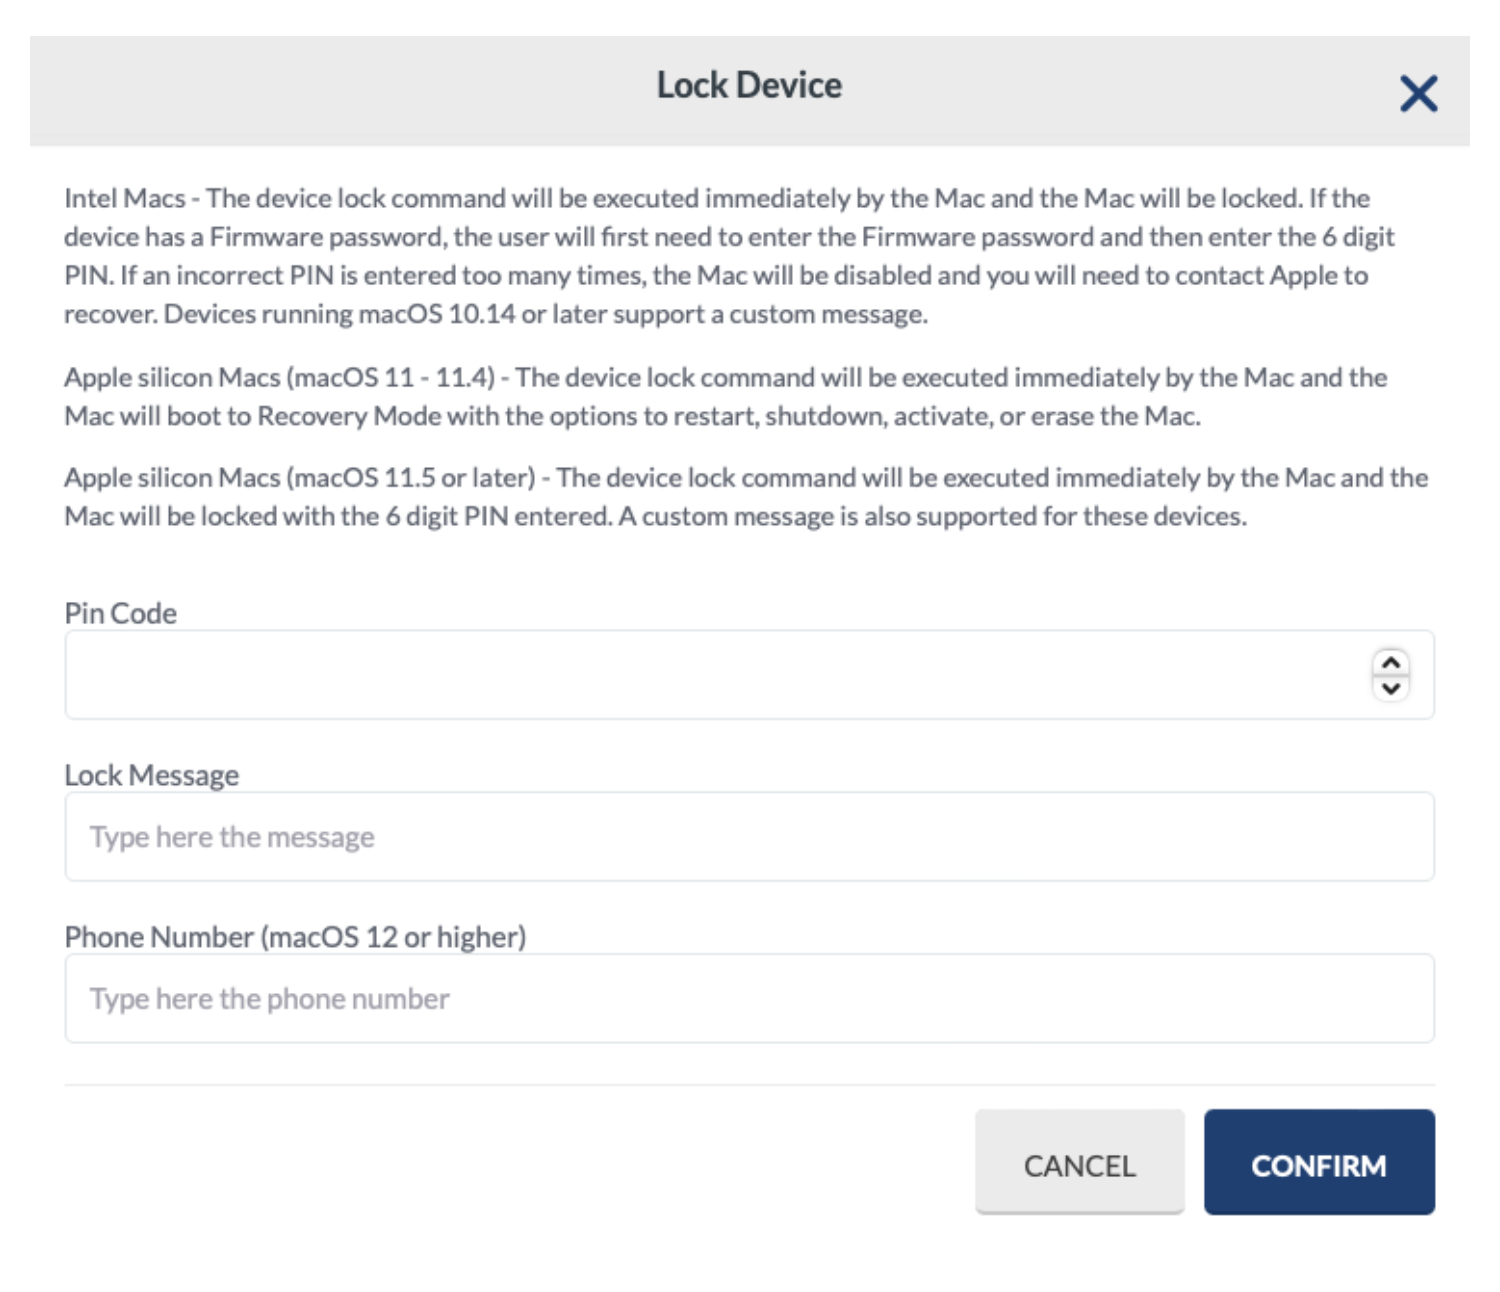
The last 10 Lock PIN codes are available under Management > Devices Overview > Click on the device's name > Has Lock PIN Code? > Click here to see the last Lock PIN Code. If the PIN is entered incorrectly too many times and shows the Mac is “Disabled”, please contact Apple support to unlock the devices.
Reminder: If the device has been sent a command to lock the device with the Lock PIN code and is then removed from Mosyle MDM, the PIN code sent will no longer be able to be retrieved from Mosyle systems if it is forgotten.
Using Dynamic Device Groups
Check device security status using Dynamic Device Group criteria. Criteria listed below can help identify devices that are not meeting security requirements of the school or district and need to be addressed, or assist in identifying devices that have potentially been lost or stolen:
- Activation Lock Status: Disabled or Enabled
- Bootstrap Token: is or is not Present
- Bootstrap Token Allowed for Authentication: is or is not Allowed
- FDE Personal Recovery Key: Disabled, Enabled, or Escrowed
- FileVault Encryption: Disabled or Enabled
- Lost Mode: Disabled or Enabled
Erasing Devices
Overview
The ability to send remote commands to erase devices is critical when managing a fleet of devices. Devices typically need to be erased to prepare for a new user, when reselling devices, if the device has been misplaced, or many other reasons. Mosyle provides the ability to remotely erase devices when needed.
Erasing iOS/iPadOS Devices
Erasing an iOS/iPadOS device using the command from Mosyle, will erase all data on the device. If the device is associated with your Apple School Manager account and has an Automated Device Enrollment profile assigned to it, once the device reboots and Wifi is connected the device will automatically re-enroll into Mosyle.
To send the erase command to an iOS/iPadOS device
- Go to Management > Devices Overview
- Select any device(s) > More dropdown menu: Erase device
The erase command can be sent for individual devices via the Device Information window or can be sent on a schedule using the Single shot profile.
Additional Options:
- Preserve data plan after the wiping (iOS 11 and later): When selected, the cellular data plan settings will be preserved so you do not need to reconfigure the cellular data plan after the device is erased.
- Disable Proximity Setup (iOS 11.3 and later): When this is selected, the device will not prompt for Proximity Setup during the Setup Assistant.
- Revoke VPP licenses: When this is selected, all VPP app licenses assigned to the device will be revoked so that the licenses can be distributed to other devices.
- Disable Activation Lock (ASM devices only): This option can be used for devices that are associated with your ASM account and have been enrolled via Automated Device Enrollment to ensure Activation Lock is disabled so that the device will automatically go through the Setup Assistant once it is wiped and will not be locked on the Activation Lock Screen.
Erasing macOS Devices
Erasing a Mac computer with an Intel processor using the command from Mosyle will erase all data, volumes, containers, and partitions, including the recovery partition. In order to reinstall the macOS on the device, you will need to use Internet Recovery. When sending the command from Mosyle you will be required to enter a 6-digit PIN which will need to be entered on the device before it is erased. If a Firmware Password exists, it will first need to be removed in order to erase the Mac.
When erasing a Mac running macOS 12.0.1 or later with T2 Security Chip or Apple silicon, the device will Erase all Content and Settings (EACS) unless the command fails. In the event the command to Erase all Content and Settings fails, the defined 'Obliteration behavior' will be used.
The options available for the Obliteration behavior include:
-
Do Not Obliterate: If EACS fails, the device will not erase. In this scenario, you can use Apple Configurator 2 to restore, click here to learn more.
- Obliterate With Warning: If EACS fails, the device will revert to the traditional erase behavior and erase all data, including the OS. The macOS will need to be reinstalled.
- Default: If EACS fails, the device will revert to the traditional erase behavior and erase all data including the OS. The macOS will need to be reinstalled.
To send the erase command to a macOS device
- Go to Management > Devices Overview
- Select any device(s) > More dropdown menu: Erase device.
The erase command can be sent for individual devices via the Device Information window or can be sent on a schedule using the Single shot profile.
Setting up devices for a new user
To set up a device for a new user, you can simply change the device assignment by first unassigning the device and then assigning it to the new user, or you can erase the device, re-enroll and assign it to the new user. Whenever possible, it's recommended to first erase the device before distributing to a new user.
Device Refresh or Selling Devices
When refreshing or replacing devices, the old devices will need to be erased. Send the erase command from Mosyle to ensure all data is removed.
Be sure to unassign the device from the Mosyle MDM server in ASM and remove the devices from Mosyle in order to free up a license for a new device. To remove a device from Mosyle, go to Management > Devices Overview > Click a device name to bring up the Device Information window > More dropdown menu: Remove device/Remove MDM.
When selling devices, it's recommended to release devices from ASM indicating the school or district no longer owns the device. Click here for more information about releasing devices.
Classroom Tools
Configuring Class Manager
Overview
Mosyle's Class Manager offers teachers a specialized tool to ensure students are focused on learning by providing a core set of functionalities for classroom tasks. It also empowers teachers to disable or allow the camera, enable Bluetooth, verify devices are compliant with teacher defined policies, and ensure that Apple Classroom is automatically configured to be used in conjunction. Class Manager works across any network so it's a great tool to use with Apple Classroom when students are face to face or standalone when they are in remote learning.
Configuring Classes
The Mosyle Class Manager will automatically populate classes and rosters that are created in or imported into Mosyle. Apple School Manager (ASM) can provide an automated way of creating and updating courses and rosters using integration with your Student Information System (SIS), Google Workspace, Microsoft Azure AD, or by SFTP upload.
If you are not leveraging Apple School Manager, you can download the spreadsheet templates in Mosyle to populate your user information under My School > Integrations > Spreadsheet.
The option to create Classes/Courses manually within the MDM is also available. To do so, navigate to My School > Hierarchy > Courses > + Add New Course, and then give it a name. Once the Course is created, associated classes can be configured.
Accessing Class Manager
Teachers and Administrators can access Class Manager from the Mosyle Manager app or by logging in to the Mosyle Web Panel. Administrators will be able to view and access all classes configured in Mosyle, teachers will be able to view and access only the classes they are assigned. To start a class, click the name of the Class in the Class Manager tab.
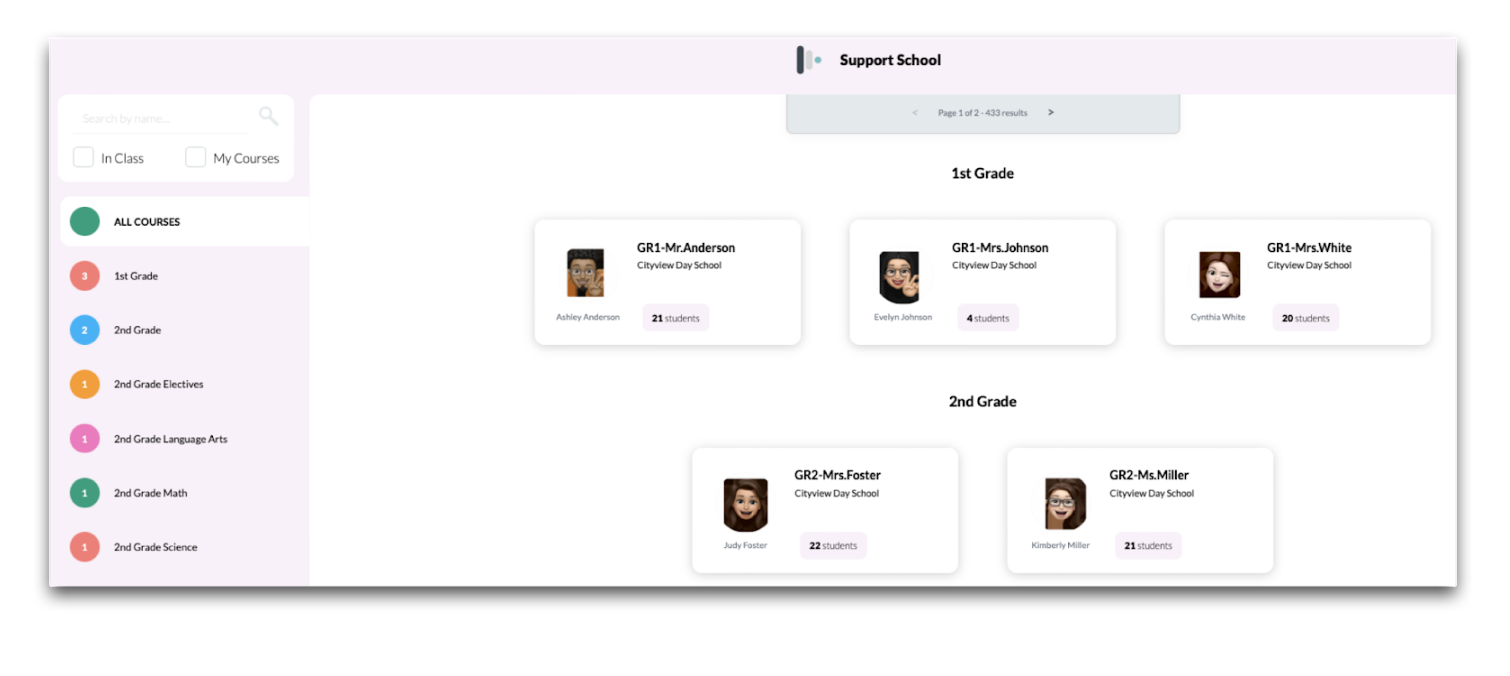
After selecting a class, the Class Manager Features are organized into the following sections:
- Class Feed
- Class History (macOS only)
- Study Apps
- Study Sites
- Heads Up!
- Safe Test
- App Lock
- Quick Poll
- Settings
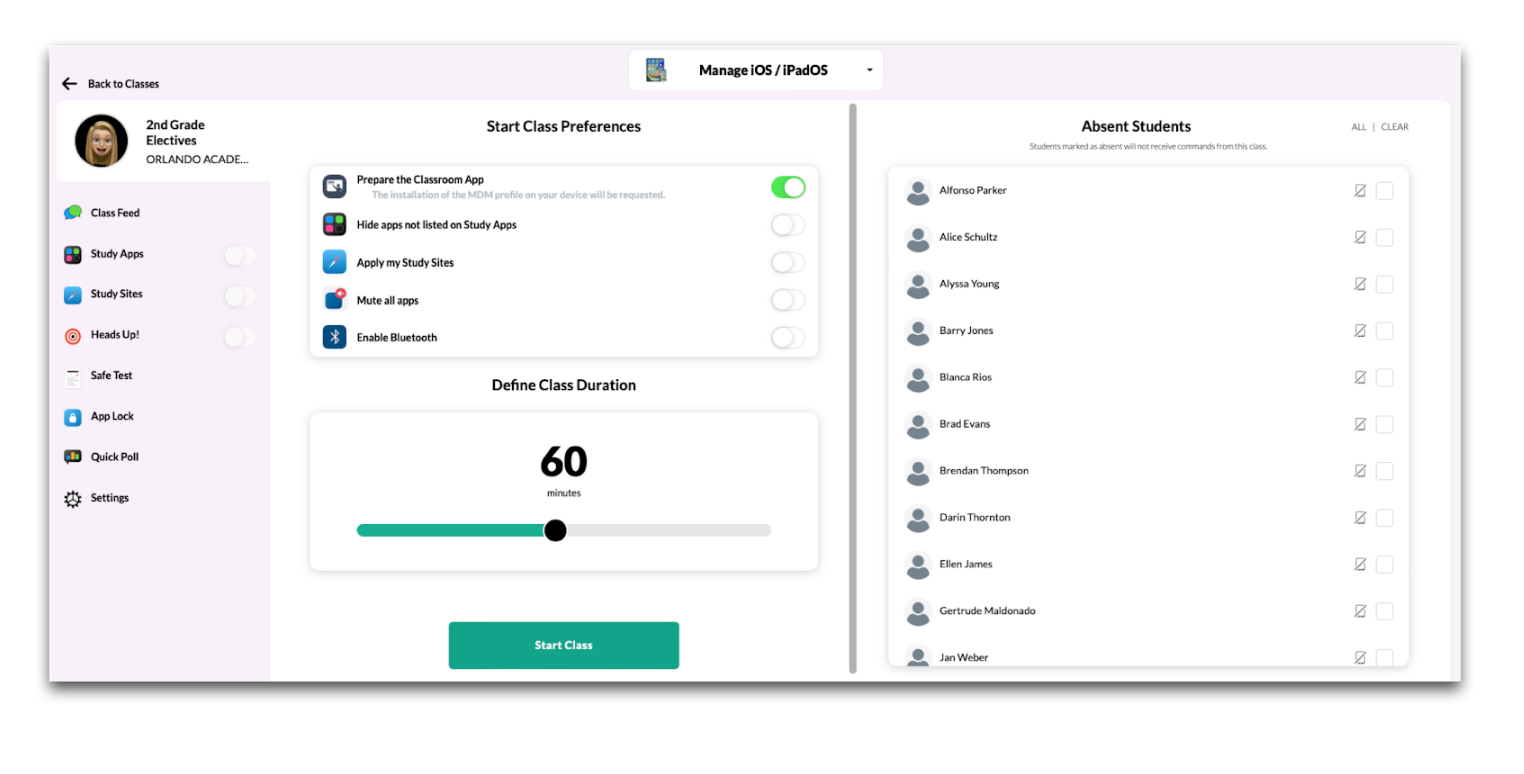
Class Manager Features
Class Feed
Each class features a Class Feed which is a message forum for the teacher and students in the class. Administrators, Teachers, and students can post messages within the Class Feed in the Mosyle Class Manager for others to see. Only messages containing text can be sent.
Deleting Messages
Teachers can delete individual messages within the Class Feed as needed.
Enable or Disable Class Feed
Posting in the Class Feed can be enabled or disabled for student devices by the Mosyle Admin under My School > Preferences > Other Settings > General Preferences > Check or Uncheck "Allow students to post in the Class Feed". When this option is unchecked, students are unable to post in the Class Feed but can still view messages posted by Teachers or Administrators. The setting configured will apply to the entire account and all students/classes.
Starting a Class & Class Preferences
To access the features of Mosyle Class Manager, the teacher will need to first select the class. After selecting the class, the teacher can navigate between managing iOS/iPadOS devices or macOS devices using the dropdown menu at the top.
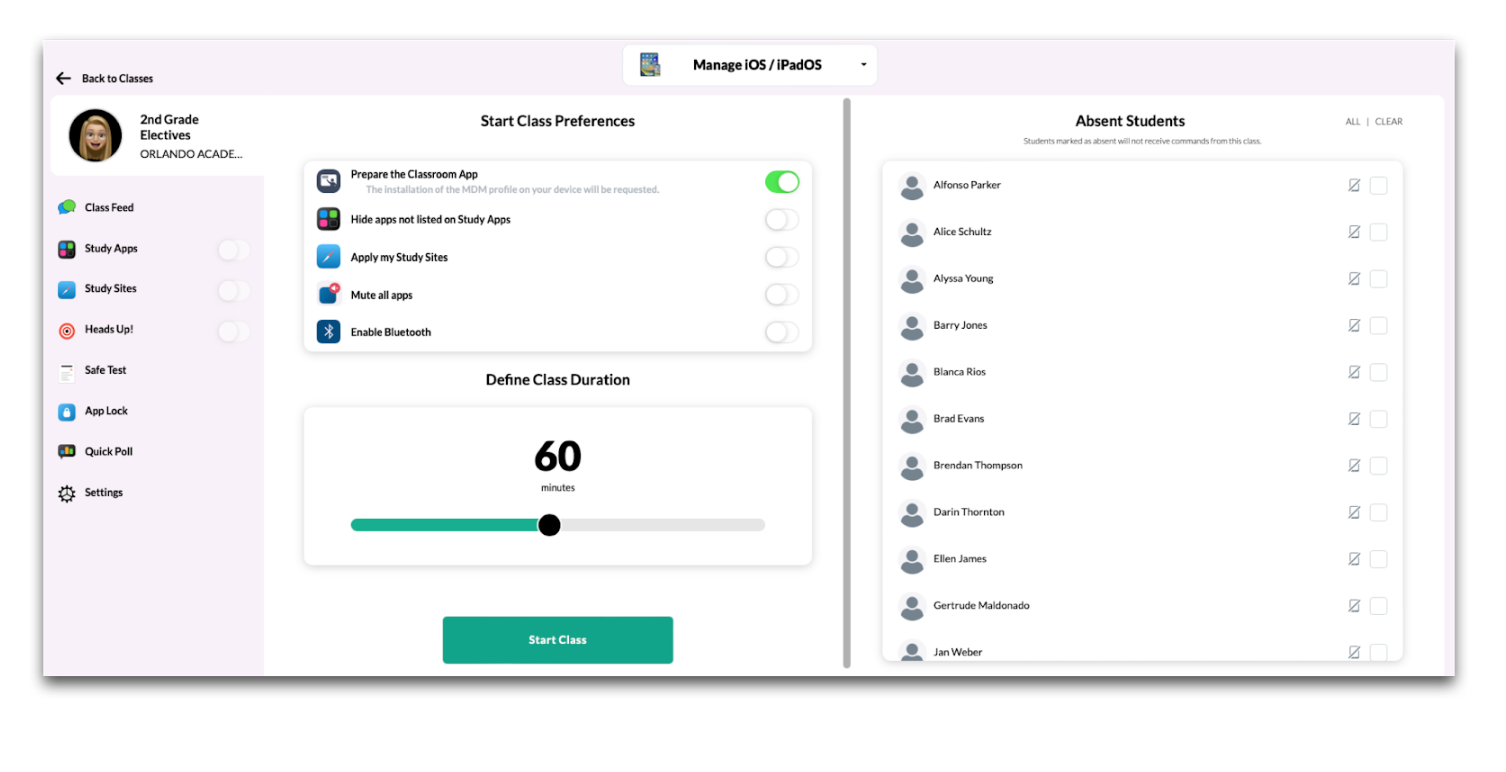
Students assigned to the class are listed on the right side. Any students that are absent should be selected so that commands initiated during the class session will not be sent to the student device. Since Class Manager commands are delivered over the network and do not require students to be within proximity of the teacher device, if a student is not present in class, their device will still be affected by commands if they are not marked "Absent".
The middle section allows teachers to define their Start Class Preferences, or preferences that will be applied immediately upon starting the class.
Prepare the Classroom App
Toggle on the option to ensure the Education Configuration profile is installed on all devices when starting the class. The Education Configuration profile is necessary to configure MDM-synced classes in Apple Classroom. If the Mosyle Administrator has configured settings to prevent the installation of the Education Configuration profile, it will not be installed, even if toggled on.
Administrators can configure the settings for the Education Configuration profile under:
- My School > Hierarchy > Locations > Check or uncheck the box for “Do not install the Education Profile for any students or teachers at this location. If the users belong to more than one location the education profile will not be installed for either location.”
- My School > Preferences > Other Settings > iOS/iPadOS and/or macOS > Check or uncheck the box for “Automatically install and update the Education Configuration profile for Apple Classroom app on all devices and allow teachers to use the Education Configuration profile during "Start Class" in Mosyle Class Manager.”
Hide apps not listed on Study Apps
Toggle on the option to immediately hide or block all applications installed on student devices that are not listed in the Study Apps list after clicking “Start Class”. On iOS and iPadOS devices, apps not selected in Study Apps will be hidden. On macOS devices, apps not selected in Study Apps will be unable to launch.
Apply my Study Sites
Toggle on the option to immediately block websites that are not specified in the Study Sites list after clicking “Start Class”. Study Sites utilizes a global proxy to only allow the sites listed. Since devices can only have one global proxy profile installed at a time, any other global proxy configured in the Web Filter management profile will be removed to install the configuration for Study Sites. When the class is over, the global proxy configured in the Web Filter management profile will be reinstalled.
If a specific global proxy is required on devices at all times, or if a DNS Proxy Extension is being utilized, its recommended Administrators remove the option for teachers to use Study Sites under My School > Preferences > Other Settings > iOS/iPadOS and macOS > Check the box "Do not allow teachers to use "Study Sites"" > Save.
Mute all apps (iOS & iPadOS only)
Toggle on the option to immediately mute application sounds after clicking "Start Class". This feature will also block app notifications.
Enable Bluetooth
Toggle on the option to immediately enable Bluetooth on devices after clicking "Start Class". On iOS and iPadOS devices, Bluetooth will be forced on and cannot be turned off. While enforced, students will be unable to pair new devices. On macOS devices, Bluetooth will be turned on.
Class Duration
Set the duration of the class to ensure student devices are automatically released from any restrictions at the end of class. Use the slider tool to set the duration of the class (in minutes). If necessary, the duration of the class can be increased by clicking “+10 min”, or the class can be ended before the expected time by clicking “End Class”.
Start Class
Click Start Class to apply any configured preferences. Students will be notified the class has begun. When the class has concluded, end the class by clicking "End Class" or use the toggle to turn the class "Off".
If starting a class where students are not assigned 1:1 to devices, teachers will be prompted to select a "Shared Device Group" to be used. Only Shared Device Groups in the same location as the teacher/class will be available. The location for the Shared Device Group can be modified under My School > Hierarchy > Shared Device Groups > Select the group > Edit.
After selecting the Shared Device Group, teachers can choose to automatically assign students to devices or allow students to self-assign by choosing their name/photo from the class roster data.
- Auto Assignment: Mosyle will randomly pair 1 student per 1 device enrolled in the selected Shared Device Group. Students will be able to identify which device they have been assigned to by viewing the lock screen where their name and photo (if uploaded) will be displayed. Teachers will be able to view which device each student is assigned within the Class Manager app as the device name will be displayed directly under each student's name.
- Roster: Mosyle will display all students' names and photos (if uploaded) on the lockscreen of each device enrolled in the Shared Device Group. From this view, each student can select their name or photo to login and complete the assignment of the shared devices.
Class View
Once a class is started, teachers can view information regarding student devices during the class. Options and features available per OS are listed below.
- Status
- Timeline (macOS)
- Live Screen (macOS)
- Screenshots (macOS)
- Absent
- Refresh Screen (iOS/iPadOS)
- Allow Camera & Block Camera (iOS/iPadOS)
iOS /iPadOS Class View
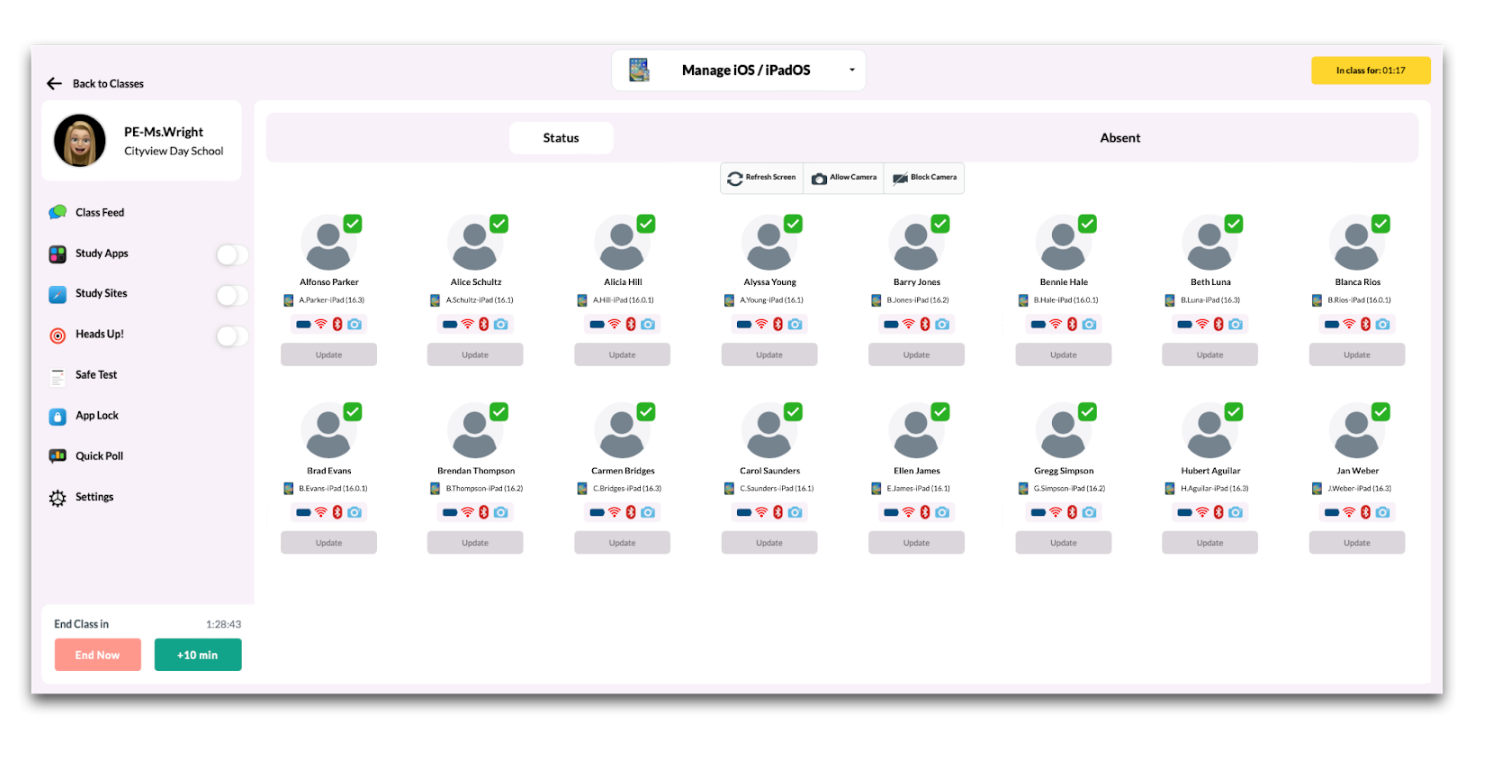
- Status
After the class is started, teachers will see a list of their students along with the name of the device assigned to the user. Additional information such as battery level, WiFi, Bluetooth status, and Camera access will be displayed. Teachers can click "Send Push" to call the device to the MDM to retrieve any pending commands. Click "Refresh Screen" to refresh the class roster view. - Absent
The Absent tab allows teachers to make any modifications to the list of students marked absent for class. This way if any students happen to be tardy, the teacher can remove them from the absent list so they are included in the class. - Allow Camera
Some Administrators apply a restriction to student devices which block the use of the Camera application. In this scenario, including the Camera app in Study Apps will not allow the use of the Camera app as the restrictions will take precedence. Teachers can temporarily allow the Camera to be used during class by clicking "Allow Camera" which will temporarily remove the Camera restriction. The restriction will be reapplied when the class ends or when teachers click "Block Camera". - Block Camera
Teachers can apply an additional restriction for the Camera application using the "Block Camera" option. This will prevent the use of the Camera in any/all applications on the device.
macOS Class View
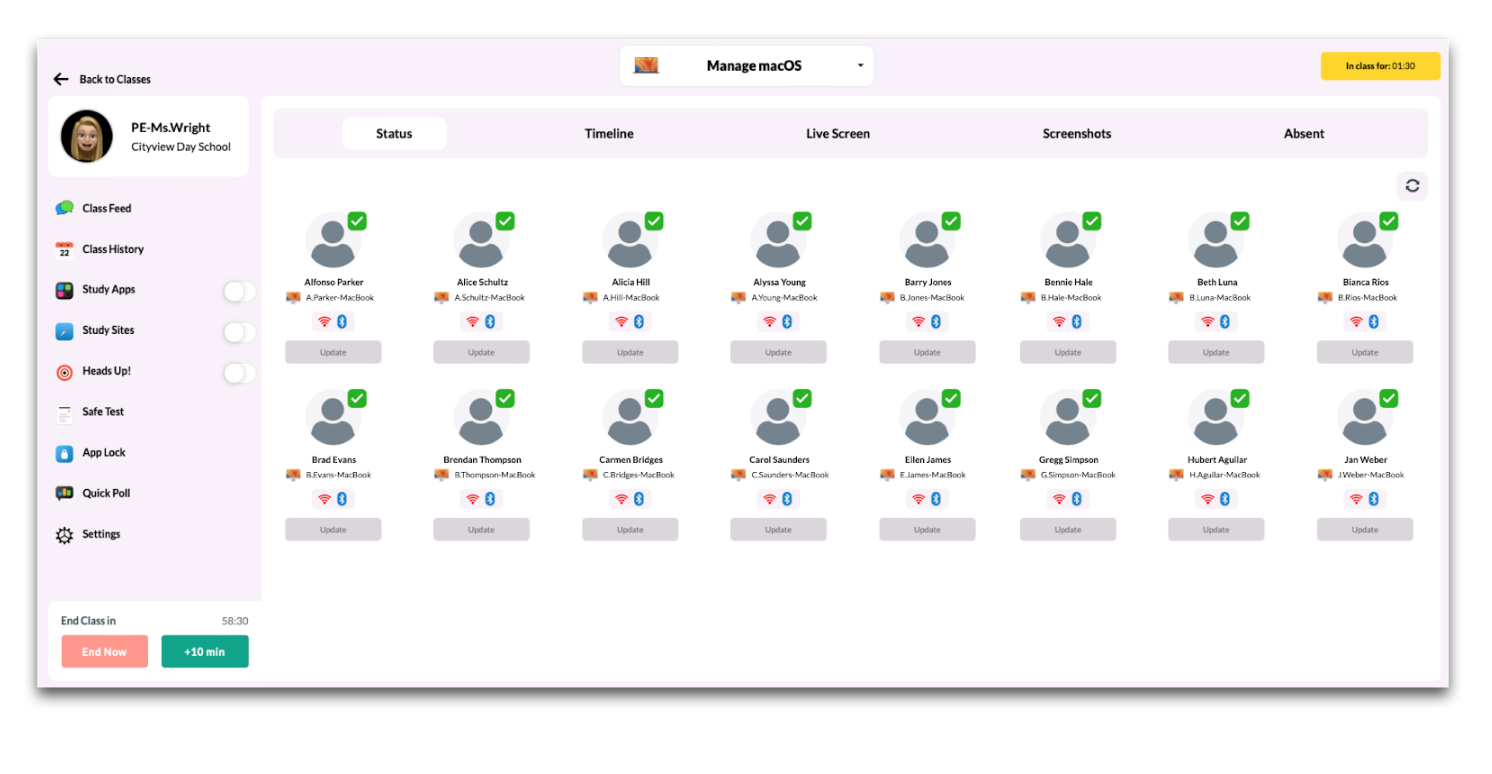
- Status
After the class has started, teachers will see a list of their students along with the name of the device assigned to the user. Additional information such as WiFi and Bluetooth status will be displayed, along with the option for the teacher to "Send Push" to call the device to the MDM to retrieve any pending commands. - Timeline (macOS only)
View a chronological timeline of student interactions with applications installed on the Mac. To the right of each student's name is a chart displaying the applications accessed during class and the duration each was open. Only the application that is present in the foreground on the Mac will be displayed. The Timeline is updated every 5 seconds.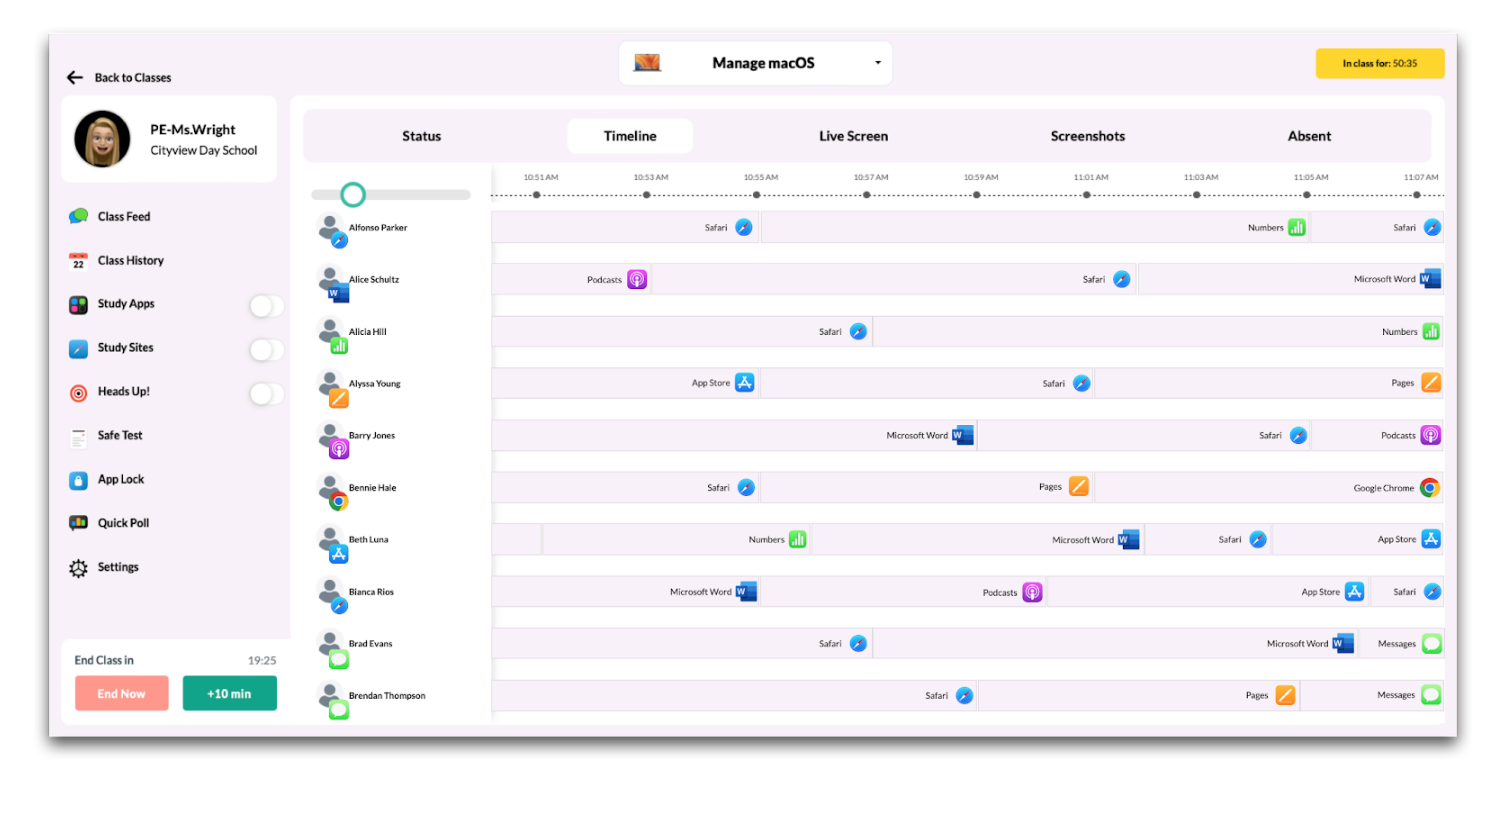
-
Live Screen (macOS only)
Teachers can view the screens of student devices in real time. Selecting this option will display the screens of all students at the same time. Live Screen requires student's grant Screen Capturing privacy permissions for the Mosyle Manager application.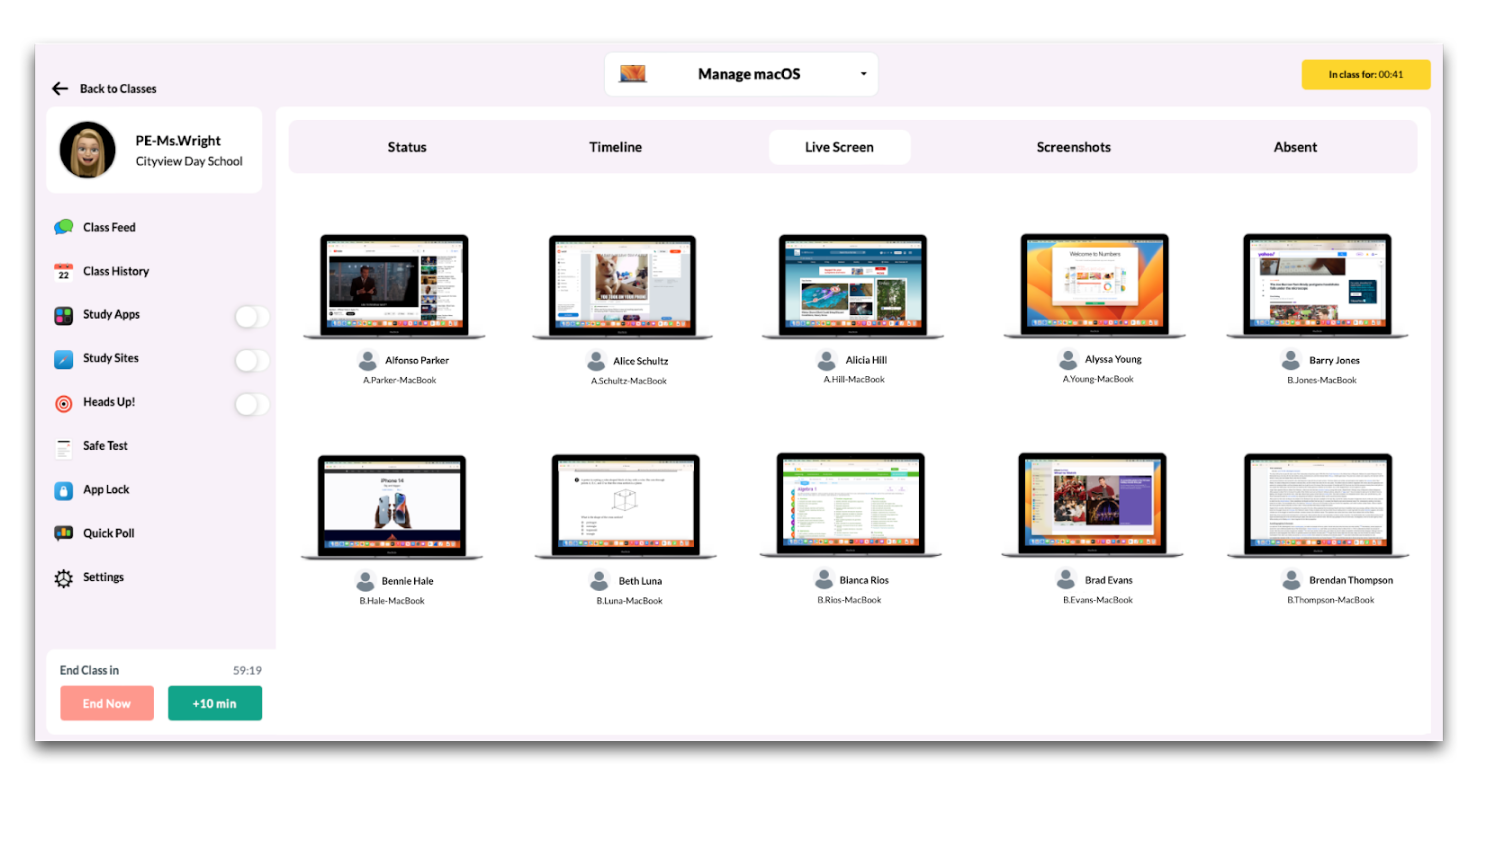 To view an individual student's screen, click the Mac icon. The student's screen will be displayed in an individual pop-up, from here teachers can take a screenshot of the screen or view it in full screen.
To take a screenshot or view in full screen:
- Click the Mac icon for the student device
- Click the Save icon at the bottom right of the screen or expand to see it in full screen
Any and all screenshots of student devices will be accessible to view in the Screenshots tab or in Class History.
- Screenshots (macOS only)
Screenshots of student screens while displayed through the Live Screen feature can be taken during class and viewed during the class session by clicking the Screenshots menu item. A history of all screenshots will be available by date under the Class History.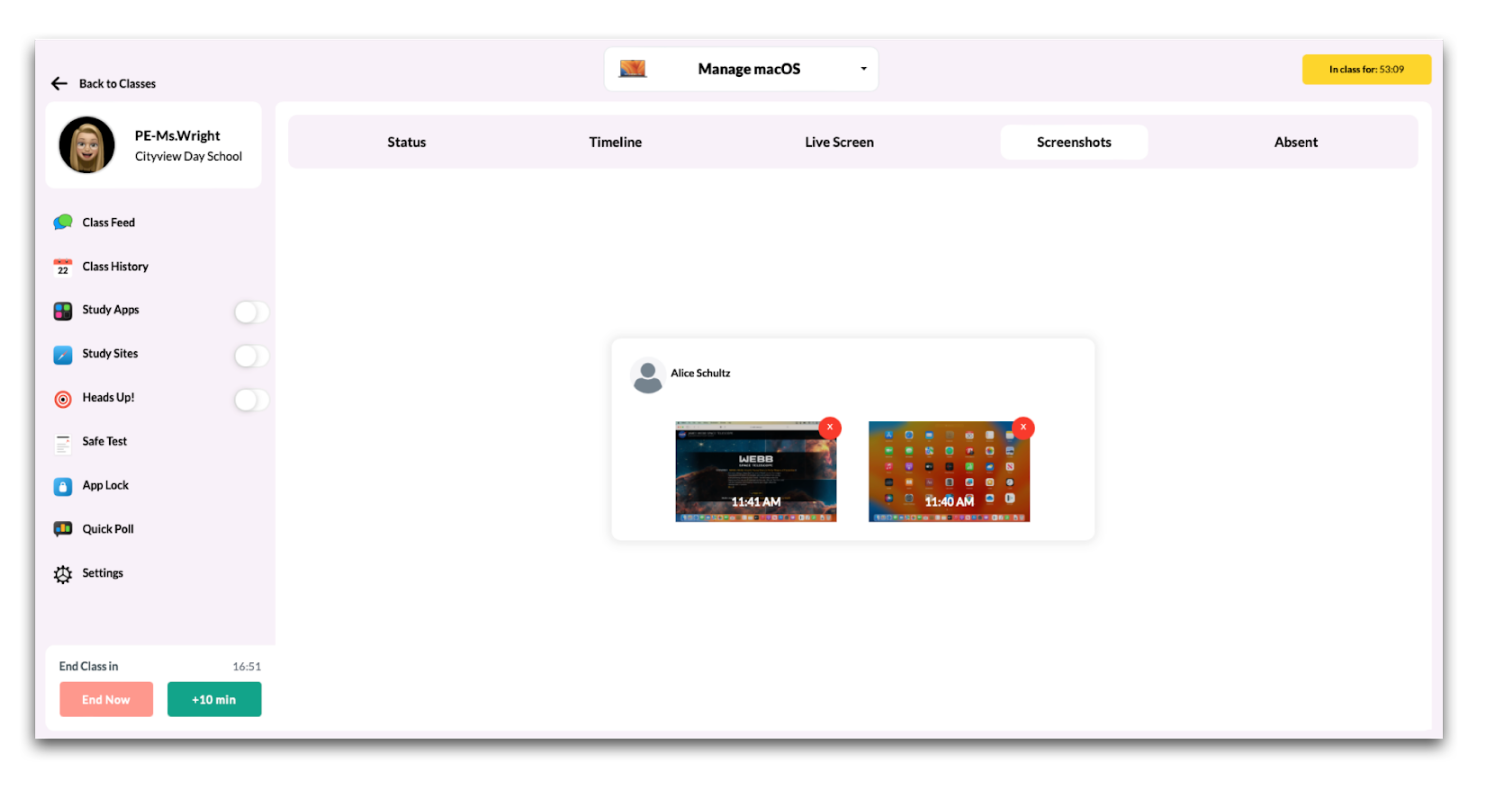
- Absent
The Absent tab allows teachers to make any modifications to the list of students marked absent for class. This way if any students happen to be tardy, the teacher can remove them from the absent list so they are included in the class.
Notes:
- Live Screen uses peer-to-peer communication and requires devices are on the same local network. Live Screen will not work if student devices are remote or on a different network than the teacher device.
- Communication is through the dynamic port range (~49k through 65k).
- For privacy purposes, the macOS will prompt students to allow screen capture permission for the Mosyle Manager app in order for teachers to view the screens. There is no way to bypass this prompt. Teachers can use the Apple Classroom application to view student screens without prompting for permission.
Study Apps
The Study Apps feature allows teachers to create a list of allowed apps for each class, allowing customization of app access based on the unique characteristics of each group of students. The Study Apps configuration will be applied to all students in the class.
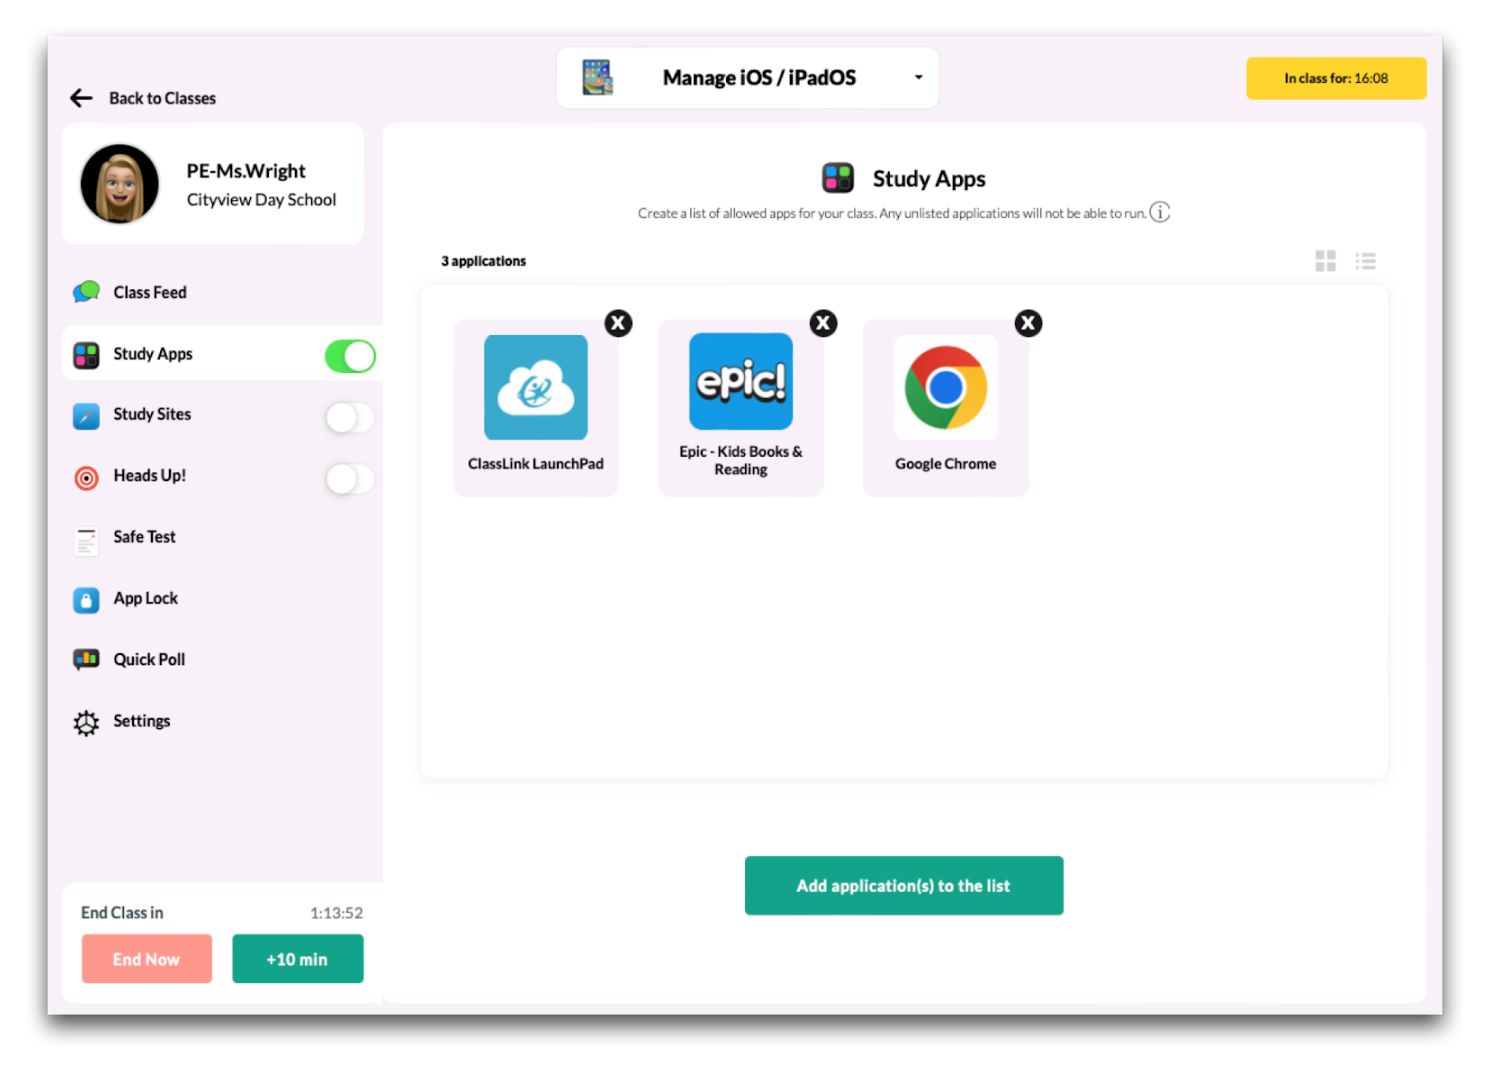
When Study Apps is enabled, only the apps available in the list will be accessible. On iOS and iPadOS devices, apps not listed will be hidden. On macOS devices, apps not listed will not launch.
Notes:
- If a specific app is required on devices at all times, its recommended Administrators let teachers know to always include the app in their list of Study Apps. For example, an app used for a web filtering solution. If you need assistance, submit a Support Ticket and our team will be happy to help.
- Apps installed through Study Apps are not removed from devices when the class ends. To remove any apps installed through Study Apps, go to Management > Devices Overview > Select the devices > Remove all apps > Remove apps no longer assigned.
Access the Study Apps List
To access the list of Study apps, navigate to the Mosyle Class Manager > Select the class > Click Study Apps from the menu on the left side of the screen.
Add or Remove Apps in the Study Apps List
To add applications to the list of Study Apps, click the “Add application(s) to the list” button at the bottom of the screen. Teachers can search for applications available in the Apps and Books token, the App Store, or by searching a list of Native Apps. The availability of each list is dependent on the access permitted by the school's Mosyle Manager Admin, see additional information below.
After finding and selecting the application to add to the list of Study Apps, click the check mark in the upper right corner. Icons for any and all applications selected will be displayed in the list.
Turn on and Apply Study Apps
Once the list of Study Apps is created it can be turned on and applied to the student devices in the class. If there are no apps listed in Study Apps, all apps will be hidden on the devices with the exception of the Mosyle Manager and Settings app.
Apply the Study Apps list to classes after they have been started by toggling on the Study Apps option in the menu. Toggle off at any time to remove Study Apps.
Availability of Apps in Study Apps List
Administrators can configure the Mosyle account so that teachers are only able to select apps from the App Store, Apps and Books token, or both when creating a Study Apps list.
-
Access to Apps and Books token
Give teachers access to select apps from the Apps and Books token when creating a Study Apps list under Management > Applications > Apps and Books > Click Edit for the token > Check the box 'Allow teachers to use the licenses from this account to install applications from the "Study Apps" list when starting a class. All licenses will be assigned using the method "device based"'. The teacher will need to be associated with the same location(s) that is allowed access to the Apps and Books token to view and select apps.
By providing teachers with access to the Apps and Books token in Study Apps, by default, any apps that are selected in Study Apps that are not yet installed on student iOS and iPadOS devices will automatically be installed when the teacher turns on Study Apps.
-
Access to App Store apps
Give teachers access to select apps from the App Store when creating a Study Apps list under My School > Preferences > Other Settings > iOS/iPadOS > Check the box to "Allow teachers to search for Study Apps on the App Store" > Click Save.
Select whether or not the apps selected by teachers from the App Store will automatically be installed on iOS and iPadOS devices if not already installed when the teacher turns on Study Apps. Check the box "Install application(s) chosen in "Study Apps" automatically when selected from the App Store" to install apps selected. Uncheck the box to ensure the apps are not installed. When apps are installed from the App Store users will be prompted to enter their Apple ID and password.
Study Sites
The Study Sites feature allows teachers to create a list of allowed websites for each class, allowing customization of website access based on the unique characteristics of each group of students. The Study Sites configuration will be applied to all students in the class.
When Study Sites is enabled, only the websites configured in the list will be accessible. Port 3180 is required for the use of Study Sites.
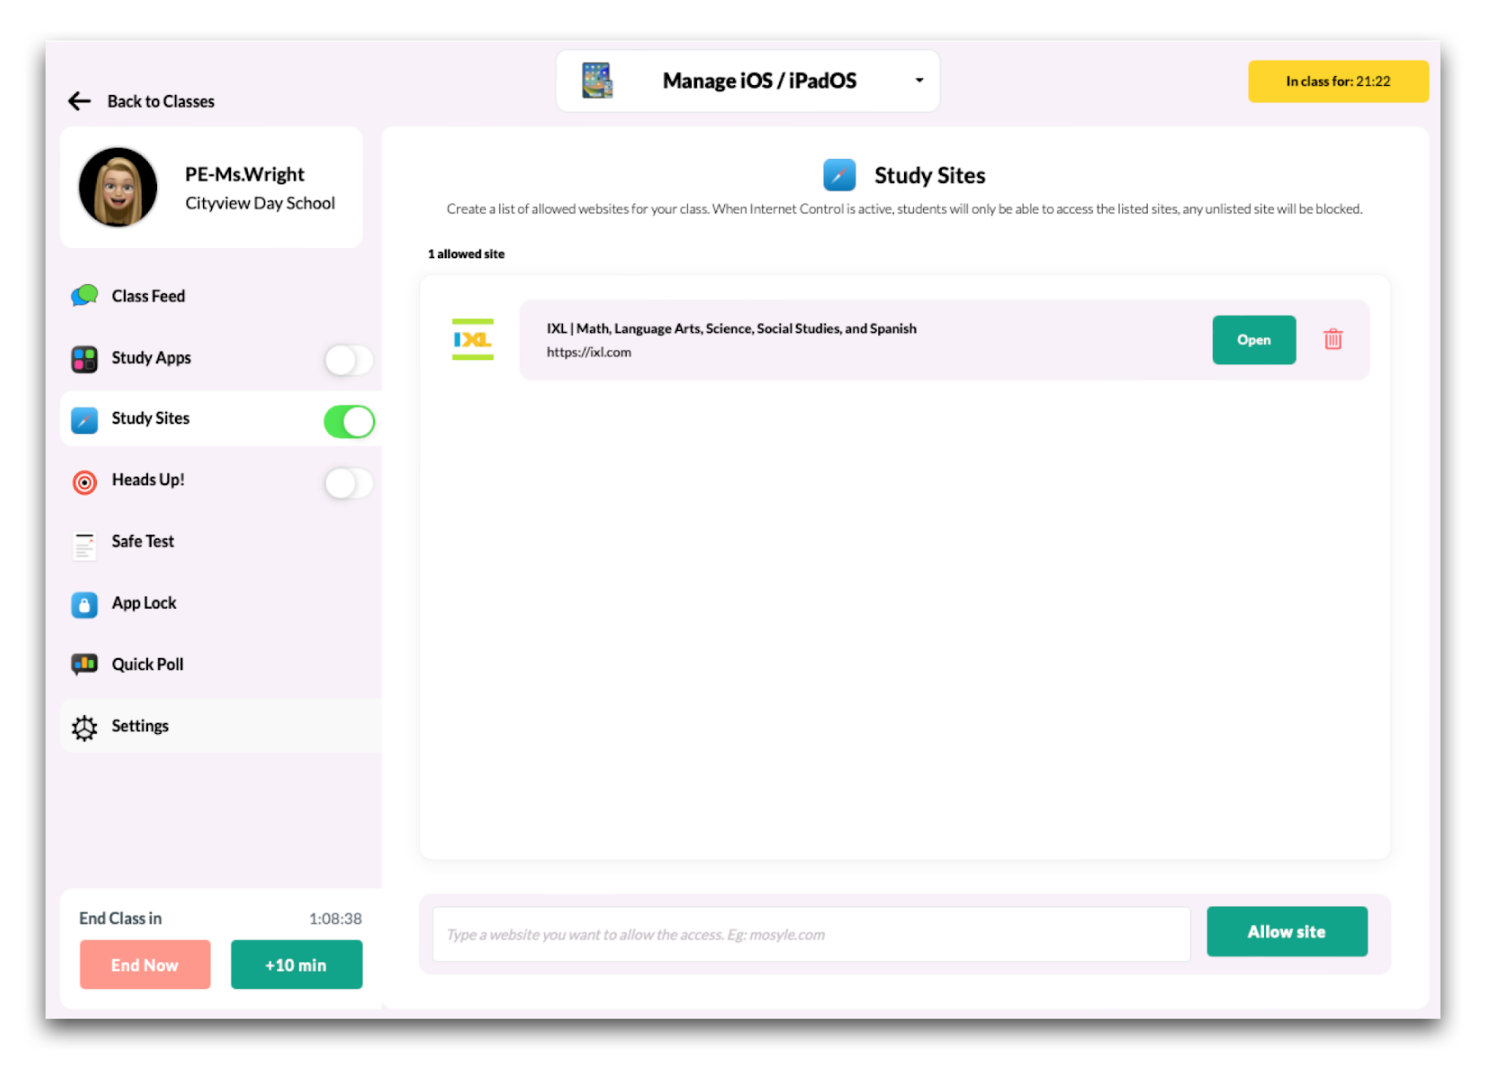
Notes:
- Study Sites utilizes a global proxy to only allow the sites listed. Since devices can only have one global proxy profile installed at a time, any other global proxy configured in the Web Filter management profile will be removed to install the configuration for Study Sites. When the class is over, the global proxy configured in the Web Filter management profile will be reinstalled.
- If a specific global proxy is required on devices at all times, or if a DNS Proxy Extension is being utilized, its recommended Administrators remove the option for teachers to use Study Sites under My School > Preferences > Other Settings > iOS/iPadOS and macOS > Check the box "Do not allow teachers to use "Study Sites"" > Save.
- The configuration of Study Sites can interrupt the use of apps if all domains and subdomains needed for the app are not listed and allowed in Study Sites.
- Mosyle, Google, and Apple domains will automatically be allowed to ensure proper communication between the MDM and devices.
Access the Study Sites List
To access the list of Study Sites, navigate to the Mosyle Class Manager > Select the class > Click Study Sites from the menu on the left side of the screen.
Add or Remove Apps in the Study Sites List
To create the list of Study Sites, select the class where the Study Sites will apply, then click Study Sites from the menu on the left side of the screen.
- To add websites to the list, type the website URL in the field at the bottom of the screen and click the “Allow domain” button. The domain will automatically be listed.
- To remove a domain, click the trashcan icon to the right of the domain to delete. Once all domains are added, they will be displayed as a list of all allowed websites.
Websites added to the list of Study Sites will be available to students in the Mosyle Manager app under “My Web Clips”. Clicking the link will navigate the students to the specified website.
Turn on and Apply Study Sites
Once the list of Study Sites is created it can be turned on and applied to the student devices in the class. If there are no websites listed in Study Sites, all websites will be blocked on the devices with the exception of Mosyle and Apple domains when Study Sites is turned on.
Apply the Study Sites list to classes after they have been started by toggling on the Study Sites option in the menu. Toggle off at any time to remove Study Sites.
Heads Up
The Heads Up feature allows teachers to quickly disable/lock student devices to gain attention during a lesson or explanation. The Heads Up configuration will be applied to all students in the class when it is turned on.
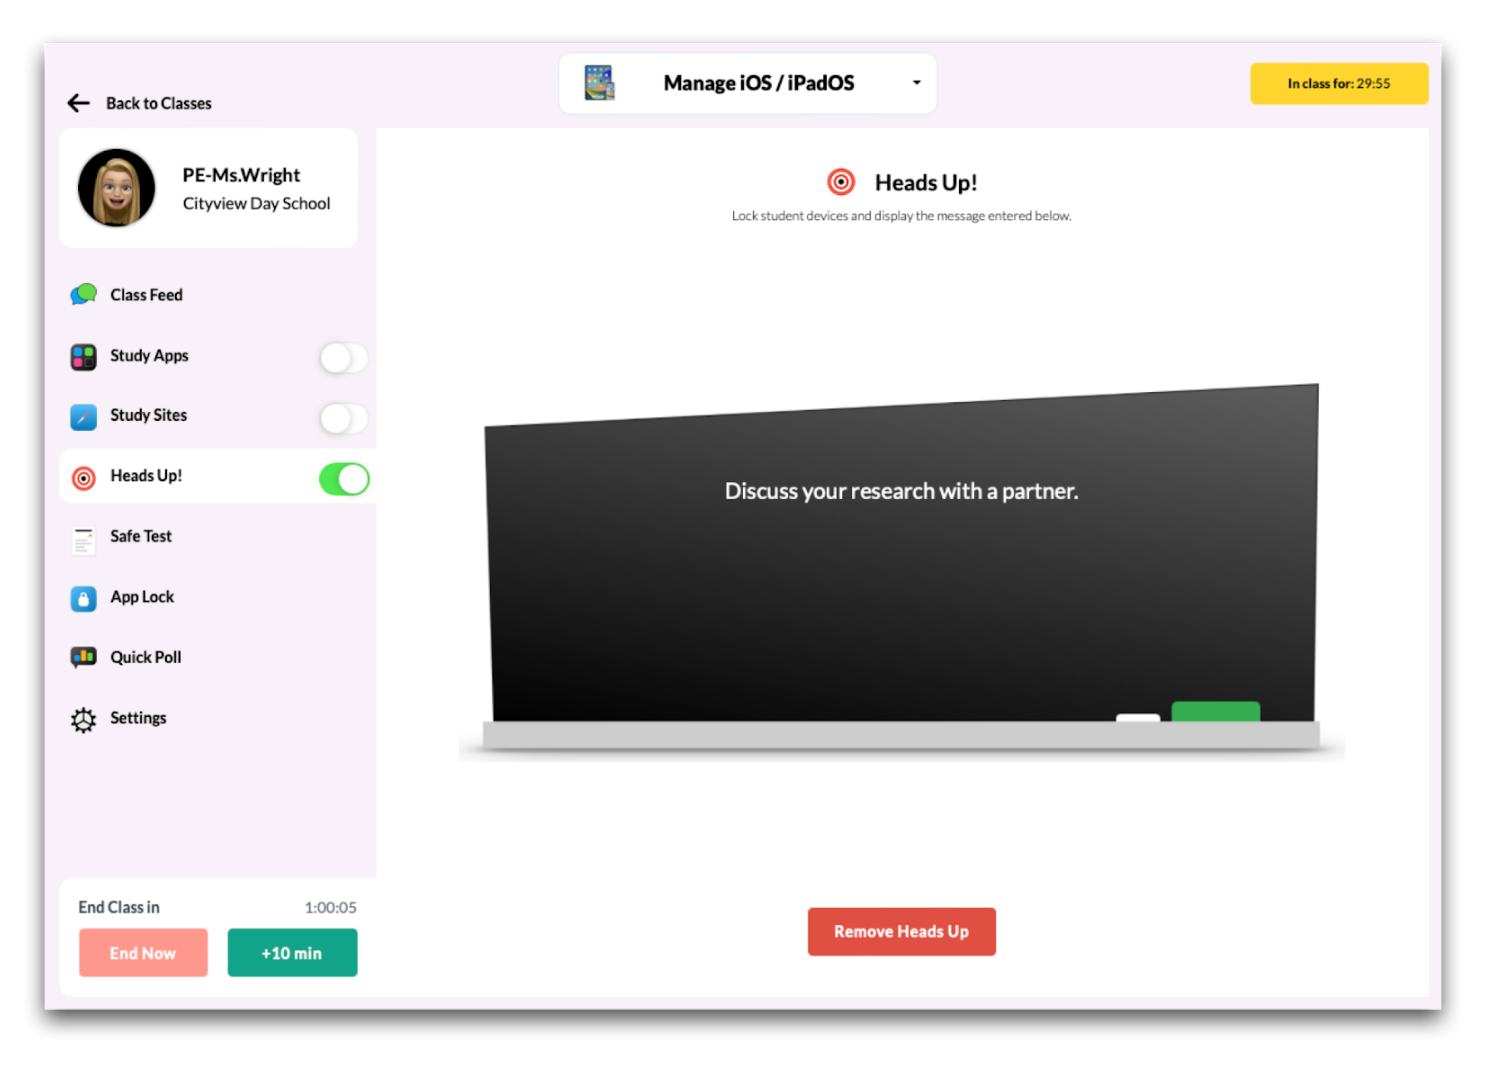
Access Heads Up Configuration
To access the Heads Up configuration, navigate to the Mosyle Class Manager > Select the class > Click Heads Up! from the menu on the left side of the screen.
Customize the Heads Up Configuration
To customize the message in Heads Up, select the “Heads Up” option from the menu on the left. Next, click the text on the blackboard and type in the message to be displayed on student devices.
Turn on and Apply Heads Up
Heads Up can only be applied after a class has been started by toggling on Heads Up from the menu on the left side of the screen or by navigating to Heads Up and then clicking “Apply Heads Up”.
Heads Up can be turned off using one of the following methods:
- End the Class
- Use the toggle to turn the Heads Up feature “Off”
- Click “Remove Heads Up” button from the Heads Up screen
Safe Test
The Safe Test feature allows teachers to quickly lock student devices into a specific website, preventing students from navigating to other online resources or browsing the Internet. The Safe Test configuration will be applied to all students in the class when it is turned on.
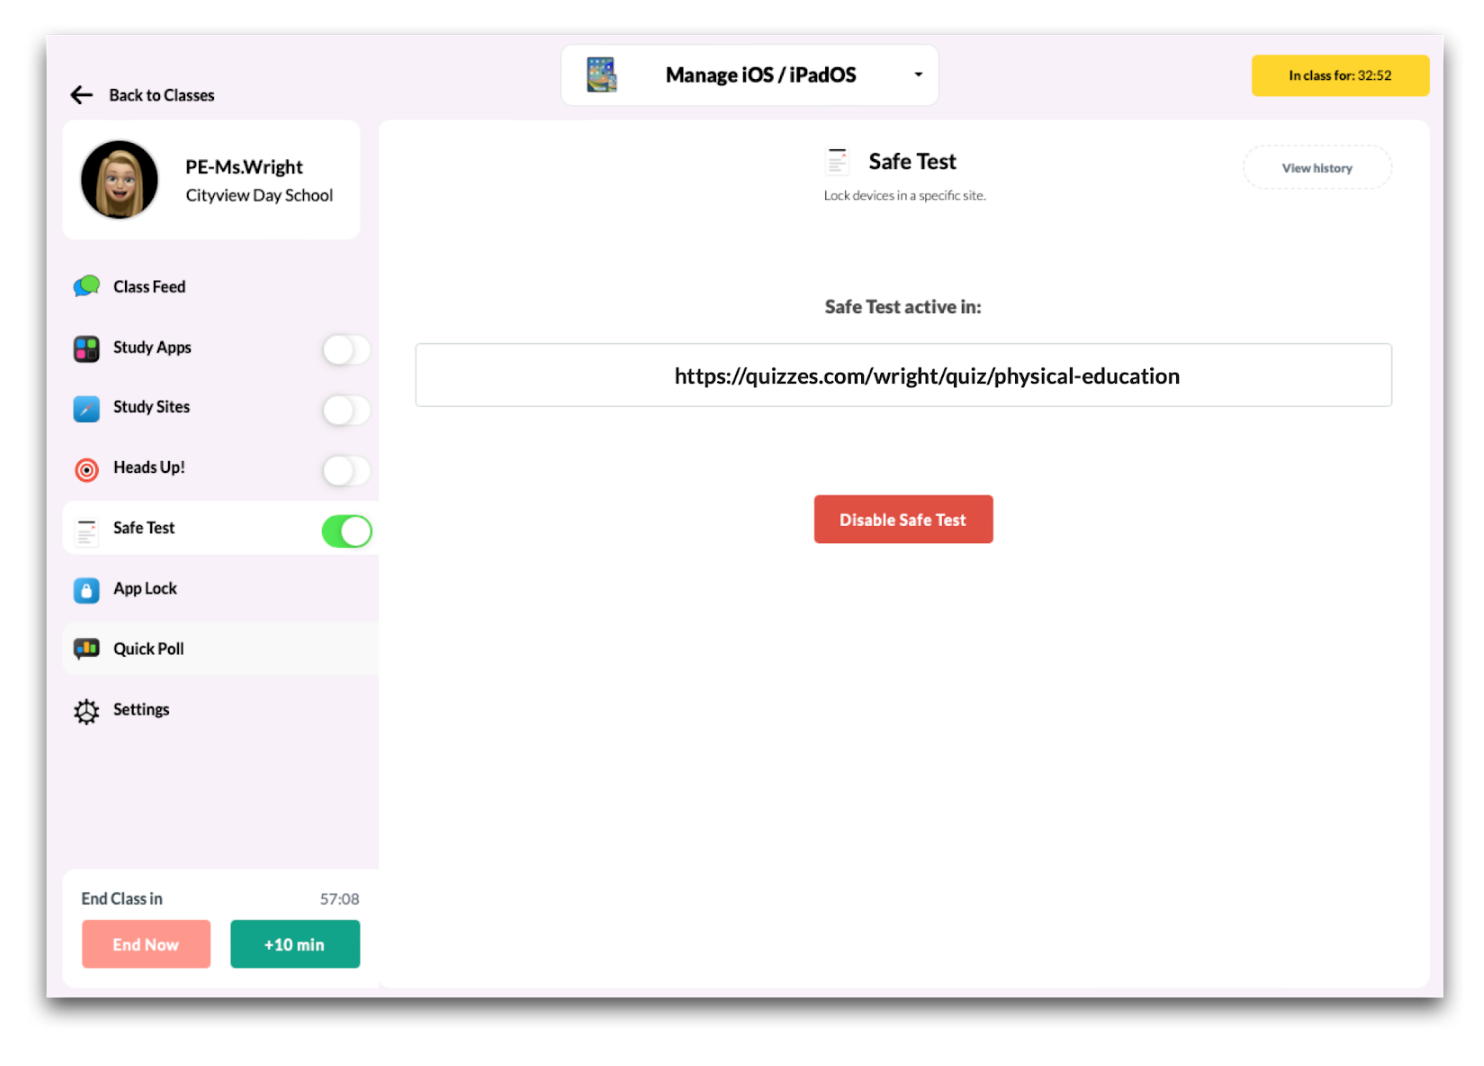
Access Safe Test Configuration
To access the Safe Test configuration, navigate to the Mosyle Class Manager > Select the class > Click Safe Test from the menu on the left side of the screen.
Update the Safe Test Configuration
To update the website in Safe Test, select the “Safe Test” option from the menu on the left. Next, click the field to enter the URL for the website that student devices will be locked into.
Turn on and Apply Safe Test
Safe Test can only be applied after a class has been started. Once the class has been started, click Safe Test from the menu on the left side of the screen. Enter the Locked URL or select the last locked URL and choose the duration for Safe Test. When finished, click Apply Safe Test.
Safe Test can be turned off using one of the following methods:
- End the Class
- Use the toggle to turn the Safe Test feature “Off”
- Click “Disable Safe Test” button from the Safe Test screen
View History
In addition to applying the Safe Test feature, you can view the history of websites entered in Safe Test as well as the date and time they were applied by clicking “View History”.
App Lock
The App Lock feature allows teachers to quickly lock student devices into a specific app, preventing students from navigating to other resources or applications. The App Lock configuration will be applied to all students in the class when it is turned on.
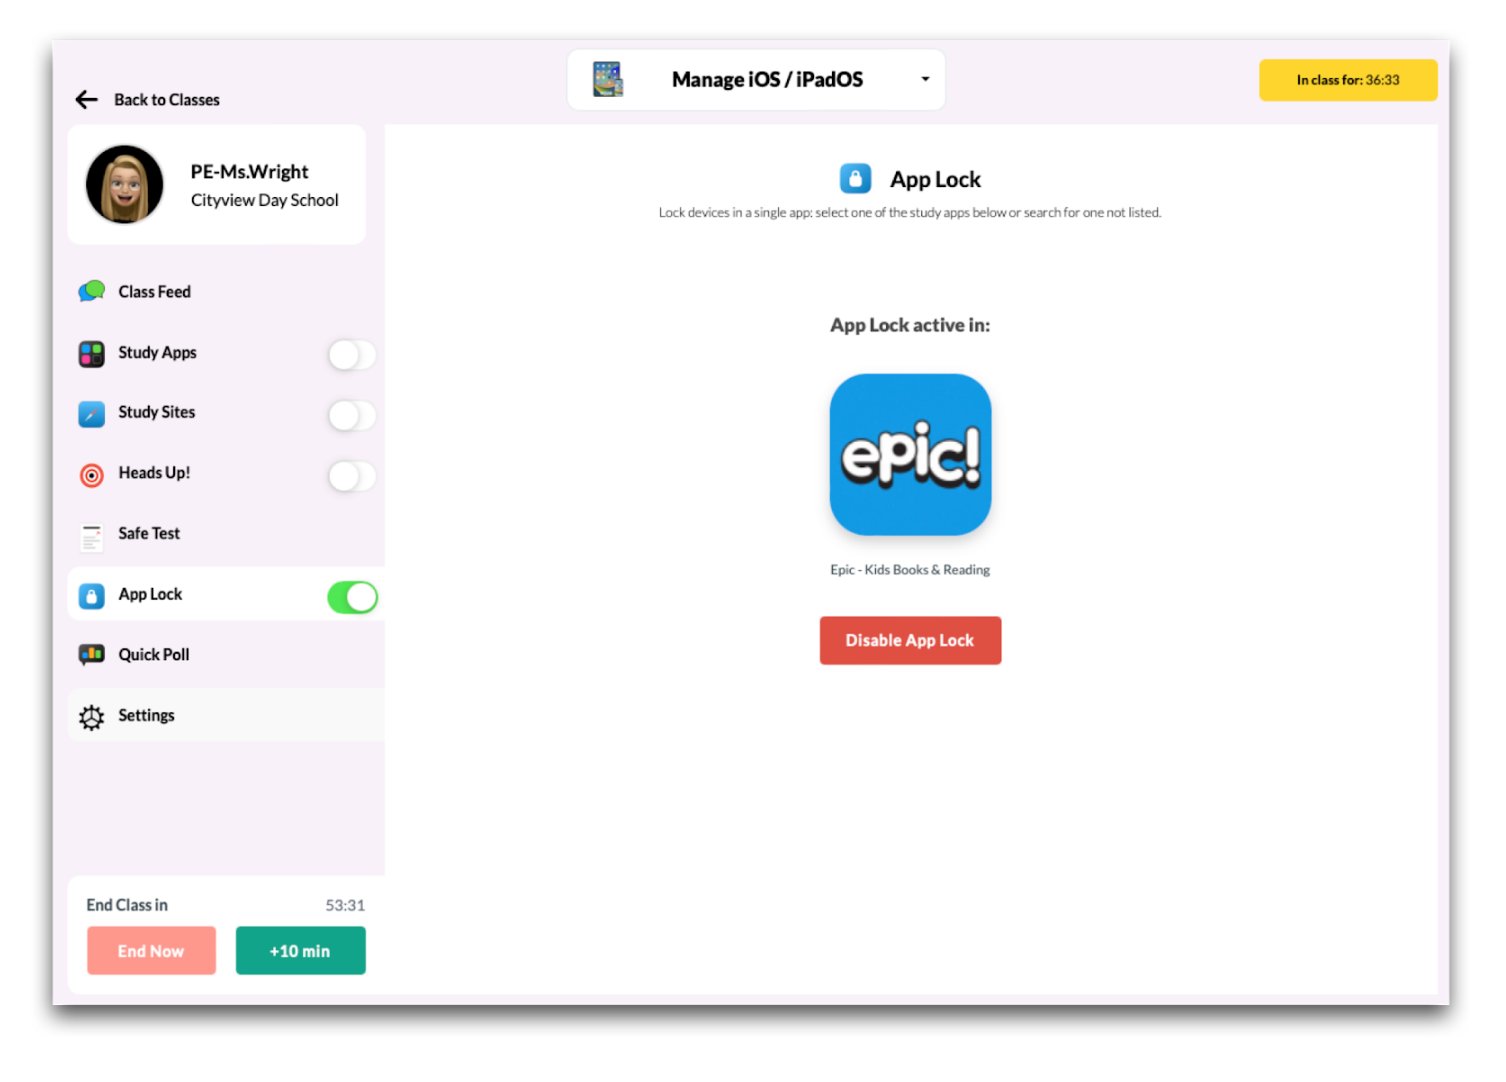
Access App Lock Configuration
To access the App Lock configuration, navigate to the Mosyle Class Manager > Select the class > Click App Lock from the menu on the left side of the screen.
Update the App Lock Configuration
To update the app selected in App Lock, select the “App Lock” option from the menu on the left. By default, all apps selected in Study Apps will be displayed in a list to provide the option for a quick selection. If the teacher would like to lock student devices into a different app, click Find App.
Turn on and Apply App Lock
App Lock can only be applied after a class has been started. Once the class has been started, click App Lock from the menu on the left side of the screen. Select the app and choose the duration for App Lock. When finished, click Apply App Lock.
App Lock can be turned off using one of the following methods:
- End the Class
- Use the toggle to turn the App Lock feature “Off”
- Click “Disable App Lock” button from the App Lock screen
Quick Poll
The Quick Poll feature allows teachers to quickly survey students to receive feedback and/or instantly view the level of student understanding. The Quick Poll configuration will be applied to all students in the class when it is turned on.
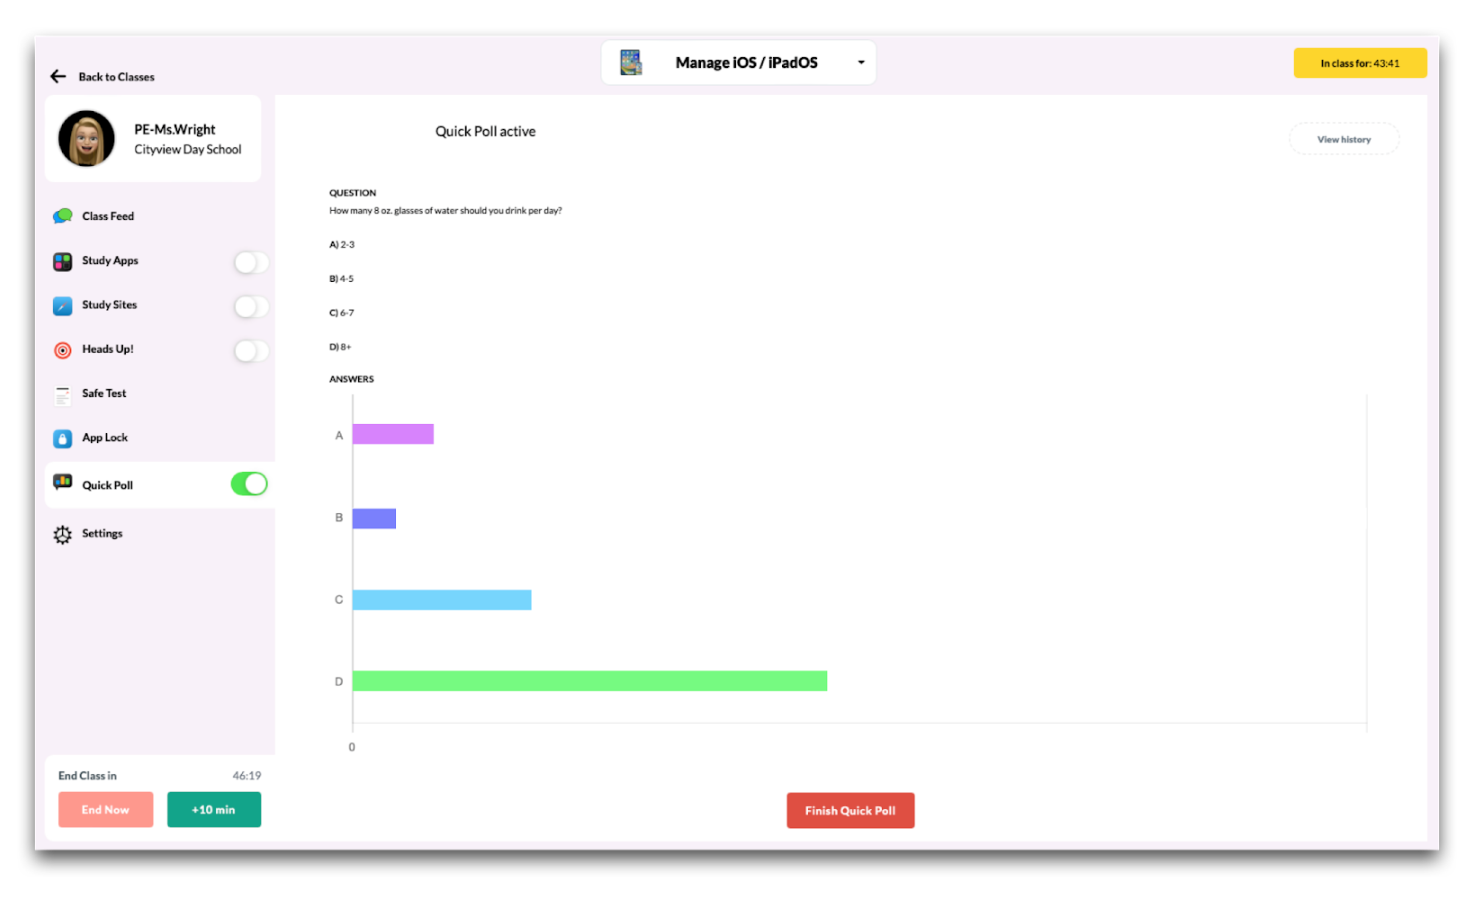
Access Quick Poll
To access Quick Poll, navigate to the Mosyle Class Manager > Select the class > Click Quick Poll from the menu on the left side of the screen.
Create a Quick Poll
To create a Quick Poll, select the “Quick Poll” option from the menu on the left. Enter the question that will be presented to students and choose whether the response should be a Short Answer or Multiple Choice. If Multiple Choice, enter the available options. If additional multiple choice options are needed, click the button “Add more options”.
Turn on and Apply Quick Poll
Quick Poll can only be applied after a class has been started. Once the class has been started, click Quick Poll from the menu on the left side of the screen. Enter the question, select the response type, and choose the duration for the Quick Poll. When finished, click Apply Quick Poll.
After the Quick Poll is applied, student devices will be locked into the Mosyle Manager application until they provide a response to the Quick Poll or until the class ends. Teachers will be directed to a screen that will show students responses in real-time.
Quick Poll can be turned off using one of the following methods:
- End the Class
- Use the toggle to turn the Quick Poll feature “Off”
- Click “Finish Quick Poll” button from the Quick Poll screen
View History
In addition to applying the Quick Poll feature, you can view the history of polls delivered, the date and time in which they were delivered, as well as student responses by clicking “View History”.
Class Manager Settings
Teachers can access Settings for each class by going to Class Manager > Select a class > Settings from the menu on the left. Some available options that can be configured include:
Class Nickname
Personalize the name of the class. The class will be displayed with the nickname in the Class Manager app and in the Apple Classroom app.
Request Apps
Mosyle Administrators can allow teachers to request applications to be deployed to their student devices under My School > Preferences > Other Settings > iOS/iPadOS > Check or Uncheck the box "Allow teachers to send app requests to administrators". When finished, click Save.
Teachers can request applications by going to Class Manager > Select the class > Click Request Apps from the menu on the left side of the Manage iOS/iPadOS screen. Search for apps from the App Store to add to the request. After selecting the apps to add, choose the class(es) the apps should be deployed. When finished, click Save.
Administrators will receive the request in the Alerts area of the Mosyle Web Panel. Configure to receive the Alert by email under Management > Alerts > Click Config for Alerts via email.
Apple Classroom app
Overview
Apple Classroom is an app available for teachers to assist with the management of supported iPad and Mac devices. Click here for more information about Classroom.
Requirements
- WiFi with client-to-client communication allowed
- Ports 3284 and 3285 need to be released
- Bluetooth must be turned on and devices must be within range
- Student devices cannot have Airplane mode or Do Not Disturb enabled
- iPad devices running iOS 9.3 or later, Mac devices running macOS 10.14.4 or later. In order to take full advantage of all Classroom features, it is recommended both teacher and student devices are running the latest versions of macOS and iOS/iPadOS.
- Click here for additional network requirements
Requirements may vary depending on the type of classes configured in the Apple Classroom app. Please visit the following Apple User Guides for additional information:
Installing the Classroom App
Before teachers can use and access the Classroom app it must be installed on the devices. Mosyle Administrators can deploy the app to devices using device based licensing via the Install App profile. When using MDM-synced classes, only teacher devices need the Classroom app. To install the app, follow the steps below:
- Obtain licenses for the Classroom app in Apple School Manager
- Make sure the licenses are synced in Mosyle under Management > Applications > Apple Apps and Books > Click the token > Update
- Create the Install App profile under Management > Install app
- Choose the Apps and Books token as the installation source, select the app and choose users/devices to assign the profile
- Click Save
Configuring the Classroom App
Currently there are three methods for syncing classes to the Apple Classroom app: MDM-synced classes, classes synced with Apple School Manager, and unmanaged classes. For MDM-synced classes, the Education Configuration profile is required on devices. The Education Configuration profile will automatically be installed on 1:1 devices assigned to students or teachers with classes assigned and on Apple Shared iPad devices after a user logs in with their Managed Apple ID.
When using classes synced with Apple School Manager and unmanaged classes, the Education Configuration profile should not be installed as it could create a conflict. The automatic installation of the Education Configuration profile can be turned off using one of the methods below:
- By Location: Go to My School > Hierarchy > Locations > Select the location > Check the box "Do not install the Education Profile for any students or teachers at this location. If the users belong to more than one location the education profile will not be installed for either location." > Click Save
- iOS/iPadOS Only: Go to My School > Preferences > Other Settings > iOS/iPadOS > Uncheck the box "Automatically install and update the Education Configuration profile for Apple Classroom app on all devices and allow teachers to use the Education Configuration profile during "Start Class" in Mosyle Class Manager." > Click Save
- macOS Only: Go to My School > Preferences > Other Settings > macOS > Uncheck the box "Automatically install and update the Education Configuration profile for Apple Classroom app on all devices and allow teachers to use the Education Configuration profile during "Start Class" in Mosyle Class Manager." > Click Save
Using any of the methods above to turn off the automatic installation of the Education Configuration profile will trigger removal commands for the profile on any devices that currently have it installed.
Reinstalling the Education Configuration profile
If needed, the Education Configuration profile can be reinstalled on the devices using one of the methods below:
- In Bulk: Management > Devices Overview > Select the devices > Menu Option: Send Educational Profile
- Individual Devices: Management > Devices Overview > Click the device name to bring up the device info window > Menu Option: Send Educational Profile
Note: If any of the options to not automatically install the educational profile are selected, no commands will be generated.
Apple Classroom for User Enrolled Devices
Per Apple's MDM protocol, devices enrolled using User Enrollment cannot receive the Education Configuration profile to set up MDM-synced classes. In this case, teachers can make use of unmanaged classes which can be configured manually on the devices. Click here for more information about unmanaged classes in Apple Classroom.
Restrictions Available to Facilitate the use of Apple Classroom
Restrictions are available for supervised devices enrolled in the MDM to force certain permissions for the Apple Classroom app. Below are the available restrictions for each OS platform.
iOS & iPadOS Restrictions
The following restrictions are available for supervised iPad devices under Management > Restrictions.
- Do not allow observation via Classroom: When enabled this restriction, Classroom app cannot see the device screen.
- Force Permission to leave classes: When this restriction is enabled, a student enrolled in an unmanaged course via Classroom will need to request the teacher's permission when attempting to leave the course (iOS 11.3 or higher).
- Force Screen Viewing permission via Classroom app: When enabled, students will not be required to authorize Screen Viewing regardless of the Education profile option configured in the Location registration within Mosyle (iOS 10.3 or higher).
- Automatically join Classroom without prompting: When this restriction is enabled, student devices will automatically join Classroom when the teacher requests, without prompting student permission (iOS 11 or higher).
- Allow Classroom to lock to an app and lock device without prompting: When this restriction is enabled, teachers will be able to lock student devices into an app or lock the device, without prompting student permission (iOS 11 or higher).
- Force Unprompted Managed Classroom Screen Observation: When this restriction is enabled, teachers will be able to view the screens of student devices, without prompting student permission (iOS 11 or higher).
macOS Restrictions
The following restrictions are available for supervised Mac devices under Management > Restrictions > Functionality tab.
- Do not allow remote screen observation by the Classroom App (macOS 10.14.4 or higher)
- Automatically join Classroom classes without prompting (macOS 10.14.4 or higher)
- Force teacher permission to leave Classroom unmanaged classes (macOS 10.14.4 or higher)
- Allow Classroom to lock the device without prompting (macOS 10.14.4 or higher)
- Allow Classroom to perform AirPlay and View Screen without prompting (macOS 10.14.4 or higher and requires the installation of the Education Configuration profile from the MDM)
Mosyle OneK12 features
Mosyle Auth 2
Overview
Mosyle Auth 2 for macOS allows end users to login to the Mac with their organization credentials. Configure Mosyle Auth 2 so that users login on the Mac with their Google Workspace, Microsoft Azure AD, Active Directory (LDAP or AD FS), or On-Premise Active Directory credentials, and keep the passwords synced between the Mac local user account and SSO.
Users must exist in Mosyle in order to login on the Mac via Mosyle Auth. When using Google or Microsoft Azure AD, the user's email address registered in Mosyle must match the email address registered in the Identity Service. When using Active Directory (LDAP, AD FS, or OnPrem), the user ID registered in Mosyle must match the authentication query used when authenticating with LDAP/ADFS.
If enrolling devices via Automated Device Enrollment, configure the Automated Device Enrollment profile with the following settings: check the box to 'Allow Bootstrap Token (macOS 10.15+)', uncheck the box to 'Prompt user to create an account' so the local user account creation during the Setup Assistant will be skipped, and check the box to 'Create additional local admin during Setup Assistant'.
It's recommended to not configure some Passcode Policies settings through the MDM when using Mosyle Auth 2 as it could cause some unexpected side effects. Anywhere possible, the passcode requirements should be handled through the Identity Service rather than through the MDM policies. The following settings are recommended to be set as 'Do not configure this option' in the Passcode Policy profile:
- Allow simple value, Require alphanumeric value, Force Password Reset (10.13+)
- Minimum passcode length
- Minimum number of complex characters
- Maximum passcode age
- Passcode history
When users login through Mosyle Auth 2, a user account on the Mac will be created. All Mosyle Auth 2 user accounts are created as Mobile accounts to leverage the possibility of User Scope profiles and ensure the secure token is passed to each user if the Bootstrap Token is allowed. To skip all user account creation prompts, such as Data & Privacy, Apple ID, Touch ID, Siri, etc., configure the Login Window profile.
Mosyle Auth 2 supports the use of 2FA, including the 2FA with Security Keys. On macOS 13+, due to USB Restricted Mode, the Security Keys for 2FA will not be allowed unless the restriction to disable USB Restricted Mode is installed, or a user has first logged in to allow access to the Security Key.
To access Mosyle Auth 2, go to Management > Mosyle Auth 2.
Creating a Mosyle Auth 2 Profile
To create a Mosyle Auth 2 profile, go to Management > Mosyle Auth 2 > Add new profile. Profiles can be assigned to individual users or devices, as well as grade levels, classes, device groups, or any other assignment option.
Choose the identity provider and then select the usage model. Every Mosyle Auth 2 profile will include the following configuration options:
-
Do not allow Sign In with Local User: Force users to authenticate via Mosyle Auth in order to access the Mac. In order to authenticate via Mosyle Auth, the Mac must have a valid internet connection. If the Mac does not have an internet connection, the user will be unable to login. If this option is unchecked, users will be able to login using the local user login to access the Mac if there is no internet connection. When logging in locally, the user will need to click the icon of a person's silhouette and enter their user account name and password.
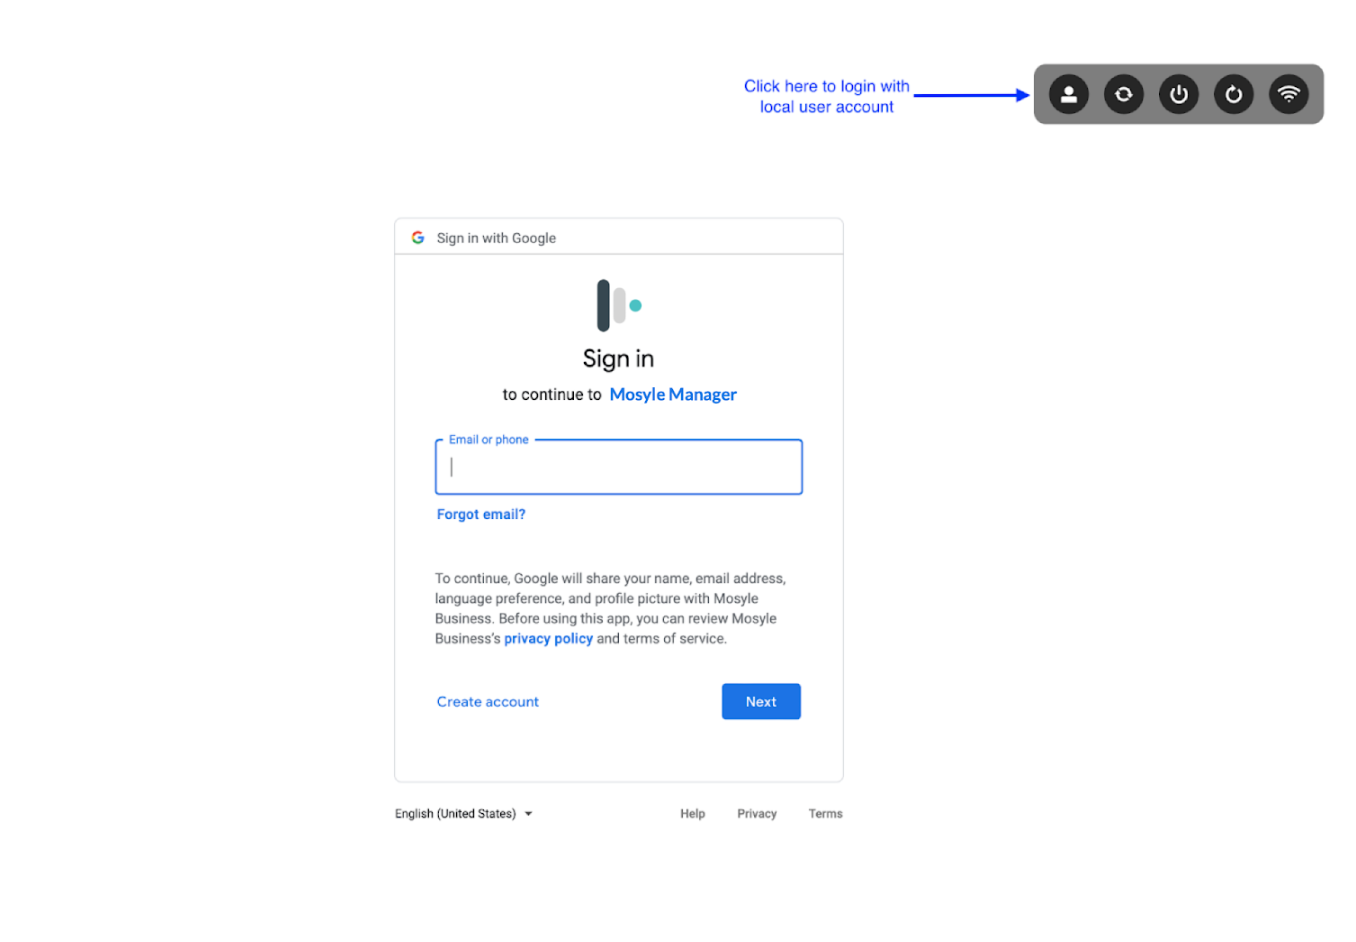
- Manage Pre-Existing Users: When selected, existing local user accounts will be converted to MDM managed user accounts, or mobile accounts. This will allow the users to receive User Scope profiles and automatically be granted a secure token upon login if the Bootstrap token is allowed.
-
Show macOS Default Background: When selected, the default macOS background will show as the background for Mosyle Auth at the login window. If you prefer to customize the login window, leave the box unchecked and upload your customized image under Organization > Preferences > Other Settings > Login Screen Wallpaper.
- Allow users to enable FileVault: Check this option to grant a secure token to users created via Mosyle Auth 2 and allow users to reset their password locally on the Mac in the event it is forgotten. Choose from the following additional options:
- Use Automated Device Enrollment admin setup information: This will automatically use the Admin username and password configured in the Automatic Device Enrollment profile to grant the user created through Mosyle Auth 2 a secure token and/or reset the user's password. The DEP Admin must have a secure token in order for the user's password to be successfully reset. If the DEP Admin does not have a secure token, leave this unchecked and enter a SecureToken-enabled Admin account name/password.
- Update Preboot Volume: This option will update the Preboot Volume so that any/all Admin users created through Mosyle Auth 2 will be available to unlock the disk in Recovery Mode. If the Preboot Volume is not updated, only the Admin user who enabled FileVault will be available to unlock the disk when the device is in Recovery Mode. Standard users, by default, will not be able to unlock the disk when in Recovery Mode. If a Standard user enabled FileVault rather than an Admin user, the Mac will prompt to enter the Recovery Key to unlock the disk in Recovery Mode.
Configuring Mosyle Auth 2 for 1:1 devices
If devices are used solely by one, individual user it's recommended to use the 1:1 usage model with Mosyle Auth 2. This configuration ensures only the user assigned to the device will be able to authenticate and login to the Mac.
The device assignment will be completed when the user logs in via Mosyle Auth 2 based on the Device Assignment settings under My School > Users > Device Assignment > User Authentication Assignment. Be sure the option under the heading 'Assignment through Mosyle Auth' is configured with the following selection: Only auto-assign devices not already assigned to a user. Once the device is assigned to the user, no other user will be able to authenticate to login and access the Mac until it is unassigned.
When using Mosyle Auth in a 1:1 usage model, Administrators can define how the account will be created on the Mac. Mosyle will automatically determine if the device is considered a “New device” or a “Device already in use” based on any pre-existing user accounts on the Mac. Once a user authenticates via Mosyle Auth 2 on a brand new device and the user account is created on the Mac, it will then be recognized as a “Device already in use”.
In all scenarios, Administrators have the ability to define the Local Password sync behavior. By default, Mosyle Auth will automatically compare the password used to authenticate during login with the saved password on the Mac. If the two passwords do not match, the user will be prompted to enter the password for the user account on the Mac, which is typically the previous IdP password, in order to update and sync the passwords. In the event users do not logout and login frequently, Administrators can define how often a user will be prompted to sync their password:
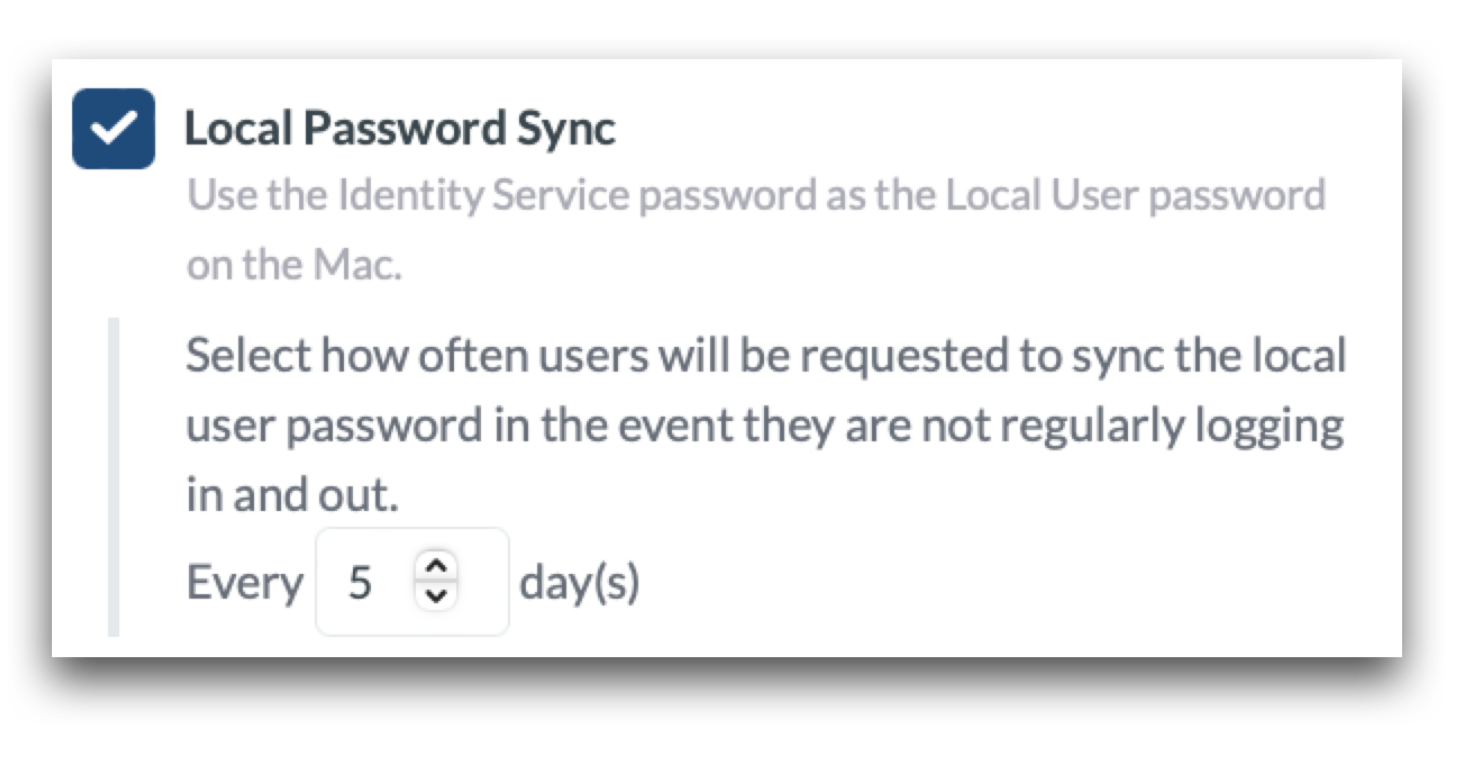
If a user updates or changes their IdP password, it is best practice to sync the password prior to logging out of the Mac. Users can do this by clicking the Mosyle Auth sync icon in the menu bar.
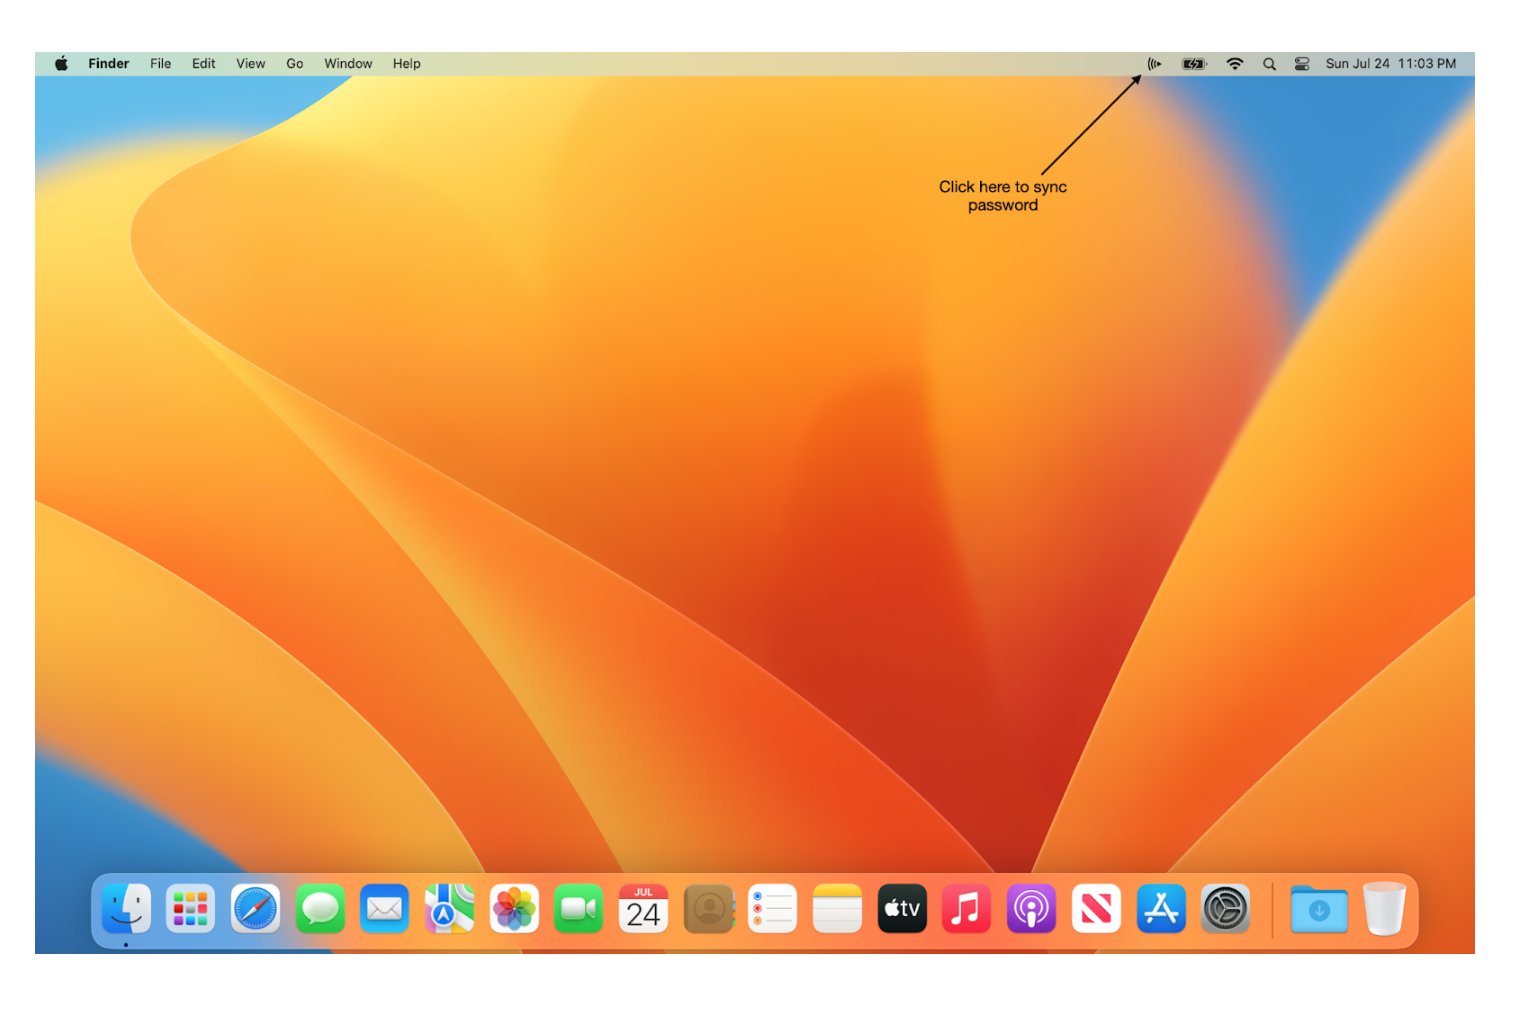
New Devices
The new device workflow is typically an unboxed device that goes through Setup Assistant, and is configured with Mosyle Auth. The device will skip all prompts and land at the Mosyle Auth login window. The user logs in with their organization credentials such as Google, Azure, etc., their account is automatically created on the Mac (formatted as defined by the Mosyle Admin) and the device automatically assigned to the user. Moving forward, only that user is authorized to authenticate and login on that Mac.
In the Mosyle Auth profile, choose how to create the user account on the Mac when the user logs in:
- Standard user
- Admin user
- Check User Group to determine the User Type (On-Premises Active Directory Only)
- Create Local User based on Mosyle User Type (not available for On-Premises Active Directory)
- Use variables to configure the formatting for the local user account name
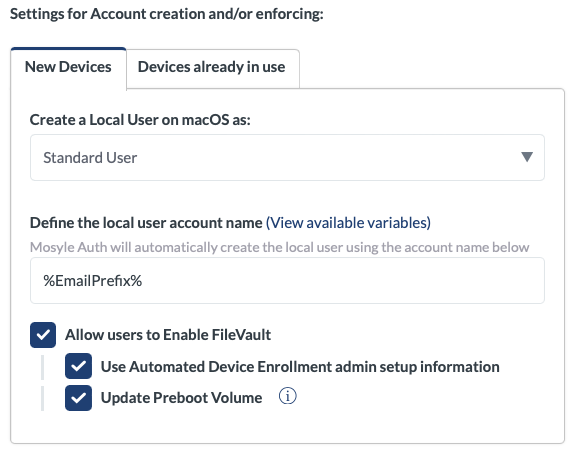
Devices already in use
For devices already in use, such as devices that are already set up and have been in use, it's understood that user accounts already exist on the device. Therefore, it is undesirable for Mosyle Auth to create a new user account on the Mac. In order to avoid the creation of a new user account on the Mac, configure the “Devices already in use” tab.
Choose whether or not Mosyle Auth should be enforced for all accounts on the device, or only for specific accounts.
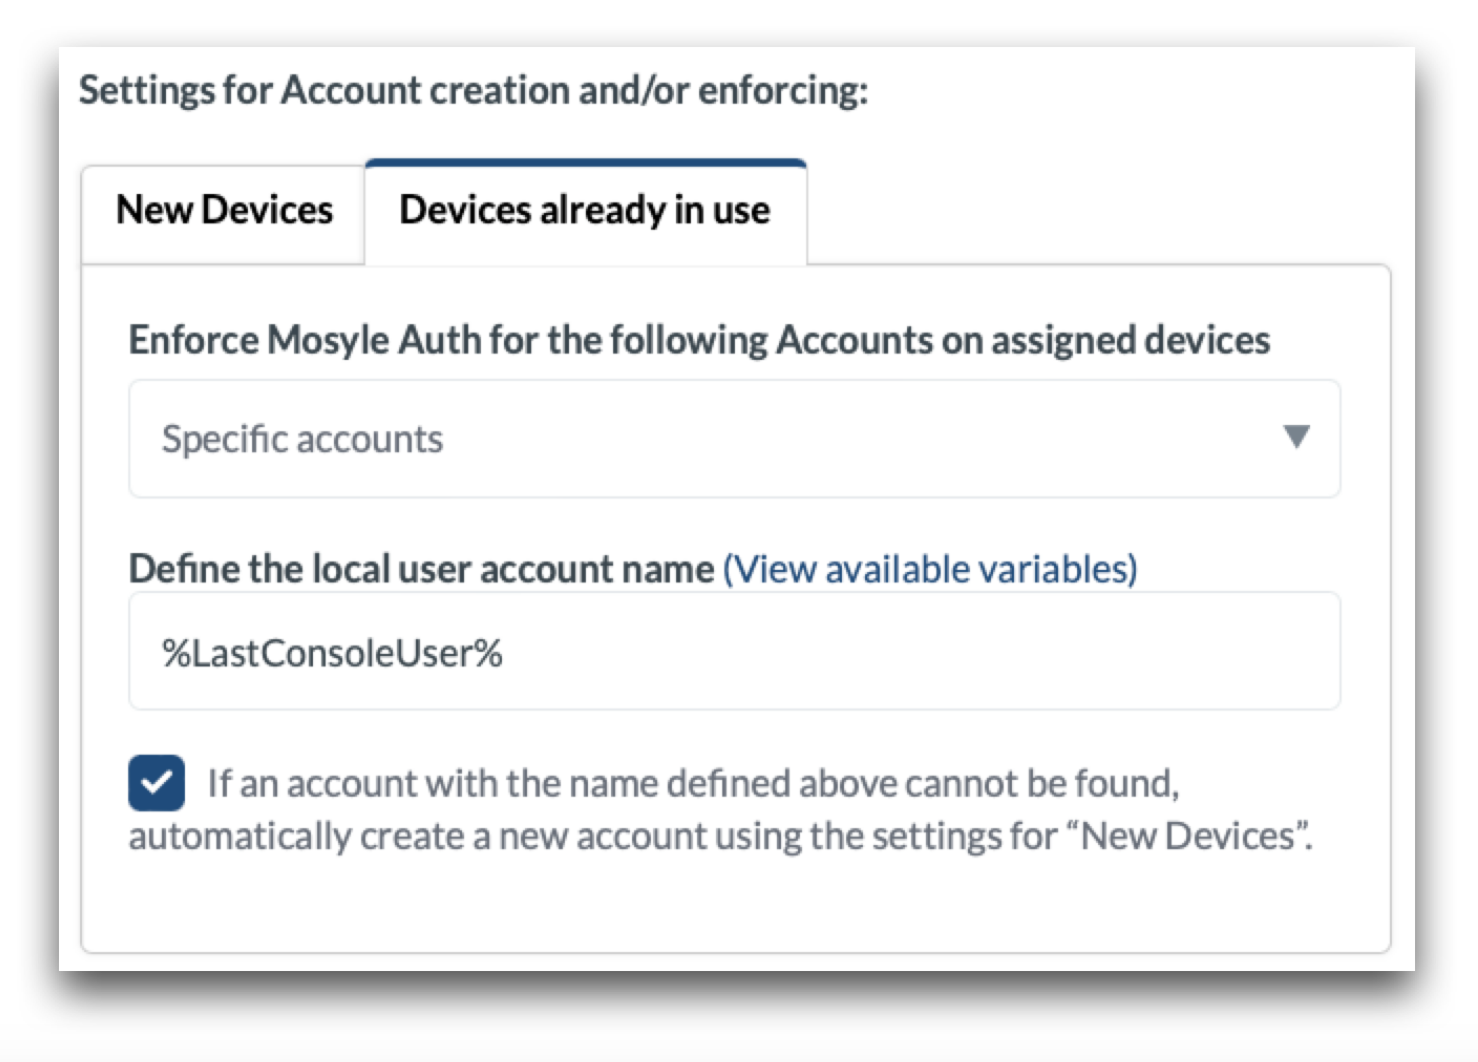
-
All Accounts on the device: To access any/all user accounts on the Mac, the user must authenticate with Mosyle Auth. The expected user credentials to authenticate with Mosyle Auth are the assigned user credentials. Therefore, they will be able to login and access any/all user accounts that exist on the Mac with their organization credentials, with the exception of the DEP admin account. Choose the style of the login window:
- Force the user to type-in the account name: The Mac login window will present a field in which the user will need to enter an existing user account name that they wish to access prior to authenticating with Mosyle Auth. The user account name entered indicates which user account to login after authenticating with Mosyle Auth.
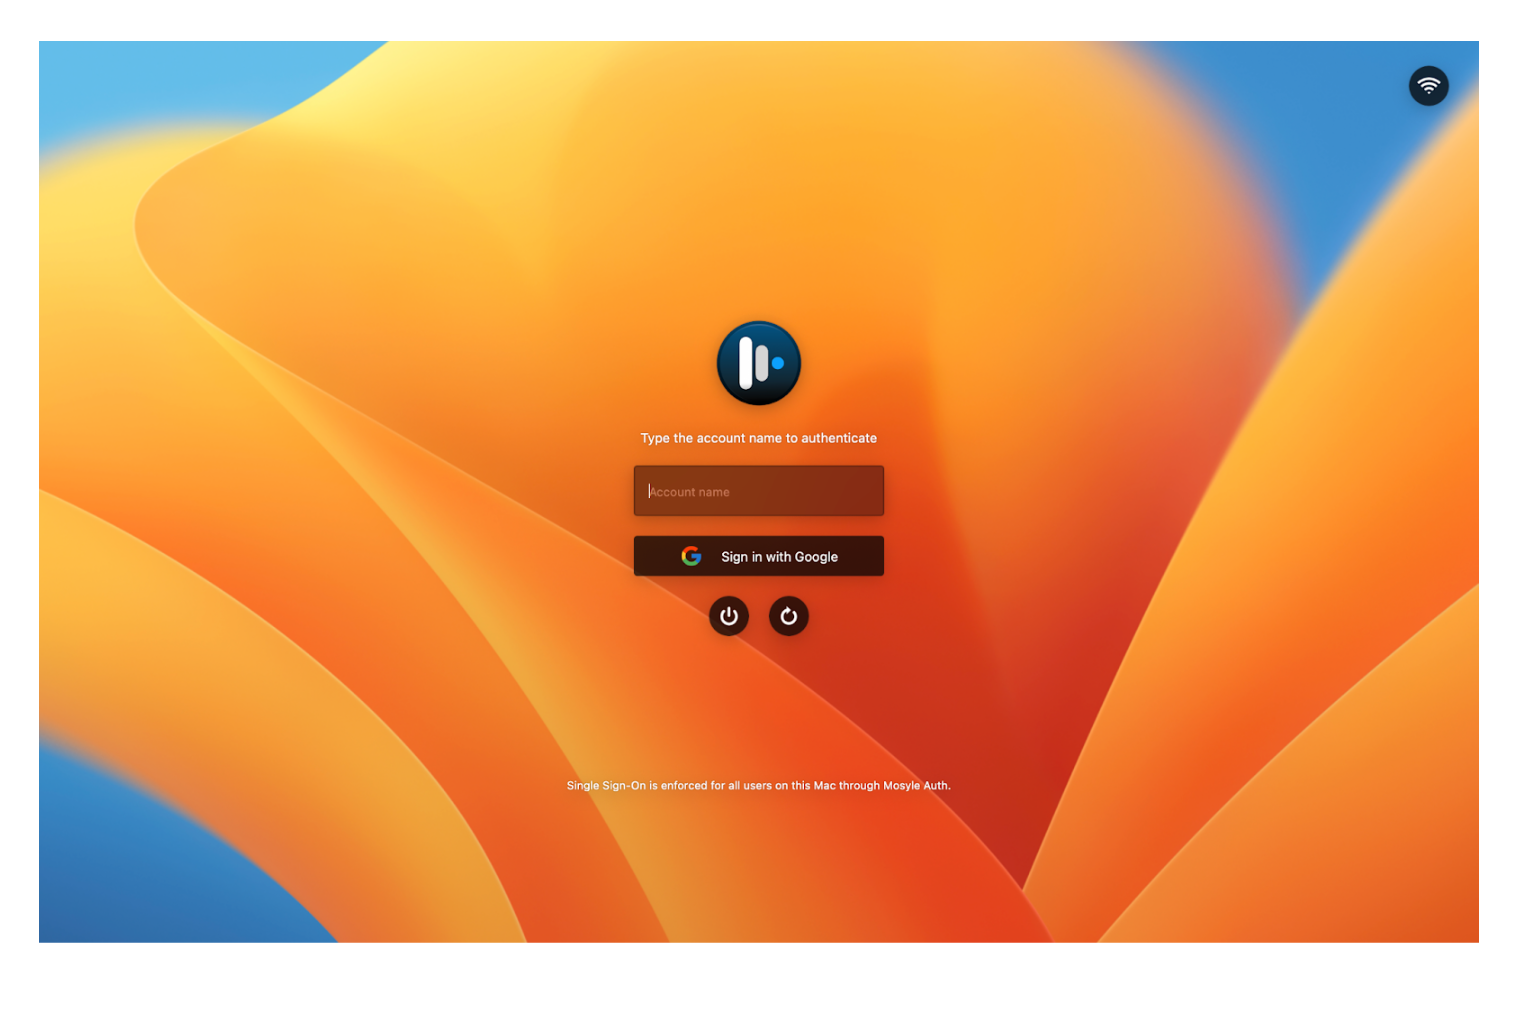
- List all users: The Mac login window will present a list of user account names that exist on the Mac. The user will select a user account and click to authenticate with Mosyle Auth to login to the selected account. Click the option “Do not show hidden users on the list of users” to ensure any hidden user accounts are not listed on the login window.
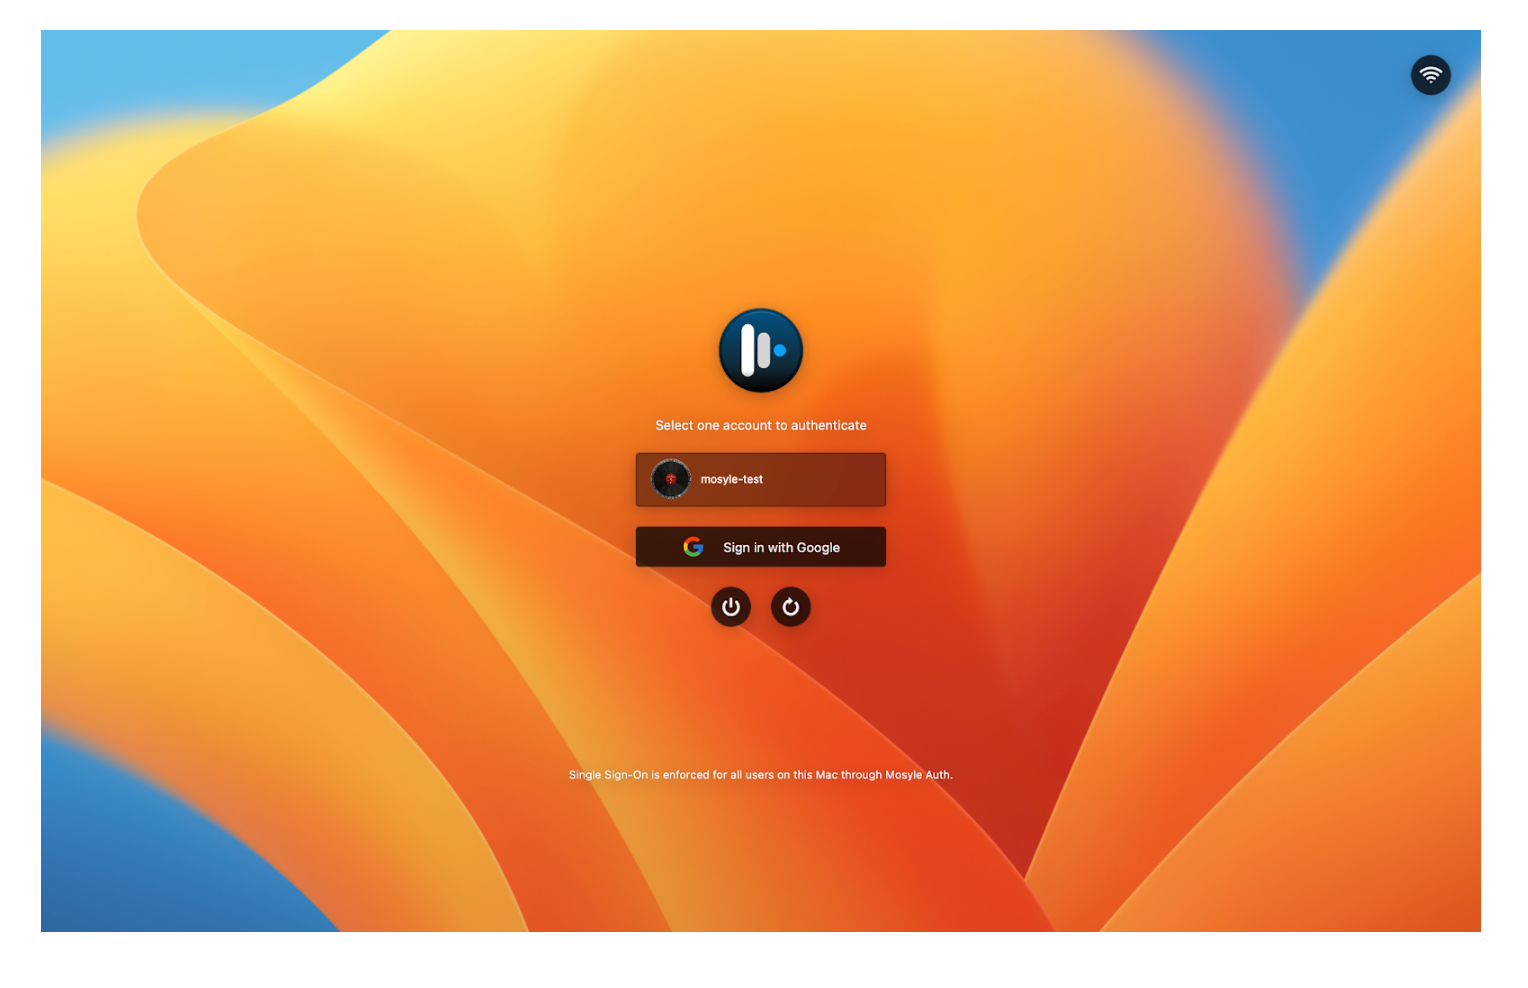
- Force the user to type-in the account name: The Mac login window will present a field in which the user will need to enter an existing user account name that they wish to access prior to authenticating with Mosyle Auth. The user account name entered indicates which user account to login after authenticating with Mosyle Auth.
-
Specific accounts: Only accounts with the specified, expected formatting can be accessed. In the field labeled Define the local user account name in the Mosyle Auth 2 profile, enter the expected user account name that already exists on the Mac. In doing this, when the user logs in with their organization credentials, Mosyle will check if a user account exists based on the expected formatting.
If the account exists, the user will be logged into the account. If not, a new user account will be created if the option “If an account with the name defined above cannot be found, automatically create a new account using the settings for New Devices” is selected. If the option is not selected and a user account with the specified formatting does not exist, the user will be unable to login.
In an environment where devices are already enrolled in Mosyle and the user's have a user account on the Mac, but its formatting does not match any registered user information in Mosyle, the “Last Console User” variable can be used to define the expected user account name.
Configuring Mosyle Auth 2 for Shared devices
It is typical to assign this type of Mosyle Auth 2 usage to devices enrolled in Shared Device Groups.
Removing Mosyle Auth 2
If you choose to remove Mosyle Auth from your devices, the login window will revert to the native macOS login window and users can login to their local user account on the Mac by entering their user account name and password (most likely the same password as their SSO password). The local user account on the Mac will not be removed if Mosyle Auth is removed. Therefore, all user data will remain and the user can access by logging in locally with their credentials.
Mosyle CDN
Overview
Mosyle offers a CDN solution that supports the PKG, DMG, ZIP, and IPA file types of up to 8 GB and is included in the Mosyle OneK12 subscription plan.
To Upload Packages to Mosyle's CDN
- Click Management > Install PKG > Click the CDN tab
- Click “Upload” > Choose a File
- Select the file > Click Choose for Upload
- Monitor the progress bar for the upload status
Using the CDN Variable
When hosting packages on the Mosyle CDN, the URL of each package is replaced with a Variable (ID). In order to continue deploying the packages using Custom Commands or other management profiles, replace any previous URLs with the PKG Variable ID to ensure expected behavior.
Finding a PKG Variable
- Click Management > Install PKG
- Click the CDN tab > Click the PKG name
- Copy the value in the Variable field (%MosyleCDNFile:00ac0f0a-c00b-0e00-aaec-0f000cd0bca0%)
- Navigate to a profile that includes the URL and replace the URL with the Variable
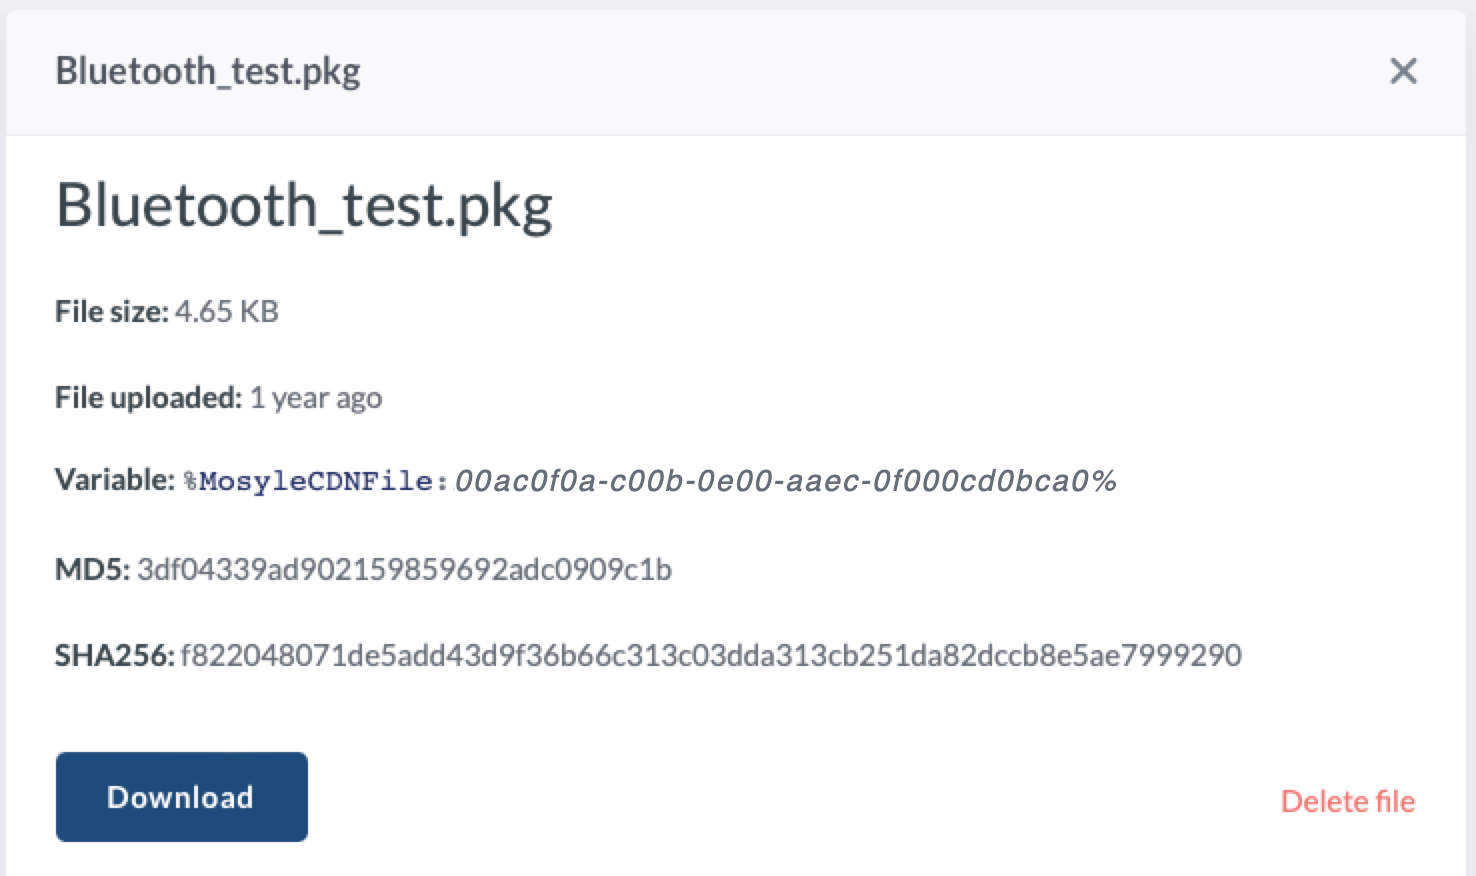
Adding a PKG Variable to the Custom Commands Profile
- Click Management > Custom Commands
- Click an existing profile's name or create a new profile
- Select 'Enable Variables for this profile' > Click the link 'Click here to view available variables'
- Click on View Mosyle CDN Variables > Copy the value in Variable
- Exit the pop-up
- Click the text box in Code > Delete the package's URL > Paste the package's Variable
- Click on the blue checkmark
- Save
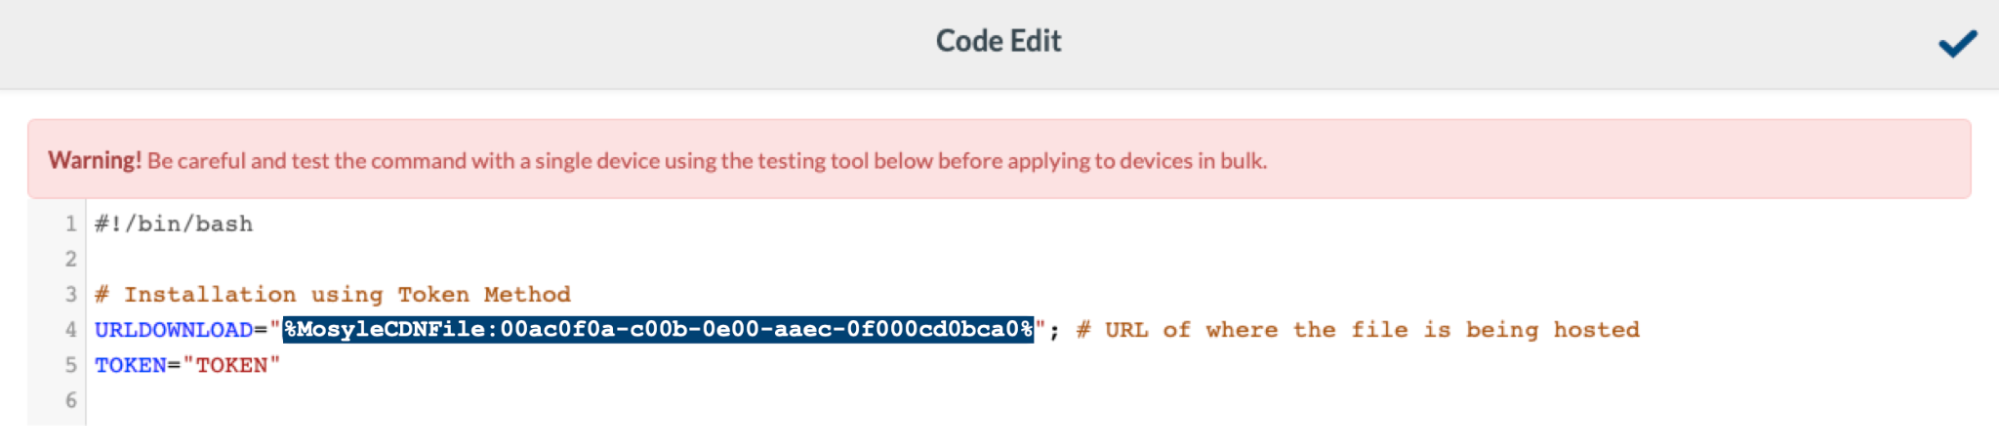
Device Scout
Overview
Device Scout checks devices against a repository of recommended security controls or any custom controls to reflect security requirements needed for a school or district environment. The repository of rules for compliance are established by recommendations from many recognized cybersecurity agencies and are mapped to CIS and NIST frameworks, as well as a set of proprietary rules. Select any/all rules to apply to the devices and ensure they are in compliance. Enable auto-remediation so that non-compliant devices are automatically corrected to be in compliance with the specific security control.
For Mac computers, the agent is leveraged for compliance scans. Therefore, the Mosyle Manager app must be installed.
Click the Security tab and expand the Device Scout menu option in the left menu bar. Device Scout is organized into four sections:
- Overview
- Devices
- Security Controls
- Logs (macOS Only)
Overview
The Overview pane provides a quick summarized view of your device compliance status. You can view the following in this area:
Device Scout Score: The score is calculated based on the security controls applied and device compliance status. The higher the score, the more secure your devices are.
Based on your Security Controls (macOS): Use the dropdown menus to view the top controls or top devices that are compliant or not compliant.
Top Rules among All Schools (macOS): A list of the top rules activated across all Mosyle companies.
Evolution over Time / You vs All Schools: View the compliance average or max active rules over a period of time for your school and other Mosyle schools.
What changed?: View any recent changes in the compliance status.
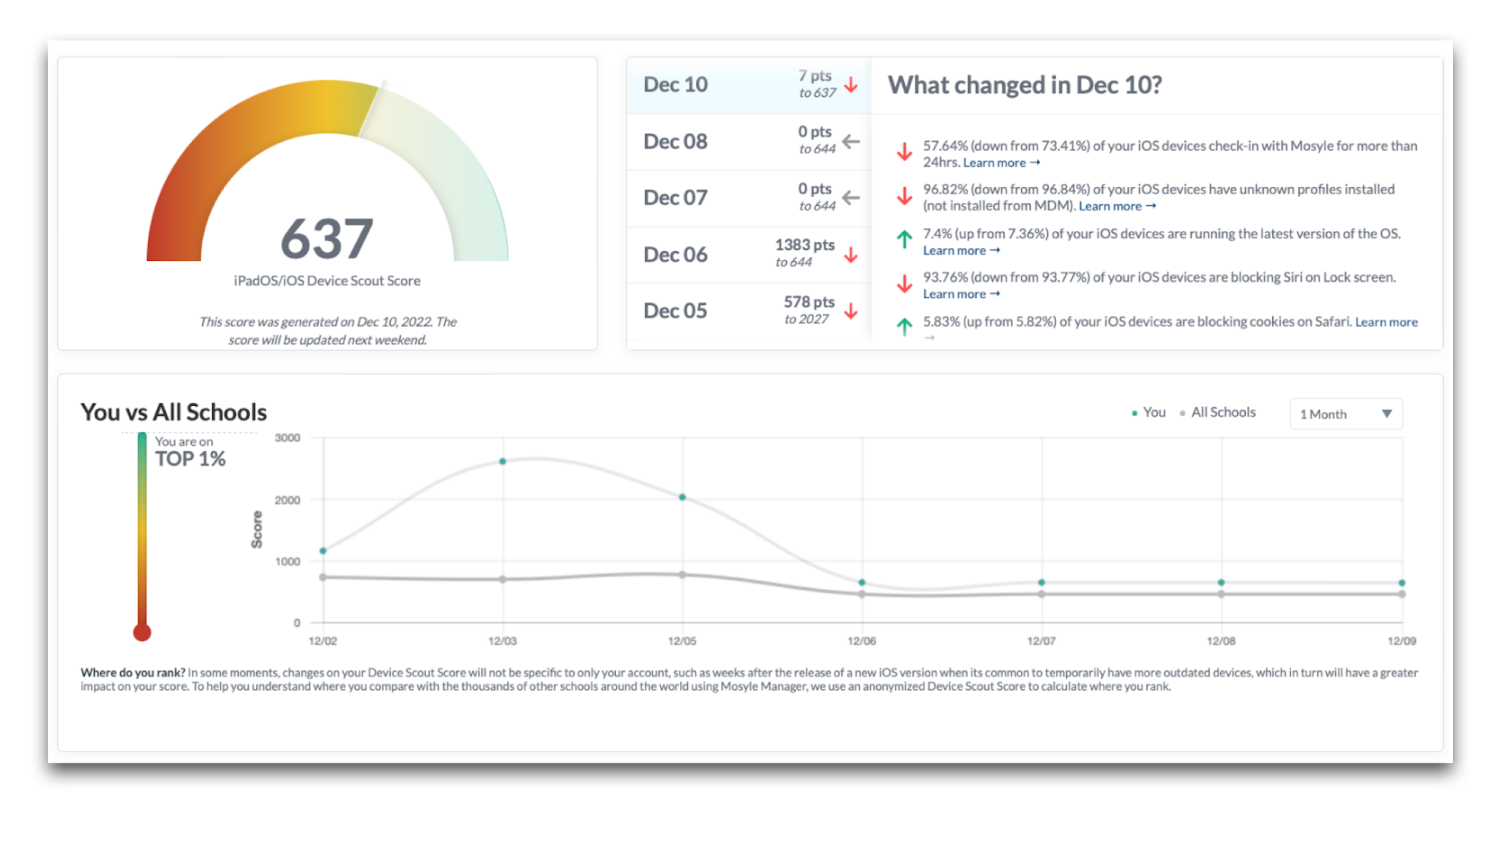
Security Controls
View a list or grid of all active Security Controls. To change views, use the dropdown on the right side of the screen to choose between “Grid View” or “List View”.
Each control will show the rule name, associated security benchmarks, the percentage of devices in compliance, as well as if remediation is turned on or not. Favorite any controls to make sure they show at the top of the list by clicking the star icon in the rule box. To refresh and update the controls to show the latest compliance status, click the refresh button within the rule. Device compliance status is checked every hour.
Using the filter, choose to view the rules based on: show only favorites, by security baselines, if remediation is available or unavailable, or if remediation is enabled or not enabled.
Search for specific Security Controls using keywords and sort based on the control name or compliance percentage.
Click + New Control at any time to add additional Security Controls. When adding controls, choose to use controls from Mosyle's Repository or by creating your own custom Security Control.
Use the Bulk Assignment or Bulk Remove buttons to assign controls to devices in bulk, or remove compliance checks for controls in bulk.
Devices that are not in compliance with the controls assigned will automatically be grouped into a “Security Group”, categorized by each control. Use these Security Groups when assigning management profiles as needed.
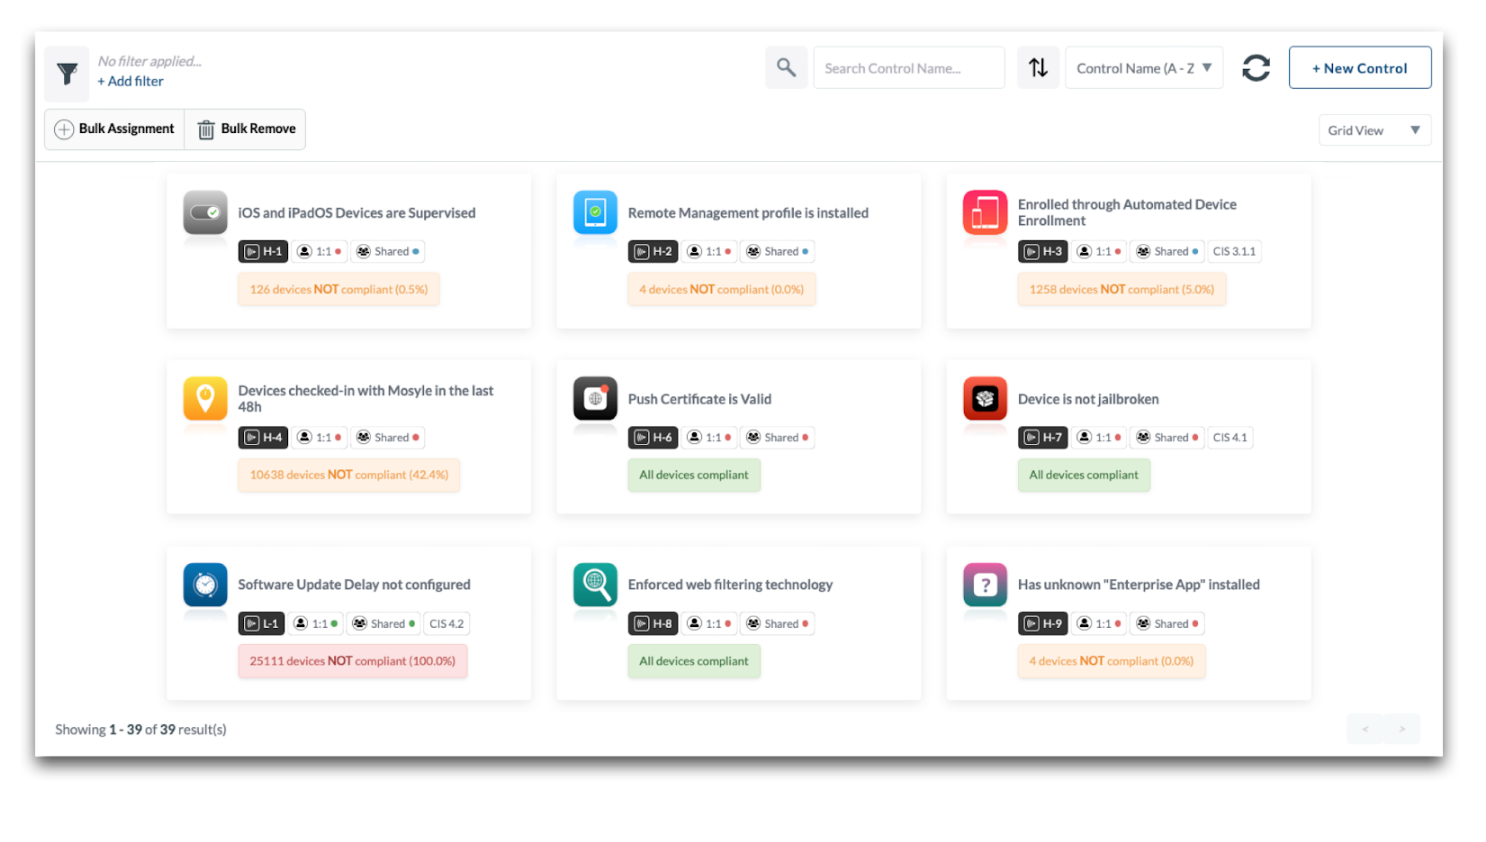
Devices
View a list of devices assigned to security controls and their corresponding compliance status. Clicking on a device tile will bring up a detailed list of the security controls assigned, which are compliant, and give you the ability to automatically remediate controls not in compliance. Click the link to open a new tab to view additional device info.
Filter the list of devices by: serial number, device name, asset tag, deviceUDID, Wifi MAC Address, Ethernet MAC Address, user assigned, grade levels, and more.
Sort the list of devices by the device name or compliance percentage.
After filtering and sorting devices as needed, export a spreadsheet of the devices and security controls by clicking the button in the upper right corner that indicates X devices match filters. The spreadsheet will include a list of devices (device name and serial number) and all assigned controls along with the compliance status.
Logs
View logs to see detailed info for when a device became compliant or lost the compliance status. In addition to the compliance status, the control name, date/time stamp, device name and serial number are listed. The logs provide detailed reports containing necessary information for any potential internal and external audits.
To export a list of devices and the compliance status, go to the Security tab and click the Devices menu option under Device Scout. Filter the devices as needed and click the Export button in the upper right to export in a CSV or XLSX file format.
Configuring Controls
When first accessing the Device Scout Overview area under the Security tab, a list of controls available from the Mosyle repository will be displayed that can be activated. Select any controls to scan for compliance and assign the devices. When finished, click Start.
To add more controls to be checked for compliance, go to the Security tab > Device Scout > Security Controls > + New Control. Choose a rule from the Mosyle Repository or create your own custom control.
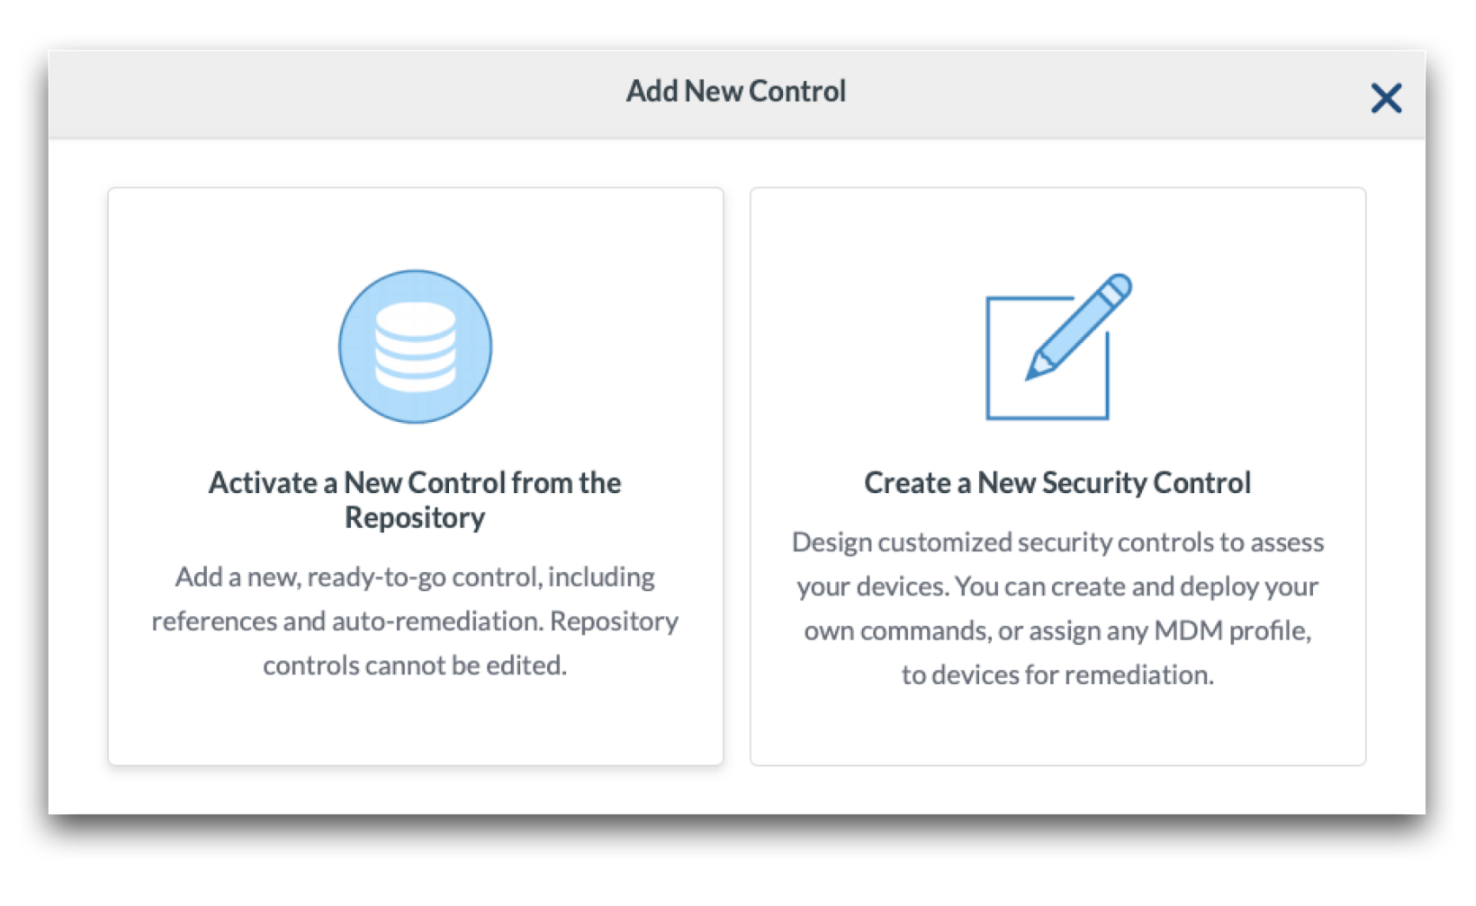
After checking the box for the rule, click the button to “Enable Tracking”. Select the users and/or devices to assign the control to and click “Enable”.
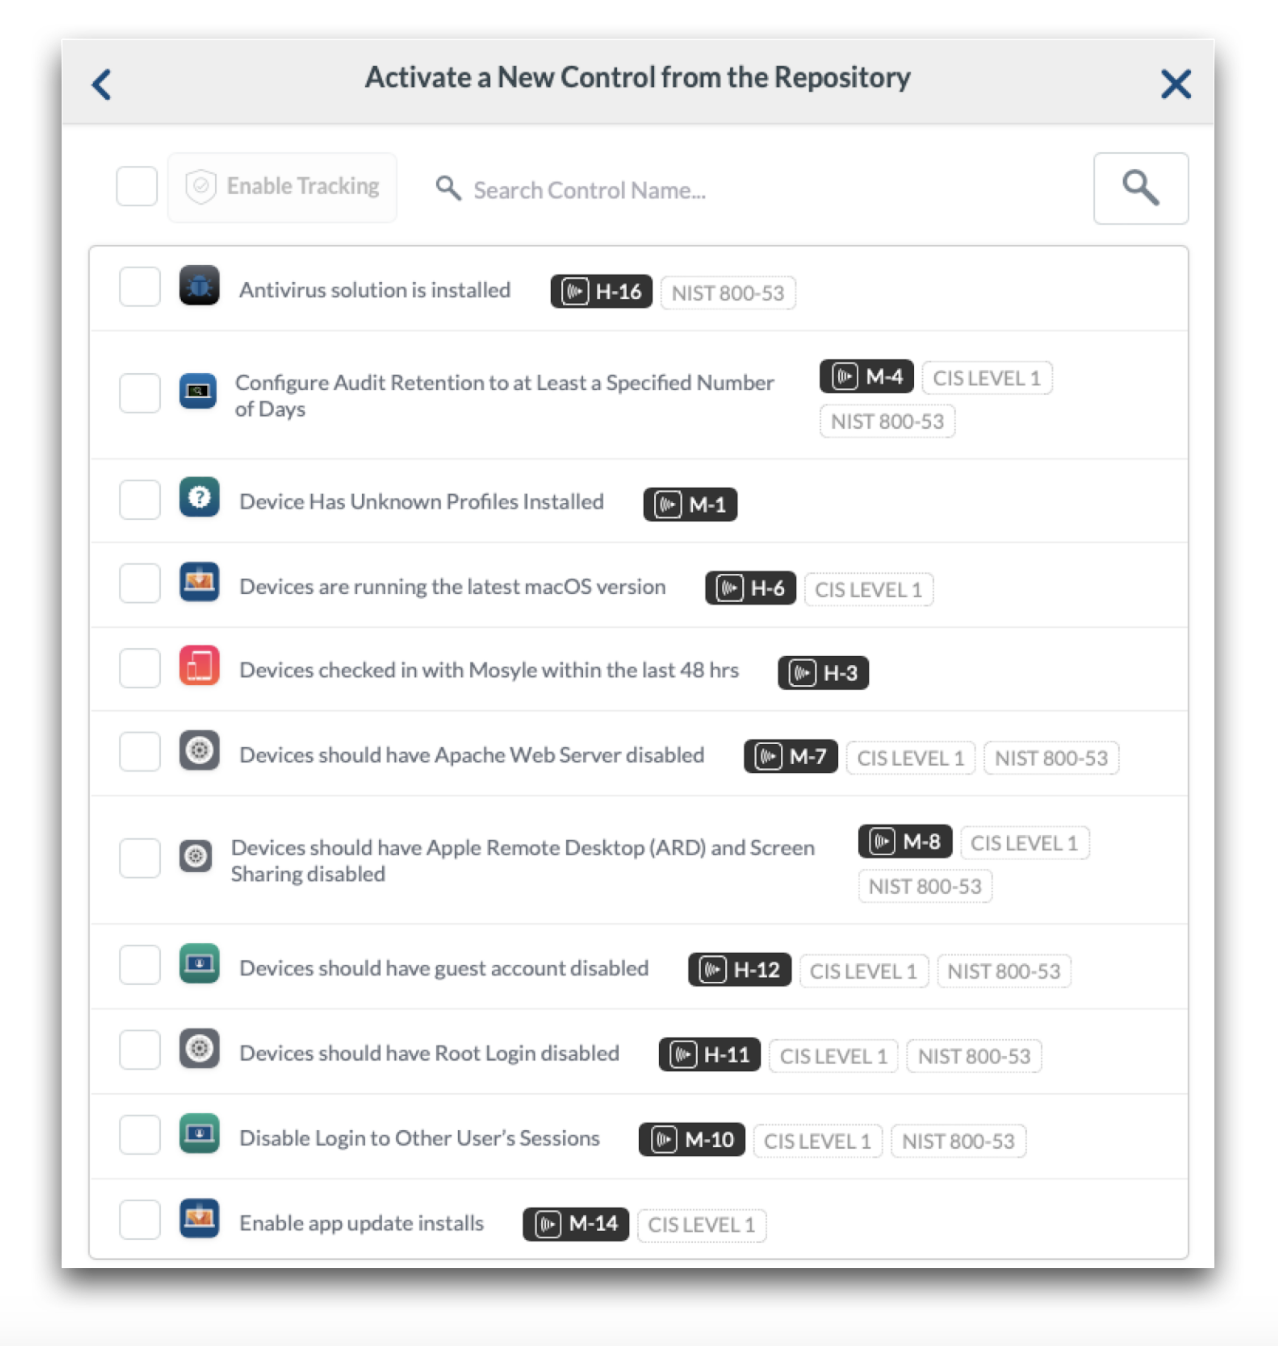
Once controls are enabled, they'll be listed in the Security Controls area. Click any of the controls to view detailed information about the control, change assignments, and/or turn on auto-remediation.
Configuring Custom Controls
To configure a custom control, go to the Security tab > Device Scout > Security Controls > + New Control. Choose “Create a New Security Control”.
Name the control, choose an icon, add tags and/or framework mapping or reference. Enter the code that should be run on devices to check for compliance. Be sure to include specific output that can be used to define devices in compliance or not. Define what should be considered compliant under “Results for Compliance”, anything that doesn't meet the definition will be considered not in compliance. Add the assignment and save.
To remediate the custom control, go to the Management tab and use any of the Management profiles, including Custom Commands, to create the profile or configuration to remediate the control. When assigning the profile for remediation, assign it to the automatically created Security Group for devices not in compliance with the control.
Compliance Checks
Devices are checked for compliance during every device info update. The device info update is automatically requested every hour, so long as the device remains online and reachable. If the device is not online, the update of device info along with any compliance checks will be pending. Once the device is back online, the commands will go through and the compliance status as well as the device info will update. For Mac computers, the compliance checks rely on the Mosyle Manager app being installed on the Mac.
If a device has not responded to a compliance status check in over 5 days, the compliance will change to “Not compliant” until the device checks back in to confirm it's current status.
Auto-Remediation
Auto-remediation is completed using a combination of management profiles and/or customized commands created by our Developers. When auto-remediation is turned off, or the security configurations are unassigned, the remediations installed via profiles will be removed from the device and the security control will no longer be enforced. Any other remediations that were not applied via profiles, rather were processed using customized commands, will no longer be executed. Turning off auto-remediation does not revert any settings.
If auto-remediation is turned on, it's recommended to not duplicate any controls or policy configuration through Management profiles to avoid any unexpected side effects. For example, if passcode controls are configured in Device Scout with auto-remediation enabled, it's not recommended to also push a Passcode Policy payload.
Detection & Removal
Overview
Detection & Removal is a client based solution that leverages Apple's Endpoint Security Framework to constantly monitor a set of different events that could potentially represent the introduction of a new malware on a macOS device. Once these events are identified, they are scanned against a multi-source signature database that combines the local XProtect Yara rules present on each device, a database of different well-known macOS malware and a proprietary database created and maintained by our Security Research team. When Detection and Removal is assigned to devices, the MosyleSecurity agent will automatically be installed.
Scans are typically done using an On-access strategy, which means that events immediately trigger scans as they happen for real-time protection, such as when a new file is downloaded from the internet or email. A weekly full-scan is also available in order to allow recently introduced definitions to be used to scan the system regardless of the occurrence of triggering events. All the routines are performed locally for privacy protection and no file is synced with Mosyle servers.
Click the Security tab and expand the Detection & Removal 2 menu option in the left menu bar. Detection & Removal is organized into four sections:
- Overview
- Devices
- Quarantine
- Settings
- Logs
Detection & Removal 2 is supported on macOS 10.15 and later.
Overview
The Overview pane provides a quick summarized view of your device status. You can view the following in this area:
- Infections - Last 24 hours: Lists the number of findings on devices over the past 24 hours. Click View Details to check out the Logs.
- Current in Quarantine: Lists the number of files currently in quarantine. Click View Details to check out the files.
- Scanned - Last 48 hours: Percentage of devices that have been scanned in the past 48 hours. Click View Details to check the list of devices to see which devices haven't recently been scanned.
- Updated Definitions - Last 48 hours: Percent of devices that have updated definitions in the past 48 hours. Click View Details to check the list of devices to see which devices haven't recently updated definitions.
- Top Infected - Last X days: Use the dropdown menu to view the list of top infected devices over the past 7, 15, or 30 days.
- Infections Over Time: View the number of infections found over a period of time for your school or district.
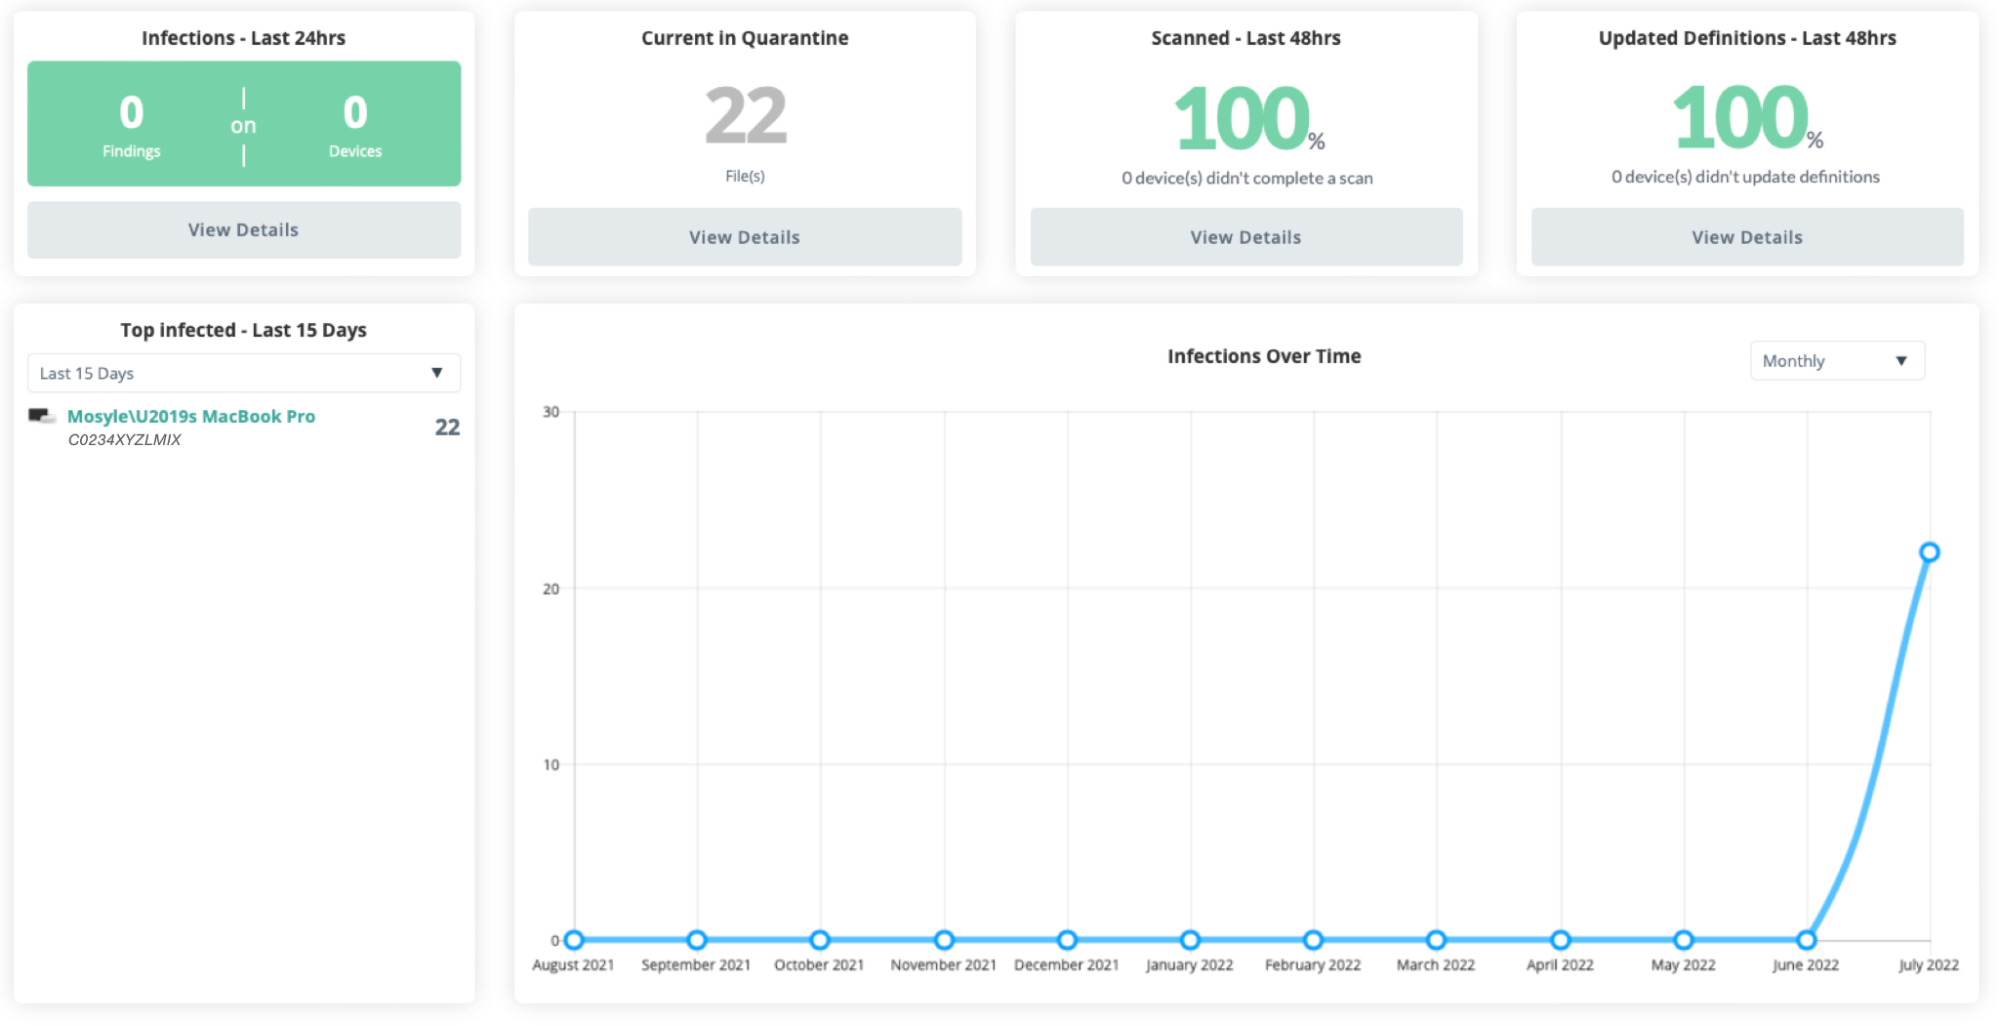
Devices
View a list of devices assigned to Detection & Removal and their corresponding scan status, date and type of last scan, last definition updates, and if there are any files in quarantine. Clicking a device serial number will open the device info window.
The device status is determined based on the last scan. If the last scan was “Healthy” it shows “Healthy”. If the last scan detected any infected files (whether or not they were automatically removed), it shows the device “Infected”. If infected files are removed after the last scan, run the scan again to update the status. A status of “Not defined” indicates a scan hasn't run yet.
Different scan types available:
- On Access: Scans any new files downloaded. If a known infected file or malware is detected, the user is notified and it is registered in the Mosyle web console immediately.
- Full: Scans all files on the device. Choose when the full scan will run and what to do with detected files in the Settings tab.

Filter the list of devices by: serial number, device name, asset tag, deviceUDID, Wifi MAC Address, Ethernet MAC Address, local hostname, hostname, current console user, last SSID, user logged in, and more.
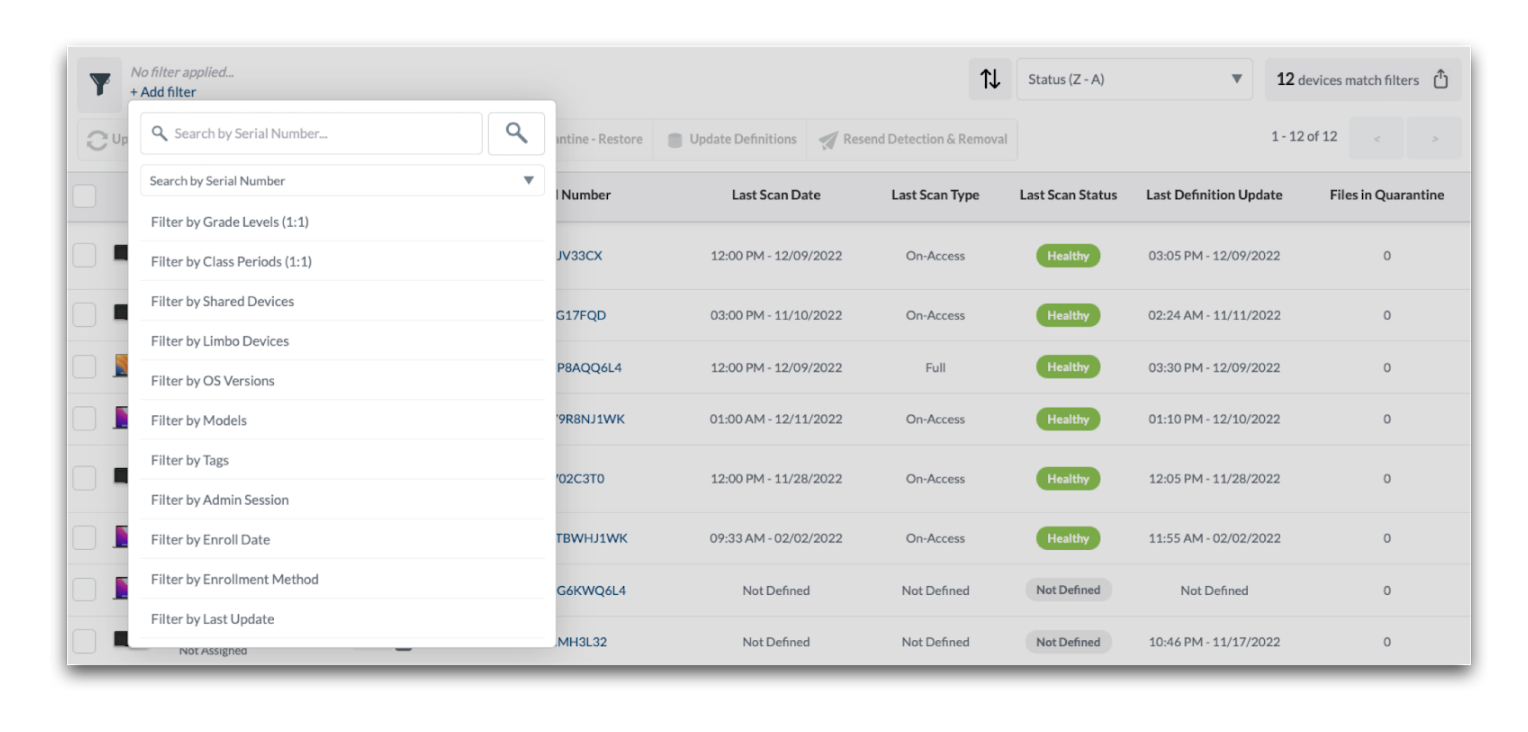
Sort the list of devices by the device name, files in quarantine, last definition update, last scan date, last scan type, serial number, status, tags, or compliance percentage.
After filtering and sorting devices as needed, export a spreadsheet of the devices and scanned status by clicking the button in the upper right corner that indicates X devices match filters. The spreadsheet will include all information found in the interface.
Quarantine
View the list of files in quarantine, including the type of threat, file path, and date and time the file was quarantined. The device name and serial number is also listed. Click the serial number to view the Device Info window.
If needed, quarantine files can be deleted from this area or restored. If a file from quarantine is restored on a device, the file will no longer be flagged as a threat on that particular device.
Sort and filter data to view specific information. Export data as needed with the export option.
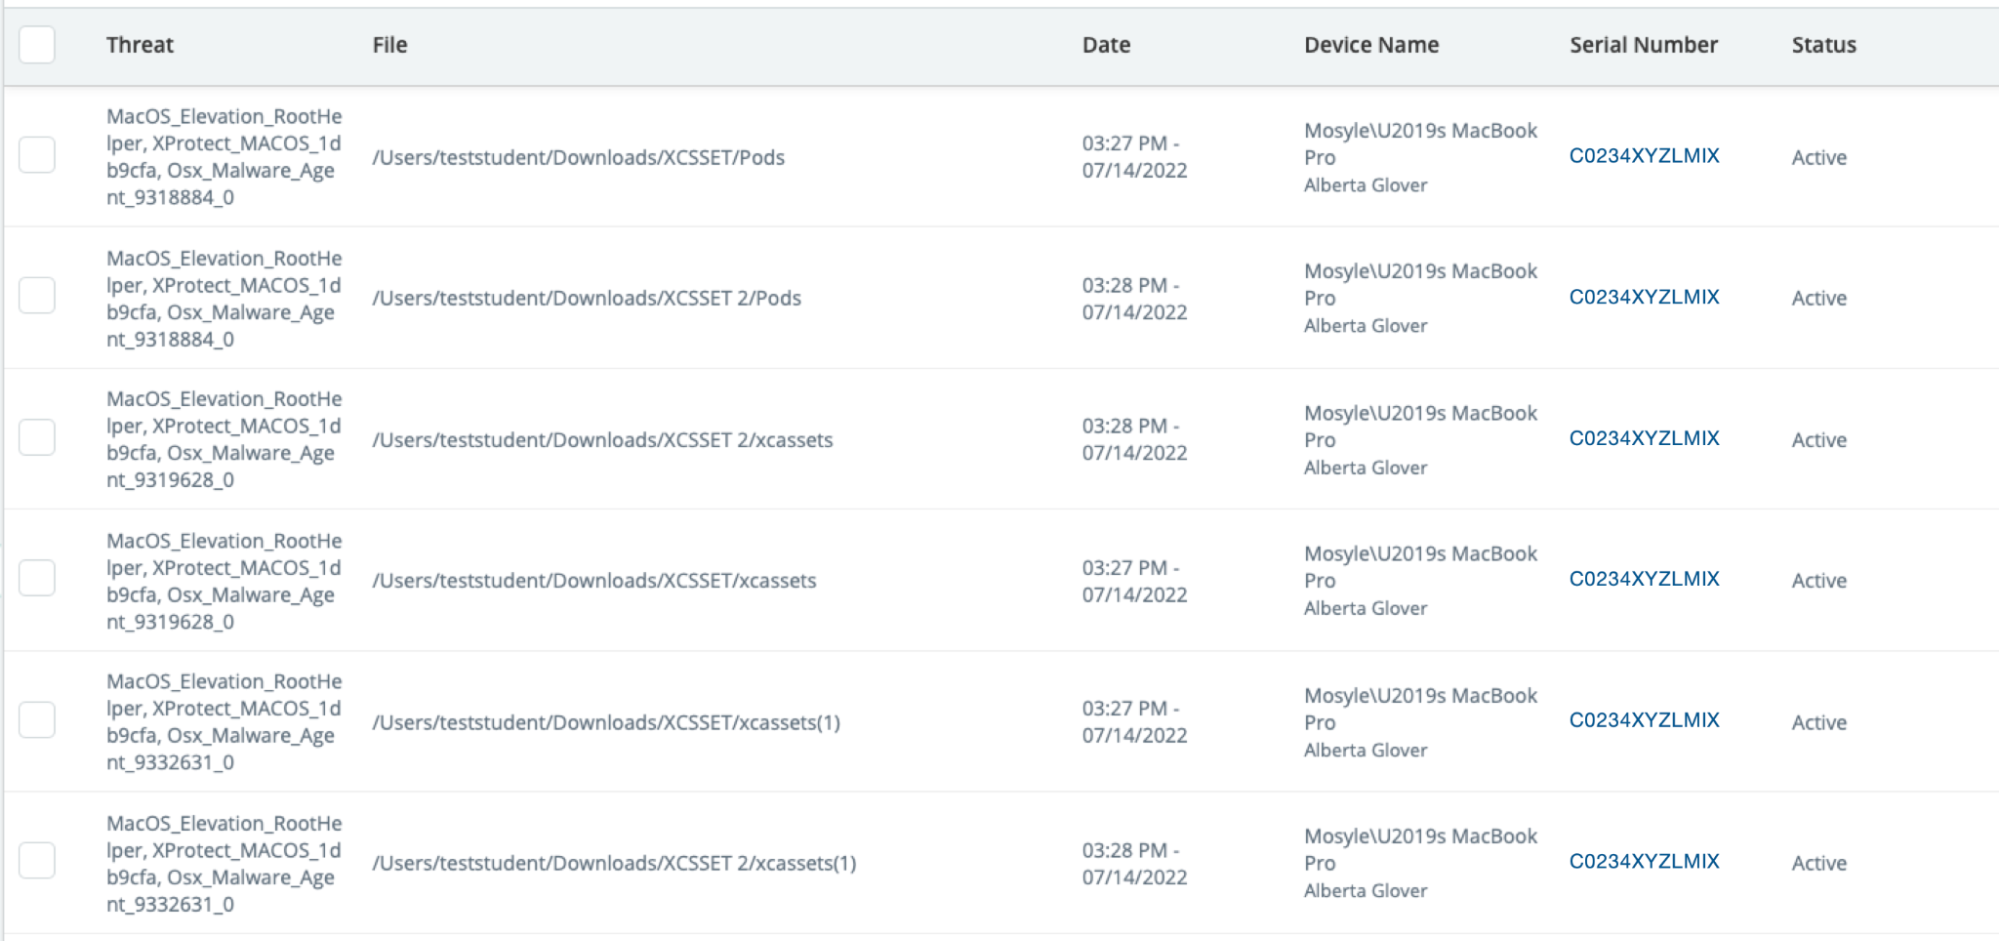
Settings
Configure the Detection & Removal settings, including the time and day of the weekly full scan, if device-based AI and behavior detection should be used, behavior for quarantined files, any manual definitions to be included, alerts, file bypass and mute paths.
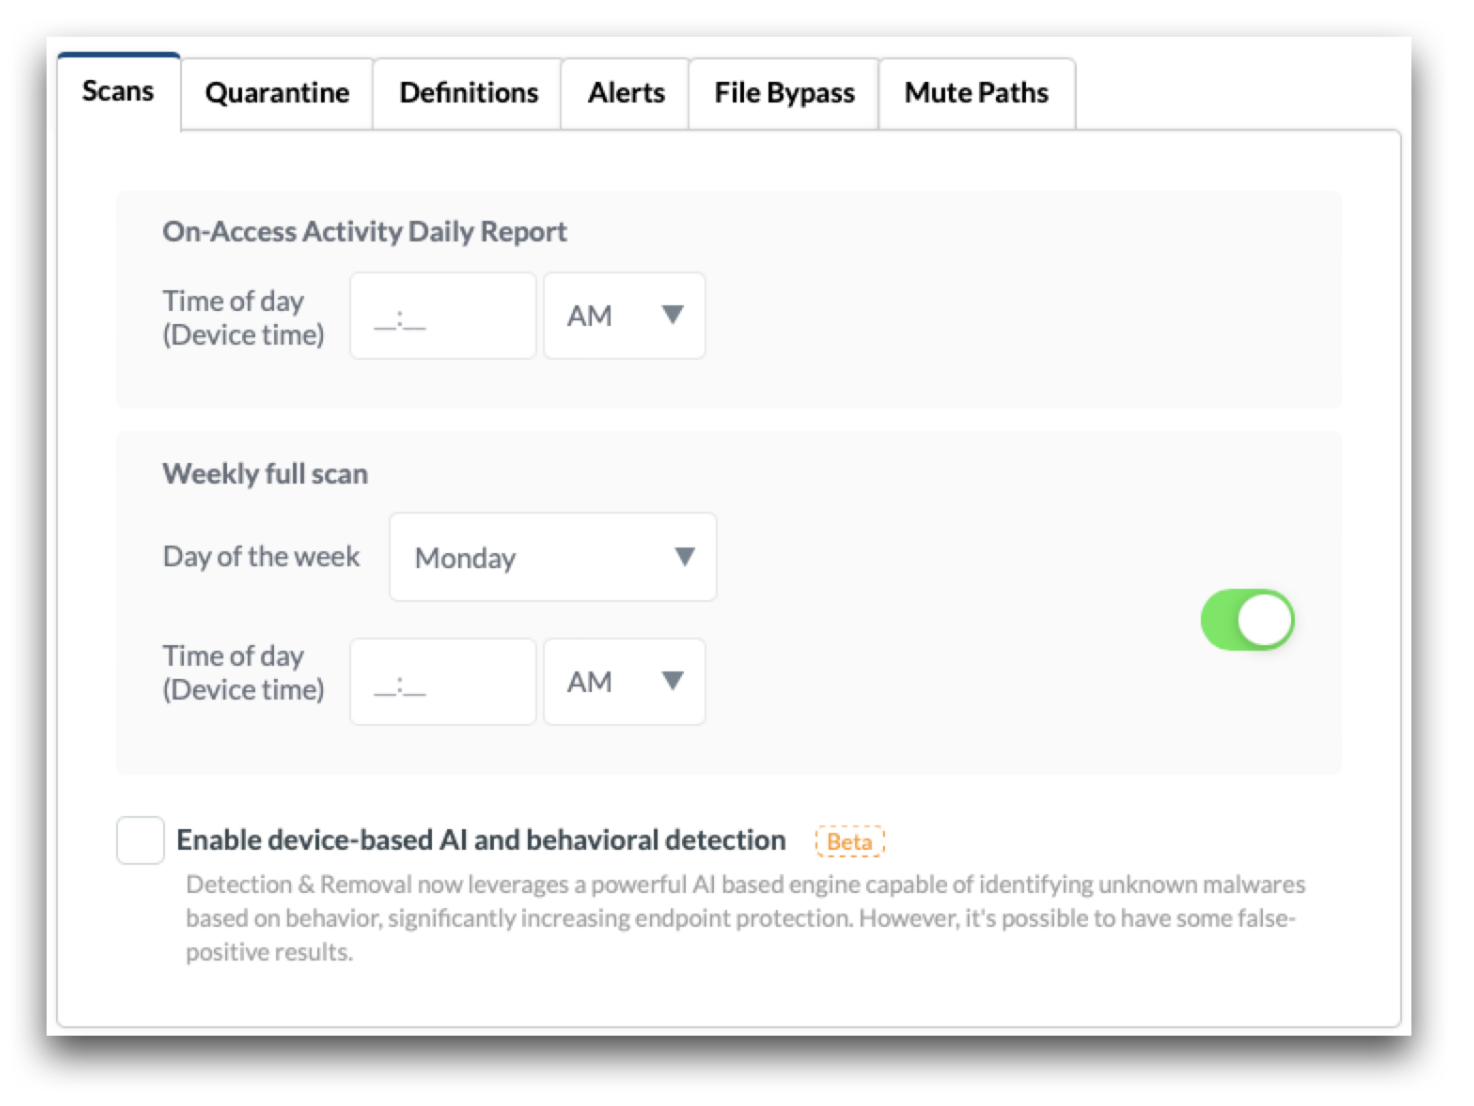
Logs
View logs to see detailed info for when a device was scanned and if any infected files or threats were found. In addition to the scanned status, the event type, details regarding the file, date/time stamp, device name and serial number are listed. To export the logs, click “Export” in the upper right corner.
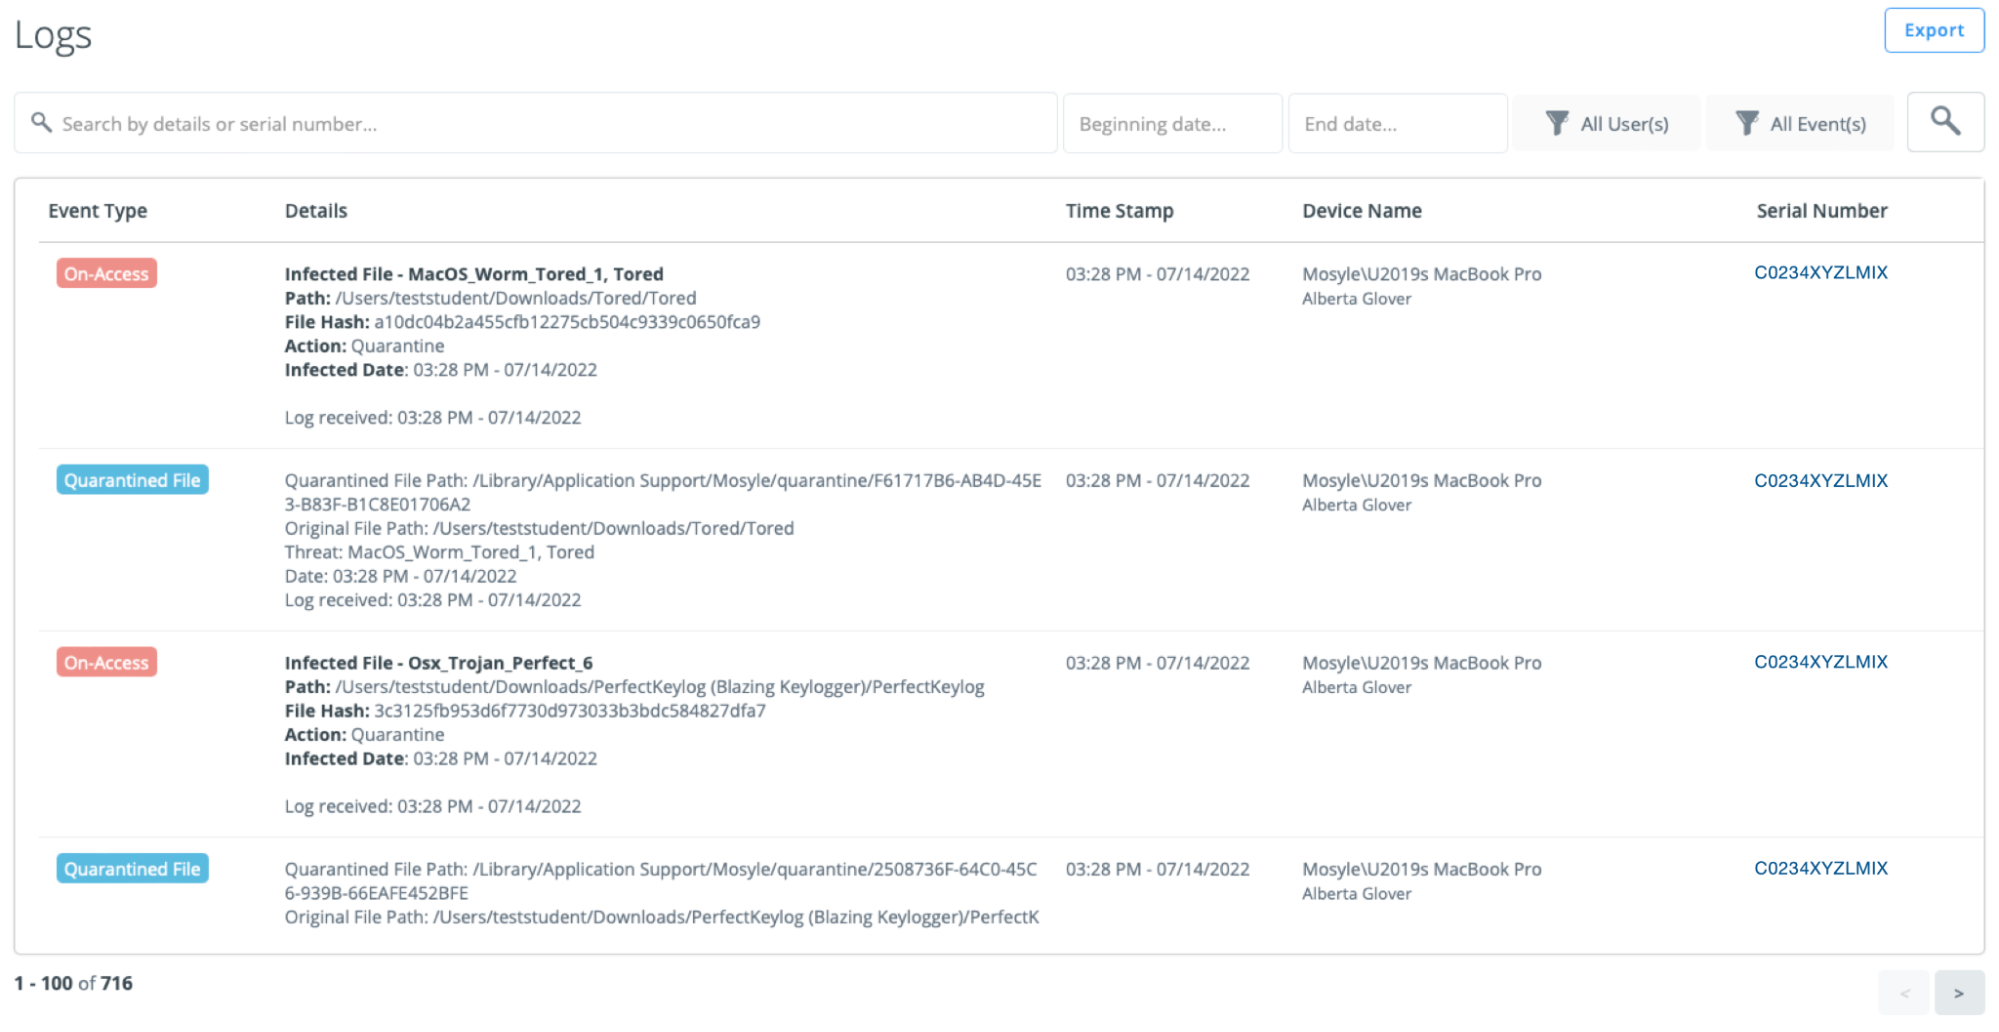
Configuring Detection & Removal
To configure Detection and Removal go to Security > Detection & Removal 2 > Settings > Add new profile.
Enter the name of the profile and configure the following tabs:
-
Scans
- On-Access Activity Daily Report: Enter the time of day to receive the daily on-access report. The report will show in the logs and will provide the infection status in the Devices list.
- Weekly full scan: Toggle on the weekly full scan to trigger a full scan on a weekly basis at the designated time.
- Enable device-based AI and behavioral detection: Check the box to enable AI based detection of unknown malwares based on behavior.
-
Quarantine
- Define the standard behavior for known malware infections: Choose the action to be taken with identified threats on the Mac. If the file is not deleted immediately, it can be found by clicking Quarantine in the menu bar.
- Define the standard behavior for AI Flagged Files: Choose the action to be taken with identified threats on the Mac. If the file is not deleted immediately, it can be found by clicking Quarantine in the menu bar.
- Definitions
- Enter any additional malware definitions to be scanned. The added definitions allow Administrators to include their own hashes for any files to be blocked from end users, in addition to the definitions/files that Detection & Removal detects as a threat.
- When adding definitions, include the hash for the file (MD5, SHA1, or SHA256) in the specified format (HashString:*:MalwareName:73).
- For example: 71f6ac3385ce284152a64208521c592b:*:ThisIsATest:73
- Where 71f6ac3385ce284152a64208521c592b is the hash, "ThisIsATest" is the filename, with the default 73 at the end (version of engine). Mosyle's Detection & Removal will then quarantine any files found with that particular hash.
- Alerts
- Configure to receive alerts based on specific events: New infected devices or New AI flagged devices. Once the event type is selected, choose the frequency to receive the email alerts along with the Administrators to receive the emails.
- File Bypass
- Use the File Bypass to bypass a specific, trusted file from being flagged.
- Enter any known and trusted files to be bypassed and not flagged by Detection & Removal. When adding the files, enter the File Name and the Hash String in the format provided above.
- Mute Paths
- This is not to be used to exclude paths or files from being scanned. To exclude files from being scanned or flagged by Detection and Removal, use the File Bypass option. The use case for the Mute Paths is to ignore security events generated by the paths entered from being scanned.
- Enter any paths to be ignored by Detection & Removal. Any events occurring at the paths entered will not be scanned by the On Access scan or the Full Scan. Only enter paths that are absolutely trusted.
After configuring the options available for Detection & Removal, assign the profile to users and/or devices.
Mosyle will automatically install the Detection & Removal engine, along with any System Extensions and Privacy Preferences required.
What to Expect
When an infection is detected, Administrators will see the infections in the Logs and in the device status view under Devices. End users will be alerted via a native macOS Notification as well as see an alert in the Manager application.
macOS Notification
Manager app
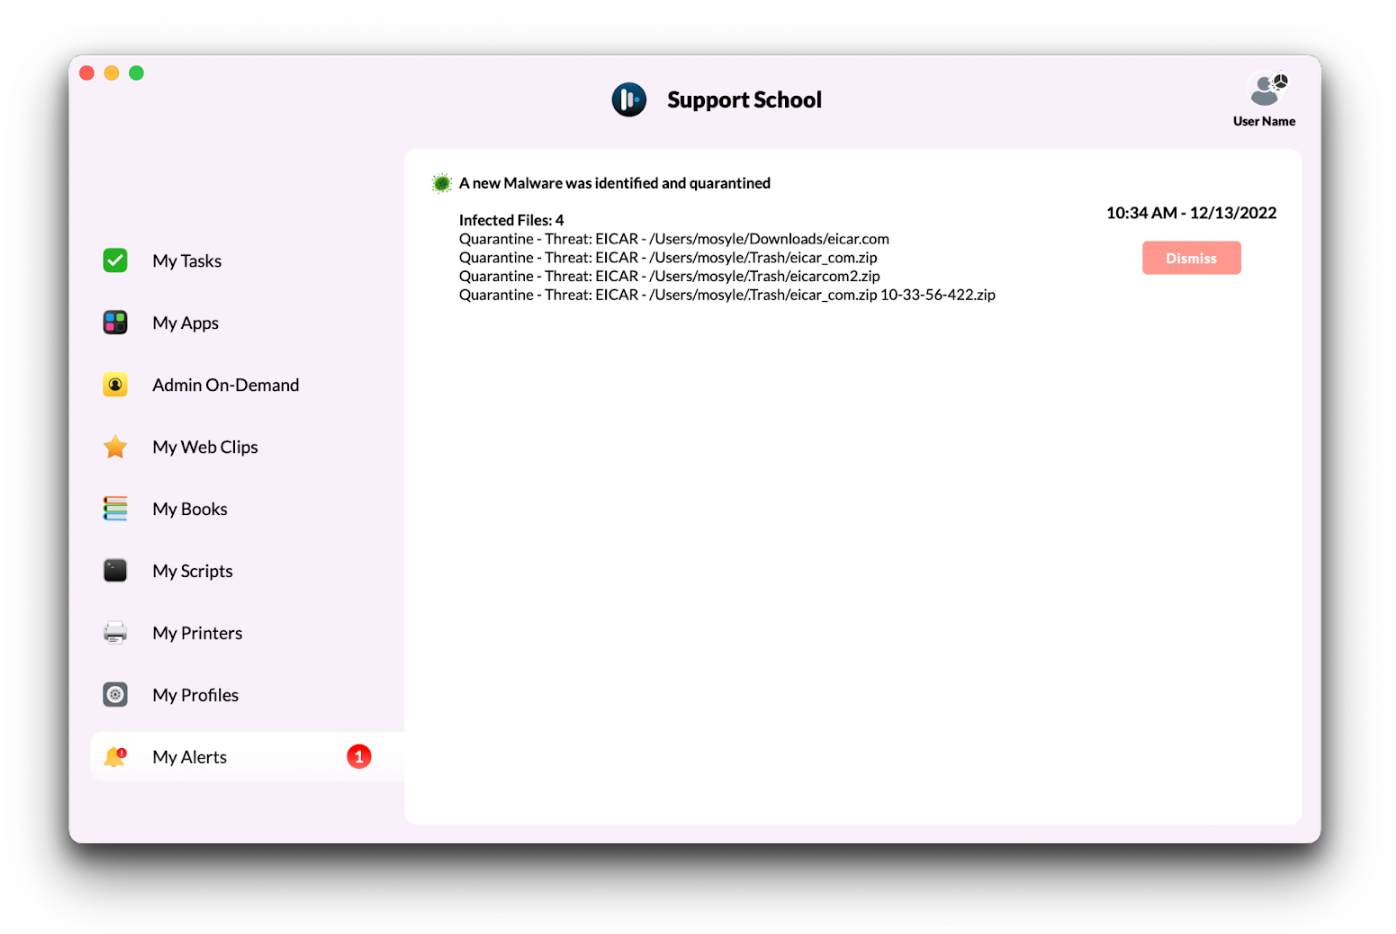
Admin On-Demand
Overview
Admin On-Demand provides a quick, easy way for Mosyle Administrators to convert Admin user accounts on the Mac to Standard users, while also allowing user accounts on the Mac to request temporary user account escalation to complete any tasks that require Admin access.
Admin On-Demand is organized into four menu items: Overview, Devices, Settings, and Logs.
Overview
The Overview pane provides a quick summarized view of your user account status on devices. You can view the following in this area:
- User account status based on last update: Includes the percentage of devices with Admin user accounts and percentage of devices with Standard user accounts.
- Number of Requests for temporary Admin escalation
- Top Requesters over the last 15 days: Displays the top users requesting temporary Admin access
- Requests over time: A graph showing the number of requests for temporary Admin access.
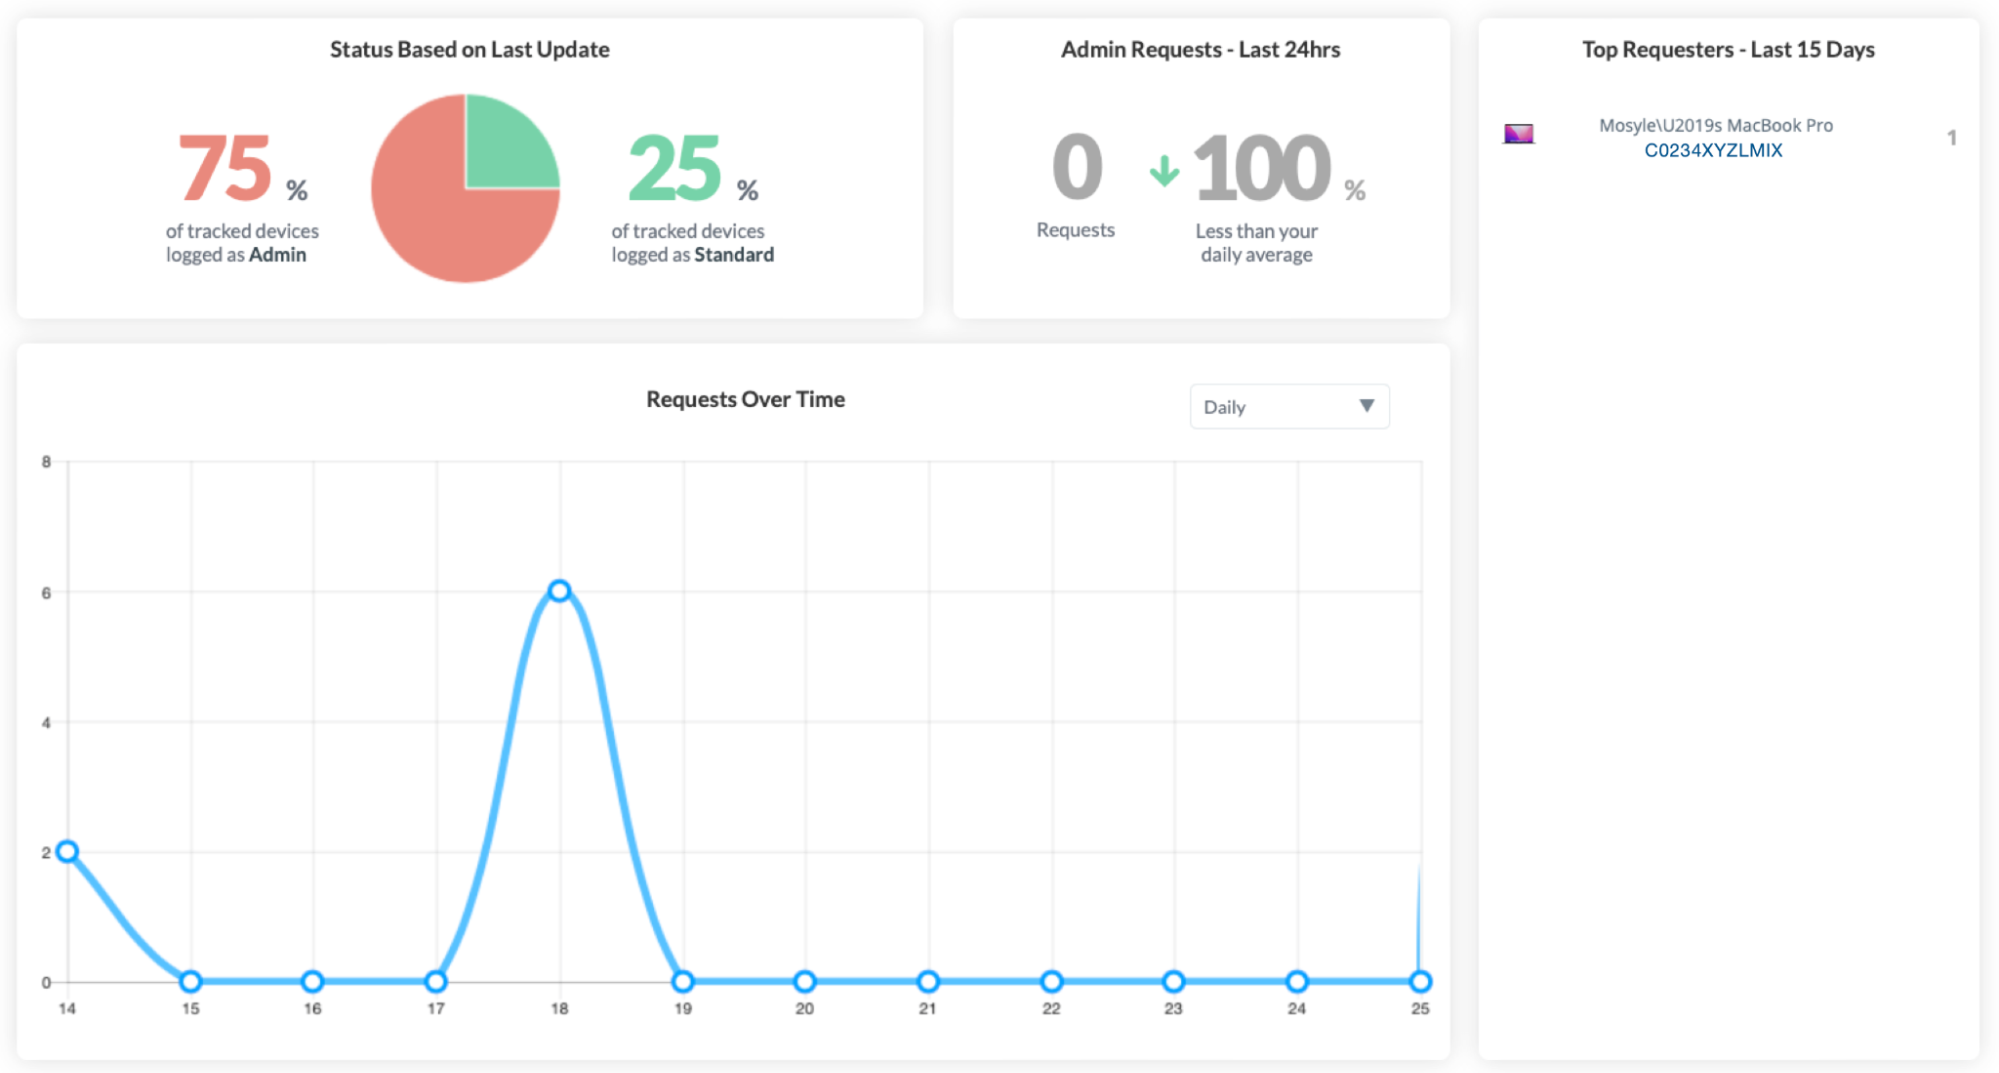
Devices
The Devices tab will show all devices assigned to the Admin On-Demand configuration and the current user type logged in on the device - either Admin or Standard.
Use Filters available to filter and sort devices to show only those of interest. If needed, the data can be exported at any time using the button in the upper right “X devices match filters”.
Click a device tile to bring up additional details about the device and user. See any logs or actions taken on the device, export the data, or convert the user to Admin or Standard user.
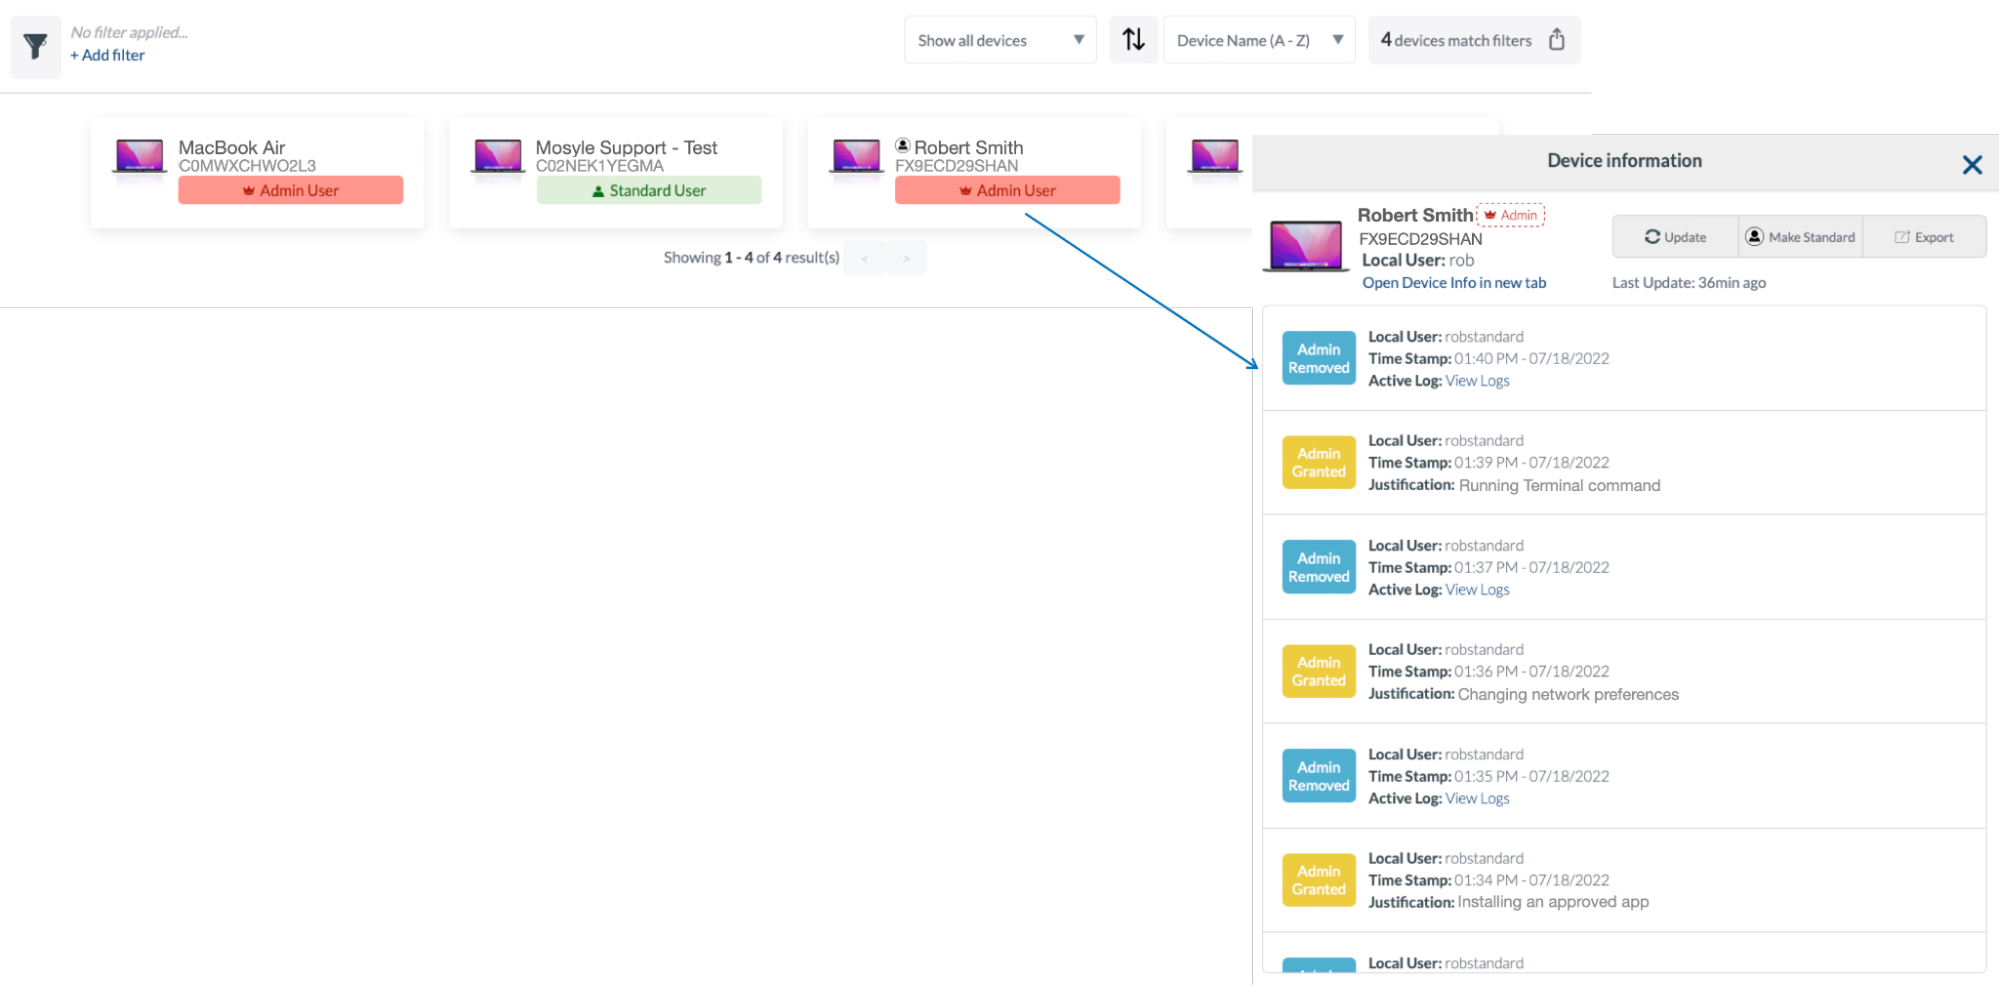
Settings
Configure the Admin On-Demand settings, including the conversion behavior, request settings, and/or customize the notification text for end users.
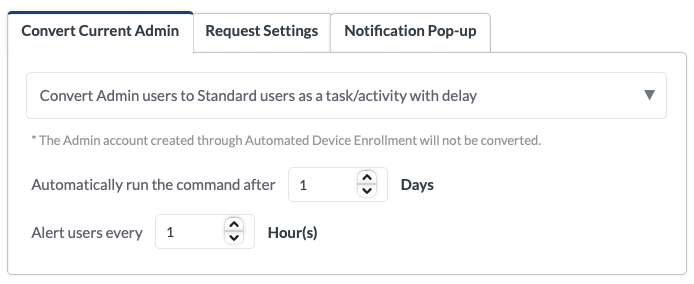
Logs
View logs to see detailed info for when a user requested Admin access, when it was granted and removed, the justification for the access, and any corresponding logs. The date & time stamp, device name and serial number are also listed. To export the logs, click “Export” in the upper right corner. To export individual device action logs, click “View” under the Active Log column and click “Export”.
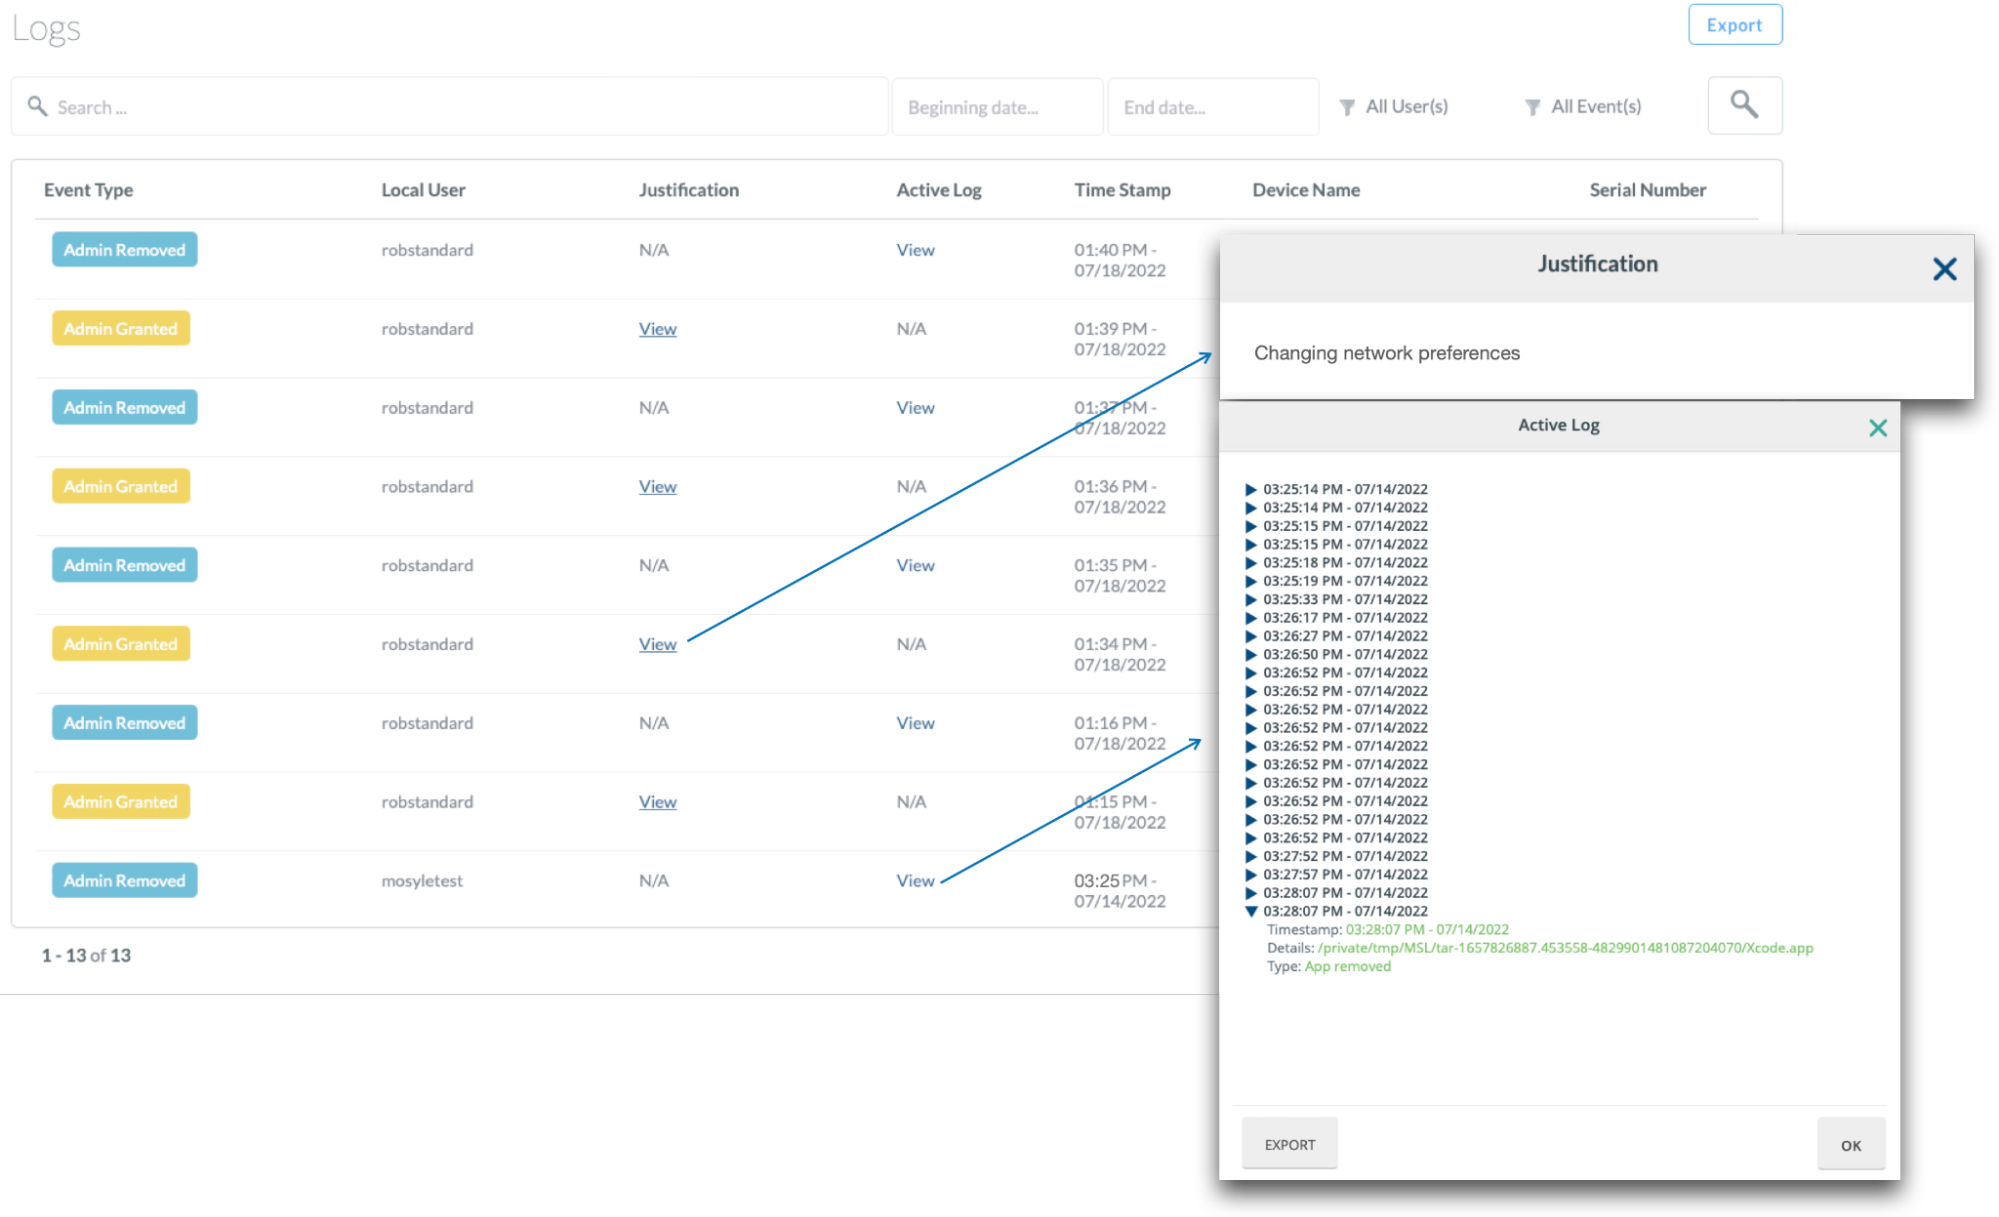
Configuring Admin On-Demand
To configure Admin On-Demand
- Go to Security
- Admin On-Demand
- Click Settings > Add new profile
- Configure the settings in the three available tabs: Convert Current Admin, Request Settings, and Notification Pop-Up
Convert Current Admin
The Convert Current Admin settings will convert the current logged in Admin user to a Standard user. This option will not convert the additional Admin account created during Automated Device Enrollment (DEP Admin), however it will convert any other logged in Admin users if enrolled manually.
Using the dropdown menu, choose from the following:
- Convert Admin users to Standard users as a task/activity with delay: This will prompt the logged in Admin user indicating they have a task assigned to convert their Admin account to a Standard user account. With this, they can choose when to execute the account conversion by clicking the task in the Manager app. As the Admin, you have the option to select how long of a delay the user will have before the command is automatically sent, as well as how often to alert users.
- Convert Admin users to Standard users upon profile save and assignment: This will send a command to automatically convert any logged in Admin user accounts to Standard user accounts when the profile is saved and/or when the profile is assigned to the user/device. The end user will not receive a notification regarding the account conversion.
- Do not convert Admin users to Standard users: This will not convert any current Admin user accounts to Standard user accounts. To convert individual user accounts to Standard user accounts you can do so under the Devices tab.
Request Settings
The Request Settings tab allows configuration of whether or not users will have access to Admin On-Demand in the Manager application to request temporary Admin access. There are two options available:
- Allow users to temporarily escalate their privileges to Admin
- Do not allow users to temporarily escalate their privileges to Admin
When users have the option to temporarily escalate their privileges to Admin, they can request the escalation in the Manager application and because they have access to perform such escalation, it will be granted automatically to the end user. The following options are available to configure for this escalation period:
- Select the duration of Admin privileges for each request: Set how long each user will have Admin access on the device after it is requested. In most cases, 1 minute is ample time to complete any task that needs Admin credentials, however, 3 minutes and 5 minutes are also available.
- Limit the number of requests: Limit the number of times users can request account escalation per day, week, month, or year.
- Require users to provide a justification for the account escalation request
- Quit Terminal app when removing Admin privileges: If the Terminal app is not quit when the user is converted back to a Standard account, the user will continue to have Admin access in Terminal so long as the current session is active.
- Quit System Preferences when removing Admin privileges
- Save relevant action logs during the period in which the user has Admin privileges: Any actions taken by the user, including any Terminal commands, will be logged.
Notification Pop-Up
Customize the pop-up message users will see before their user account is escalated to have Admin privileges.
What to Expect
When users have access to Admin On-Demand, they can request the user privilege escalation from the Manager application.
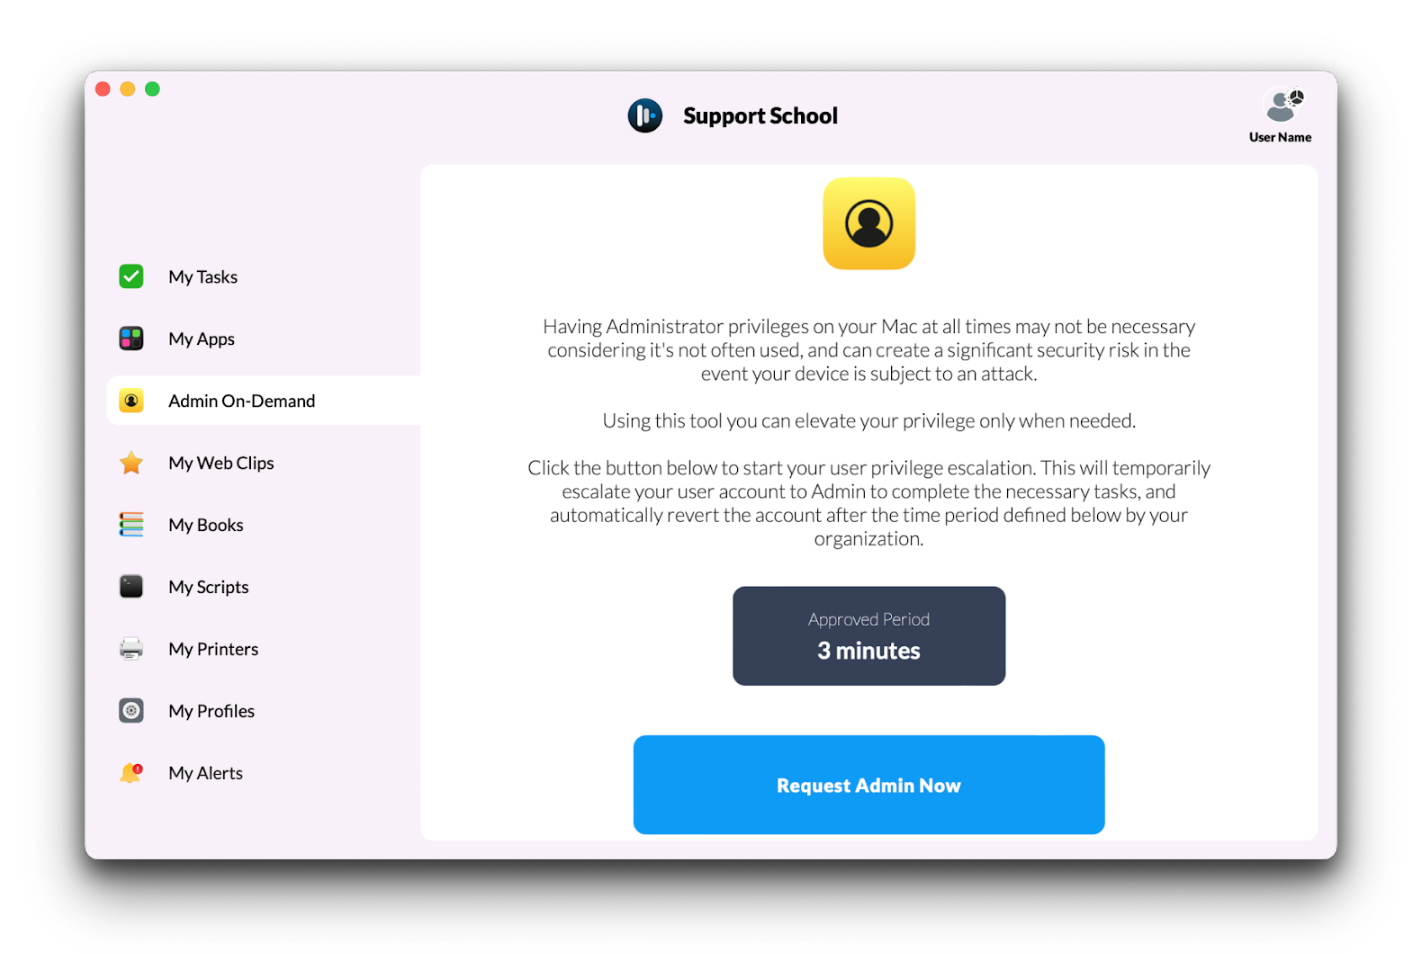
After requesting Admin access, users will receive a notification indicating the account has been converted.
At the end of the approved time period, the end user will receive a notification that their account has been converted back to Standard user access.
Actions taken during the user privilege escalation can be viewed in the Admin On-Demand Logs.
DNS Filtering
Overview
DNS Filtering provides Administrators an easy way to filter network traffic to ensure users are accessing approved sites. It is organized in 7 tabs: Overview, Settings, Filtering, Security, Allowed/Blocked, Alerts, and Logs.
DNS Filtering profiles and configurations can be assigned to individual users and groups, or to all devices. Complete assignment based on what is needed for the school or district environment. Profiles can be quickly toggled ON and OFF using the toggle in the left menu.
When the DNS Filtering is assigned to a user/device, the necessary configuration profiles (DNS Settings and DNS Proxy Extension) will be automatically installed. Mosyle's DNS Filtering requires iOS/iPadOS 14+ and macOS 11+.
The Mosyle DNS Filtering requires specific domains and ports. Please see the help center article titled “Domains and Ports for DNS Filtering” for more information.
Overview
The Overview tab provides query data on the devices assigned to the individual profile. View the total number of queries, number of blocked queries, global traffic, number of queries per day, and filter by the list of top domains resolved and/or blocked.
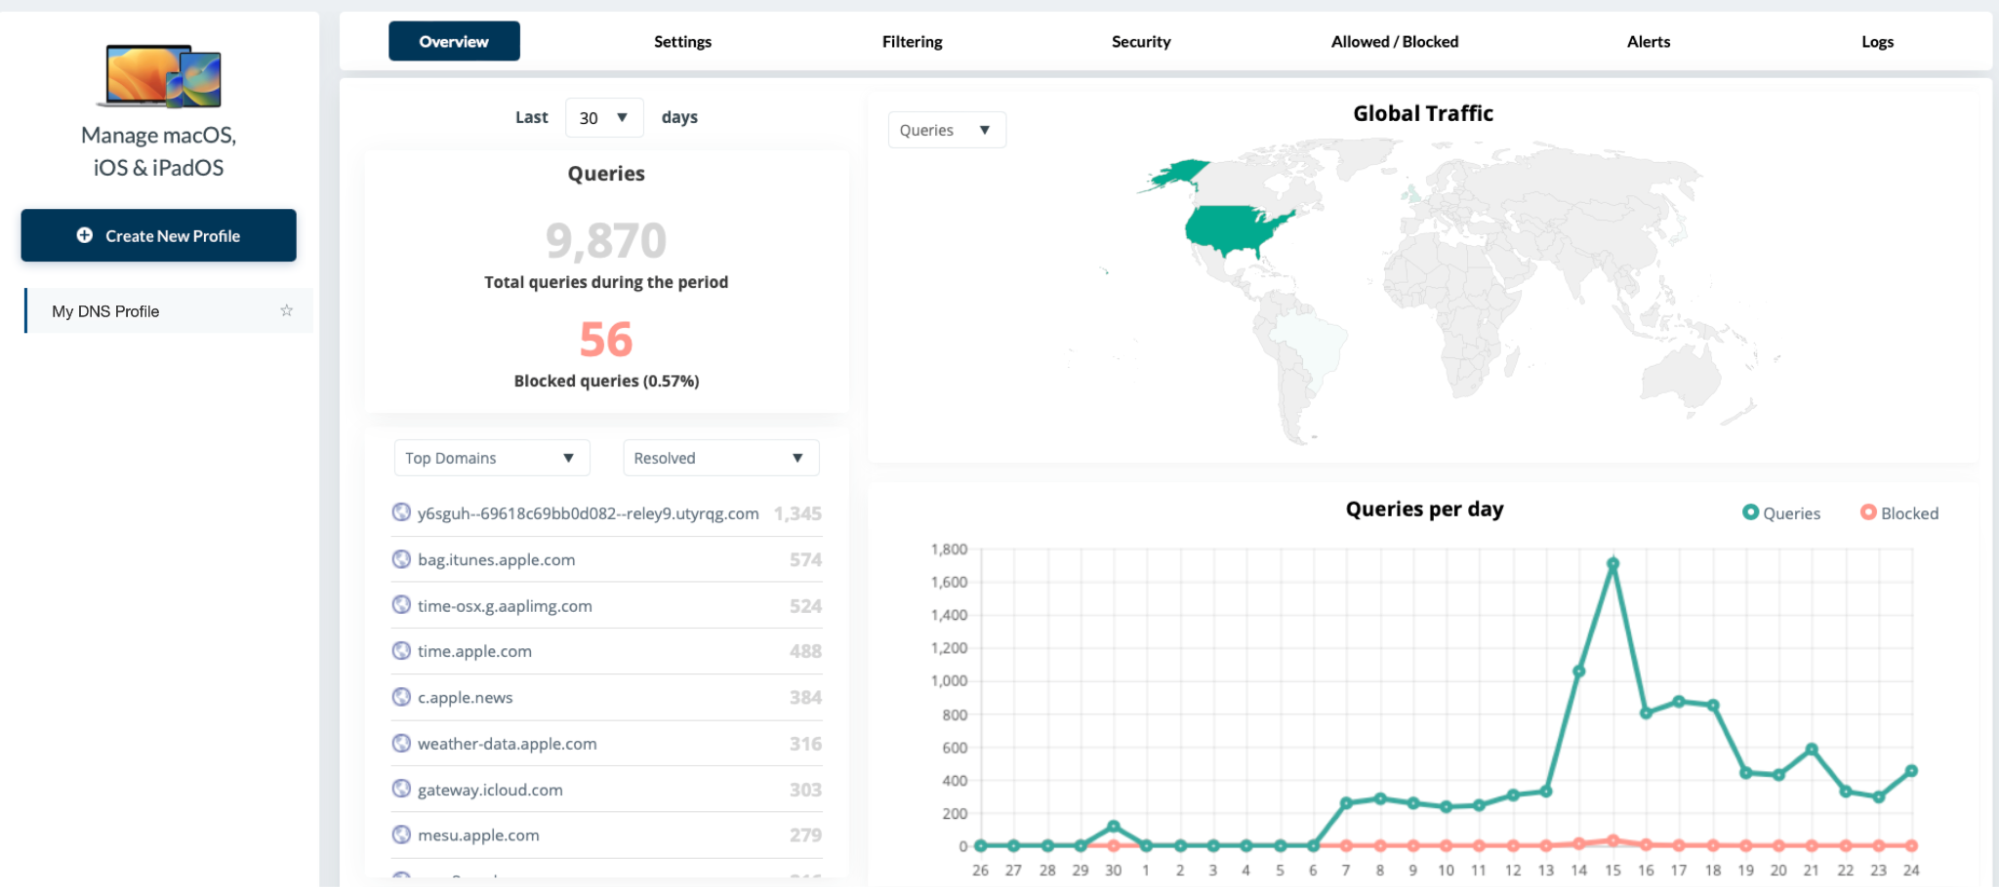
Settings
The Settings tab can be configured to specify Privacy & Logging settings, settings for macOS and iOS management, and any DNS Bypass rules. Assign the profile to the users/devices to be filtered. When using the DNS Filtering, it's strongly recommended not to apply any other content filtering solutions or profiles to avoid conflicts.
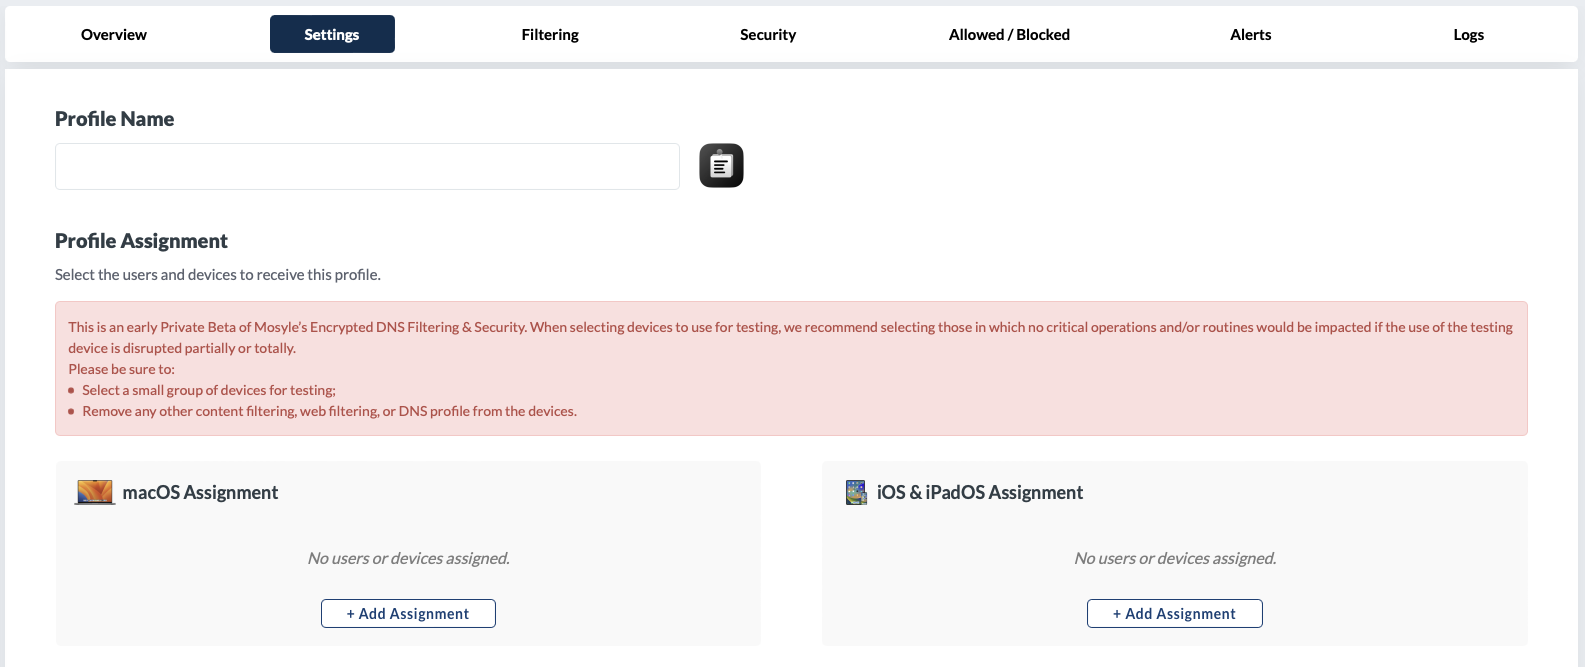
Filtering
The Filtering tab can be configured to apply a Standard set of filters to filter network traffic. Custom filters can be created and applied.
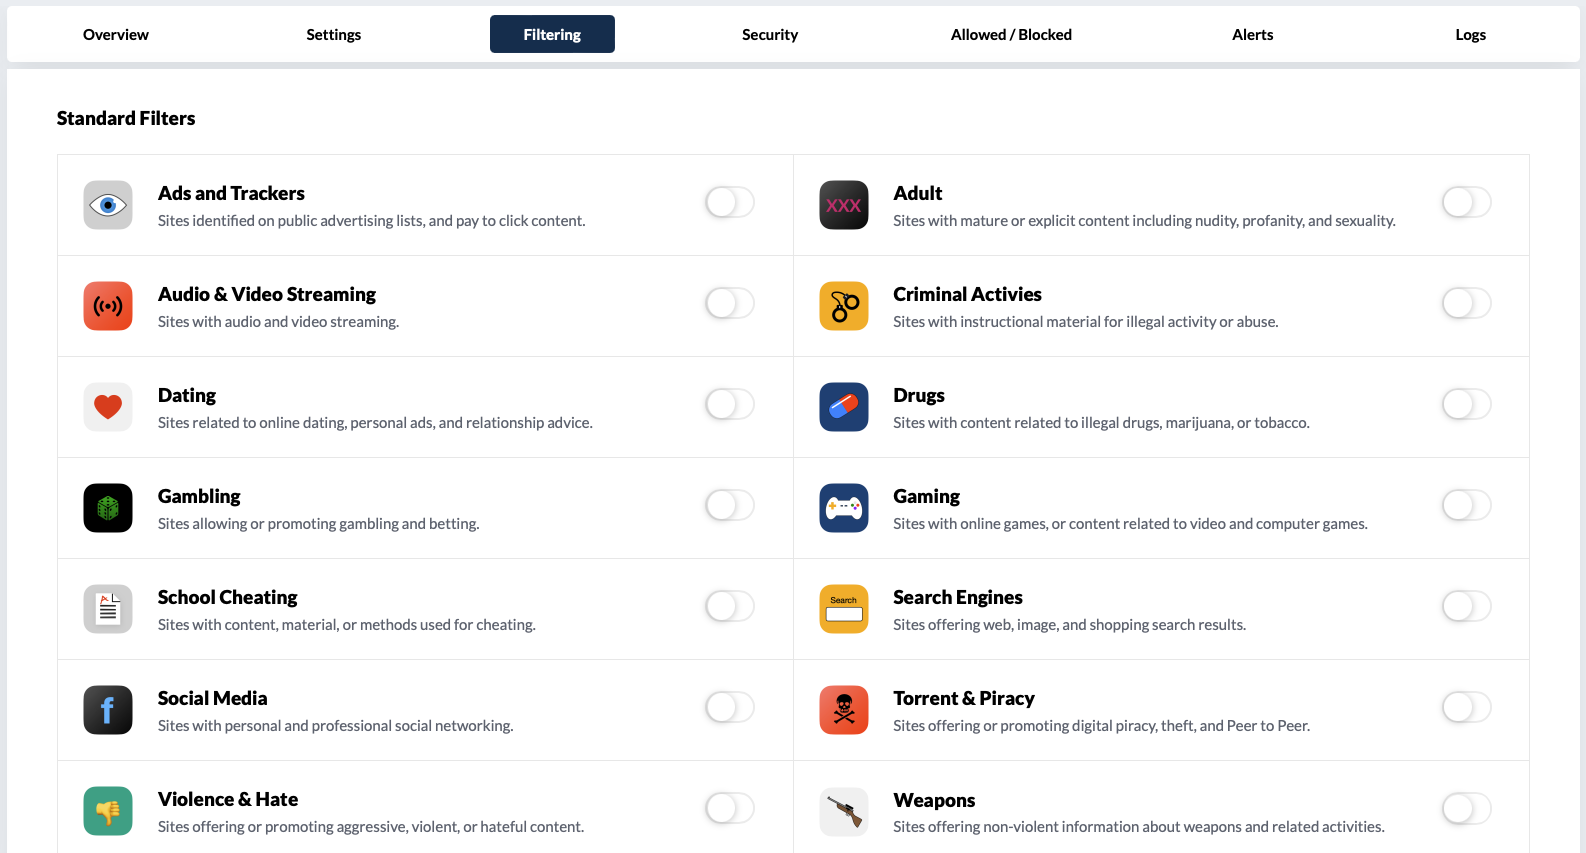
Security
Configure the Security tab to block domains based on malicious activity, domain age, or hosting country.
Allowed/Blocked
Customize specific domains that should be always allowed or always blocked, despite their categorization. Add domains that require custom resolution.
Alerts
Configure alerts so that Administrators are notified when users attempt to access a domain or site that is not allowed.
Logs
View logs to see any blocked and/or allowed sites. The logs provide the device identifier, serial number, URL visited, the action (blocked/allowed), the reason for the block based on URL categorization, the IP address, and date & time stamp.
Click the gear icon to add the URL as an always blocked domain, always allowed domain, report as wrong classification, or set to exclude the domain in the logs.
The logs can be filtered by specific URLs, dates, devices, or by status (allow/block). Once filtered, the results can be exported.
Configuring DNS Filtering
To configure DNS Filtering
- Go to DNS Filtering
- Click + Create New Profile
- Name the profile and select the users/devices the filtering will be assigned to
- Configure the following tabs: Settings, Filtering, Security, Allowed/Blocked, and Alerts
Settings
The following options can be configured in the Settings tab. When finished, click Save.
-
Privacy & Logging Settings
- Log all resolved requests. By default all blocked requests will be logged. Checking this box will ensure all requests, even allowed requests are logged.
- Include device identifier in the logs: Indicate the device identifying information that will be displayed in the logs - either device name or assigned user. Leave this unchecked to exclude the device identifier from the logs.
- Include device IP in the logs: Check this option to include the device IP. By default the device IP will not be included in the logs.
- Select the duration of time to retain logs of blocked requests: 10 days, 15 days, or 30 days
- Exclude common system domains in the logs: Customize the list of domains to be excluded in the logs. Domains trusted and frequently used can be excluded, such as *.apple.com.
-
macOS management
- Extend the DNS Filtering to Google Chrome or Firefox by checking the appropriate boxes
- Automatically block other third party internet browsers and applications that can conflict with the DNS Filtering: Click “Customize this selection” to choose the browsers and apps to block. By default, Google Chrome and Firefox will be included in the list. If users are permitted access to these browsers, be sure to deselect them from the list.
-
iOS management
- Automatically block other third party internet browsers and applications that can conflict with the DNS Filtering: Click “Customize this selection” to choose the browsers and apps to block.
- The DNS Filtering utilizes the Mosyle Manager application on iOS/iPadOS devices. To ensure end users cannot remove the app from the devices, check the box “For the DNS Filtering to work on the iOS Devices, the Mosyle Manager app must be installed….”
-
Mosyle DNS Bypass for flights, hotels, and local domains / DNS Rules
-
Configure the DNS Bypass rules so devices can connect to captive portals on flights or in hotels to allow network connectivity or enter custom domain configuration for the DNS Filtering to bypass.
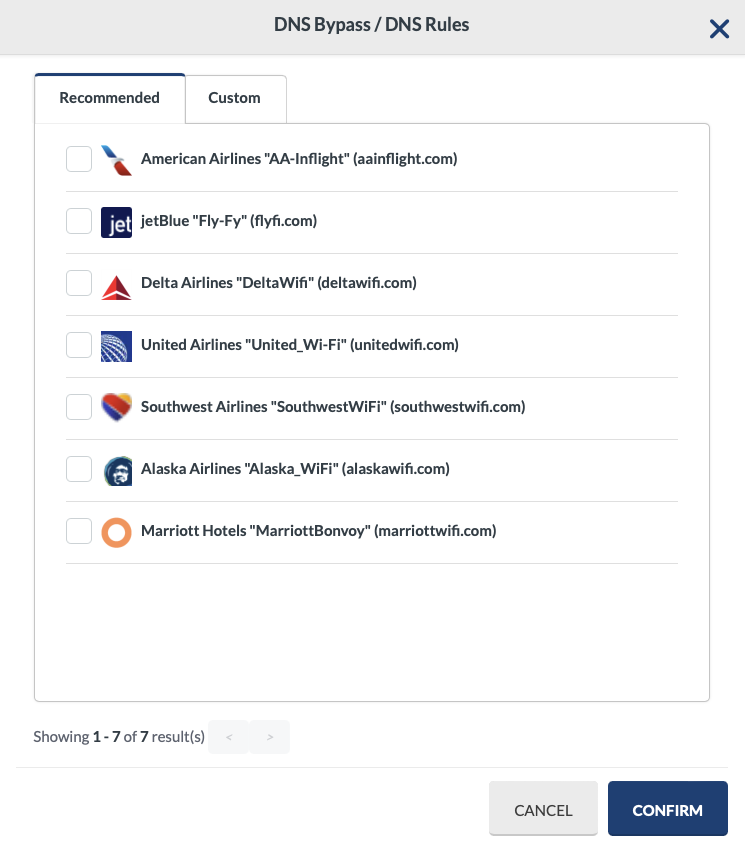
-
Filtering
Toggle ON any of the Standard filters to be blocked. If any additional filters need to be applied, create a custom filter by clicking “Create new filter”. Choose the site categories to be blocked. If needed, enter a URL in the URL checker to check the site categorization.
If desired, toggle on the options to enforce Safe Search and/or YouTube restricted mode. When finished, click Save.
Security
Toggle ON any of the options to block domains based on malicious activity, domain age, or hosting country. To add a hosting country click the button “Select / Edit Countries”. When finished, click Save.
Allowed/Blocked
Domains added in the Allowed list will always be allowed, even if they are configured to be blocked due to site categorization. Domains added in the Blocked list will always be blocked, even if their site categorization is not blocked.
If a domain requires custom resolution, such as an internal resource, enter the domain in the Allowed list and check the box for “Customize resolution” and enter the IP address.
Alerts
Configure to receive email alerts if users attempt to access a restricted domain, or attempt to access a site that is blocked due to its categorization. Choose how long devices will remain in the alerts until they are removed if there are no additional occurrences.
Email Preferences can be configured to receive a daily report, receive an email for every alert, or not receive email alerts. Choose the Administrators to receive the alert emails. When finished, click Save.
Best Practices
Recommended Standard Teacher MDM Profile
This guide provides a recommended baseline configuration for teacher and staff Apple devices managed through Mosyle MDM. The goal is to create a balanced standard that protects school data, reduces classroom distractions, and keeps devices consistent without overly limiting teachers from doing their work.
Staff / Teacher – Standard Security & Classroom UsePurpose
This profile should be applied to school-owned teacher and staff devices such as MacBooks, iPads, and other Apple devices assigned to employees. This profile should be less restrictive than a student device profile, but more controlled than a personal unmanaged device.
- Protect school data
- Reduce security risks
- Limit classroom distractions
- Keep device settings consistent
- Allow teachers to use approved instructional tools
Recommended Mosyle Profile Naming Examples
Staff - macOS - Teacher Baseline
Staff - iPadOS - Teacher Baseline
Staff - Standard Restrictions
Staff - Security Baseline
Staff - Web Filtering
Recommended Baseline Settings
1. USB Storage / External Drives
| Setting | Recommendation |
|---|---|
| USB storage access | Allow only if needed |
| Unknown USB accessories | Restrict when device is locked |
| External drive writing | Restrict where possible |
| External drive reading | Allow only for approved workflows |
USB drives are one of the easiest ways for school data to leave a device. They can also introduce malware or create data-loss concerns. Teachers may have legitimate reasons to use external storage, but the standard should be to use approved cloud storage instead whenever possible.
Suggested policy language:
Teachers should avoid using personal USB drives for school data. Approved school cloud storage should be used whenever possible to reduce the risk of data loss, malware, or unauthorized transfer of sensitive information.
2. Siri
| Setting | Recommendation |
|---|---|
| Siri | Disabled |
| Siri while locked | Disabled |
| Dictation | Allowed only if needed for accessibility |
Siri is usually not required for classroom instruction or staff productivity. Disabling Siri reduces privacy concerns, prevents accidental voice activation, and removes unnecessary lock-screen access.
3. AirDrop
| Setting | Recommendation |
|---|---|
| AirDrop | Disabled by default |
| AirDrop from Everyone | Not allowed |
| Password sharing through AirDrop | Disabled |
AirDrop can be useful, but in a school setting it can also be abused for distractions, inappropriate file sharing, or accidental exposure of sensitive information.
Possible exception groups:
- Art teachers
- Media teachers
- STEM teachers
- Yearbook staff
- Technology staff
4. Apple ID and iCloud
| Setting | Recommendation |
|---|---|
| Personal Apple ID | Not allowed on school-owned devices |
| Managed Apple ID | Preferred |
| iCloud Drive | Disabled unless approved |
| iCloud Photos | Disabled |
| iCloud Keychain | Disabled |
School-owned devices should not become tied to personal Apple IDs. This can create problems with Activation Lock, app ownership, data ownership, privacy, and long-term device support.
5. App Store and App Installation
| Setting | Recommendation |
|---|---|
| App Store | Restricted |
| User app installation | Disabled or limited |
| Managed apps | Required method |
| Removing managed apps | Disabled |
6. Classroom Distraction Controls
| Feature | Recommendation |
|---|---|
| Game Center | Disabled |
| Messages | Disabled unless approved |
| FaceTime | Disabled unless approved |
| Camera | Allowed |
| Microphone | Allowed |
| Screen Recording | Allowed for teachers |
Teachers should have access to instructional tools such as the camera, microphone, screen recording, printing, and approved classroom applications. Consumer features that do not support instruction should be limited.
7. Privacy and Security
| Security Item | Recommendation |
|---|---|
| Password / Passcode | Required |
| Auto-lock | Required |
| FileVault on macOS | Enabled |
| Firewall on macOS | Enabled |
| Gatekeeper | Enabled |
| Local admin rights | Standard user preferred |
8. Web Filtering and Content Protection
Teacher devices should still have web filtering enabled, but the teacher policy should be less restrictive than the student policy. Teachers may need access to broader educational content, research tools, media, and administrative websites.
| Category | Recommendation |
|---|---|
| Adult content | Blocked |
| Malware / phishing | Blocked |
| Risky categories | Blocked |
| YouTube | Allowed with staff-level filtering |
| Social media | Allow or limit based on school policy |
Suggested Mosyle Profile Structure
Instead of placing every setting into one large profile, it is better to split the configuration into smaller Mosyle profiles. This makes troubleshooting easier and allows IT to update one area without affecting everything else.
Recommended Profiles
| Profile Name | Purpose |
|---|---|
| Staff - Restrictions | AirDrop, Siri, Game Center, App Store, iCloud, sharing controls |
| Staff - Security | Password, FileVault, firewall, auto-lock, Gatekeeper |
| Staff - Wi-Fi | School Wi-Fi, certificates, auto-join settings |
| Staff - Apps | Required apps, classroom tools, security agents, print clients |
| Staff - Web Filtering | Staff-level filtering policy, malware protection, content protection |
Recommended Final Standard
| Category | Recommended Setting |
|---|---|
| USB storage | Restricted / exception only |
| Siri | Disabled |
| Siri while locked | Disabled |
| AirDrop | Disabled |
| Personal Apple ID | Not allowed |
| iCloud Photos | Disabled |
| iCloud Keychain | Disabled |
| App installs | Mosyle-managed only |
| Game Center | Disabled |
| Camera | Allowed |
| Microphone | Allowed |
| Screen Recording | Allowed for teachers |
| Printing | Allowed |
| FileVault | Enabled |
| Firewall | Enabled |
| Password / Passcode | Required |
| Auto-lock | Required |
| Web filtering | Enabled |
| Admin rights | Standard user preferred |
Recommended Exception Process
Some teachers may need exceptions based on their role or instructional workflow. Exceptions should be intentional, approved, and documented.
Example Exceptions
- Art teacher needs AirDrop for media workflow
- STEM teacher needs USB storage for robotics equipment
- Music teacher needs external audio devices
- Media teacher needs camera, microphone, and screen recording access
- Administrator needs broader website access
Exception Documentation Should Include
- User or group name
- Device serial number
- Requested exception
- Business or instructional reason
- Approval person
- Review date
Recommended Standard Student MDM Profile
This guide provides a recommended baseline configuration for student Apple devices managed through Mosyle MDM. Student devices should be configured with stronger restrictions than teacher or staff devices because they are used in a classroom environment, may be shared or assigned to minors, and must support school safety, security, and compliance requirements.
Students – Standard Restrictions and SecurityPurpose
This profile should be applied to school-owned student iPads, MacBooks, and other Apple devices. The goal is to keep the device focused on learning, reduce distractions, protect students, prevent unauthorized changes, and maintain consistent device behavior across the school.
- Keep devices focused on instructional use
- Reduce classroom distractions
- Prevent inappropriate sharing or communication
- Protect student data and school-owned equipment
- Support web filtering and school compliance requirements
- Prevent students from bypassing school controls
Recommended Mosyle Profile Naming Examples
Students - iPadOS - Standard Restrictions
Students - macOS - Standard Restrictions
Students - Security Baseline
Students - Web Filtering
Students - App Controls
Students - Shared Device Restrictions
Recommended Baseline Settings
1. USB Storage / External Drives
| Setting | Recommendation |
|---|---|
| USB storage access | Blocked |
| External drives | Blocked unless approved |
| Unknown USB accessories | Restricted |
| File transfer to removable media | Not allowed |
Students should not be able to copy school files, screenshots, assignments, or sensitive information to removable storage without approval. External storage also increases the risk of malware, inappropriate files, and data loss.
2. Siri and Dictation
| Setting | Recommendation |
|---|---|
| Siri | Disabled |
| Siri while locked | Disabled |
| Siri Suggestions | Disabled |
| Dictation | Disabled unless required for accessibility |
Siri is not normally required for student learning devices and can create privacy concerns, classroom distractions, or unintended lock-screen access.
3. AirDrop
| Setting | Recommendation |
|---|---|
| AirDrop | Disabled |
| AirDrop receiving from Everyone | Not allowed |
| Password sharing through AirDrop | Disabled |
AirDrop should be disabled for students because it can be used for inappropriate file sharing, classroom disruption, bullying, image sharing, or bypassing normal communication controls.
4. Apple ID and iCloud
| Setting | Recommendation |
|---|---|
| Personal Apple ID | Blocked |
| Managed Apple ID | Allowed if school-managed |
| iCloud Drive | Disabled unless required |
| iCloud Photos | Disabled |
| iCloud Keychain | Disabled |
| iCloud Backup | Disabled unless school-approved |
Student devices should not be tied to personal Apple IDs. Personal accounts can create privacy issues, app ownership problems, Activation Lock concerns, and support issues when the device needs to be reassigned.
5. App Store and App Installation
| Setting | Recommendation |
|---|---|
| App Store | Disabled or restricted |
| Install apps | Not allowed by students |
| Remove apps | Not allowed for managed apps |
| In-app purchases | Disabled |
| Untrusted enterprise apps | Blocked |
Required apps should be assigned through Mosyle and Apple School Manager Apps and Books. This keeps app licensing, installation, updates, and removal under school control.
6. Classroom Distraction Controls
| Feature | Recommendation |
|---|---|
| Game Center | Disabled |
| Messages | Disabled unless required |
| FaceTime | Disabled unless required |
| Music / Apple Music | Disabled or restricted |
| Podcasts | Disabled or restricted |
| News | Disabled or restricted |
| Screen recording | Restricted unless needed for instruction |
7. Camera, Microphone, and Screen Recording
| Feature | Recommendation |
|---|---|
| Camera | Allowed if needed for instruction |
| Microphone | Allowed if needed for instruction |
| Screen recording | Restricted unless approved |
| Screenshots | Restrict if supported and appropriate |
For many classrooms, the camera and microphone may be required for projects, testing, accessibility, video assignments, and teacher-approved activities. These should not be blocked globally unless the school has a specific reason.
8. Web Filtering and Content Protection
| Category | Recommendation |
|---|---|
| Adult content | Blocked |
| Malware / phishing | Blocked |
| Proxy / VPN bypass sites | Blocked |
| Gambling | Blocked |
| Violence / weapons | Blocked according to school policy |
| Social media | Blocked or limited by grade level |
| YouTube | Restricted or education-filtered |
| AI tools | Controlled by school policy |
Student filtering should apply both on-campus and off-campus when possible. Students should not be able to bypass filtering by using VPN apps, proxy sites, alternative browsers, private relay services, or unauthorized DNS settings.
9. Browser and Search Settings
| Setting | Recommendation |
|---|---|
| Safari | Allowed only with filtering |
| Private Browsing | Disabled where possible |
| Browser extensions | Restricted |
| SafeSearch | Enforced |
| YouTube Restricted Mode | Enforced where applicable |
10. VPN, DNS, and Network Changes
| Setting | Recommendation |
|---|---|
| VPN apps | Blocked unless school-managed |
| DNS changes | Restricted |
| Proxy configuration | Restricted |
| Private Relay | Disabled |
11. Privacy and Security
| Security Item | Recommendation |
|---|---|
| Password / Passcode | Required based on grade level and device type |
| Auto-lock | Required |
| FileVault on macOS | Enabled for assigned MacBooks |
| Firewall on macOS | Enabled |
| Gatekeeper | Enabled |
| Local admin rights | Not allowed |
12. Account and Settings Restrictions
| Setting | Recommendation |
|---|---|
| Account changes | Restricted |
| Erase all content and settings | Blocked |
| Device name changes | Restricted |
| Wallpaper changes | Optional: restrict for shared devices |
| Bluetooth changes | Restricted if not needed |
| MDM profile removal | Blocked |
Suggested Mosyle Profile Structure
Student settings should be split into multiple Mosyle profiles instead of one large profile. This makes management, troubleshooting, and grade-level customization much easier.
| Profile Name | Purpose |
|---|---|
| Students - Restrictions | AirDrop, Siri, App Store, iCloud, Game Center, account changes, device changes |
| Students - Security | Passcode, auto-lock, FileVault, firewall, Gatekeeper, profile removal protection |
| Students - Wi-Fi | Student Wi-Fi, certificates, auto-join, network restrictions |
| Students - Apps | Required apps, blocked apps, approved learning tools, app removal restrictions |
| Students - Web Filtering | CIPA-aligned filtering, malware protection, category restrictions, bypass prevention |
| Students - Testing Mode | Assessment restrictions, app lock, browser lock, testing-specific controls |
Recommended Final Student Standard
| Category | Recommended Setting |
|---|---|
| USB storage | Blocked |
| Siri | Disabled |
| Siri while locked | Disabled |
| AirDrop | Disabled |
| Personal Apple ID | Blocked |
| iCloud Photos | Disabled |
| iCloud Keychain | Disabled |
| App installs | Mosyle-managed only |
| Removing managed apps | Blocked |
| Game Center | Disabled |
| Messages | Disabled unless required |
| FaceTime | Disabled unless required |
| Camera | Allowed if needed for instruction |
| Microphone | Allowed if needed for instruction |
| Screen recording | Restricted unless approved |
| VPN apps | Blocked unless school-managed |
| DNS / proxy changes | Restricted |
| Private browsing | Disabled where possible |
| Web filtering | Required |
| SafeSearch | Enforced |
| YouTube Restricted Mode | Enforced where applicable |
| Password / Passcode | Required based on grade/device type |
| Auto-lock | Required |
| Admin rights | Not allowed |
| MDM profile removal | Blocked |
Recommended Grade-Level Approach
Not all students need the same level of restriction. The school may want to separate student profiles by grade band.
| Grade Level | Recommended Approach |
|---|---|
| K–2 | Most restrictive; only required apps; very limited settings access |
| 3–5 | Highly restricted; allow only approved learning apps and websites |
| 6–8 | Restricted with some flexibility for projects, research, and classroom tools |
| 9–12 | Controlled but more flexible; still block bypass tools, unmanaged apps, and risky content |
Recommended Exception Process
Student exceptions should be limited and documented. Exceptions should normally be tied to a class, grade level, accessibility requirement, testing requirement, or approved instructional activity.
Example Exceptions
- STEM class needs Bluetooth or USB access for robotics
- Media class needs camera and microphone access
- Testing group needs a special locked-down testing profile
- Student requires Dictation or accessibility tools
- High school course requires access to specific approved websites
Exception Documentation Should Include
- Student name or group
- Grade level
- Device serial number or assigned device group
- Requested exception
- Instructional or accessibility reason
- Approving staff member
- Expiration or review date